Manage Secrets
In the management console, open Customization in the left sidebar and select Resources. In the center of the screen, select Secret & Files from the menu.
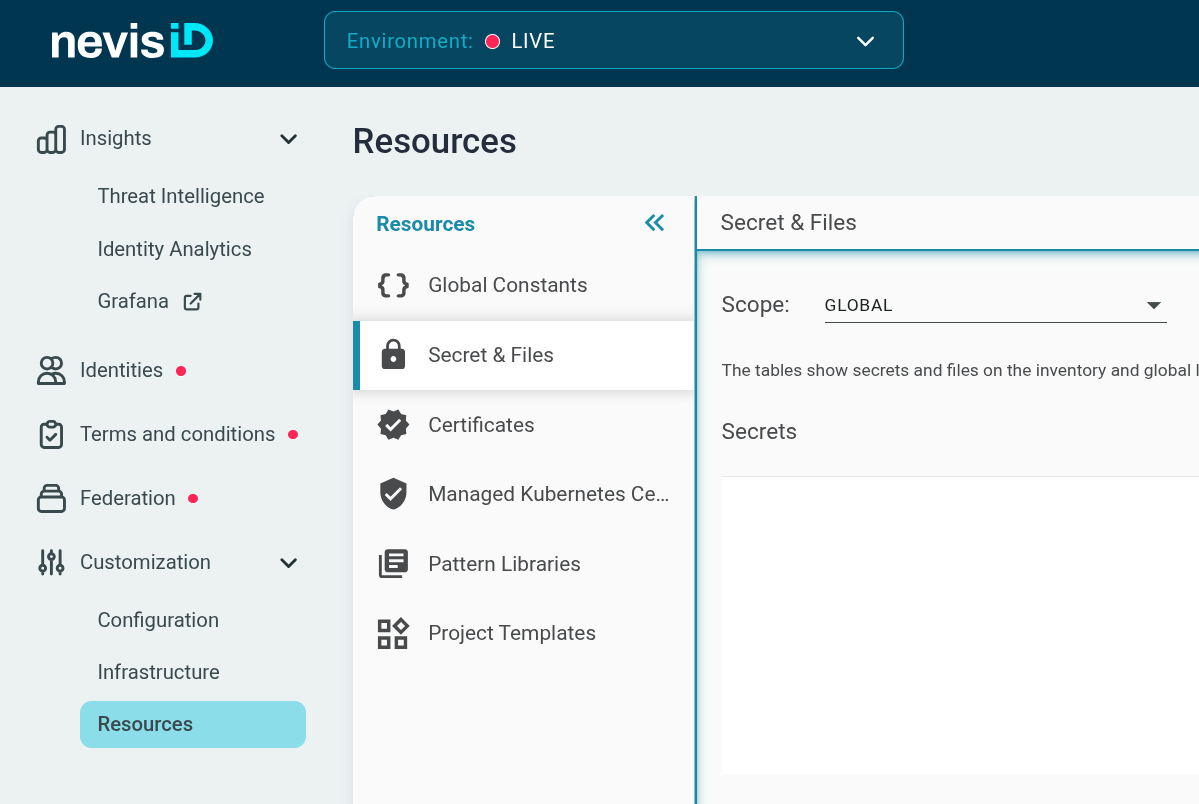
The Secret & Files screen is where you manage secrets required by your configuration.
Use the Scope drop-down to select the environment whose secrets you want to view or manage. Kubernetes secrets are only visible when a specific environment is selected — they are not shown when Scope is set to GLOBAL.
Secrets that were provided by Nevis as part of your instance are displayed with (read-only) in the Type column. These secrets cannot be edited or deleted, but they are visible so you can reference them in your inventory variables.
Secret values cannot be viewed again once a secret is created.
Secret Types
When creating a secret, you choose where it is stored:
- Kubernetes secret — stored in the Kubernetes namespace associated with the selected environment. The value is never resolved during generation, so it does not appear in the deployment preview or generation output. Kubernetes secrets are scoped to a single environment and cannot be shared across environments.
- Internal secret — stored in the nevisAdmin database. The value is retrieved during generation and deployment and may appear in plain text in the deployment preview. Internal secrets can be shared across environments by selecting the scope Global during creation.
We recommend using Kubernetes secrets. Storing secrets in Kubernetes is an industry standard and ensures that secret values are scope to the namespace and never exposed in the generation output.
Creating a Secret
Use one of the following buttons to create a secret:
- Create secret — for simple text, such as a password or token.
- Upload secret file — for sensitive files that you want to reference in your configuration.
The button opens a dialog. For Create secret the dialog looks as follows:
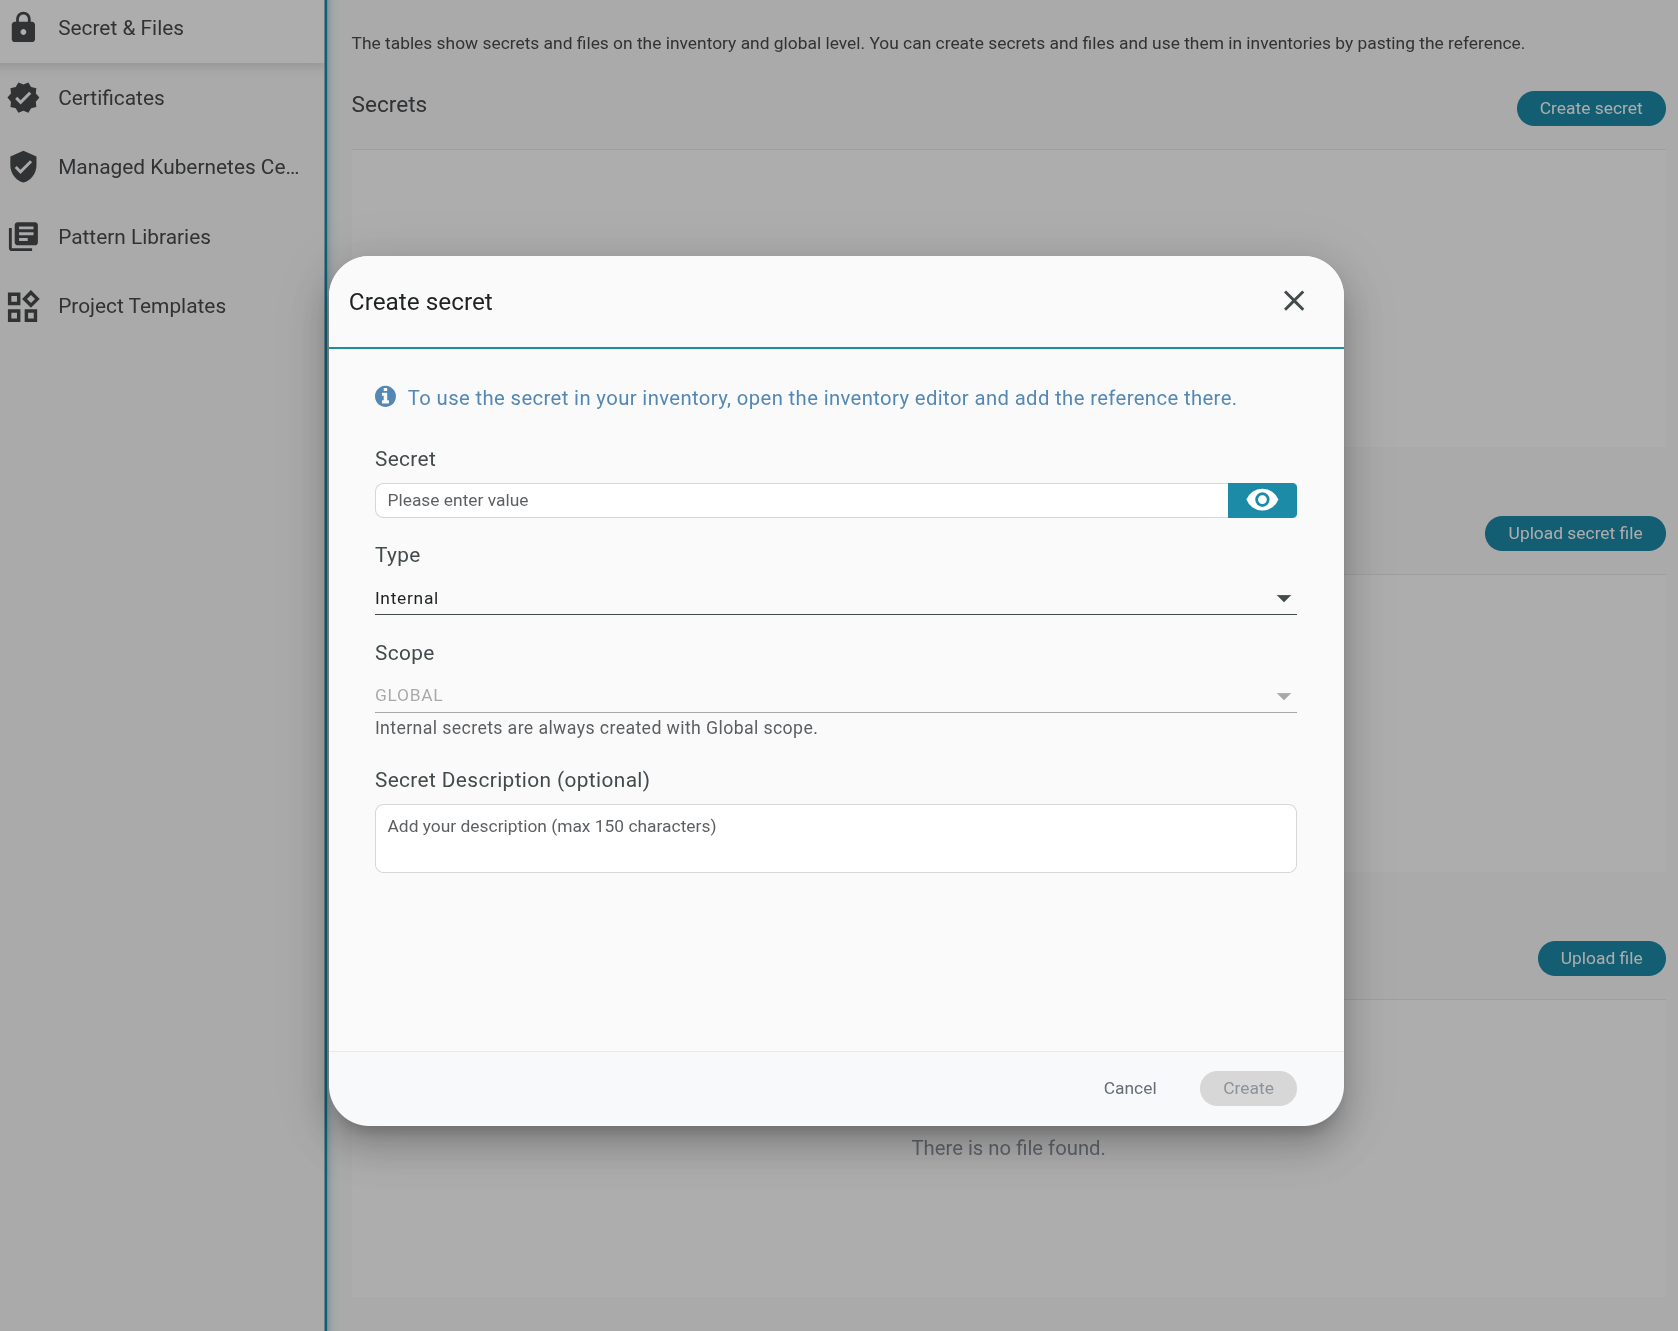
- In the Type drop-down, select Kubernetes (recommended) or Internal.
- Enter a Secret Name and a Secret Key.
- Enter the secret value.
- Optionally, add a description.
- Click Create.
The secret appears in the list and is ready to be referenced in your inventory.
A single Kubernetes secret (identified by its Secret Name) can hold multiple keys. To store several related values together, create entries with the same Secret Name but different Secret Key values.
Editing a Secret
You can add, remove, or update the keys of a Kubernetes secret you created through the screen. Externally provisioned secrets (shown as read-only) cannot be edited.
- Find the secret in the Secrets section.
- Click the Edit icon in the Action column.
- Modify the key-value pairs as needed.
- Click Save.
Existing key values are not displayed during editing. To update a value, enter a new one for the corresponding key.
Deleting a Secret
- Find the secret in the Secrets section.
- Click the Delete icon in the Action column.
- Confirm the deletion.
Deleting a secret is permanent. Any inventory variable that references the deleted secret will no longer resolve after the next deployment.
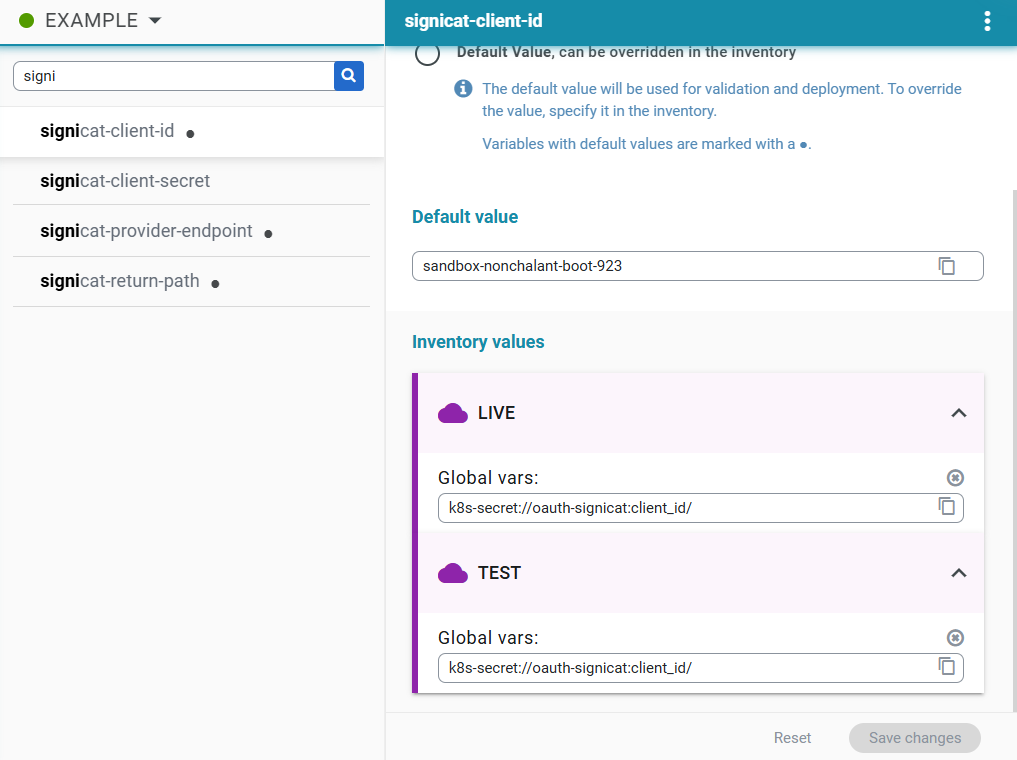
Referencing a Secret in Inventory Variables
Once a Kubernetes secret exists, reference it in your inventory using the following format:
k8s-secret://<secret-name>:<secret-key>/
Where <secret-name> is the Secret Name and <secret-key> is the Secret Key.
To add the reference to your inventory:
- Copy the reference shown in the Secrets table for the relevant secret and key.
- Under Customization > Configuration, find the pattern that requires the secret reference and paste the reference into the relevant property. Alternatively, click the var icon next to the property and create a variable from it. To learn more about working with variables, see the Working with Variables guide.
- Note that the Variables screen behaves differently in Nevis ID because you can define per-inventory values there.