Migration Planning Guide
A successful migration depends as much on project planning as on technical configuration. This guide helps you decide on a strategy, sequence your work, and avoid common pitfalls before you run the first live migration.
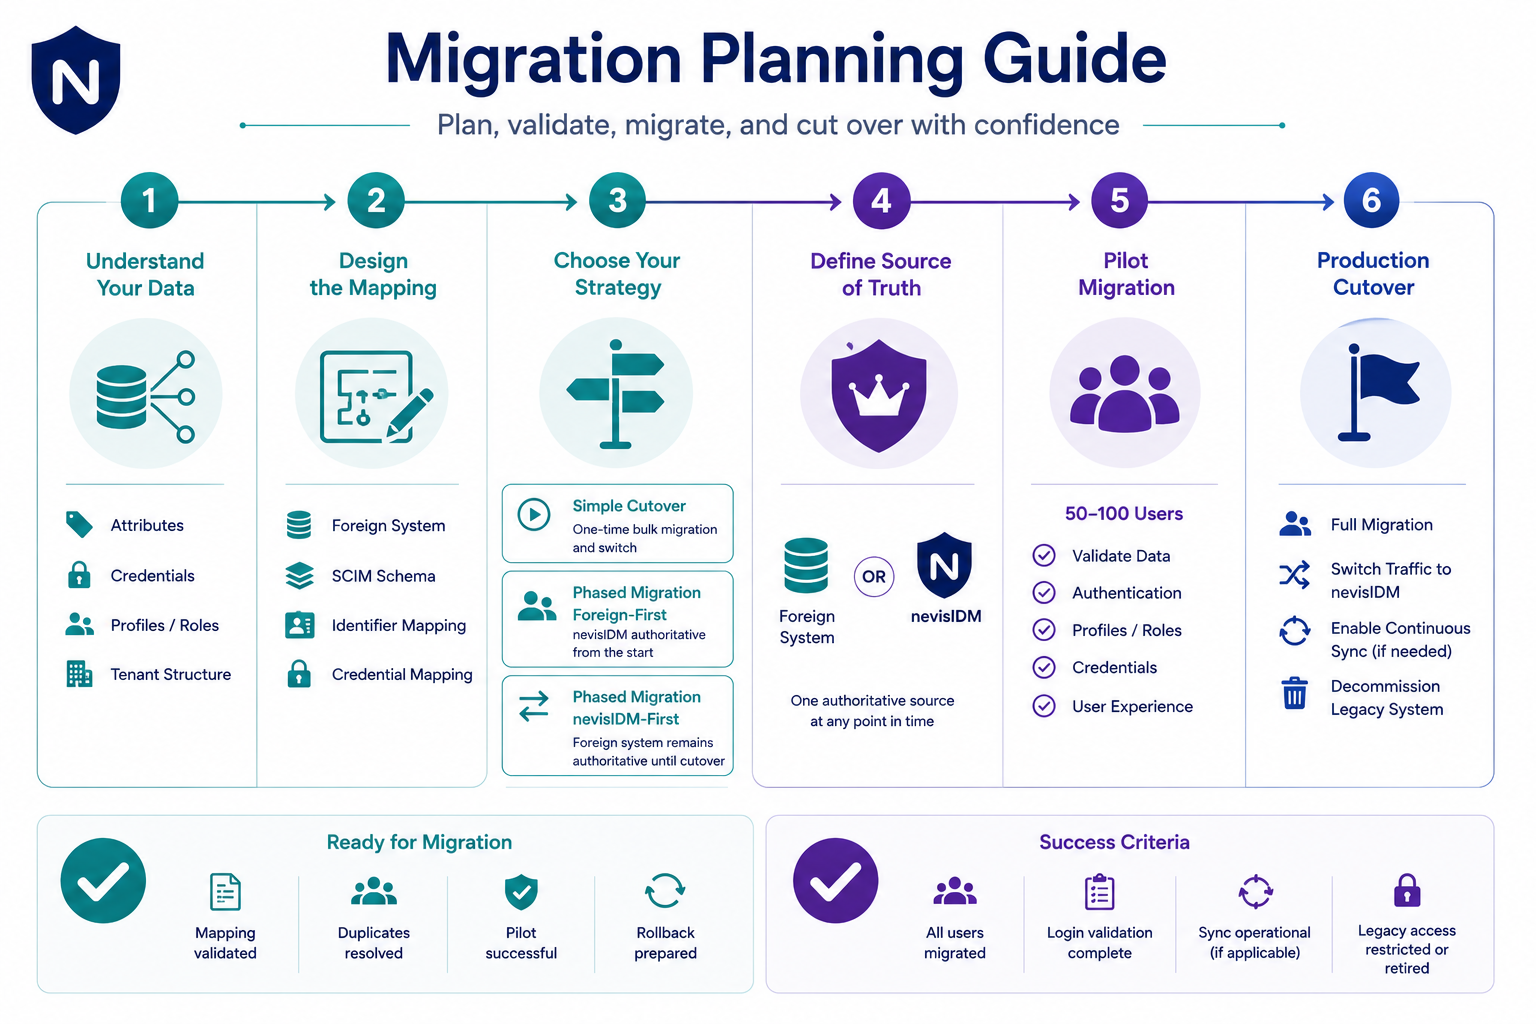
Step 1 - Define your attribute structure
Before writing any mappings, document exactly which attributes your legacy system stores and how they map to nevisID's SCIM schema. Pay particular attention to:
- Identifiers — what field in the foreign system becomes userName in SCIM? Is it unique? Are there duplicates to resolve? Are there other important identifiers to carry over?
- Credentials — which credential types exist in the foreign system? Are passwords stored as hashes that nevisIDM can import directly, or do users need to reset?
- Profiles — does your foreign system have a concept of user profiles or roles that maps to nevisIDM profiles?
- Multi-tenancy — do users belong to one nevisIDM client or multiple? Record the
client_idfor each user segment.
Step 2 - Identify your primary system
At any point in time, exactly one system is the primary system — the authoritative source for user data. This is where user modifications happen through external GUIs, app, APIs. Changes made directly in the secondary system risk being overwritten on the next sync, so shall not be done. Document and communicate this clearly to operations and support teams.
Step 3 - Choose your migration strategy
Based on the detailed information provided in under migration procedures, select the method which fits your migration scenario.
Simple cutover
Migrate all users in a single bulk run, then switch traffic to nevisIDM. Best for scenarios when the legacy system is switched off immediately after migration and usage of NevisID begins.
- Run the full bulk migration in test mode and validate output
- Schedule a maintenance window
- Run the live bulk migration
- Switch all applications to use nevisID as the identity provider
- Decommission unneeded legacy systems
Legacy first
The legacy system remains the source of truth until cutover. Changes flow from the legacy system into nevisID via the Continuous Inbound procedure. At cutover, traffic switches and nevisID becomes authoritative.
nevisID first
nevisID is deployed alongside the legacy system. Users are synced to the legacy system over an extended period of time time. nevisID is the authoritative system from the start; the legacy system is kept in sync via Continuous Outbound process until fully decommissioned one day.
Step 4 - Validate with a pilot group
Before migrating all users, select a representative pilot group (for example, 50–100 users from different segments). Migrate them, verify their data in nevisID, and have them log in to confirm the experience is correct. Fix any mapping or configuration issues before the full run. This step is optional, but can help ensure setup of the new systems reached full production readiness.
Pre-migration checklist
- Legacy data export validated (no missing or corrupt records)
- Attribute mapping documented and reviewed
- Duplicate usernames / email addresses resolved
- Credential types identified and mapped
- nevisID client (tenant) IDs confirmed
- Test-run completed successfully on full dataset
- Pilot group migrated and validated (optional)
- Rollback plan documented
- Cutover date and maintenance window agreed
- Support teams briefed on post-cutover password reset process
Post-migration checklist
- All users present in nevisID (compare record counts and other data)
- Error report reviewed and residual failures addressed
- Sample logins tested end-to-end
- Continuous sync running (if applicable) and event backlog cleared
- Legacy system access restricted or decommissioned per plan
Next steps
- To execute the bulk migration, see Running Your First Migration.
- To set up ongoing sync after cutover, see Continuous Sync Setup.