Standalone Deployment for Nevis Components
This chapter explains how to migrate a Nevis instance based on Java EE deployment to standalone deployment using nevisAdmin 3.
As of November 2018 standalone deployment is available for:
- nevisLogrend
- nevisAuth
- nevisIDM
The following screenshots show the migration of a nevisAuth instance. The steps to migrate nevisLogrend and nevisIDM are comparable.
Preconditions
If any of the following preconditions are not fulfilled, contact Support to analyze your case.
Operating System
The operating system must be one of:
- nevisAppliance 2.201811 or later
- an OS with support for systemd (e.g. RHEL 7 or later)
Nevis Component
The component must provide support for standalone deployment:
- Check the release notes of the component for the minimum required version.
- For nevisIDM on nevisAppliance you have to select the version first. See nevisAppliance reference guide for details.
nevisAdmin 3 Administration
Check if custom creation command parameters have been configured for the component.
Go to Administration, click on Instance settings and select the component from the Instance name drop-down.
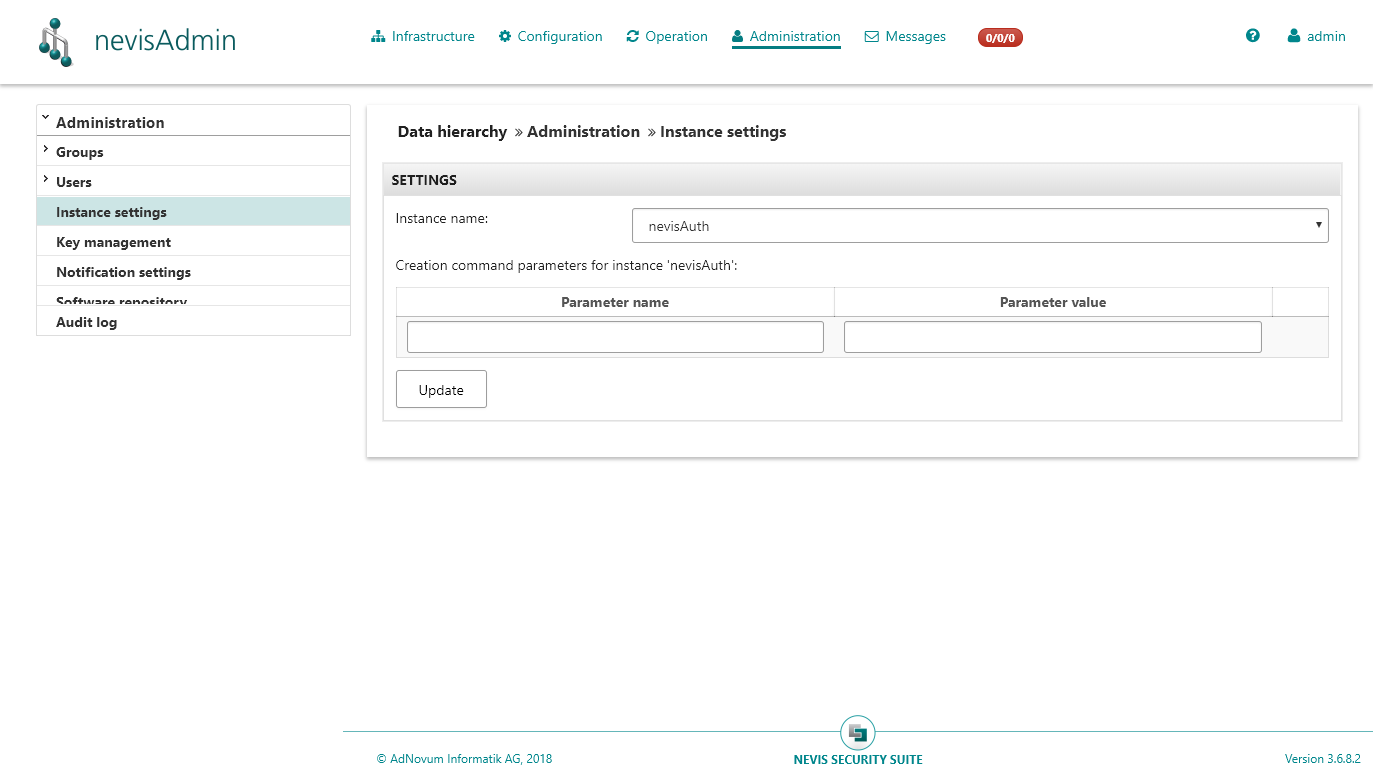
There should be no parameters configured on this screen otherwise the migration may fail.
nevisAdmin 3 Infrastructure / Configuration
Check the file manager of the instance (Infrastructure) and the file manager of the realm (Configuration).
Files which are specific to the type of deployment may cause problems during migration. This includes:
- server.xml
- logrend.properties
- vmargs.conf
Download these files to have a backup and then remove them from the file manager. You may re-apply any manual settings in these files in step 3.
Step 1: Backup and Remove Instance
nevisAdmin 3 does not generate any configuration files which are specific for the deployment type.
Instead, nevisAdmin 3 relies on the inst create command of the component to create the instance. However, this command is executed only if the instance does not exist.
Thus, you first have to remove the existing instance on the target host. This can best be done on the command line using:
<componentName> inst remove <instanceName>
For instance, here is how to remove a nevisAuth instance named "auth":
nevisauth inst remove auth
As an alternative you may remove the instance via nevisAdmin 3. Go to Operation and navigate to the instance.
Open the Installation panel and click the Destroy button to remove the instance:
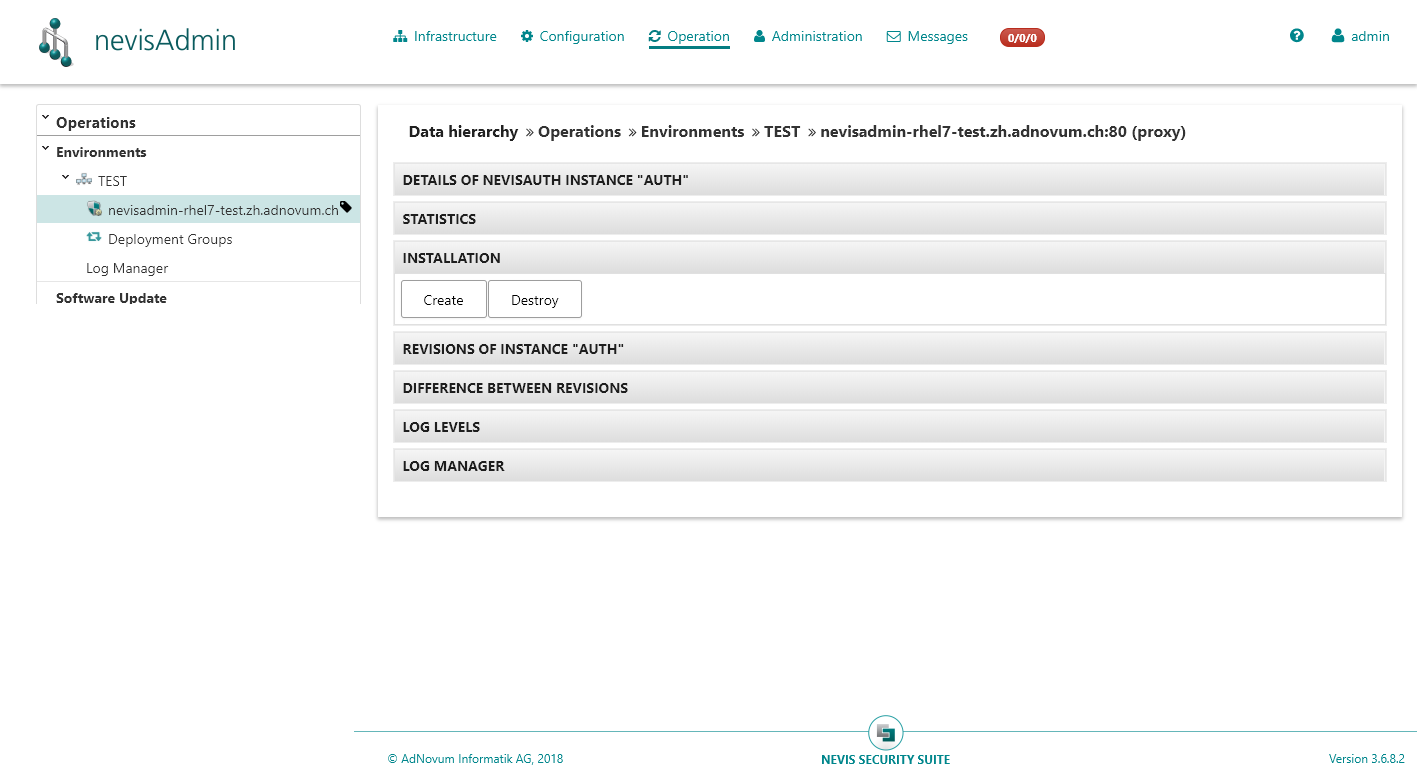
A backup of the instance will be created and stored in: /var/opt/<component>/<instance>_<timestamp>.gtar.gz
Store this backup in a safe place.
In case you have done manual changes via a nevisAdmin 3 file manager you may have to re-apply some configurations later.
During the migration configuration, files which are specific to the type of deployment, will be replaced.
The following files may be affected:
- server.xml
- logrend.properties
- log4j.xml
- vmargs.conf
Step 2: Deploy as Standalone Instance
In the following screenshot, configuration options which are not relevant have been replaced with ... for illustration purposes:
Go to Infrastructure and navigate to the instance.
There should not be any Custom inst create parameters for this instance.
In the drop-down Deployment Type select standalone and click the Update button.

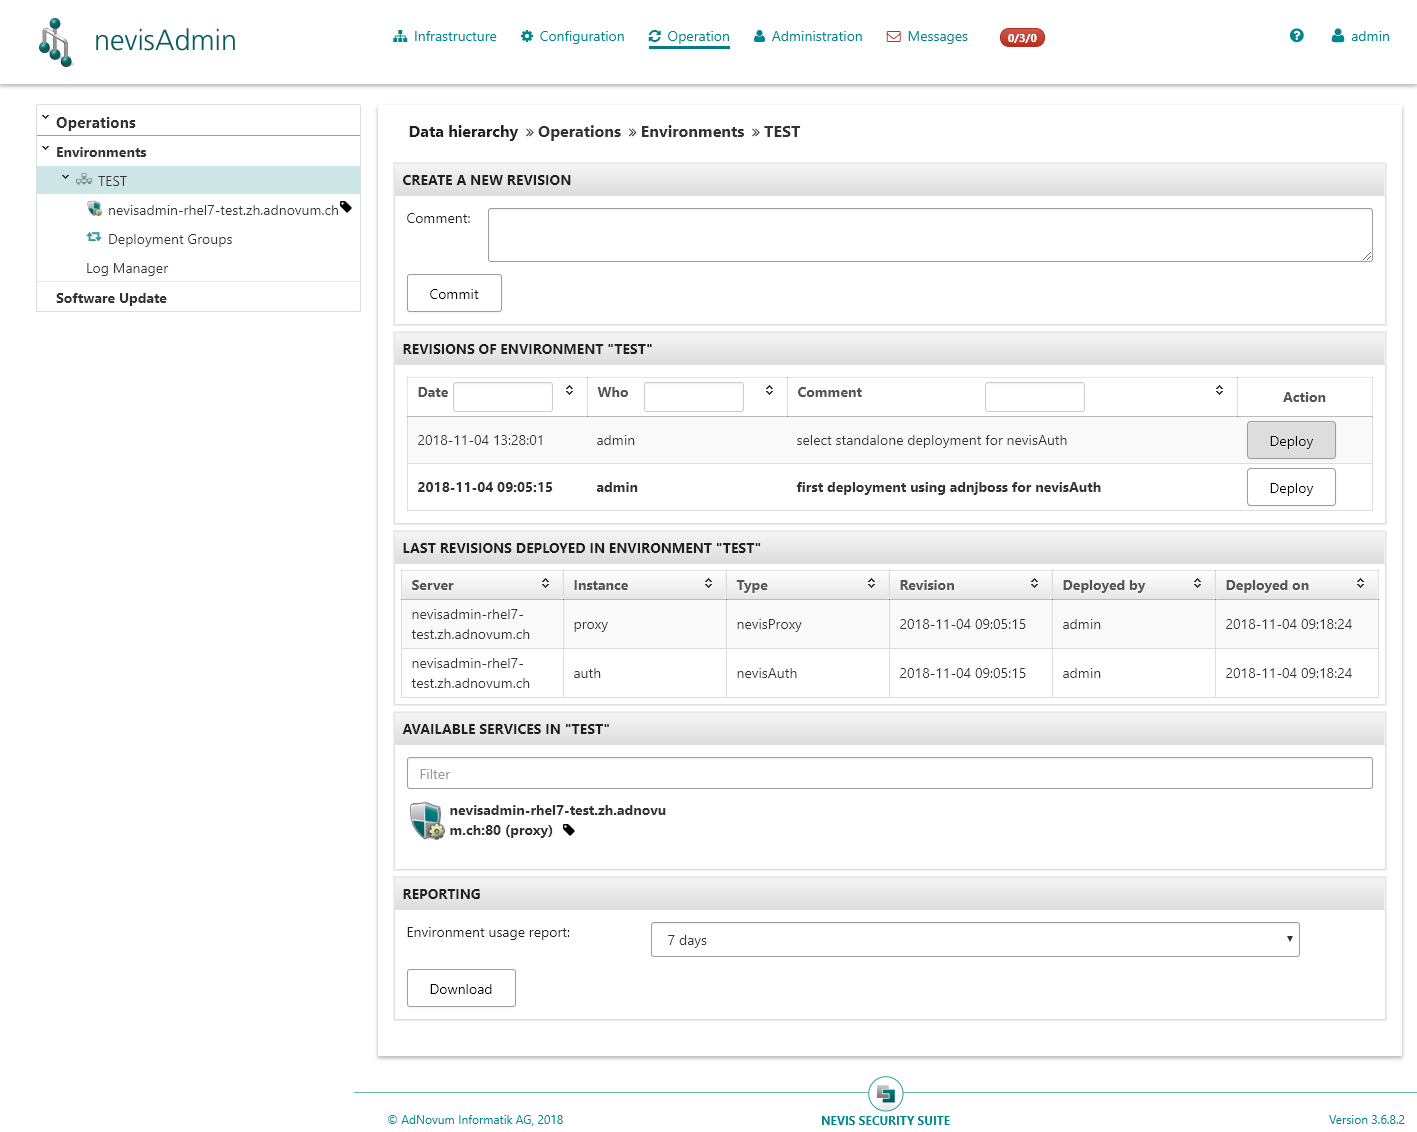
Go to Operation, select the environment and create a new revision.
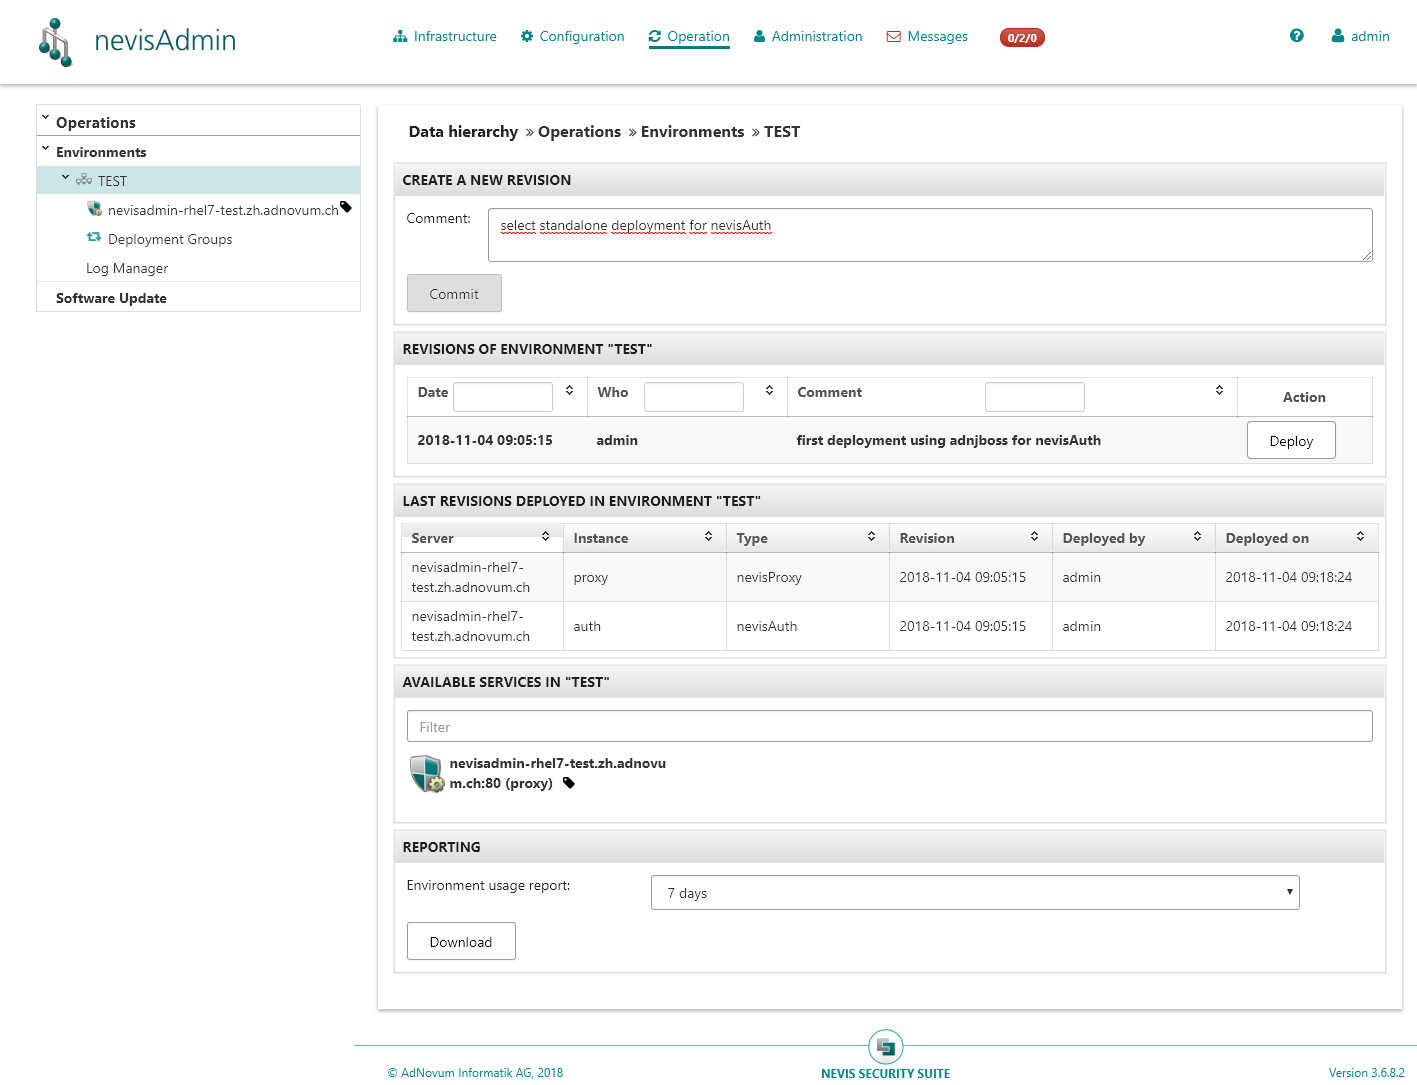
Then, click the Deploy button for this revision.
nevisAdmin 3 does NOT deploy nevisIDM by default. You have to create a deployment group which contains the nevisIDM instance and deploy this group instead.
When deployment is done, check if the configuration works as expected by doing a login.
Step 3: Re-Apply Manual Configuration
This step is required only if you have done manual changes to configuration files which are specific for the deployment type and the files have been replaced by the migration.
For instance, manual settings in conf/vmargs.conf have to be supplied via conf/env.conf instead.
For setting Java VM arguments in env.conf you have to set the variable JAVA_OPTS. The following example explains the format:
JAVA_OPTS="-Xmx1024m -Xms1024m -XX:+UseParallelGC"
Changes may be applied on the target host and tested first. Once everything works as expected, the relevant file should be imported into a nevisAdmin 3 to ensure that the configuration is complete and the file will be included in each deployment.
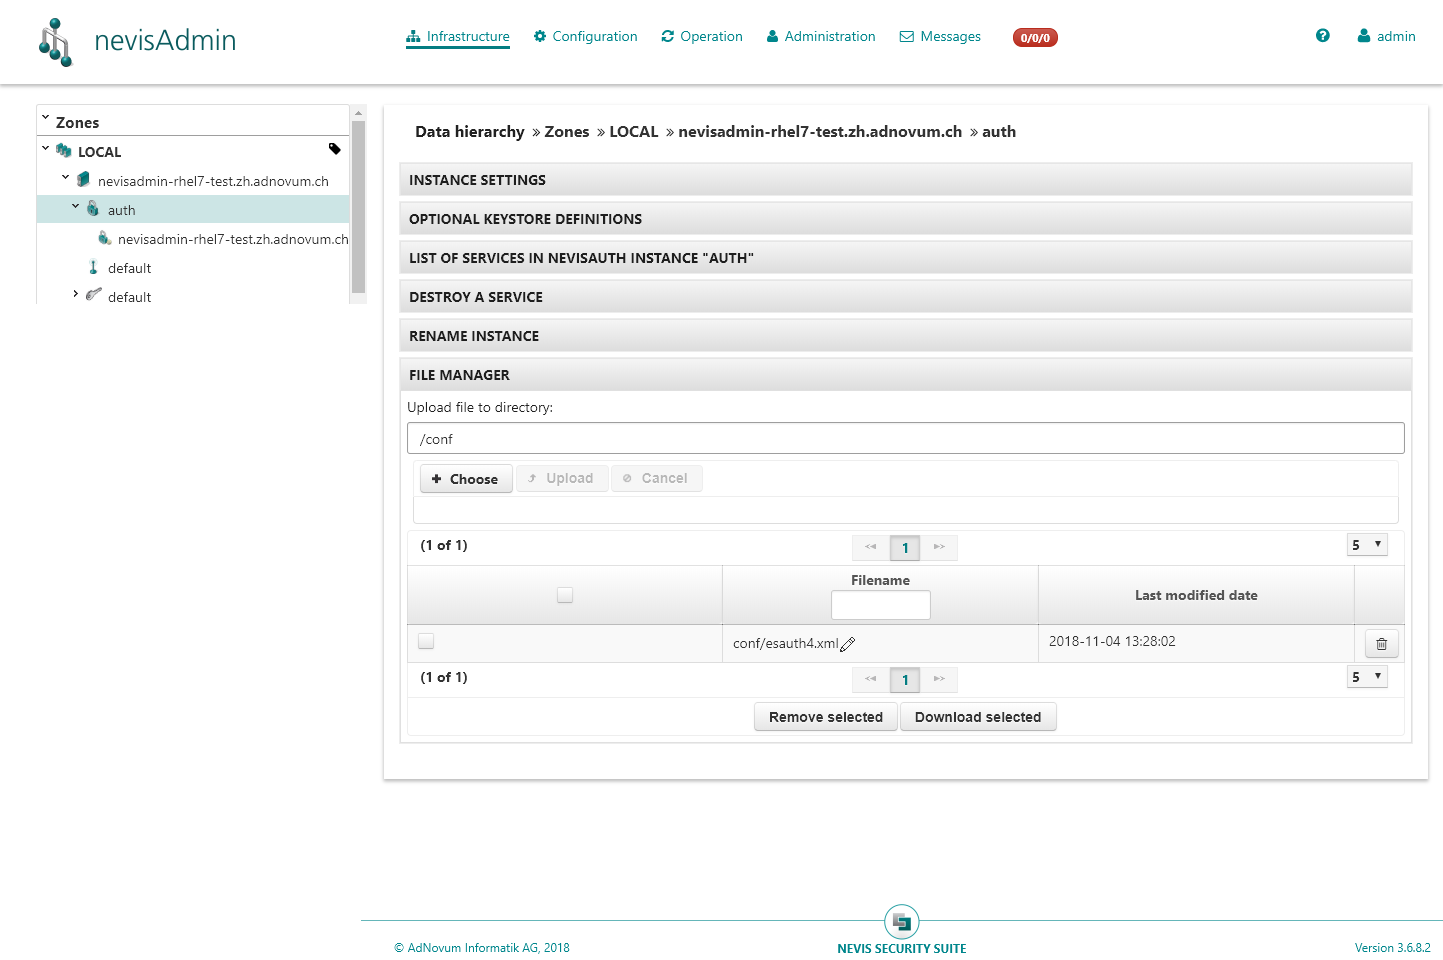
In case of nevisLogrend and nevisAuth you may upload the file via the nevisAdmin 3 instance or realm file manager. For nevisIDM configuration files, only the instance file manager can be used.
When uploading the file via a file manager, ensure that you have set the correct target directory.
In the instance file manager the directory is relative to the instance (e.g. /conf):