Working with Certificates
This documentation applies when you use PEM-based keystores or truststores in your configuration project. See Configuring Key Material and Certificates for more information.
Attaching a Certificate
There are several ways to add a certificate to an inventory:
- By attaching a new certificate as a file to the inventory. This will create an inventory level certificate, which you can use only in the given inventory.
- By using an existing certificate (on a global or inventory level).
- Using a global certificate: Global certificates can be used in multiple inventories. To use a global certificate, you first need to upload a certificate as a global file/secret file, via the buttons Upload global secret file or Upload global file in the Secret & Files screen. To open this screen, go to the sidebar of the Administration tab, and select Secret & Files from the Global Settings menu. For more information, see the chapter Secrets & Files.
- Using an existing inventory level certificate: To use an existing inventory level certificate, the certificate must have been used in the given inventory before.
You can view all certificates in the Certificates screen. Note that only valid certificates (.pem files) are considered as certificates and can be viewed in the Certificates screen. For more details, see the chapter Certificates.
Attaching a certificate as a file to an inventory
To attach a certificate as a file to an inventory, perform the following steps:
Precondition
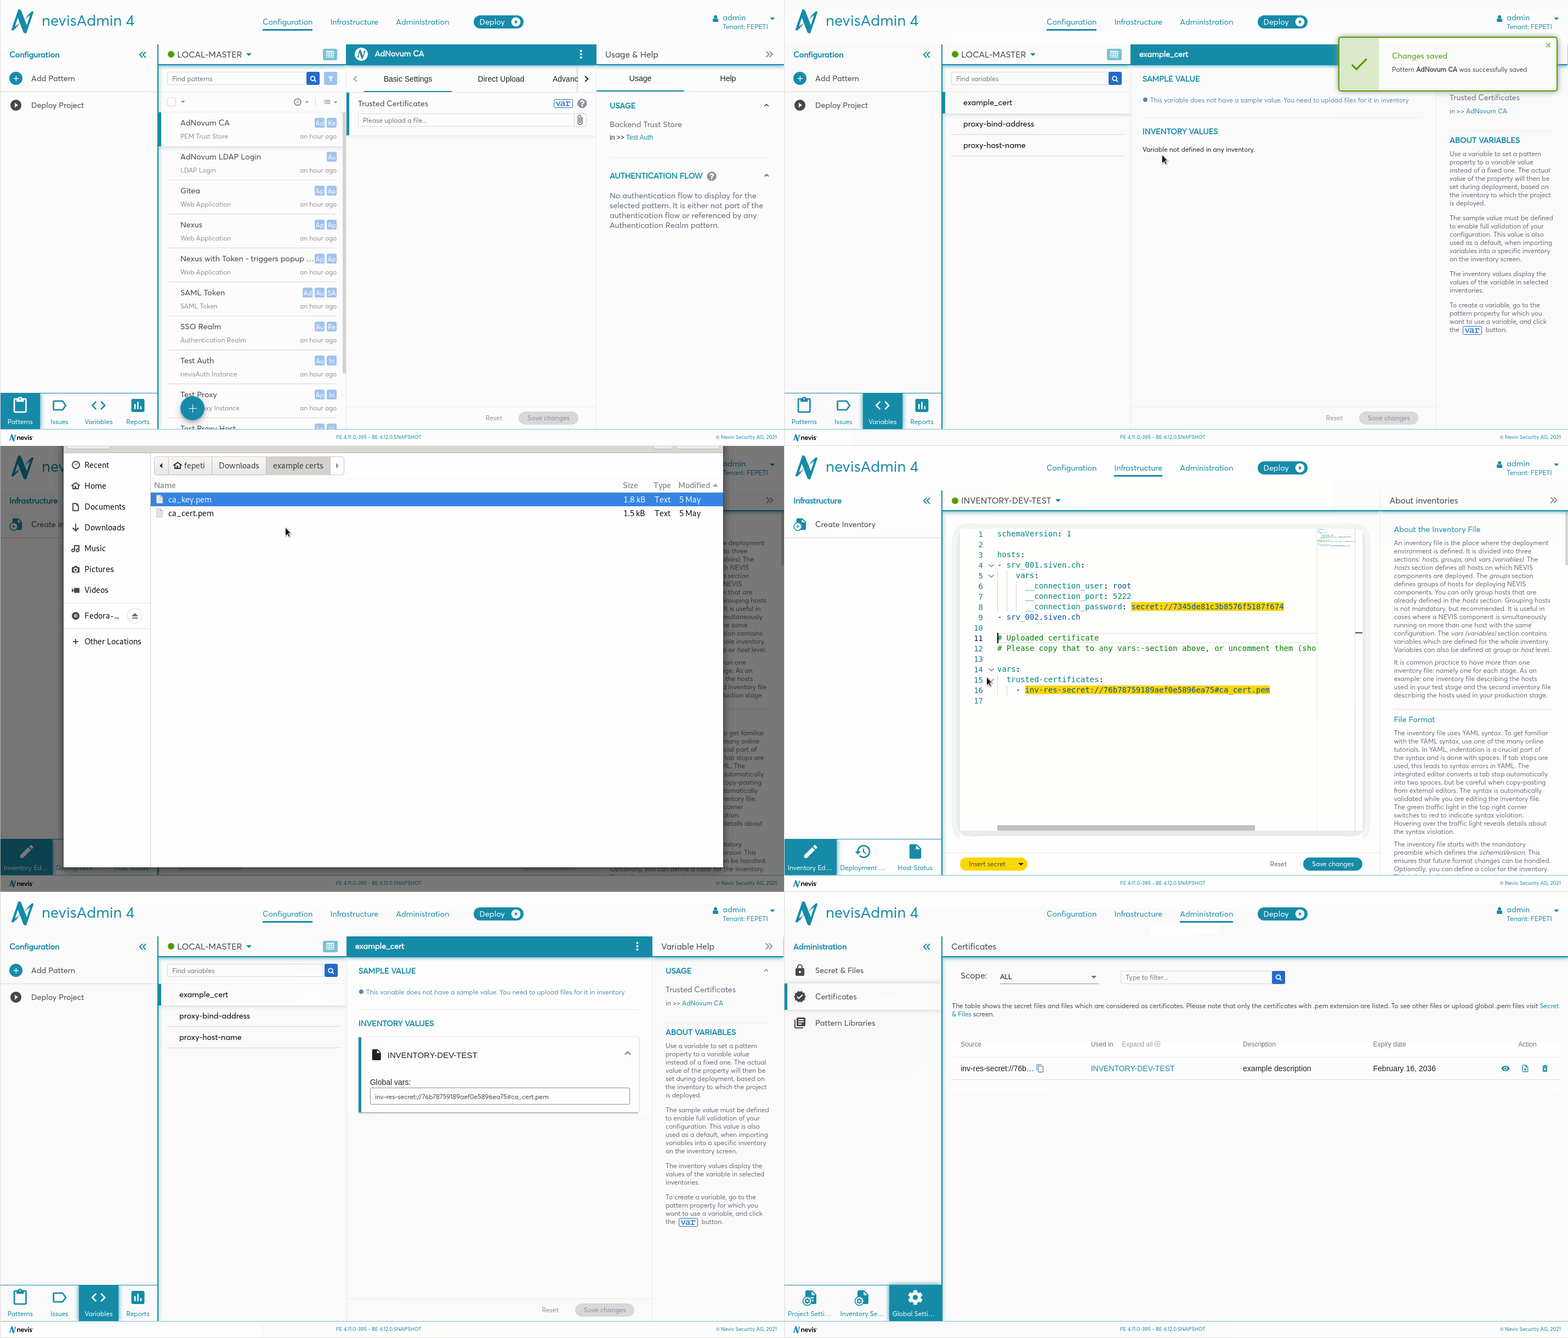
As a precondition to attach a certificate to an inventory, add PEM certificate patterns and variables to your configuration project. For more information, see the chapter Configuring Key Material and Certificates. In this example, we assume you created a variable called example_cert.
- In the Infrastructure tab, go to the relevant inventory file.
- Open the inventory file in the Inventory Editor and click inside the file.
- Subsequently click on the triangle arrow icon on the Insert secret button. The button is located below the inventory text file. Select Attach certificatefrom the drop-down menu.
- The Attach certificate dialog opens.
- Click on Select file and select the certificate file that you want to add to the inventory. Note that you can upload a valid certificate in PEM format (with .pem extension) only.
- Add a description, if needed. The description will be visible in the Secret & Files screen and also in the Inventory Editor on hovering over the inserted certificate value.
- Click Attach to add the certificate to the inventory (even if it is already present in the inventory).
- The certificate is inserted at the bottom of the inventory file, as a dummy trusted-certificates variable with a file attachment value, commented out.
- You can copy-paste the inv-res-secret values to any level in the inventory file.
- Variables in the vars section are valid for the entire inventory.
- Change the name of the variable from trusted-certificates to example_cert.
- Click on Save changes in the lower right corner of the inventory file.
The following movie demonstrates the steps to perform.

Using an already existing global certificate
Precondition
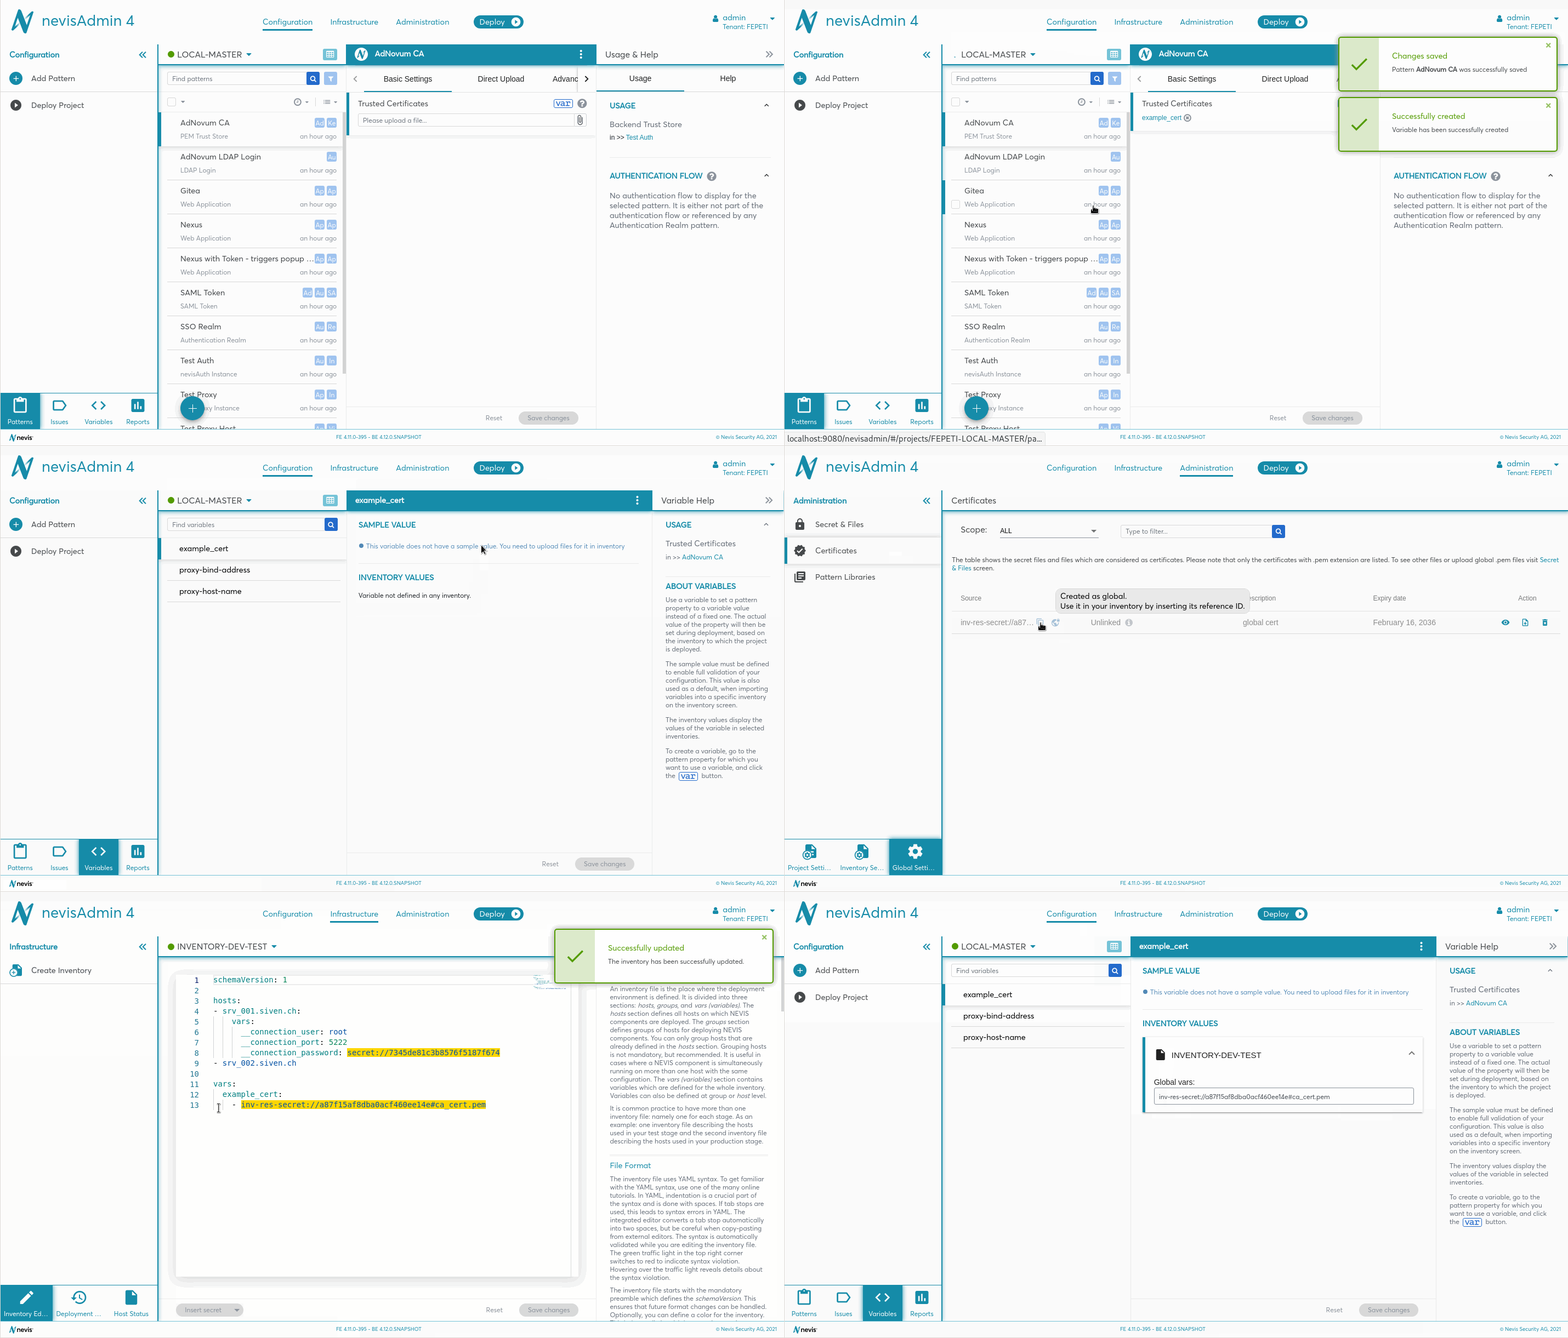
As a precondition to attach a certificate to an inventory, add PEM certificate patterns and variables to your configuration project. For more information, see the chapter Configuring Key Material and Certificates. In this example, we assume you created a variable called example_cert.
There are two ways to reference a global certificate in your inventory. Both options are explained.
By manually copy-pasting the reference ID into the inventory. For this, perform the following steps:
- Visit the [Certificates] screen and find your certificate there.
- Copy the reference ID (secret resource ID / resource ID).
- Click inside the relevant inventory file in the Inventory Editor.
- Paste the reference ID to the variable as a value (to example_cert. in our example).
- You can copy-paste the reference ID to any level in the inventory file.
- Variables in the vars section are valid for the entire inventory.
- Click on Save changes in the lower right corner of the inventory file.
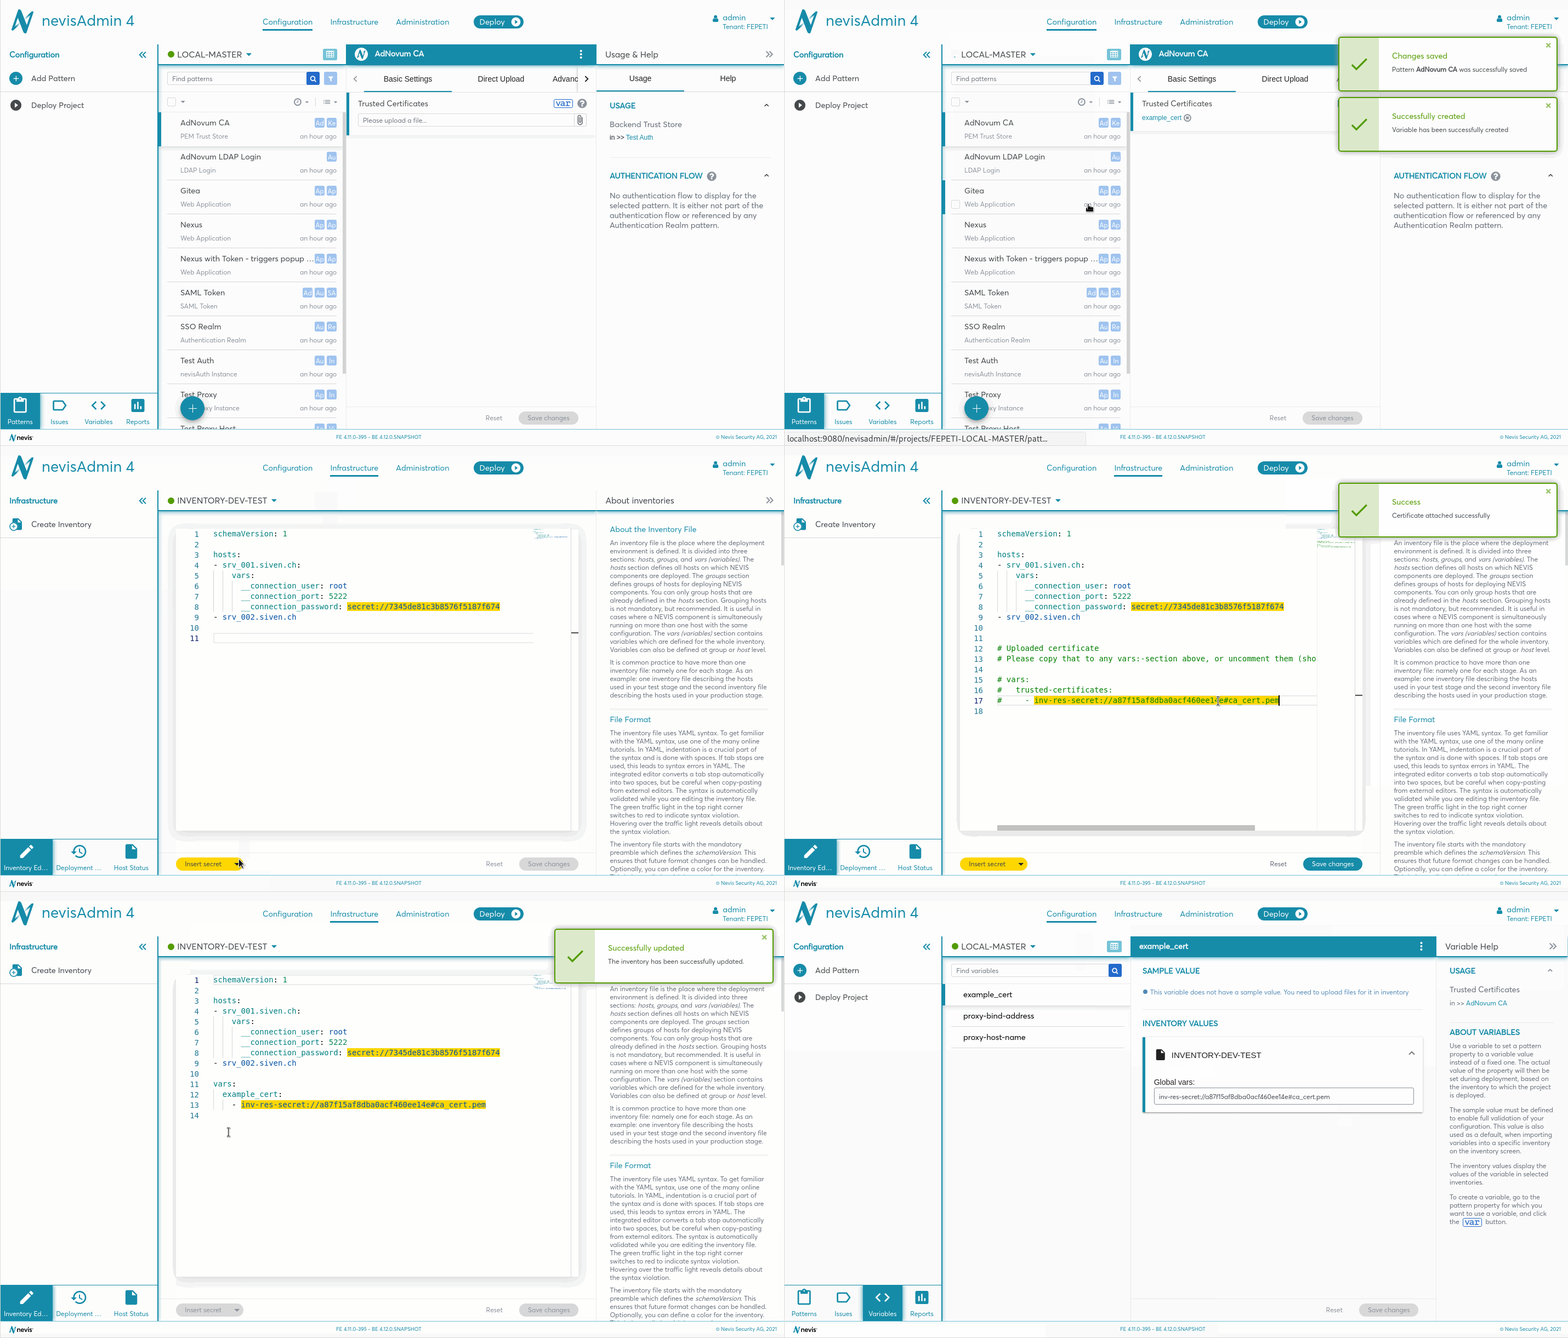
By selecting the existing global certificate from the list. For this, perform the following steps:
- Click inside the relevant inventory file in the Inventory Editor.
- Click on the triangle arrow icon on the Insert secret button. The button is located below the inventory text file. SelectAttach certificatesfrom the drop-down menu.
- The Attach certificate dialog opens.
- Select the global certificate from the dropdown. Note that even if the certificate was removed from the inventory screen (unused), it can still be reused. Remove the certificate from the Secret & Files screen, to make it unusable.
- Click Attach to add the certificate to the inventory (even if it is already present in the inventory).
- The certificate is inserted at the bottom of the inventory file, as a dummy trusted-certificates variable with a global certificate reference ID (inv-res-secret / inv-res) commented out.
- Change the name of the variable from trusted-certificates to example_cert.
- You can copy-paste the reference ID to any level in the inventory file.
- Variables in the vars section are valid for the entire inventory.
- Click on Save changes in the lower right corner of the inventory file.
The following movies demonstrate the steps to perform.


Selecting an already existing inventory level certificate
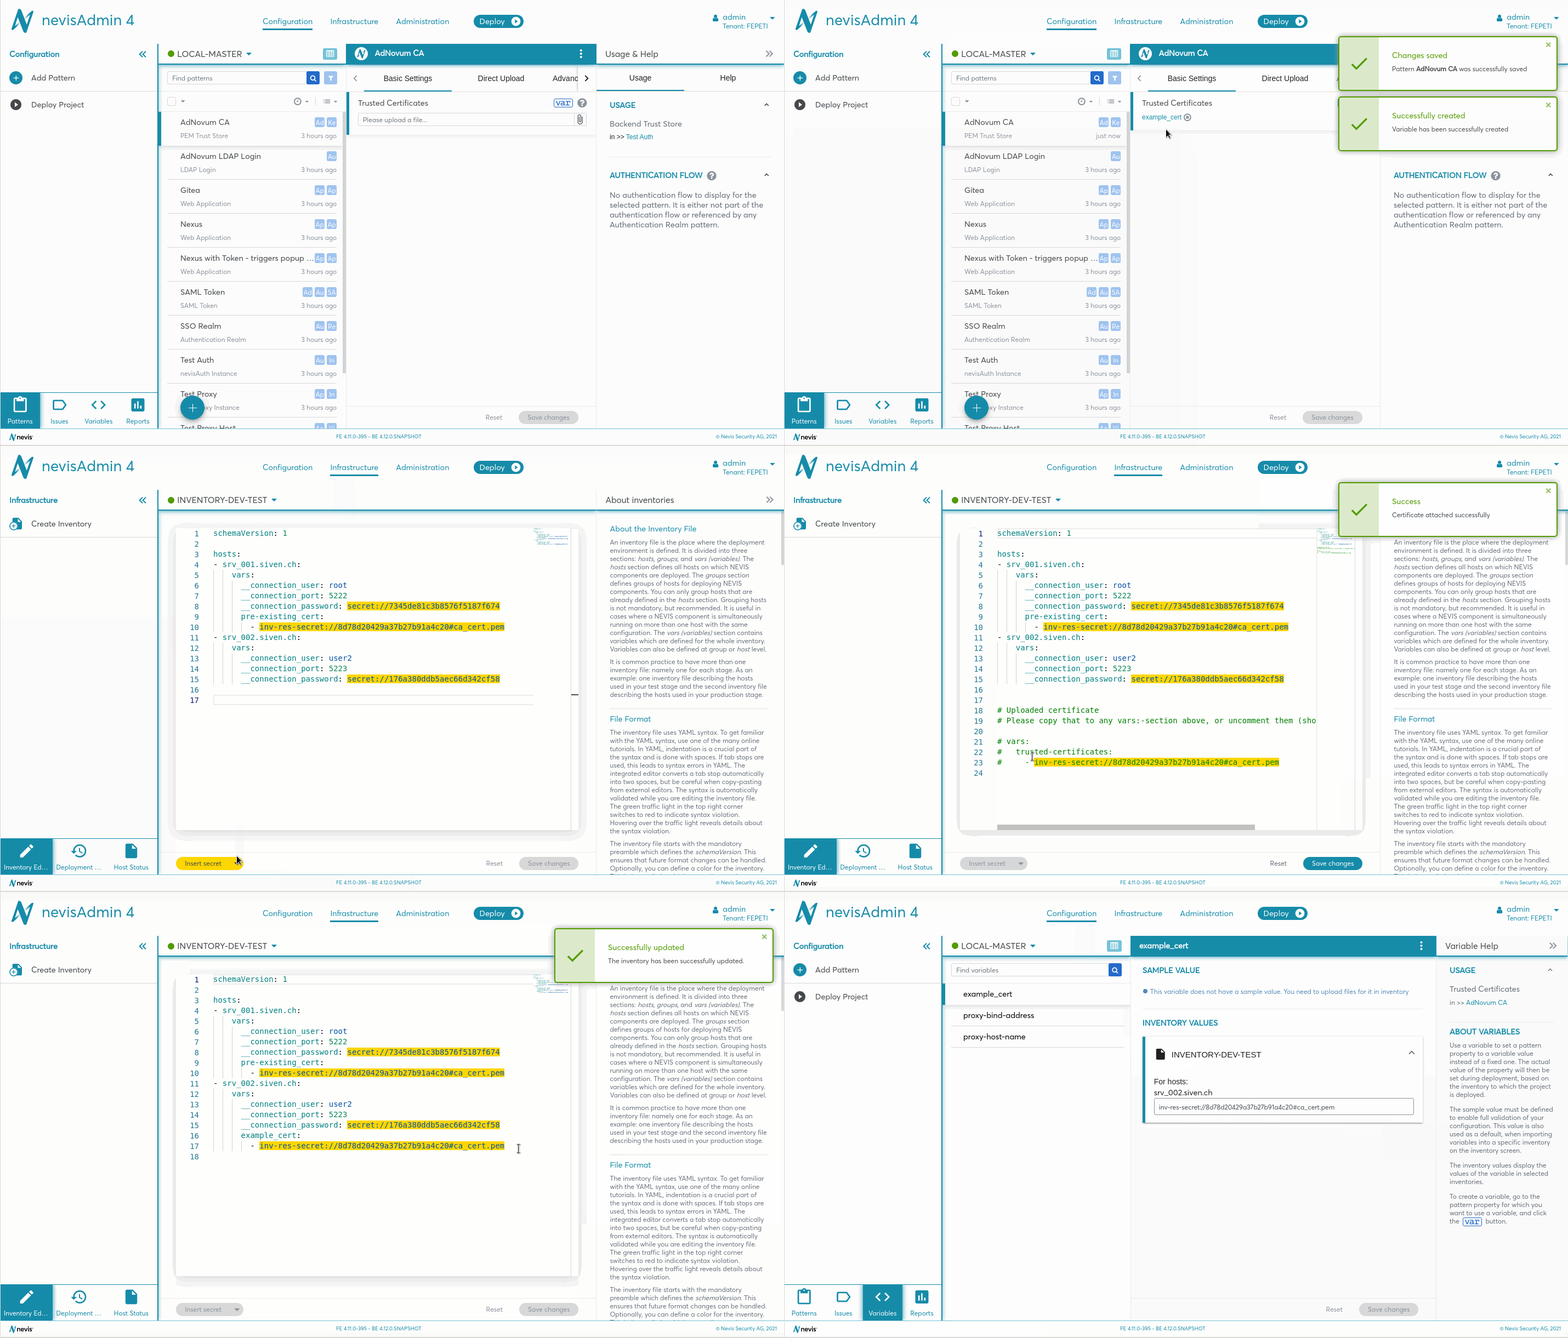
To select an already existing inventory level certificate, perform the following steps:
Precondition
As a precondition to attach a certificate to an inventory, add PEM certificate patterns and variables to your configuration project. For more information, see the chapter Configuring Key Material and Certificates. In this example, we assume you created a variable called example_cert.
- Click inside the inventory file in the Inventory Editor.
- Click on the triangle arrow icon on the Insert secret button. The button is located below the inventory text file. Select Attach certificates from the drop-down menu.
- The Attach certificate dialog opens.
- Select the existing certificate from the drop-down. Note that even if the certificate was removed from the inventory screen (unlinked), it can still be reused. Remove the certificate from the Secret & Files screen, to make it unusable.
- Click Attach to add the certificate to the inventory (even if it is already present in the inventory).
- The certificate is inserted at the bottom of the inventory file, as a dummy trusted-certificates variable with a file attachment value, commented out.
- You can copy-paste the inv-res-secret values to any level in the inventory file.
- Variables in the vars section are valid for the entire inventory.
- Change the name of the variable from trusted-certificates to example_cert.
- Click on Save changes in the lower right corner of the inventory file.
The following movie demonstrates the steps to perform.

Adding a Certificate as Plain Text
The below steps and the example are deprecated. They are only valid if you created variables for the properties with a text field in the Advanced Settings tab of the PEM Key/Trust Store patterns.
Instead, create attachment variables for the Key Store Content or Trusted Certificates: as file properties and follow the steps above. You find the mentioned properties in the Basic Settings tab of the PEM Key/Trust Store patterns.
If you want to add a certificate as plain text inside the inventory, perform the next steps:
- Add the variable name.
- Start its value with the pipe symbol.
- Starting on the next line, paste the certificate file content. Make sure to add proper indentation for every pasted line, as depicted by the following example:
vars:   my-certificate: |
 -----BEGIN CERTIFICATE-----
 <certificate-content>
 -----END CERTIFICATE-----