FAQ
The FAQ chapter lists common and often asked questions and their answers regarding the nevisAppliance.
How to get back the removed SQL Plus
Q: I see that SQL Plus is removed from the nevisAppliance extended image due to license restrictions. How do I get it back on my nevisAppliance?
A: Due to Oracle license restrictions, we cannot deliver Oracle software that is directly installed in the nevisAppliance. But you can add it on your own on designated machines.
Proceed as follows:
-
Download the RPM packages from the Oracle website:
<http://www.oracle.com/database/technologies/instant-client/linux-x86-64-downloads.html/>You need the following .rpm files:- oracle-instantclient-basic-12.2.0.1.0-1.rpm
- oracle-instantclient-sqlplus-12.2.0.1.0-1_x86_64.rpm
-
Copy these files to a new 'boot safe' directory on the nevisAppliance:
/home/nvbuser/oracle -
Create an installation script in the directory
/etc/init.d.custom.first/S10installOracleClient, with this content:
#!/bin/sh
PATH=/sbin:/bin:/usr/sbin:/usr/bin
export PATH
case "$1" in
  start)
   rpm -i /home/nvbuser/oracle-instantclient-basic-12.2.0.1.0-1.rpm /home/nvbuser/oracle-instantclient-sqlplus-12.2.0.1.0-1.x86_64.rpm
   # create custom sqlplus / sqlplus64 wrapper with LD_LIBRARY_PATH"
   # here some further and manual steps are required
   # according to http://www.oracle.com/technetwork/topics/linuxx86-64soft-092277.html#ic_x64_inst
   # we create a wrapper for sqlplus to set LD_LIBRARY_PATH
   # locally because adnpkg heavily uses sudo which runs in a non-interactive shell

   # delete symlink "/usr/bin/sqlplus64" created by oracle
   rm /usr/bin/sqlplus*

   cat >"/usr/bin/sqlplus" <<EOF
   #!/bin/bash
   # Custom Nevis wrapper sets LD_LIBRARY_PATH locally and delivers 'sqlplus' to us,
   # because Oracle delivers now solely 'sqlplus64' tool.

   export LD_LIBRARY_PATH=/usr/lib/oracle/12.2/client64/lib
   exec /usr/lib/oracle/12.2/client64/bin/sqlplus "${@}"
EOF

   # and create ours instead
   chmod +x /usr/bin/sqlplus
   ln -s /usr/bin/sqlplus /usr/bin/sqlplus64

   chmod 755 /usr/bin/sqlplus

   # delete symlink "/usr/bin/sqlplus64" created by oracle
   rm -f /usr/bin/sqlplus64

   # ... and create our instead
   ln -s /usr/bin/sqlplus /usr/bin/sqlplus64
   ;;
  stop)
   # nothing to stop
   ;;
  *)
   echo "Usage: S20installOracleClient {start|stop}"
   exit 1
esac
exit 0
- Make the script executable:
chmod 500 /etc/init.d.custom.first/S10installOracleClient
- Reboot your nevisAppliance.
Note, that system startup takes a bit longer now due to the package installation!
How to enable core dumps
Q: How do I enable core dumps for Nevis components (like nevisProxy) on the nevisAppliance?
A: Core dumps are disabled to protect the current system. You can enable them for support cases (make sure you take care of the disk consumption they need).
To enable core dumps, proceed as described here:
- Add these 2 settings in /etc/sysctl.conf
kernel.core_pattern=/tmp/core-%e-%p-%t
fs.suid_dumpable=2
-
# sysctl -p #( apply the above settings)
-
# ulimit -c unlimited
-
Add the following lines to /etc/security/limits.conf
* soft core unlimited
* hard core unlimited
- Add the following line to the nevisproxy systemd file (e.g. /usr/lib/systemd/system/[email protected]), see Marker
<====
[Unit]
Description=nevisproxy/4.6.4.0 instance %i
Requires=base.nevis.service
After=base.nevis.service network-online.target

[Service]
User=root
Group=root
LimitNOFILE=500000
LimitCORE=infinity                  <====

Type=forking
- # systemctl daemon-reload
- # nevisproxy <instance> restart
Check the PID in the output, then you can issue either # kill -6 <PID> or # kill -11 <PID>
and will find the coredump in /tmp
[root@nbnevap07-lts202111 lib]# ls -ltr /tmp
total 713333
drwx------ 3 root  root     4096 Jul 1 23:42 systemd-private-4735530319e64df58bc8010d195ee53c-ntpd.service-xaC8EK
drwxr-xr-x 2 bin   bin      4096 Jul 1 23:42 hsperfdata_bin
srwxr-xr-x 1 bin   bin       0 Jul 1 23:42 OSL_PIPE_1_SingleOfficeIPC_b43758de80cee4fadd3e3da6cbf1962
drwx------ 2 bin   bin      4096 Jul 1 23:42 lu1385l207ac.tmp
drwxr-xr-x 2 nvauser nvbgroup   4096 Jul 1 23:54 hsperfdata_nvauser
-rw------- 1 root  nvbgroup 730669056 Jul 2 00:06 core-navajosv2_4-13388-1751407574.   <===
drwxr-xr-x 1 root  root     4096 Jul 2 00:14 hsperfdata_root
How to install a custom splunkforwarder
Q: I must have a custom splunkforwarder version on my nevisAppliance, which works with our shop infrastructure/standard, not the most current splunkforwarder version delivered with the Rolling Release. How can I do that?
A: Follow the instructions below to install a custom splunkforwarder version.
- Download and copy the RPM to a location that survives reboots (for example,
/home/nvbuser/splunkforwarder) - Copy the following script to the directory
/etc/init.d.custom.first/S20installsplunkforwarder, use the command chmod to make it executable, and adapt it to your chosen paths and splunkforwarder version.
#!/bin/sh
PATH=/sbin:/bin:/usr/sbin:/usr/bin
export PATH
case "$1" in
  start)
   /etc/init.d/splunk stop
   rpm -e splunkforwarder
   rpm -i /home/nvbuser/splunkforwarder/splunkforwarder-<version>-linux-2.6-x86_64.rpm
   /etc/init.d/splunk start
   ;;
  stop)
   # nothing to stop
   ;;
  *)
   echo "Usage: S00installsplunkforwarder {start|stop}"
   exit 1
esac
exit 0
How to change the Nevis systemd-based startup file
Q: I must change the nevisProxy startup time to be longer (300 seconds) then the default value set because our config is very complex. How can I change the relevant reboot-resistant file on the nevisAppliance?
A: Follow the instructions below to adjust the value and restart/check the service.
(1) First, edit the respective service file and assign the value with an editor:
# systemctl edit [email protected]

In the editor that opens, insert the following two lines which override the default setting of '1min 30s' (although this value is not explicitly seen
in our service file in /usr/lib/systemd/system/[email protected] because this is a standard value set by systemd initially) and assign it your new value of 300 seconds:

[Service]
TimeoutStartSec=300

Reload the daemon:
# systemctl daemon-reload

Now restart the nevisProxy instance:
# nevisproy restart <instance>

Verify the new setting:
# systemctl show nevisproxy@<instance>.service

The value shown differs in the kind how systemd works internally and represents your assigned value. Although you have set 'TimeoutStartSec', systemd shows your assigned value as 'TimeoutStartUSec' (micro-seconds) - because that is the internal representation of the setting. In addition, the value is written in a different format (min and seconds):

Type=forking
Restart=on-failure
PIDFile=/var/opt/nevisproxy/proxy/run/navajo.pid
NotifyAccess=none
RestartUSec=12s
TimeoutStartUSec=5min                          <==================
TimeoutStopUSec=1min 30s
...
How to reset a lost root password
Q: I must reset the root password on the nevisAppliance because we lost it. What has to be done?
A: Follow the instructions in the screenshots below to reset the local root password.
Step 1: (Re-) Boot the nevisAppliance. On the GRUB boot selection screen, press key 'e' to edit the boot options:
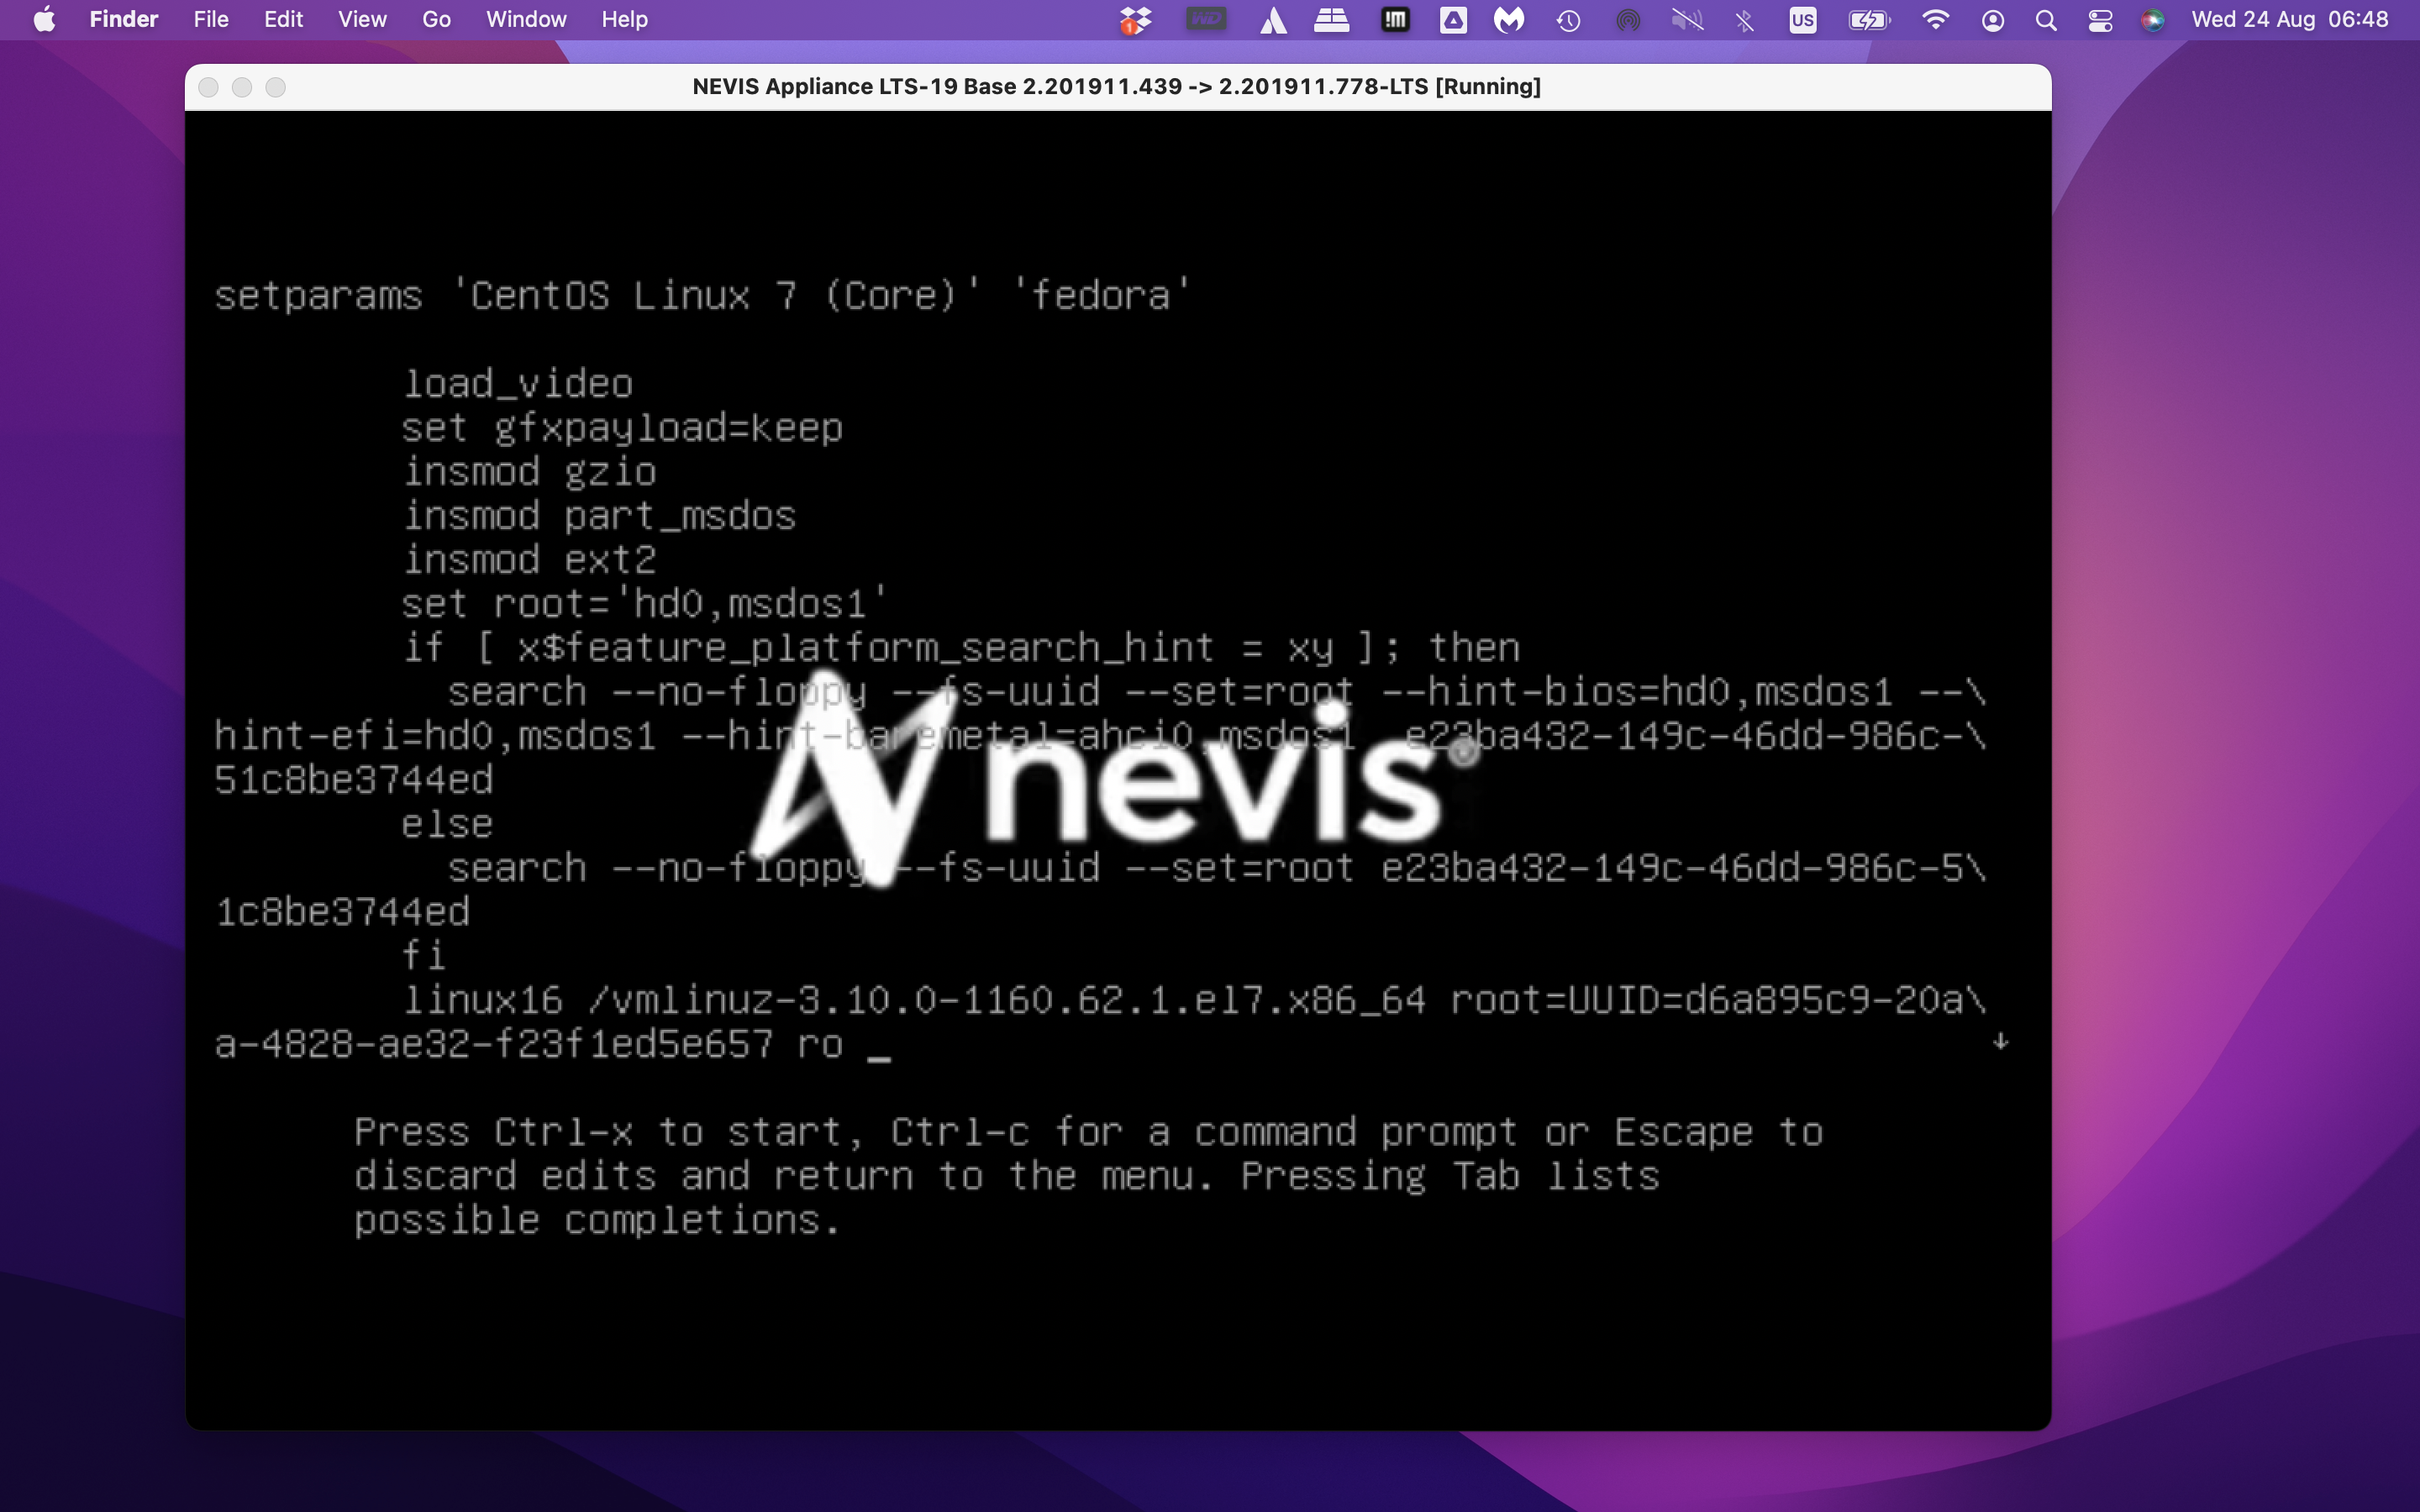
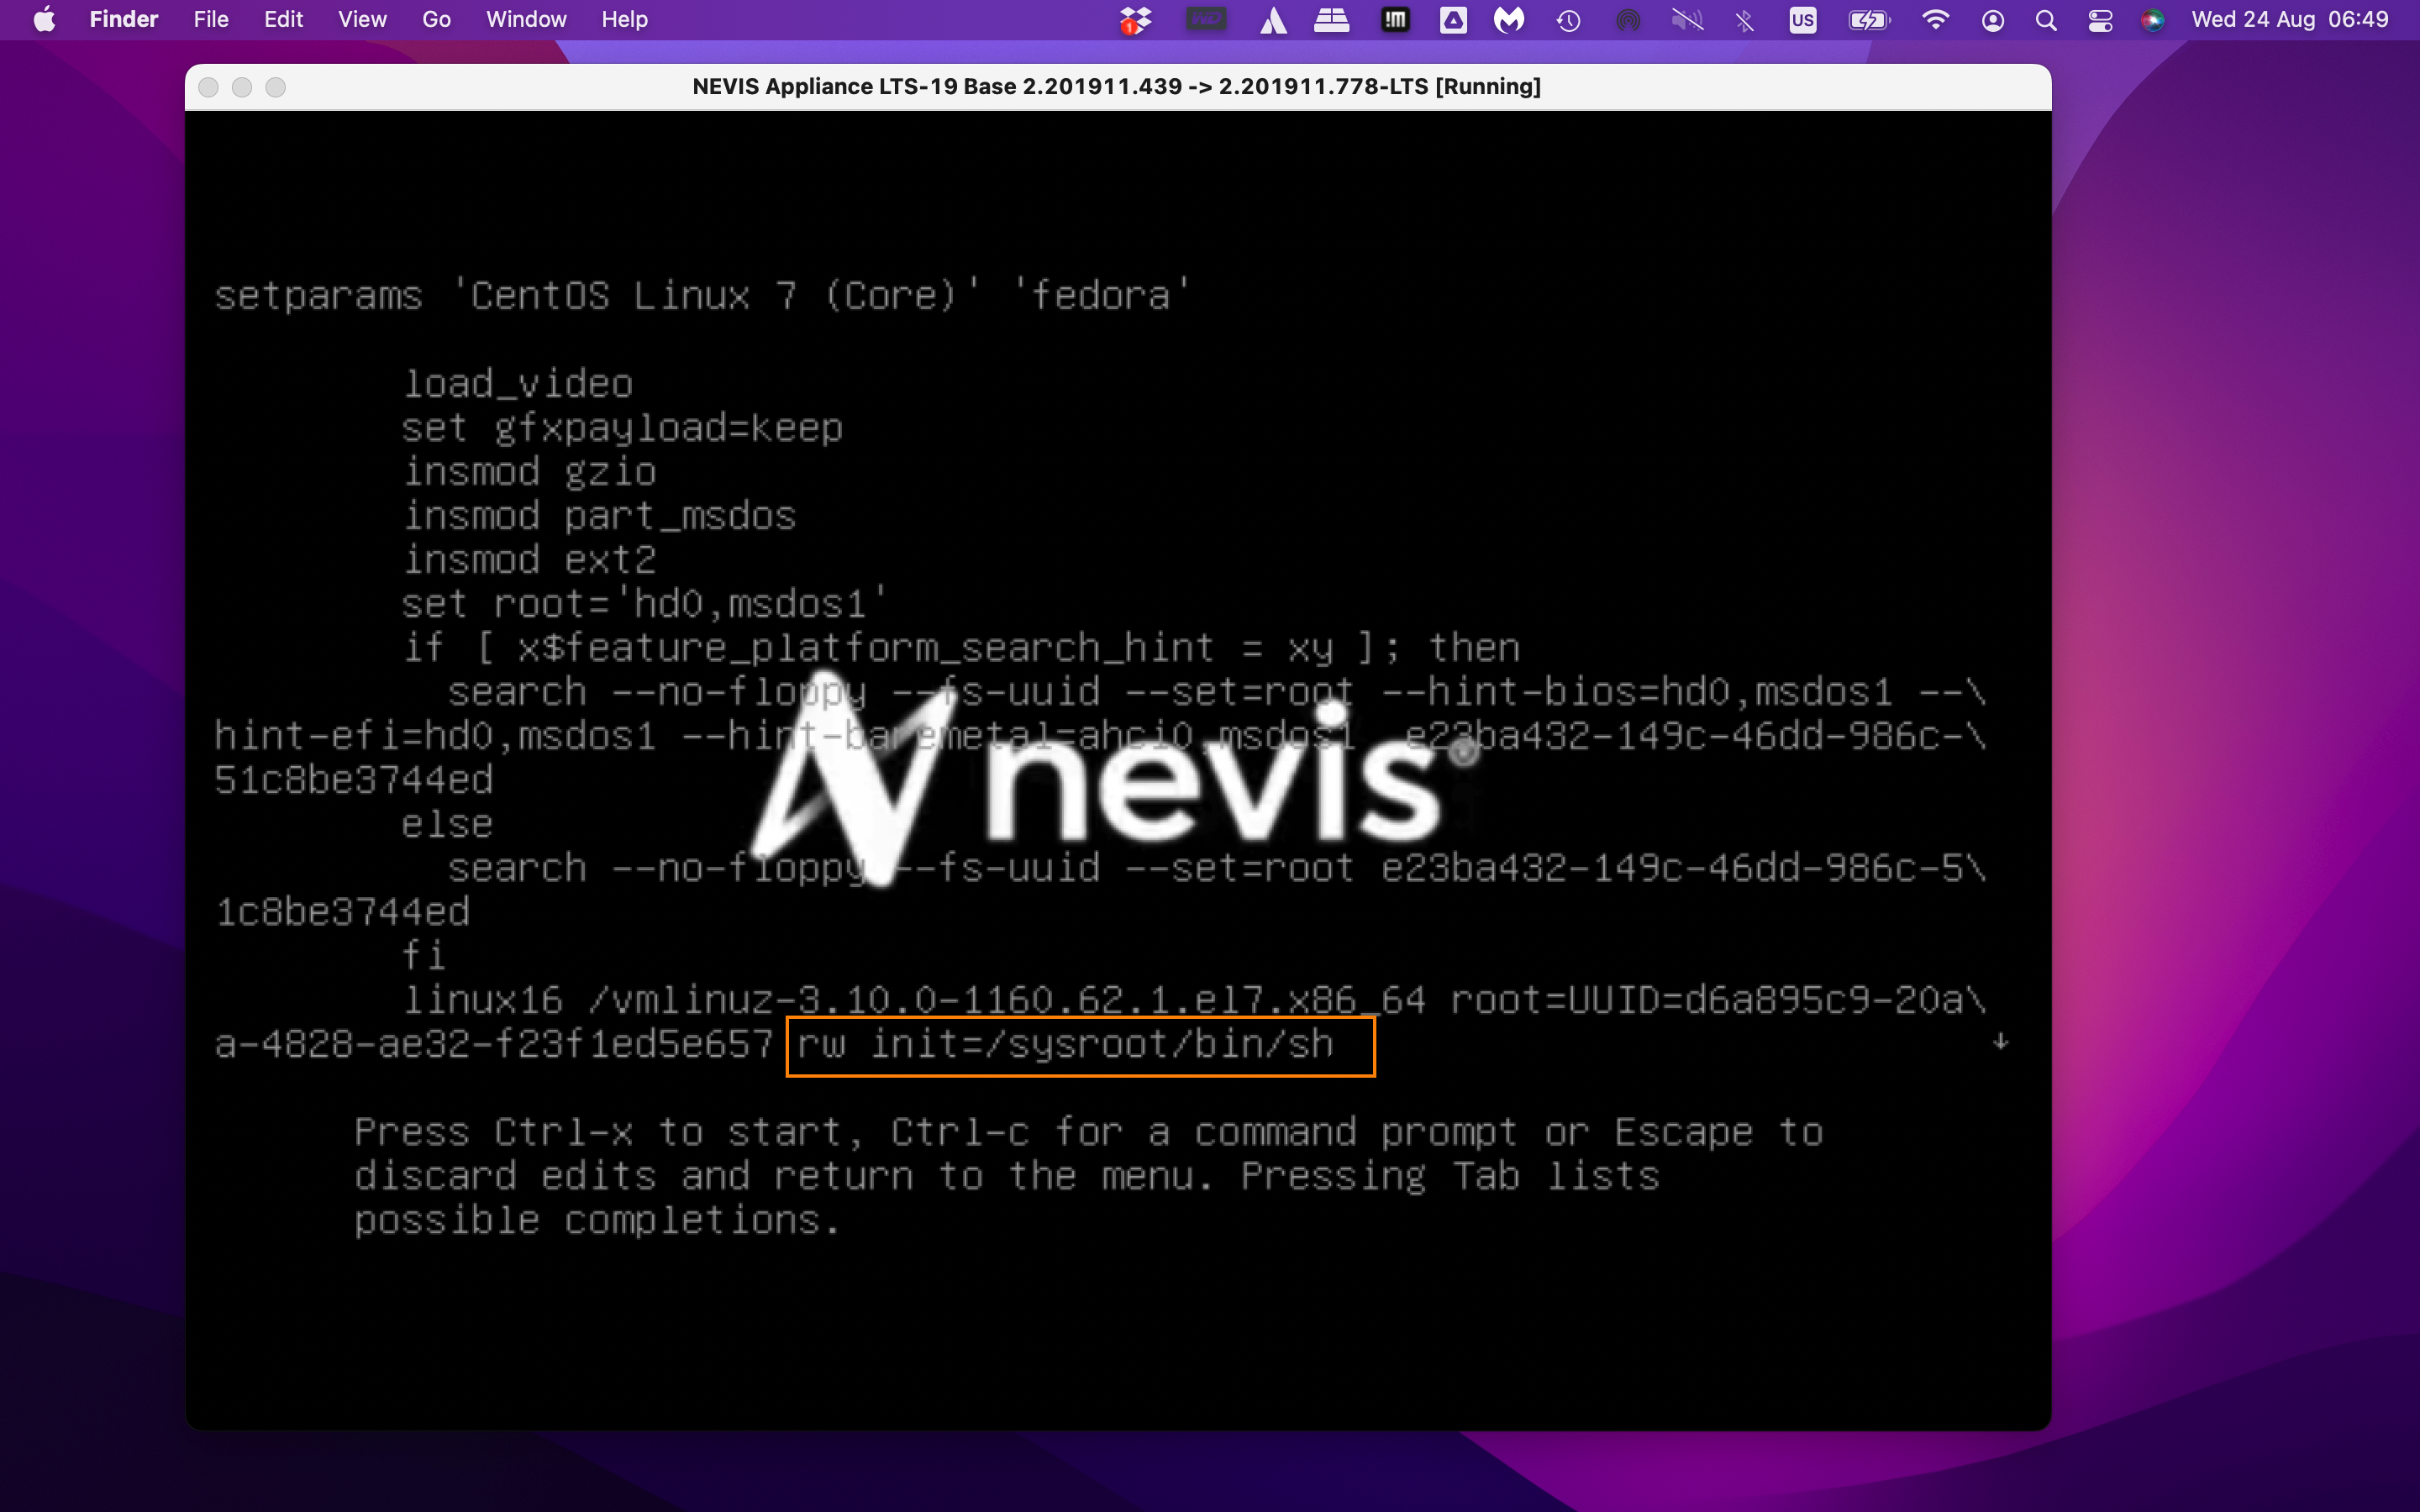
Step 2: on the marked line below, replace 'ro' with rw init=/sysroot/bin/sh
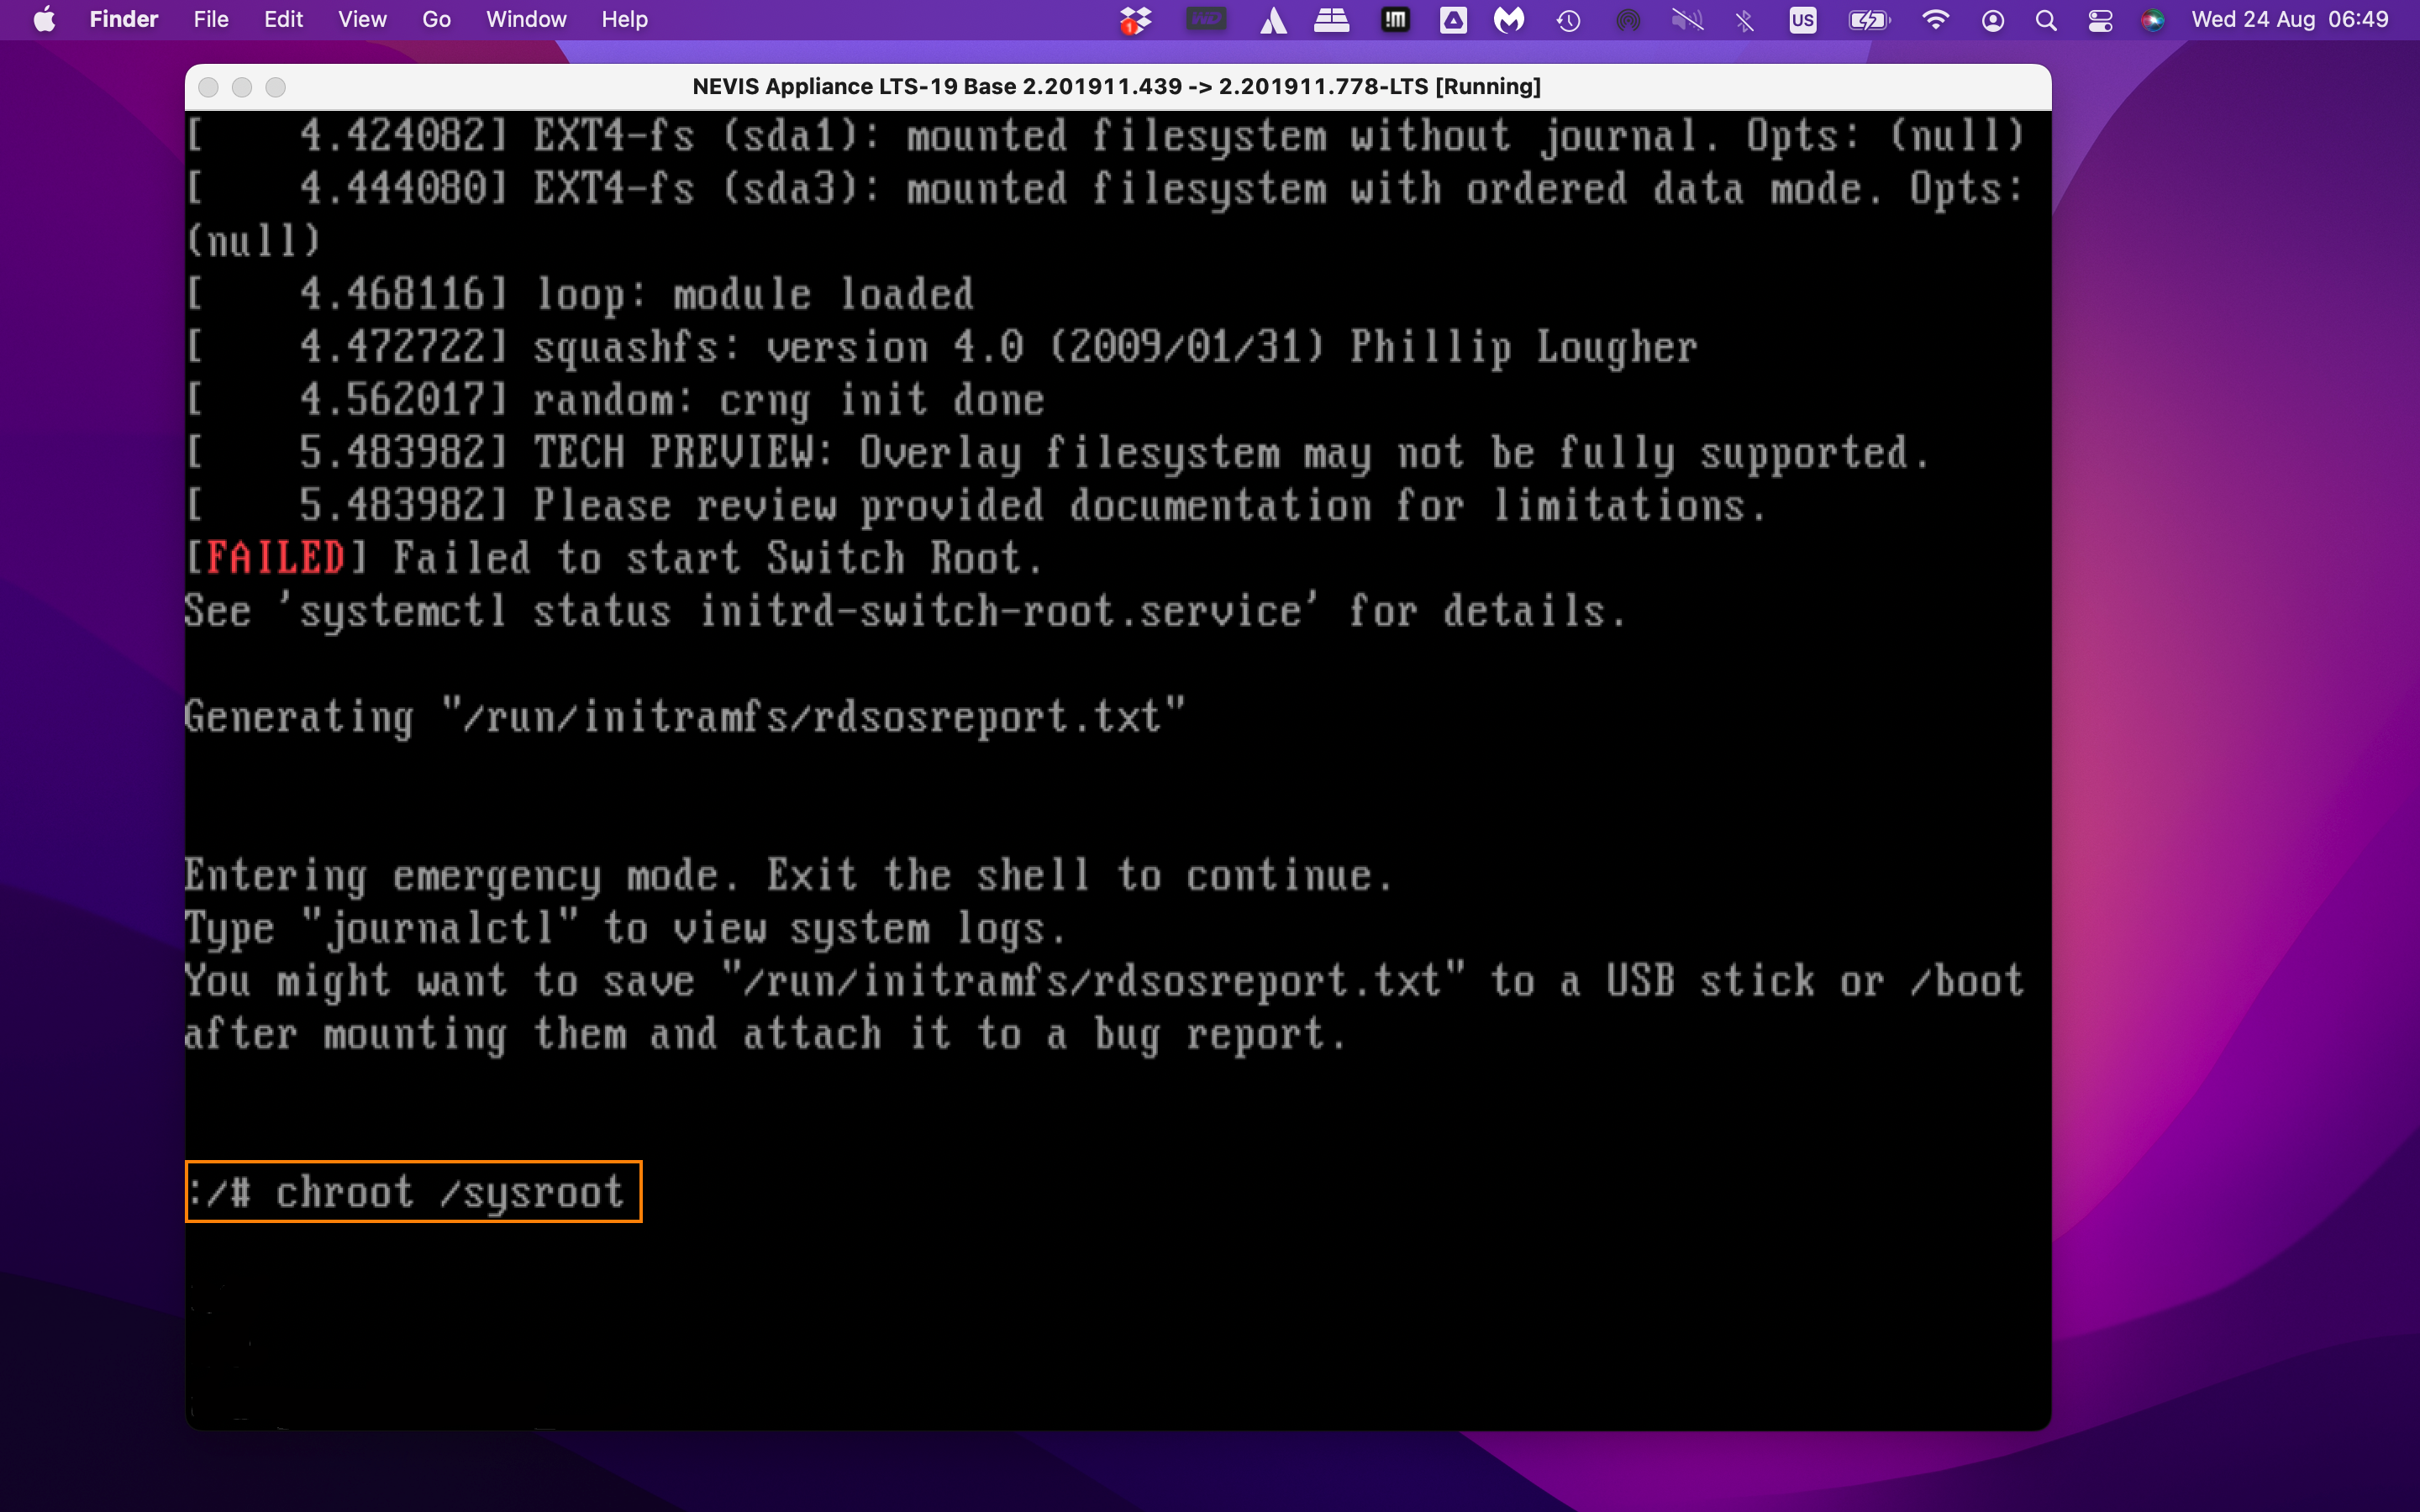
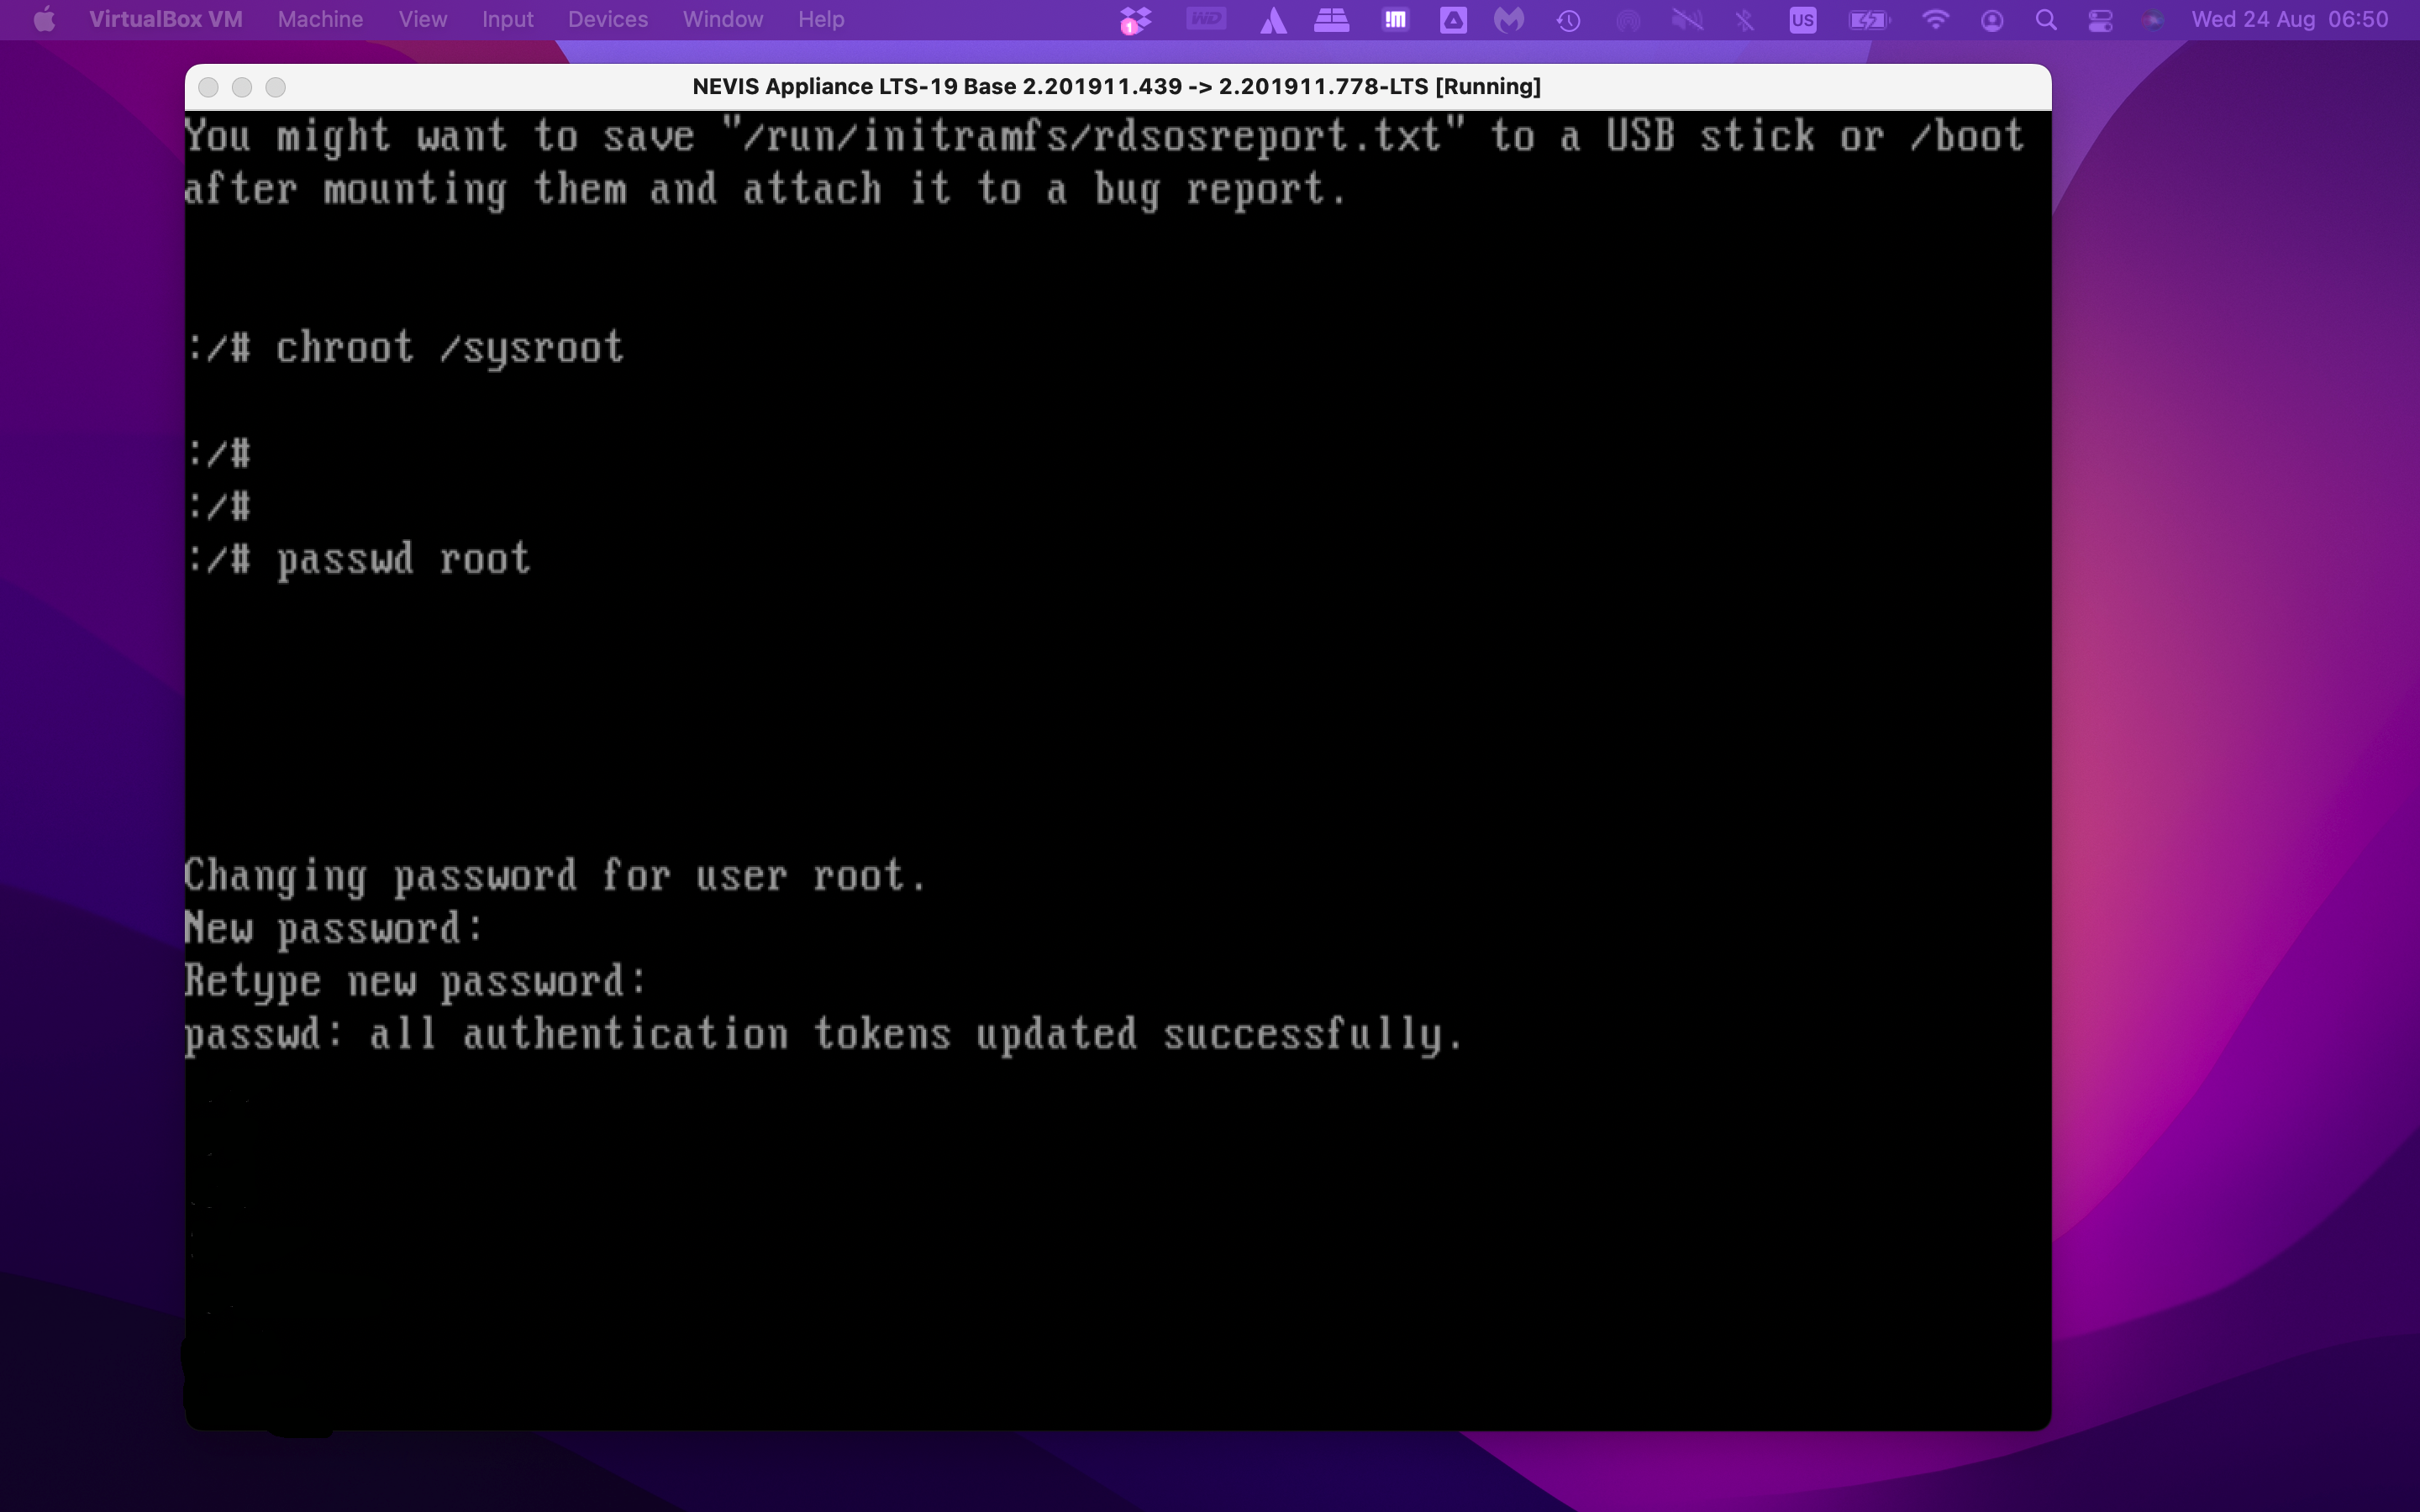
Step 3: in the shell, enter 'chroot /sysroot' to access the nevisAppliance OS root
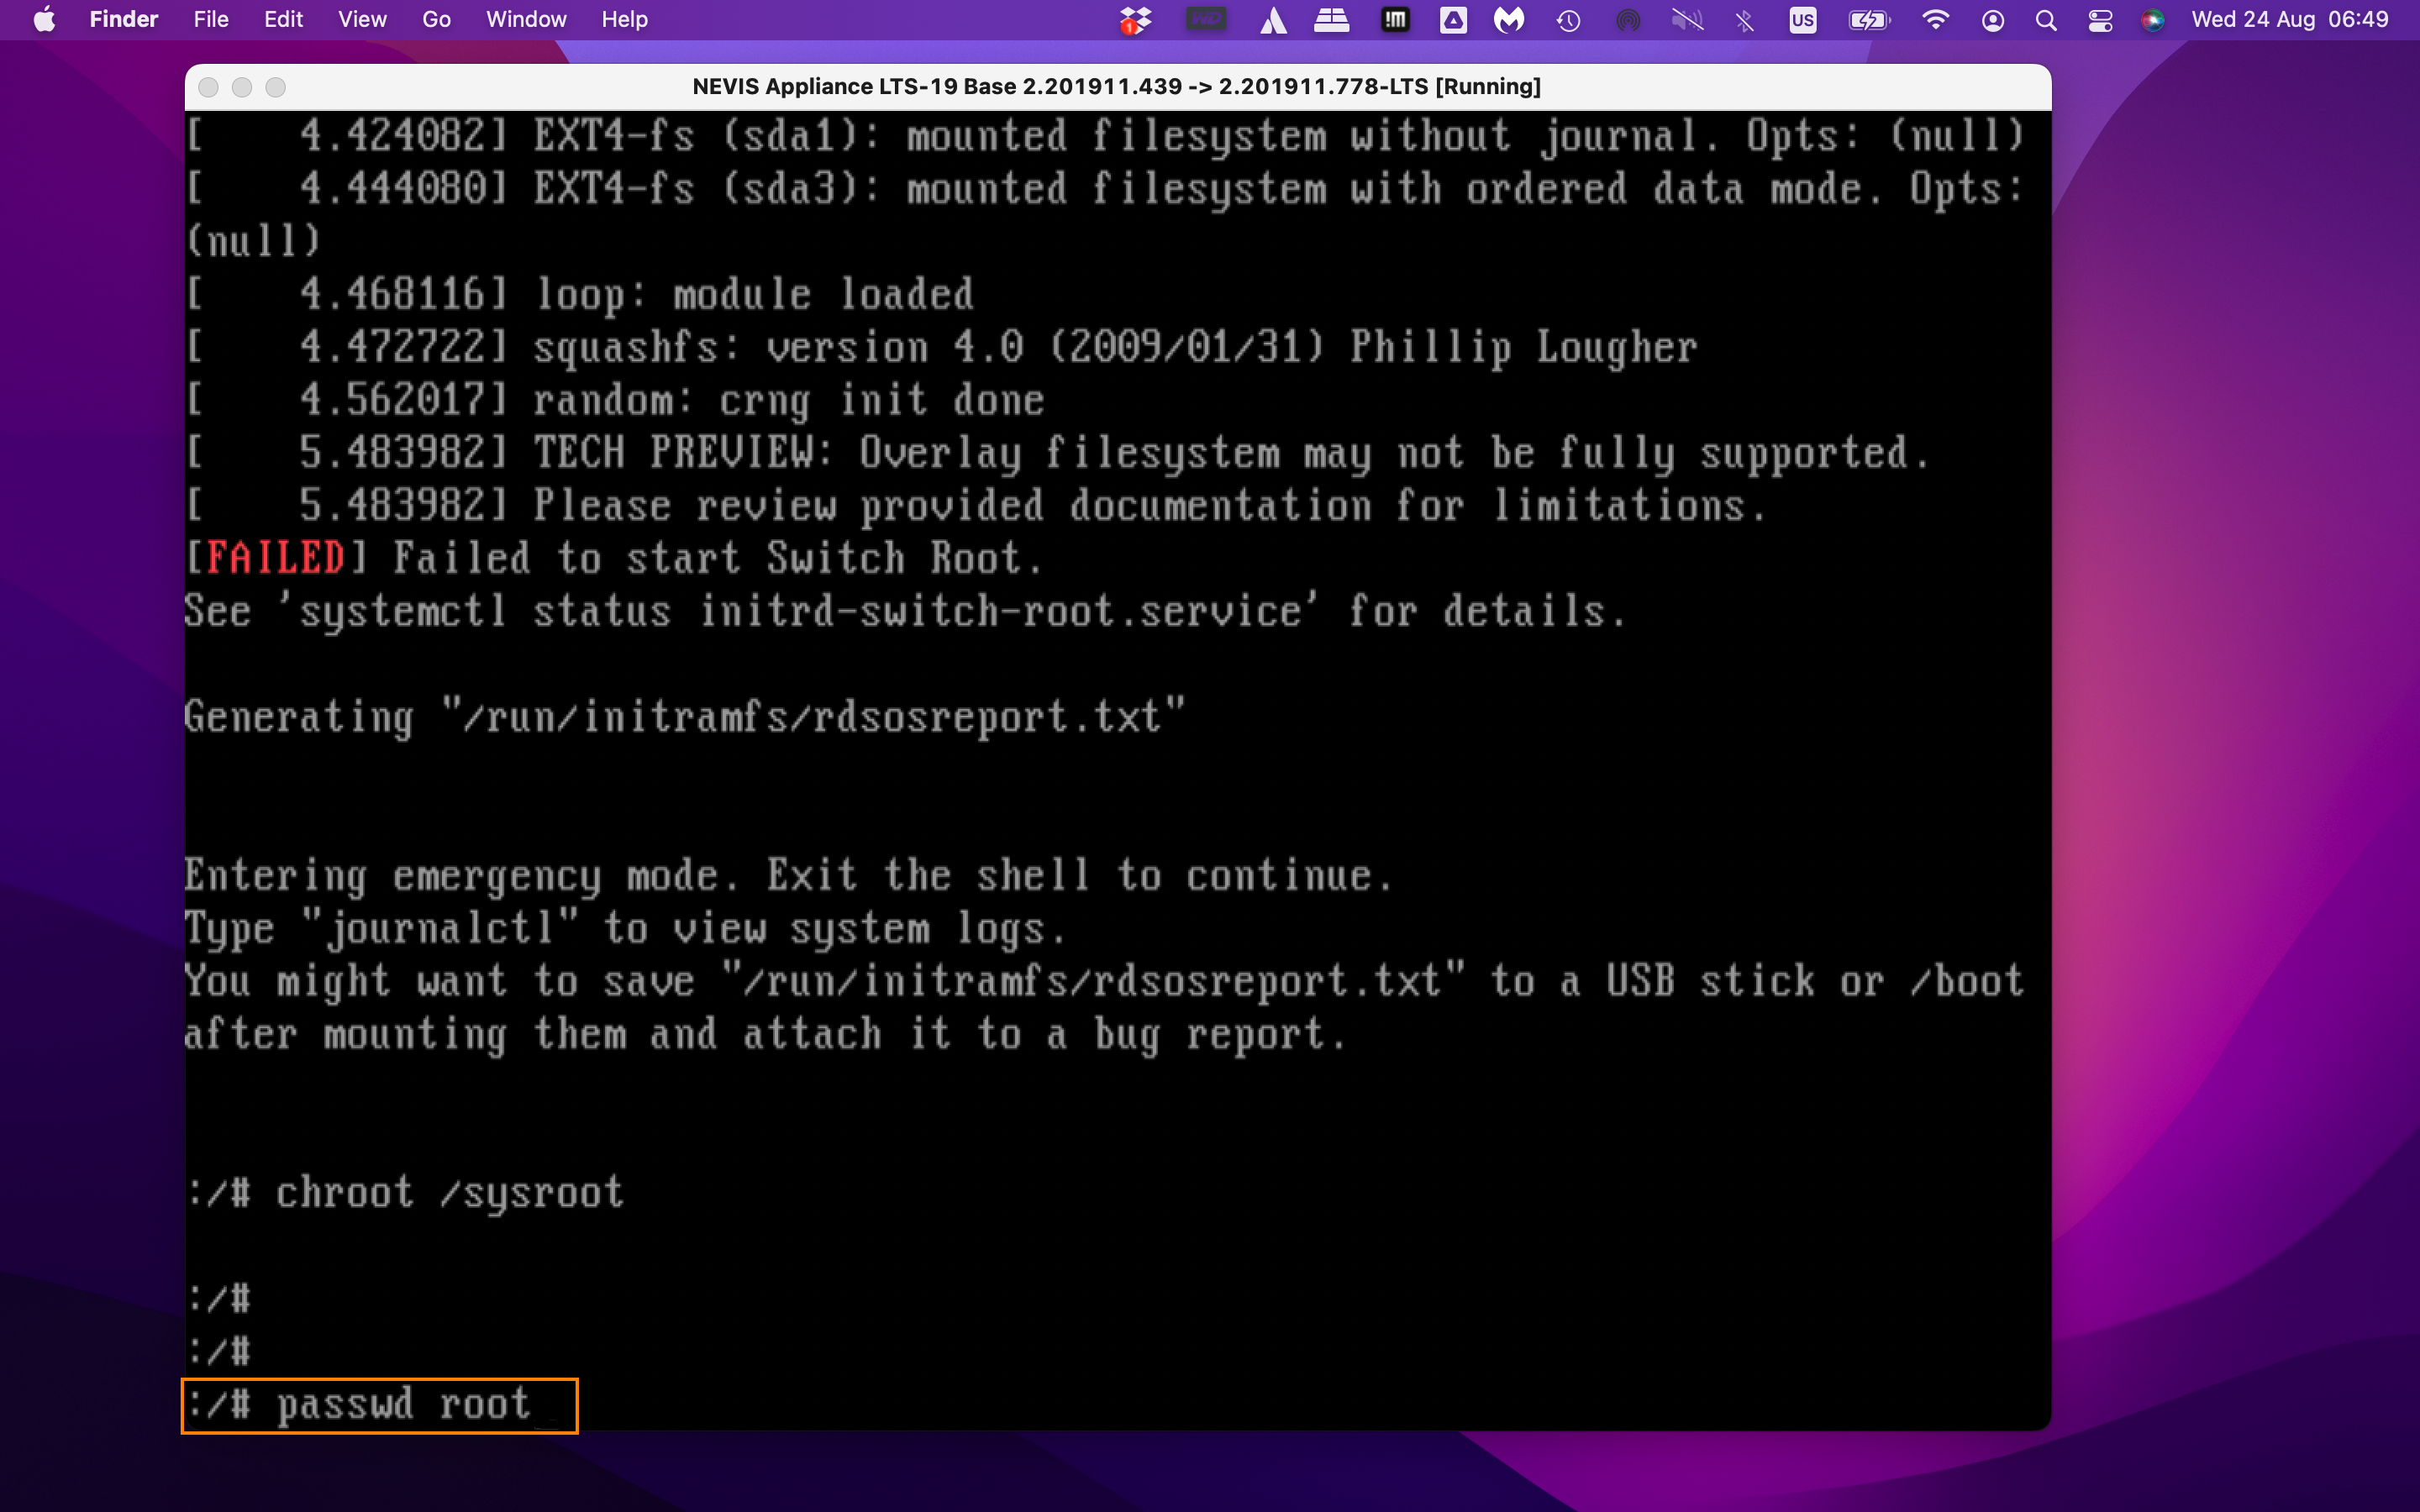
Step 4: use the normal 'passwd root' command to change the root user's password
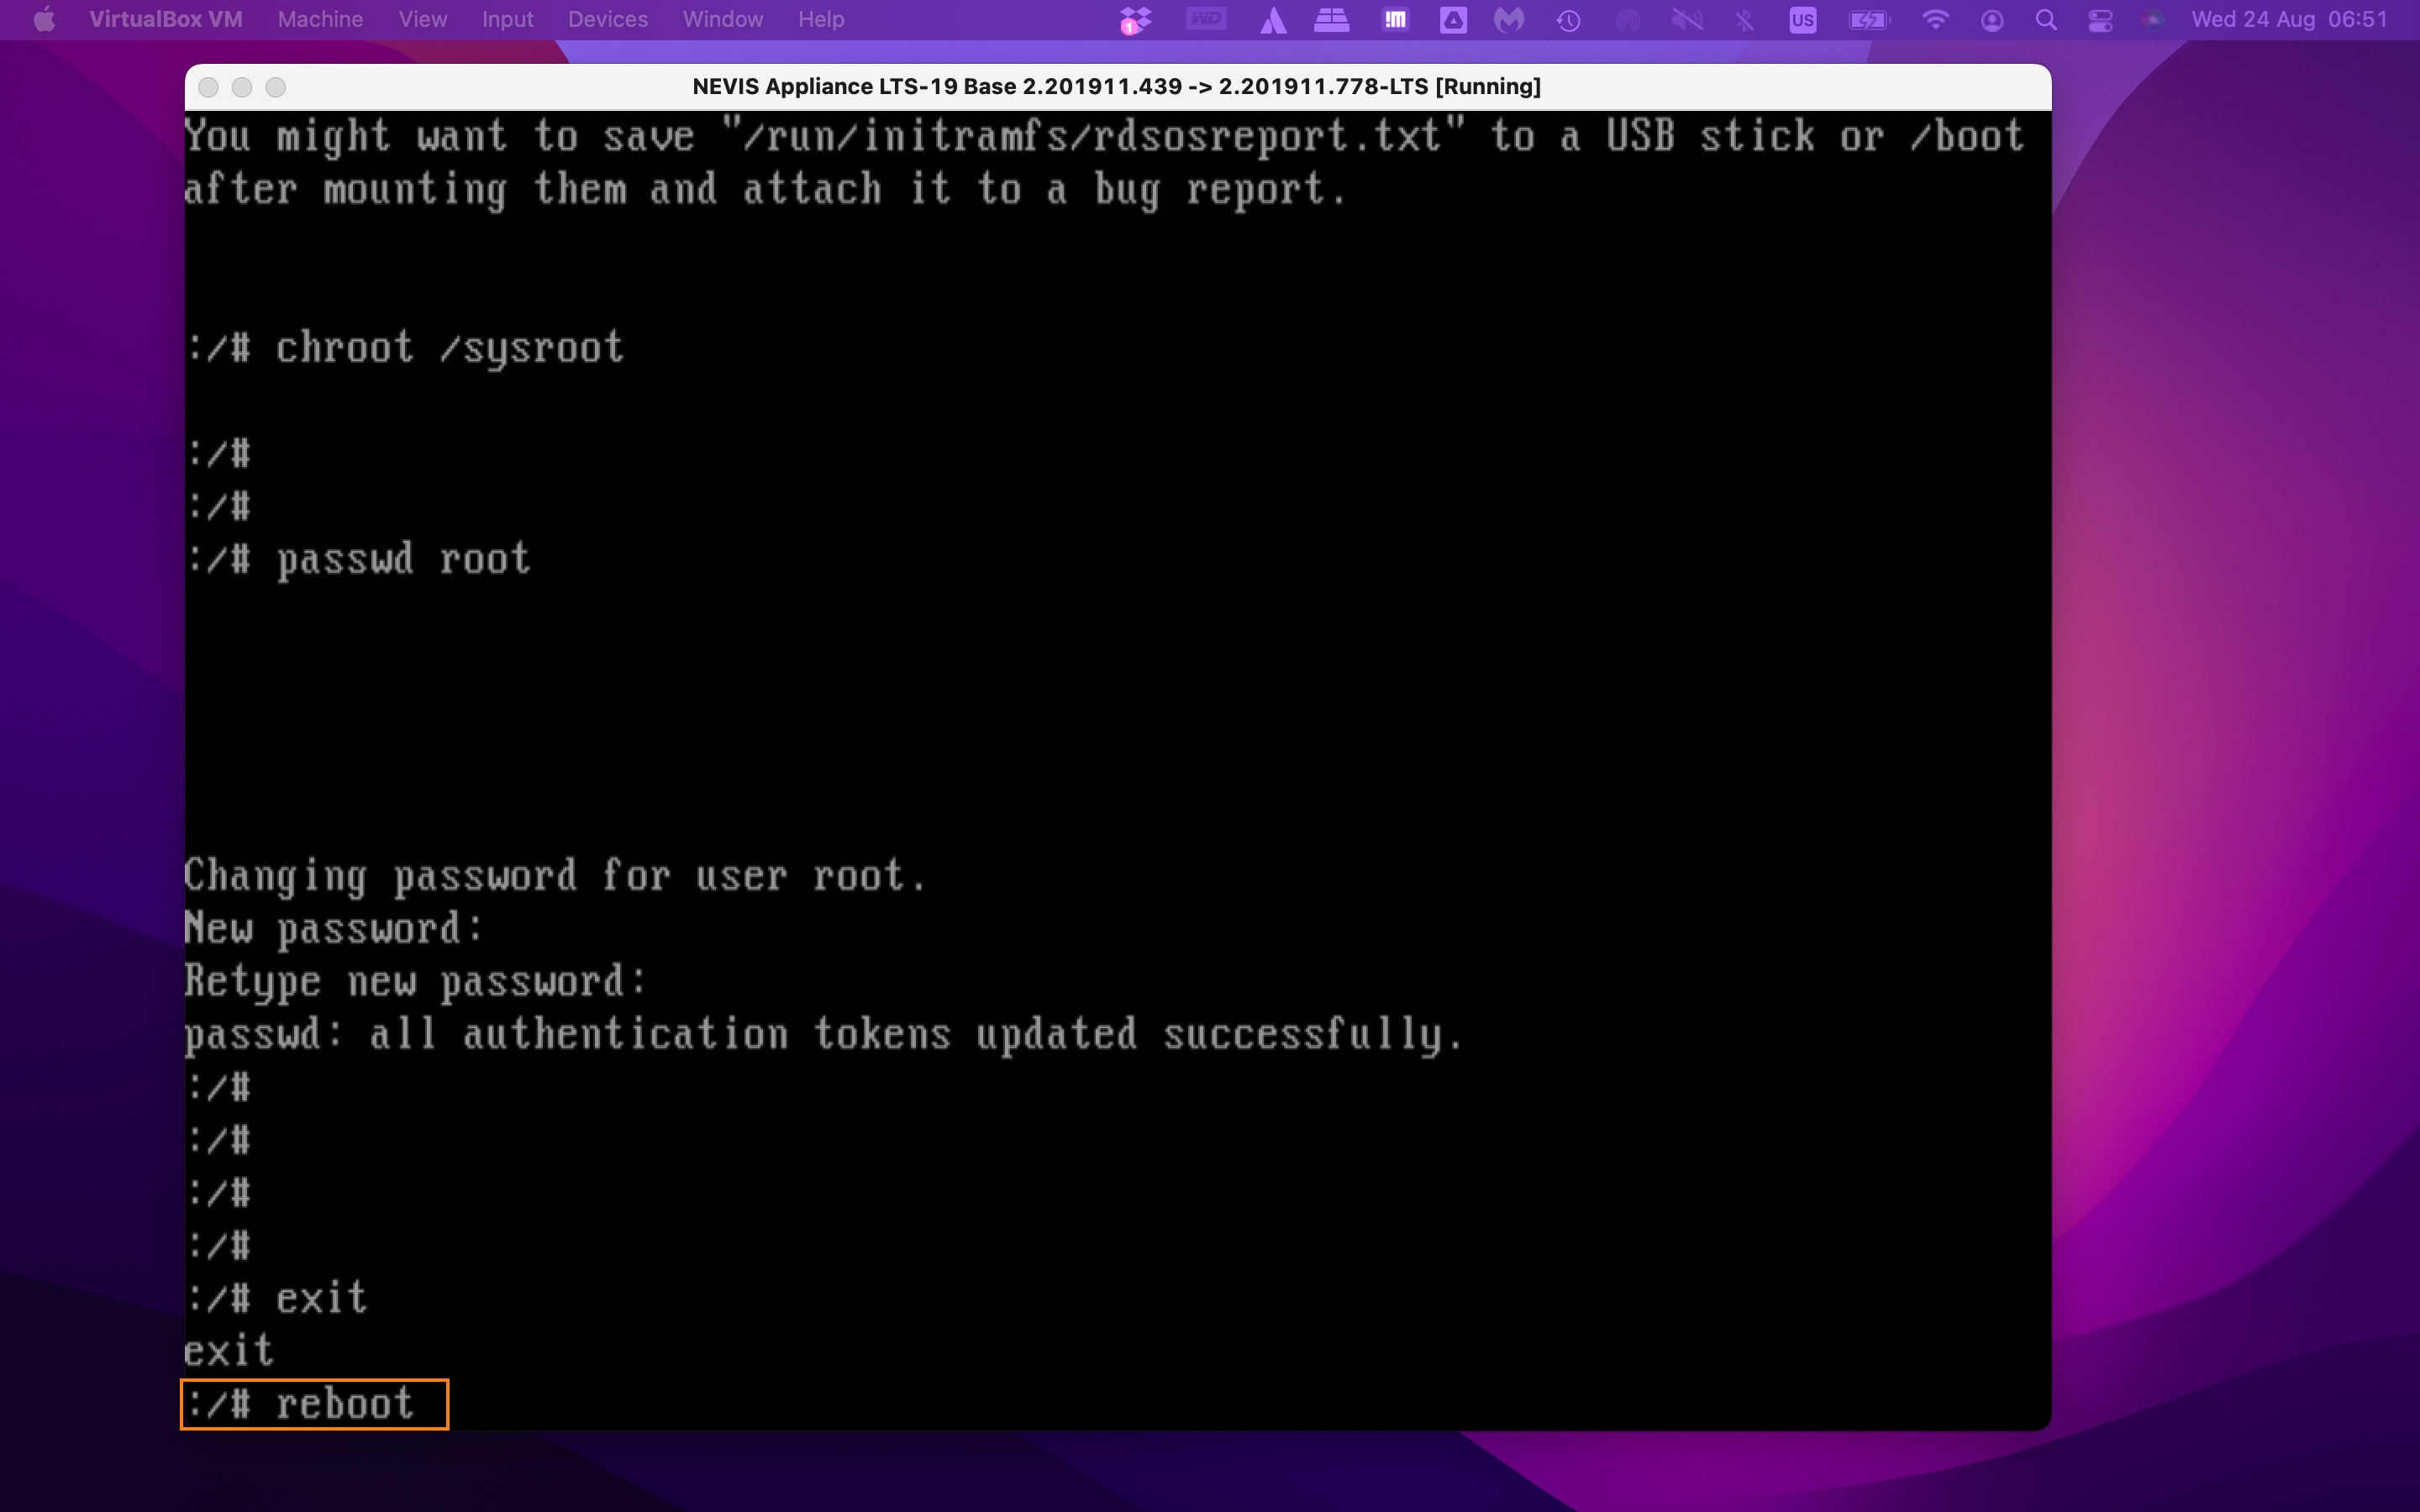
Step 5: exit the shell

Step 6: reboot the nevisAppliance and use the new root password
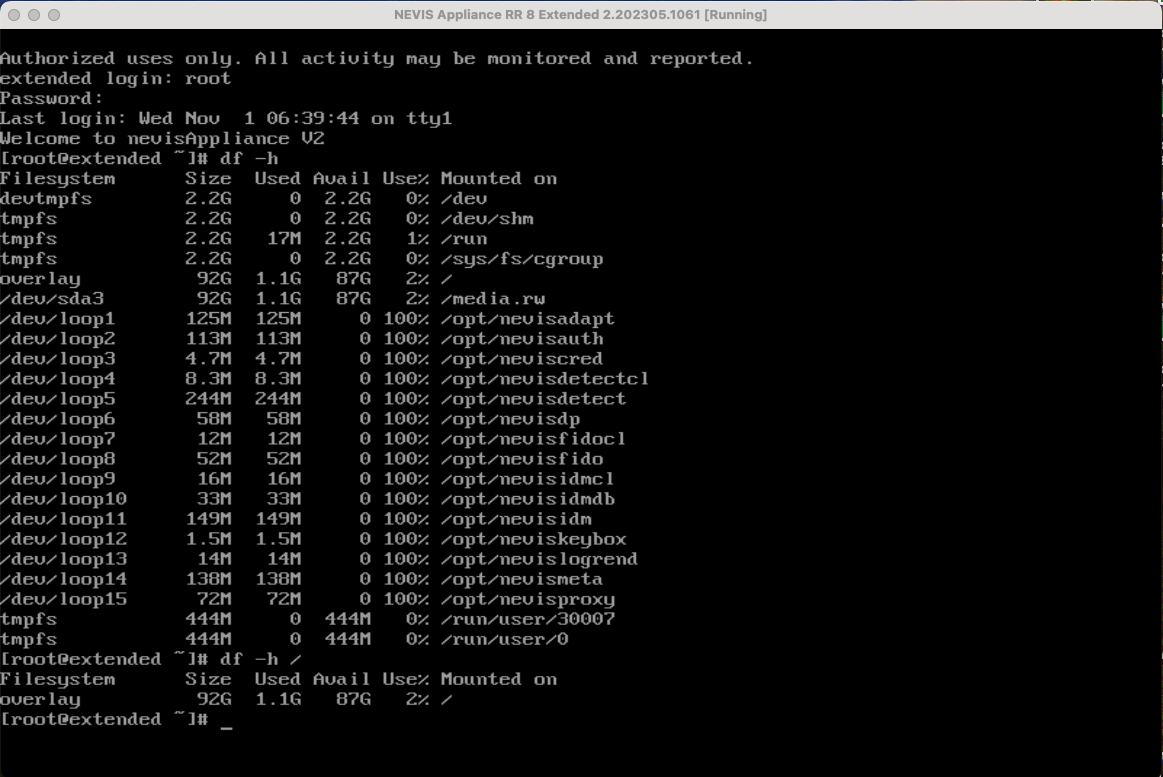
How to increase the root partition because I am running out of disk space
Q: I am running out of disk space in the root partition of the nevisAppliance. How can I enlarge it?
A: Follow the instructions below to adjust/extend the size of a nevisAppliance partition. In our example we will expand the partition from 20GB to 100GB.
Step 1: Shutdown the nevisAppliance
# init 0
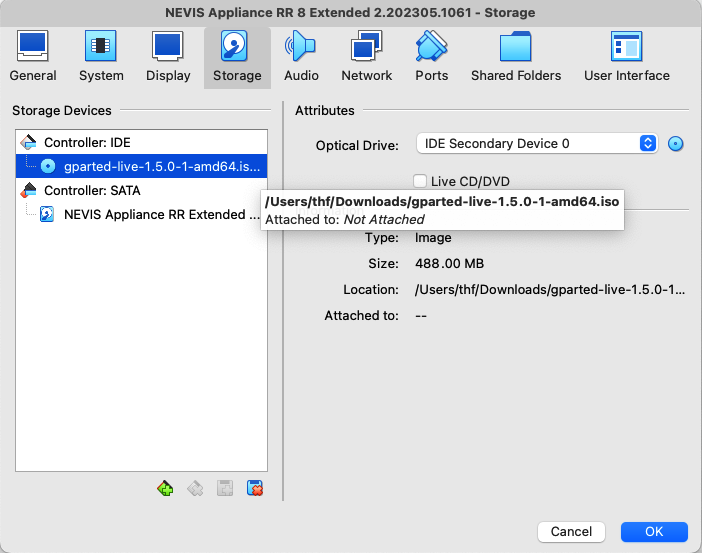
Step 2: Download and insert the GParted iso image (https://sourceforge.net/projects/gparted/) into the appliance CD-Rom drive
Step 3: Change the BIOS of the server to boot from CD/DVD first and start the appliance.
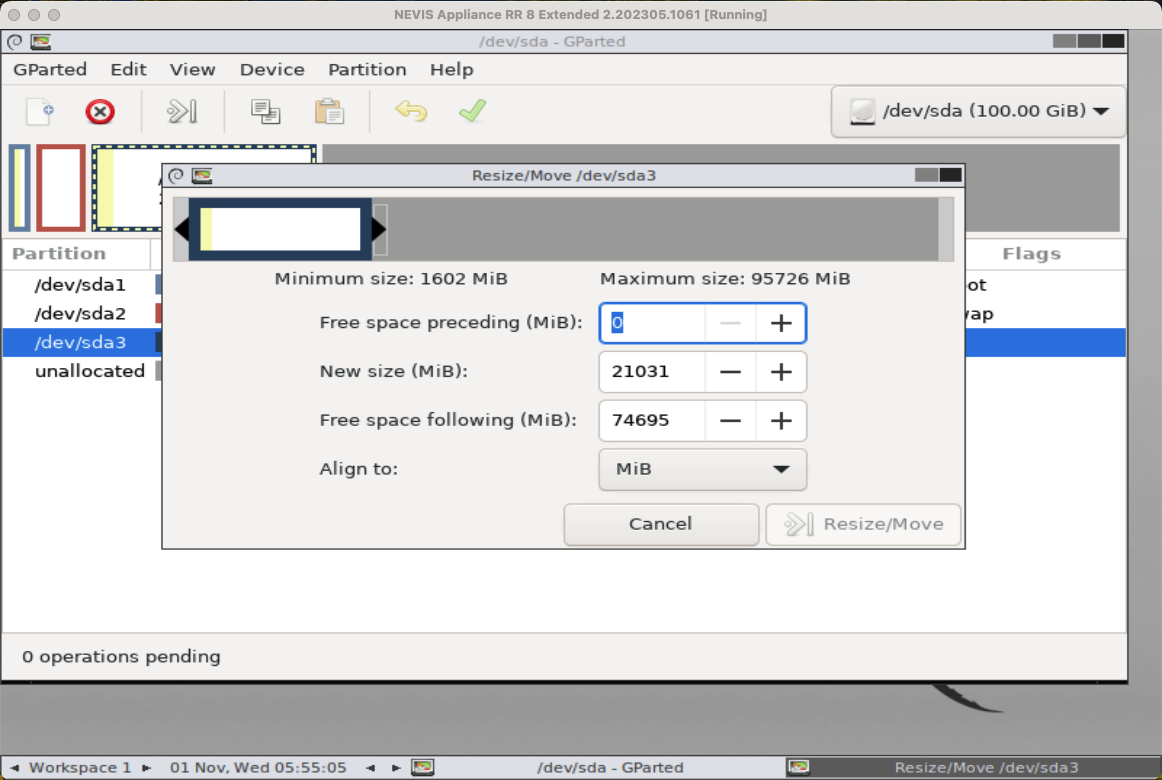
Step 4: As soon as GParted has started, select the partition to be extended. Make sure to pick the right partition, images below are examples only! In the menu then, click on "Partition" > Resize/Move
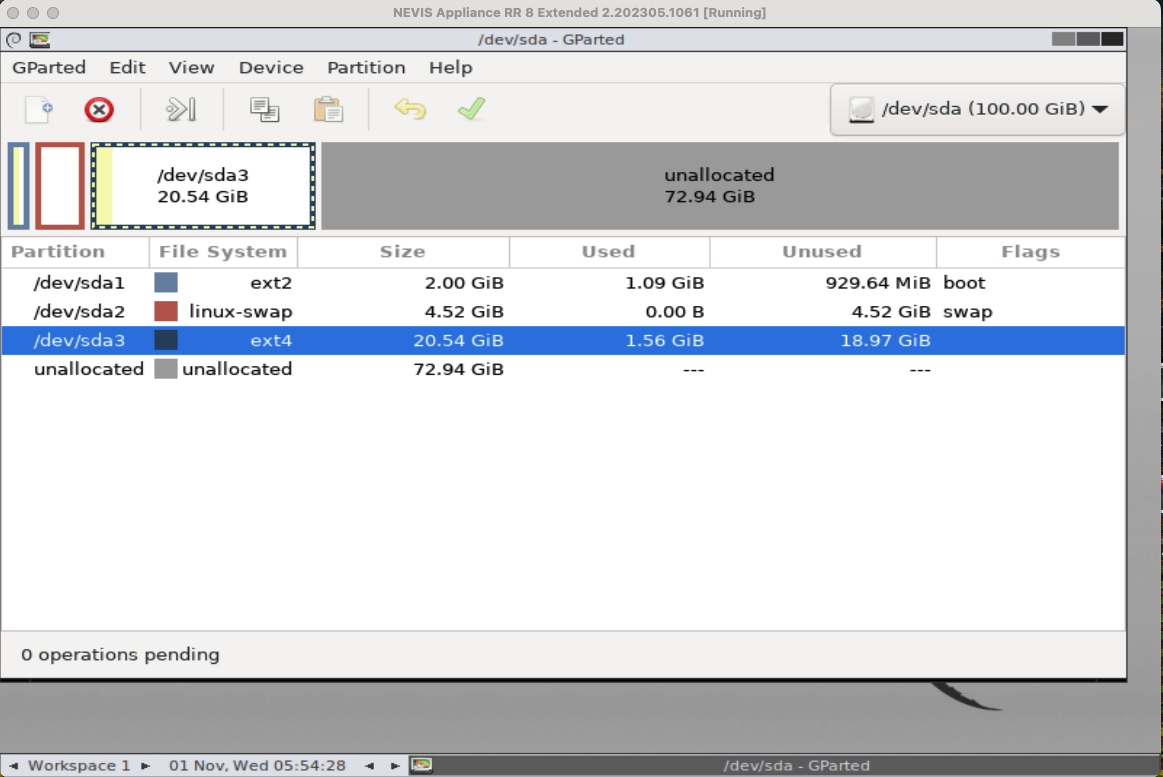
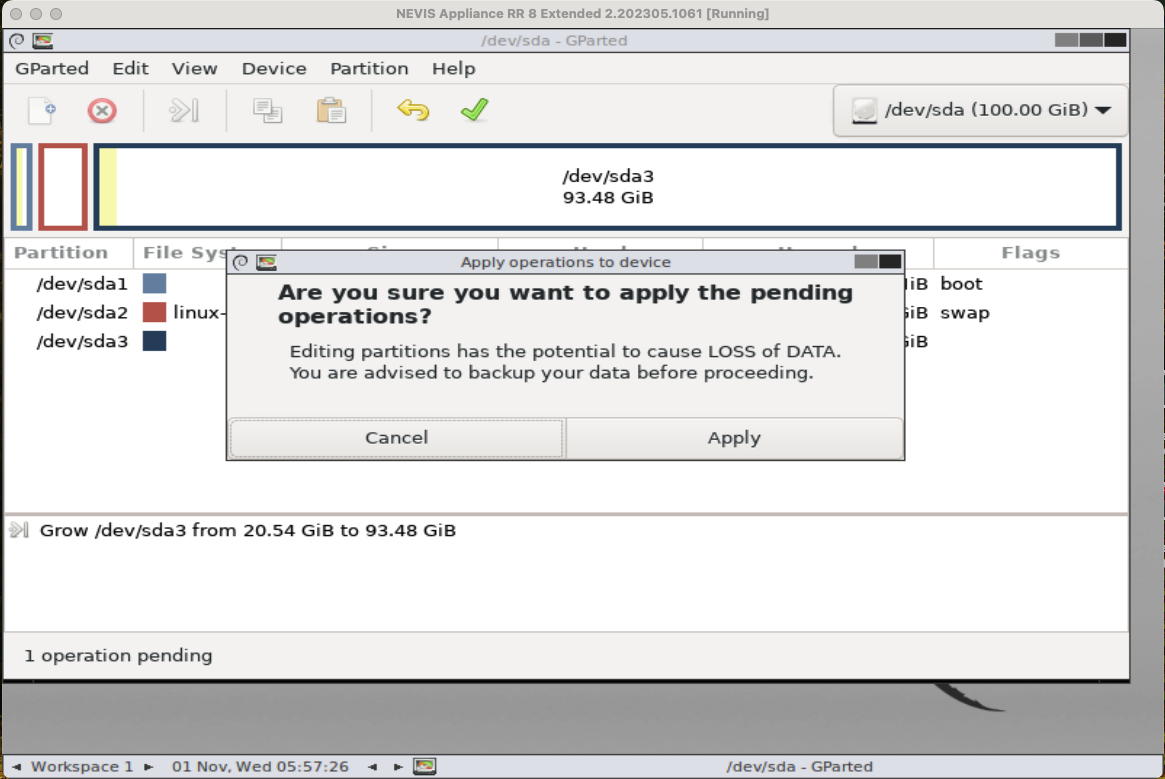
Step 5: Enter the new size of the partition or drag the slider in the GUI. Then click on "Resize/Move" and apply (green checkmark)
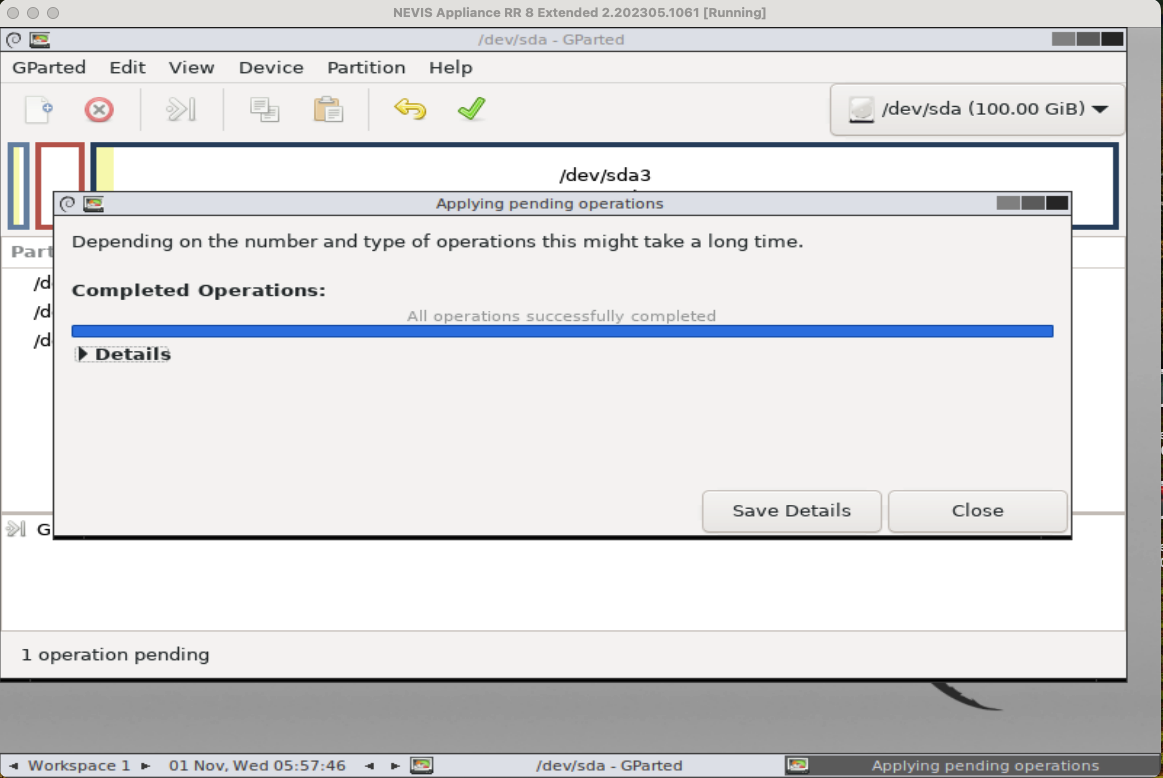
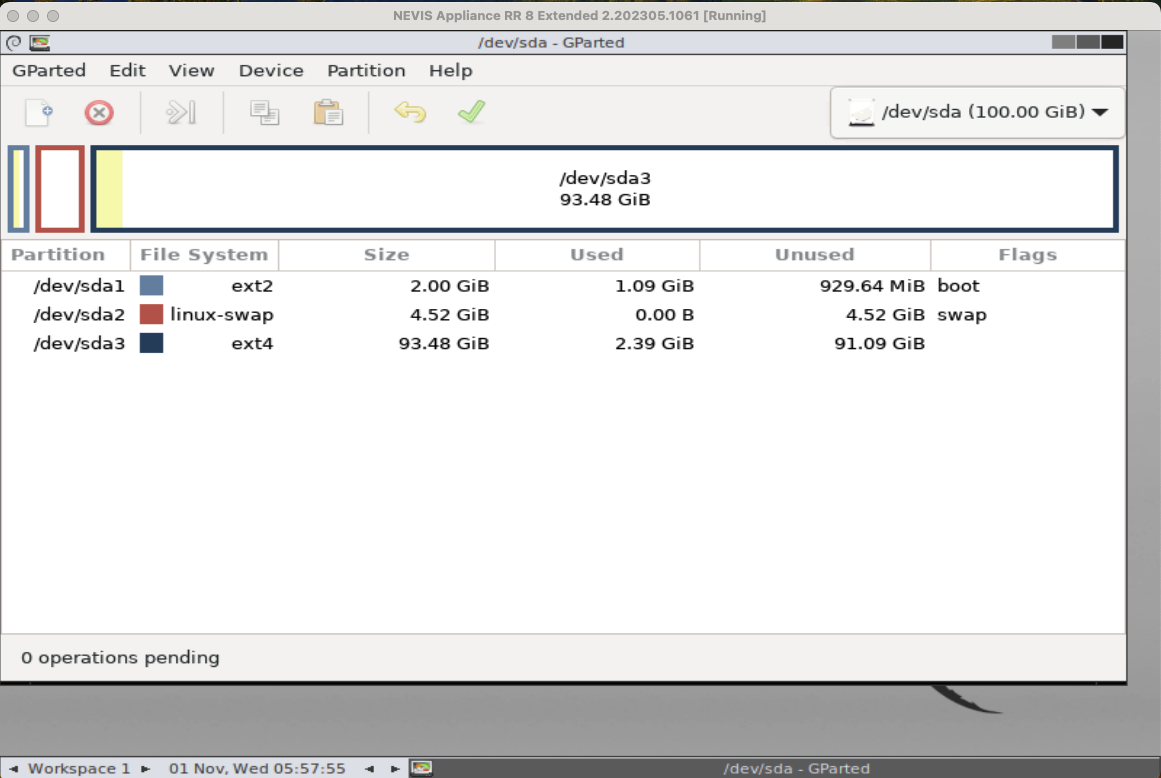
Step 6: Quit GParted, reboot the nevisAppliance and check the new partition size
How to increase the ulimits (proc/number of open files, ...) permanently?
Q: I must increase the max. number of open files globally on the nevisAppliance. How can I adjust the settings reboot-resistant on the nevisAppliance?
A: Create a new file in /etc/security/limits.d that patches the settings; example for nofiles (number of open files):
# echo "* soft nofile 65536"  > /etc/security/limits.d/30-nofile.conf
# echo "* hard nofile 65536" >> /etc/security/limits.d/30-nofile.conf
Reboot the nevisAppliance and check with
# ulimit -n
The asterisk adjusts the setting for 'everyone' on the system. You can replace it with a specific user to limit the setting. The entries in the directory are processed in alphabetical order.
Be aware, that the "ulimits" set in the described way do not apply to services managed as "systemd" units in nevisAppliance. This is due to "systemd" limitations. (see LimitNOFILE in "systemd unit limit properties" as an example)
MariaDB memory issues if used as session DB
Q: I have high memory issues/leaks using MariaDb with (standard) memory allocation configuration as Session Database
A: Per default, MariaDB is using system malloc to allocate/free memory blocks; for high frequency malloc/free as for the session db the strategy used in malloc is not good enough though the memory allocator must be switched to a better fitting one. We have included in the Nevis DB appliance tcmalloc and jemalloc which can be used as a replacement and have been successfully tested for high volume transactions.
The following needs to be set in the mariadb sytemd service file to switch to tcmalloc; the section is already in the file as comment (around line 165)
...
# Library substitutions. previously [mysqld_safe] malloc-lib with explicit paths
# (in LD_LIBRARY_PATH) and library name (in LD_PRELOAD).
Environment="LD_PRELOAD=/usr/lib64/libtcmalloc.so"
...
Then reload the systemd daemon and restart the MariaDB
# systemctl daemon-reload
# systemctl restart mariadb