nevisAgent software installation
nevisAgent is a daemon running on each server. nevisAdmin performs all actions to Nevis components via this nevisAgent.
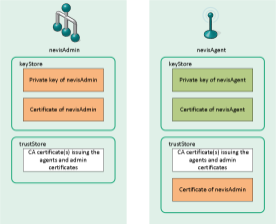
Secure communication between nevisAdmin and nevisAgent is established over a mutual authenticated SSL connection. The following configuration is required to establish a connection:
- The host name of the server where the agent is running must match the common name of the subject of the certificate used by the agent.
- The issuer certificates (CA chain) of the certificate used by the agent must be stored to the trust store used by nevisAdmin.
- The issuer certificates (CA chain) of the certificate used by nevisAdmin must be stored to the trust store used by the agent.
- The certificate used by nevisAdmin must be stored in the trust store used by the agent.
Package
The nevisAgent has to be installed on every server hosting Nevis software components. The agent is available for Linux and Solaris and requires a Java runtime environment, e.g., adnjdk17 or adnjdr17. The agent is already pre-installed on the nevisAppliance (update to the newest nevisAppliance release if the agent is not available on your server).
The initial installation of a nevisAgent requires two steps:
- Installation of the software package.
- Creation of the nevisAgent instance by using the nevisagent handover command.
# rpm -i nevisagent-3.2.8.x-1.i486.rpm
# nevisagent handover
Only one nevisAgent instance (called "default") can be installed on a server.
Configuration
vmargs.conf
The nevisAgent does not require a configuration file but reads its base configuration from the Java environment as defined by the /var/opt/nevisagent/default/conf/vmargs.conf file.
| Variable name | Description |
|---|---|
| ch.nevis.nevisadmin.agent.ssl.keyStore | The key store used by the nevisAgent storing the agent's certificate and private key. The certificate's subject CN must match the server name the nevisAgent is running on to allow a successful SSL handshake with nevisAdmin. |
| ch.nevis.nevisadmin.agent.ssl.keyStorePassword | The passphrase of the key store. |
| ch.nevis.nevisadmin.agent.ssl.trustStore | The trust store used by the nevisAgent must contain the certificate of the nevisAdmin server(s) as well as the certificate chain (issuer certificates). |
| ch.nevis.nevisadmin.agent.ssl.trustStorePassword | Defines the passphrase to open the trust store. Optional (ch.nevis.nevisadmin.agent.ssl.keyStore is used by default). |
| ch.nevis.nevisadmin.agent.ssl.cipher.include | Defines a comma separated list of cipher suites to be used by nevisAgent when accepting connections from nevisAdmin. This parameter is optional. See the relevant section of the Oracle website for a list of possible values. |
| ch.nevis.nevisadmin.agent.hostname | The name of the interface the nevisAgent shall listen to. |
| ch.nevis.nevisadmin.agent.port | The port the nevisAgent shall listen to. Default is port 9094. |
It is possible to generate the necessary key material with the nevisAdmin web front end, as soon as you have added the nevisAgent instance to the infrastructure generate button (see the chapter: Instance).
To generate the key material, go to the nevisAgent instance viewand click the (Re)generate button (no.1 in the figure below). Download and install the key material listed in the File Manager panel (keystore, truststore and password files –no.2 in the figure) onto the server.
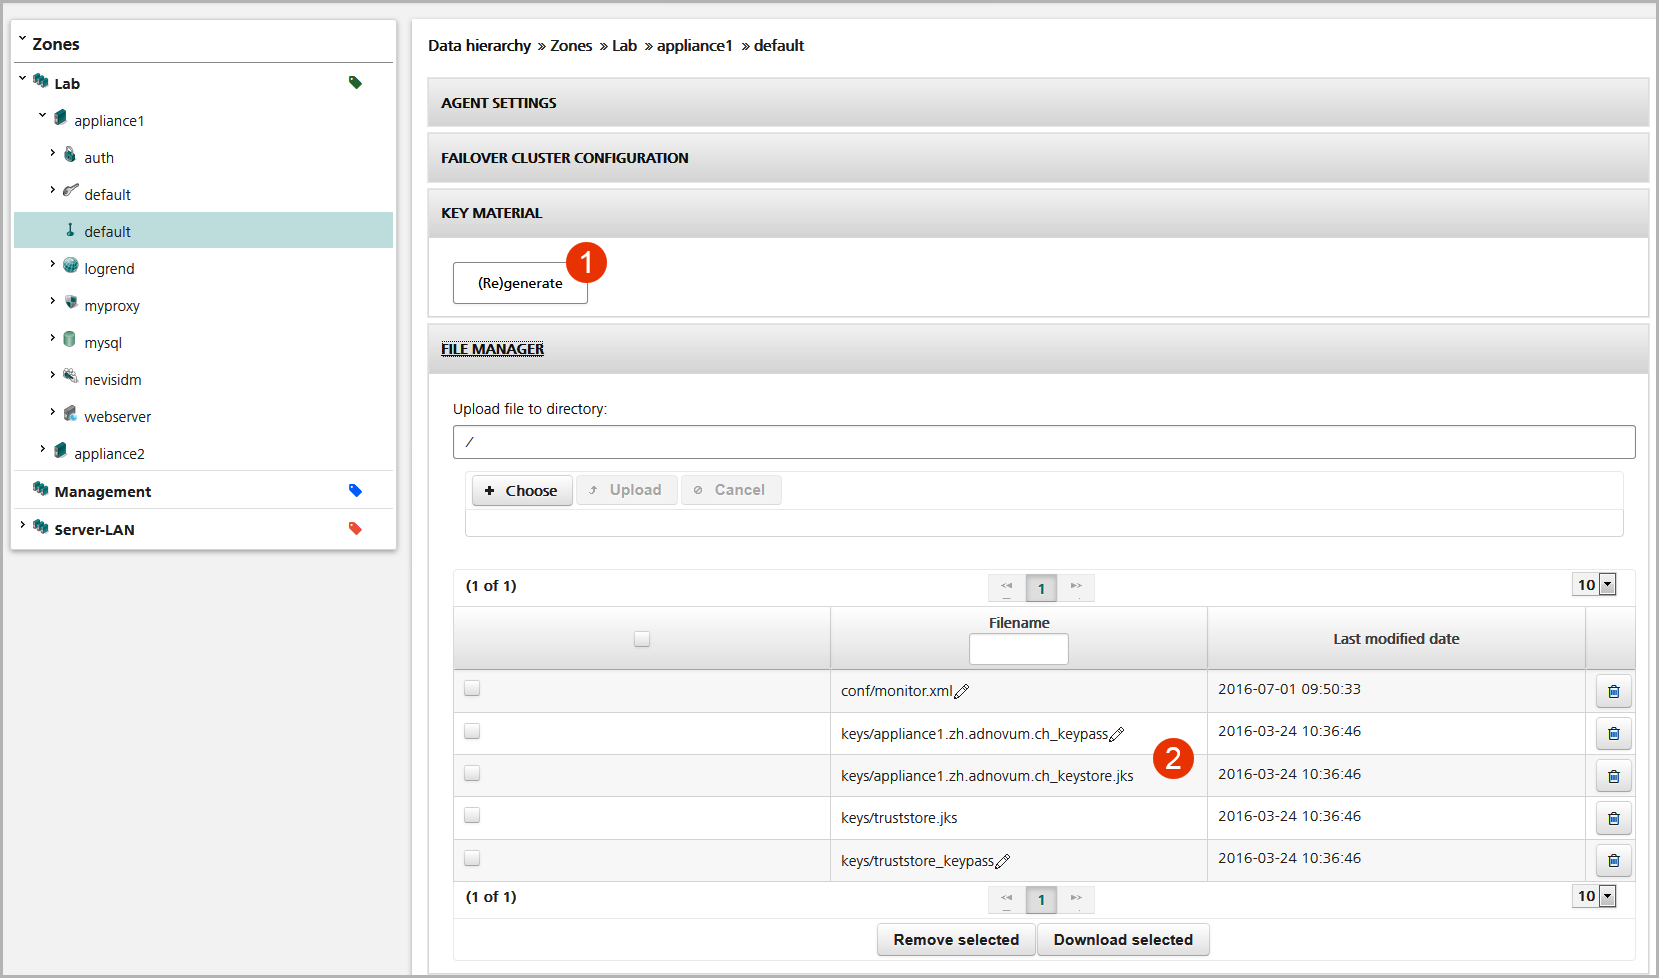
Key material installation steps:
Generate the key material within the nevisAgent view of nevisAdmin as shown in the figure above.
Download the four files and transfer them to the server where the agent has been installed (as described in the chapter: Package).
Initialize the nevisKeybox:
# neviskeybox handoverCreate the directory /var/opt/neviskeybox/default/agent on the server where the agent has been installed and move the files to this directory.
Make sure that the two *keypass files have execution permission:
# chmod 700 /var/opt/neviskeybox/default/agent/*keypass
Start the agent as described in the next section.
Starting the agent
The agent can be started after successful installation by using the following command:
# nevisagent start
Troubleshooting
The log files of the agent are stored in the following directory:
/var/opt/nevisagent/default/logs/
The nevisagent.log file contains the log messages of the agent application as well as of the daemon listening on the defined port. It shows messages about the request processing and any error messages about SSL connections from nevisAdmin. This may also include messages about requests that have been denied due to access control restrictions (e.g., if a nevisAdmin instance has tried to connect without prior registration of its certificate within the agent's truststore).