Deploying the configuration snapshot
The committed configuration may be deployed to the target server. You can choose from three different modes:
- Deploy all involved nevisProxy, nevisAuth and nevisLogRend instances simultaneously by clicking the Deploy button within the revision table of the environment's operation view. Note: Shared instances, like nevisIDM, or instances whose configuration is updated only rarely, like an ICAP server, are not deployed at environment level. You need to deploy them manually via the instance view or by using a deployment group.
- Open a specific instance and deploy the new revision to the dedicated instance only.
- Create deployment groups. You can assign instances to a group and deploy them together, e.g., create a deployment group for all instances located within the same data center or define a group for all instances of the same type. An instance can be assigned to multiple groups.
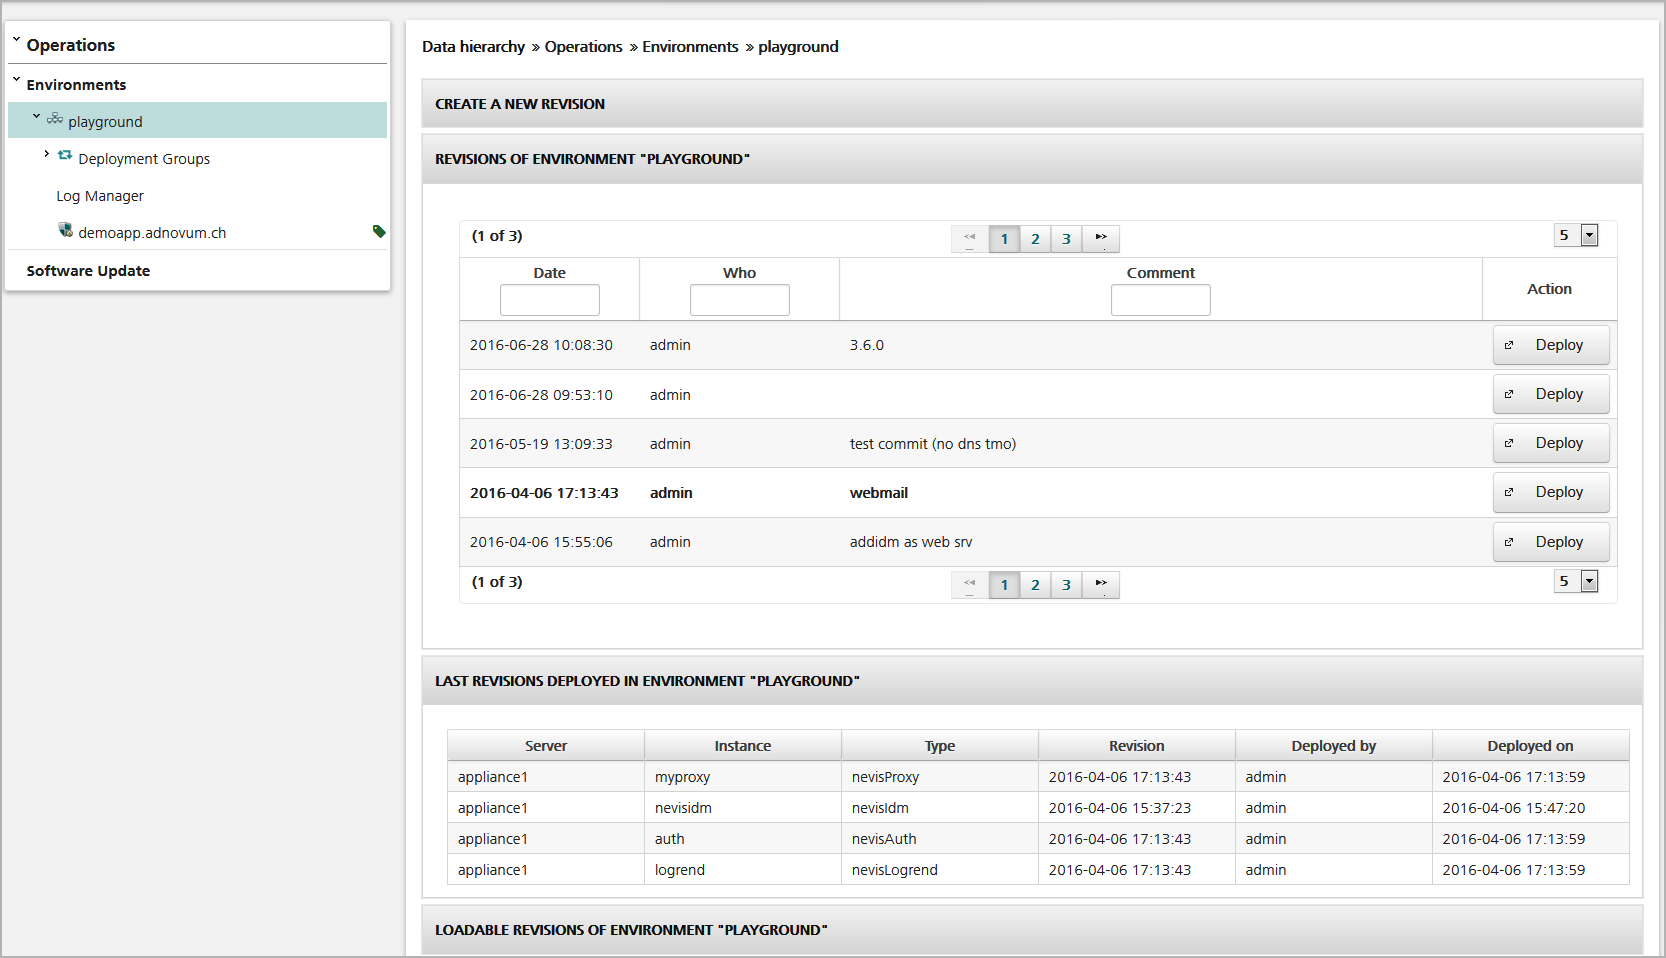
The revision table shows all available configuration snapshots (see the figure above). An entry shown in bold means that the marked revision was deployed for the whole environment (full deploy). If this table does not contain an entry in bold, this means that this environment has not been deployed yet, or that a single deploy (instance) or group deploy (deployment group) has taken place.
The Last Revisions Deployed panel displays the last deployed revision for each instance. It is updated accordingly at each deploy. Lines without a deployed revision ("---") indeed have not been deployed yet.
You use the Loadable Revisions panel to load an existing configuration into nevisAdmin (see the next chapter for details).
Notes
- The instances are automatically created on the target server when deploying an instance for the first time.
- If you have to change the host name or port of a nevisAuth, nevisIDM or nevisLogRend service or if you re-create the server's key material, manually destroy the nevisAuth / nevisIDM / nevisLogRend instance before deploying the updated configuration. The "destroy" button is located on the "installation" panel of the operation view of the nevisAuth/nevisLogRend instance.
- If you want to manage existing instances which have been created manually, you have to ensure that they have been created with the proper file ownership (destroy and let nevisAdmin re-create the instances if you encounter problems).
- The deployment of configuration files ends with a restart/re-init of the instance. nevisAdmin verifies that the restart was successful (instance is up and running). If the restart fails nevisAdmin automatically initiates a rollback.
- nevisAdmin keeps a record of deployed files. Files that belong to a previous deployment, but are not used anymore, will be removed on the target system if the deployment was successful. This feature requires nevisAgent version 3.4.1.0, and later and can be switched off by setting the following configuration option in nevisadmin.properties:
ch.nevis.nevisadmin.deploy.deletefiles=false
- Instances that are down when the deployment is started are NOT started and the status of the installed files is not checked either for these instances.
- Check the Message panel (see the chapter Messages) for errors which may happen during the deployment process to ensure that the deployment of all instances was successful.