Main Concepts
This section describes the main concepts behind nevisAdmin 4.
Patterns
An important concept behind the nevisAdmin 4 configuration is that of patterns. Patterns are flexible, reusable templates that you specify through the nevisAdmin 4 web interface. The following list summarizes the most important points about patterns:
- Patterns are the building blocks of your configurations.
- They implement best practices for common use cases.
- If you combine patterns, you can also build complex configurations.
- Patterns have properties that allow you to configure the pattern to fulfill your specific needs.
Conceptually, patterns correspond to Nevis use cases, such as "provide secure access to a backend web application" or "enforce authentication when accessing a set of applications". On a more detailed level, nevisAdmin 4 uses patterns to activate and configure concrete features, such as TLS encryption options or authentication workflows. Also, for every Nevis component, a special "instance pattern" is available. This special type of pattern allows you to link the configuration of a Nevis component to server groups where instances of the component will be created.
Technically, each pattern consists of two elements: a configuration page in the GUI and an underlying generation script. The pattern defines which properties (form fields) are shown on the configuration page. The generation script translates the property values, which you enter in the GUI, into component-specific files and instructions. For this, the script uses the comprehensive patterns API. This API ensures that inputs are validated and feedback is provided if you enter invalid or conflicting values. For more information on the Generation process, see Generation.
Sample use case
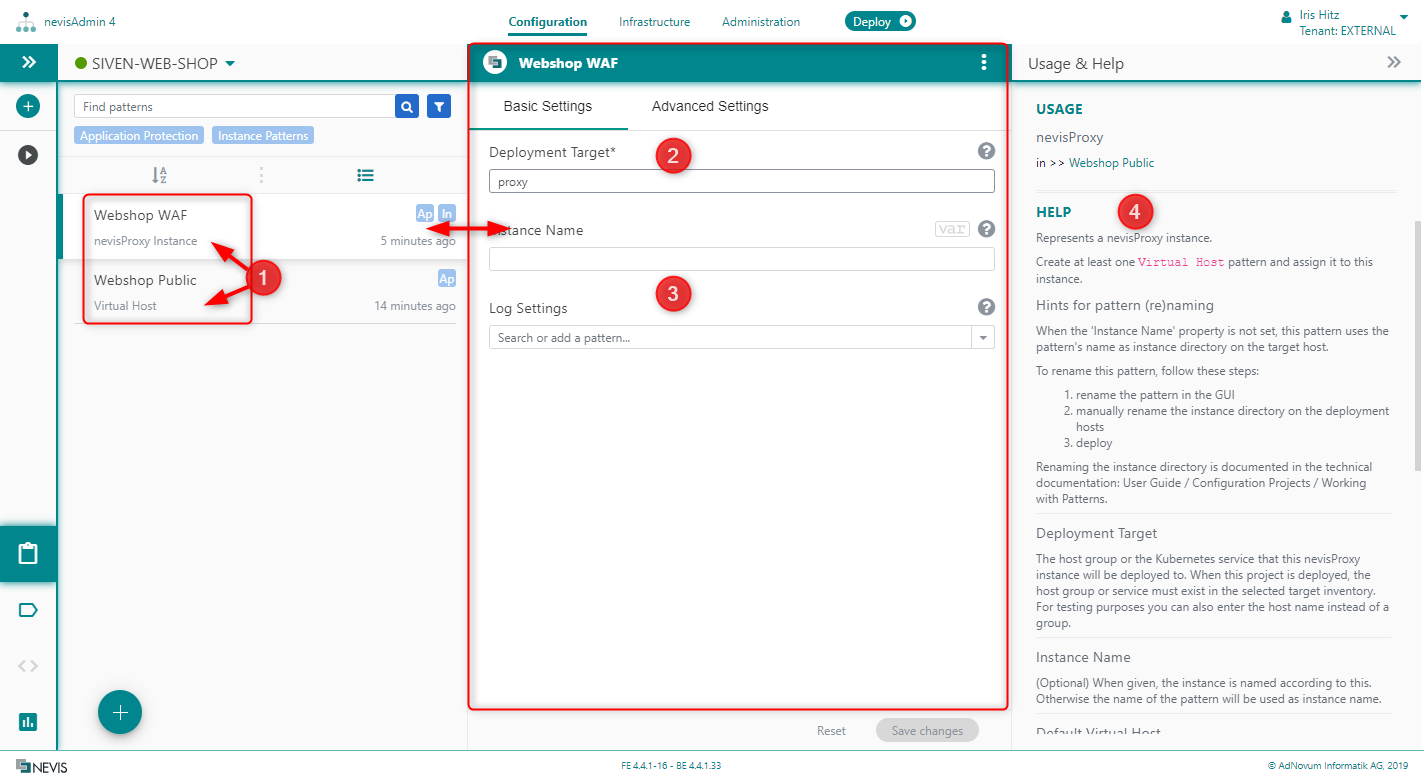
The standard patterns delivered with nevisAdmin 4 allow you to quickly get your configuration running with best-practice solutions. Have a look at the following figure. It shows the patterns nevisProxy Instance and Virtual Host (no.1 in the figure below). You use these patterns to create a nevisProxy instance. The only thing you have to do is to enter certain values, such as a name for the target deployment server (host) or the frontend address on the Virtual Host(see no.2). You can also specify some additional settings, if you want, by entering values in the lower input fields (no.3). All other properties are already included in the pattern, according to best-practice standards for setting up a nevisProxy instance.
Note that nevisAdmin 4 offers support when you specify the property values in the input fields. The Help section on the right guides you through the process. It explains the meaning of each input field and its underlying property (no.4).
Standard Pattern Library
nevisAdmin 4 comes with the Nevis Standard Pattern Library. This library covers commonly encountered Nevis use cases while adhering to security and configuration best practices.
Further Reading
- Working with Patterns for instructions on using the user interface.
- Nevis Configuration Guide for common use cases and how to configure them.
- Standard Patterns Reference for a list of all patterns included with nevisAdmin 4.
Projects
In nevisAdmin 4, a project defines the abstract configuration of a Nevis environment. A project consists of several patterns, which specify the behavior of the Nevis products and components (as well as possible third-party elements) within the Nevis environment.
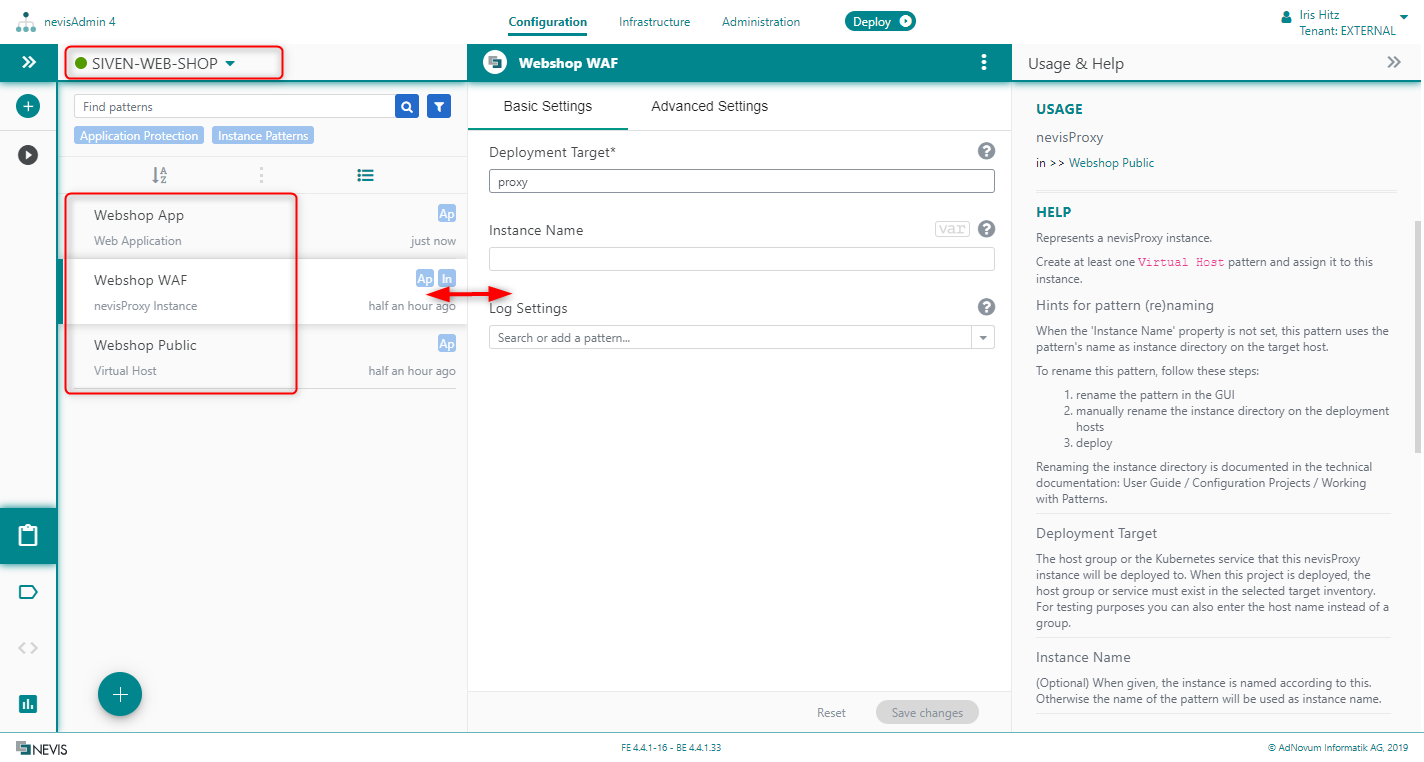
Have a look at the following figure. It shows the project "SIVEN-WEB-SHOP". This simple project defines a Nevis environment that only consists of the nevisProxy instance "Webshop WAF" and the required virtual host "Webshop Public", which protects the backend application "Webshop App". As you can see, the nevisProxy instance, the virtual host, and the backend web application are defined by the three patterns nevisProxy Instance, Virtual Host, and Web Application, respectively. These patterns are reusable templates containing many predefined settings. You only have to specify a few properties yourself, such as entering a name for the deployment target (target servers) in case of the nevisProxy instance. All other properties are already set by default.
The deployment hostname enter in the example in the [figure below] is just a kind of placeholder or alias, not the real deployment host. A project does NOT define the actual target servers or the IP addresses of the components in your Nevis environment. Connecting the abstract configuration defined in a project with concrete servers happens later on when you deploy your project.
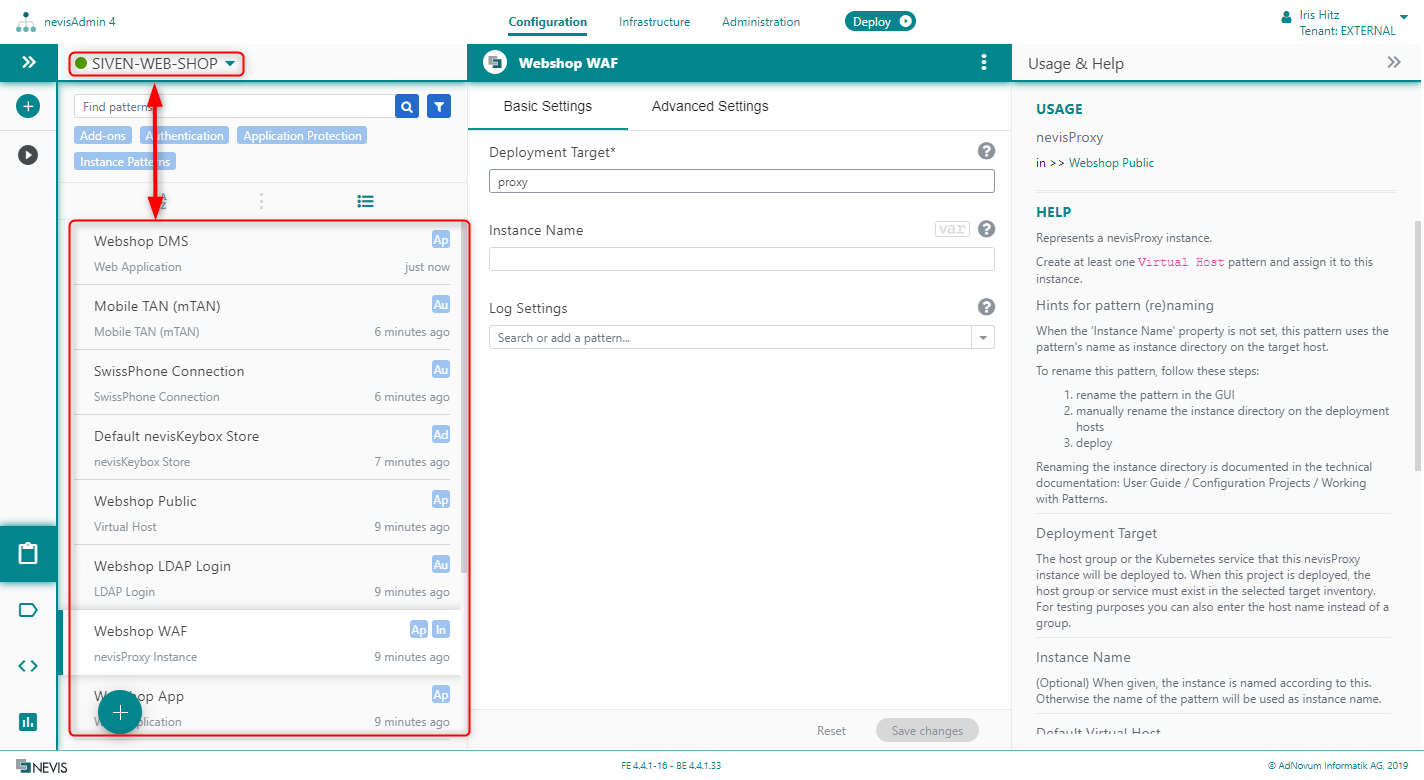
The figure below shows another project "SIVEN-WEB-SHOP". This project is a bit more complex. It defines a configuration that, among others, includes a nevisProxy and a nevisAuth instance, an authentication realm, two authentication procedures (mTAN and LDAP with username/password login) as well as two web applications protected by Nevis. As you can see, the entire setup is configured with patterns. To configure the web applications "Webshop App" and "Webshop DMS", the same pattern Web Application has been used, but with different settings for each application.
You can create as many projects as you like. For each project, combine the provided patterns according to your needs. This allows you to define multiple configurations, for distinct setups (such as INTRANET, CUSTOMER-PORTAL and PARTNER-PORTAL) or different branches (e.g., ECOMMERCE-EMEA, ECOMMERCE-ASIA, ...).
Project Variables
In the nevisAdmin 4 user interface, each editable field of a pattern represents a property of the pattern. Mostly, the value that you enter for such a property stays the same, regardless of the deployment stage you're deploying to (such as DEV, INT, ACC or PROD). However, sometimes you want the value of the property to be different for each stage. This is where variables come into play. You use variables to give a property within a project a variable value instead of a constant one. The actual value of the property then depends on the inventory the project is deployed to (see Inventories.
Variables allow you to be more flexible. By using variables, you can adjust your configuration to the requirements of a specific environment, without having to change the configuration itself.
Note that variables are project-bound. A certain variable is only available within the project in which you have specified it.
Further Reading
- Creating a Project for setting up projects via the user interface.
- Working with Variables for detailed information on using variables.
Inventories
Within nevisAdmin 4, the inventory refers to the list of concrete target servers (or hosts) that represents your server infrastructure. You specify your inventory in the inventory file. Besides the list of hosts, the inventory file also contains logically grouped hosts (host groups) and variables that apply to a host, host group or your entire inventory. With the inventory file, you define your deployment environment.
It is possible to create multiple inventories, just as you can create multiple projects. This allows you to explicitly connect a specific Nevis configuration or project with a specific server infrastructure or inventory, to serve different purposes. For example, inventories allow you to test your Nevis setup before you integrate the product into your IT environment and finally go into production, by creating an inventory for each stage on the road from testing to production (TEST inventory, INT inventory, PROD inventory).
Note that you define the projects and inventories completely independent from each other. Only when you deploy your project, you assign the project to a certain inventory. For more details, see Deployment.
Further Reading
- Infrastructure Inventories for working with inventories in the GUI.
- Classic Infrastructure Inventory YAML file format for details on how inventories are structured.
Generation
After you have specified your Nevis configuration through patterns, nevisAdmin 4 will translate the information in the patterns into configuration files and activation commands. This is done by the so-called Generation Engine.
The entire generation process consists of the following elements (see also the [following figure]:
- Pattern input As input for the generation process, the Generation Engine needs the information from the pattern(s). This information is basically a list of configuration settings. The list includes the property values that are provided by you through the user interface.
- Generation process The next step is the actual generation process. During this step, the Generation Engine validates the configuration and creates the component configuration files and commands.
- Generation output The output of the generation process are configuration settings (files and commands) suitable for deployment to the target hosts.
The following figure shows the generation process:

Further Reading
- Generation Process
Deployment
Deployment is the process of activating or updating a configuration (defined in a configuration project) on one or multiple servers (s).
Within nevisAdmin 4, specifying the configuration and defining the server setup are two independent processes. It is not before the deployment that you link the configuration of your Nevis environment (project) with your concrete server infrastructure (inventory). Therefore, if you deploy a specific configuration in the nevisAdmin 4 GUI, explicitly select the server infrastructure (inventory) on which you want to run your Nevis component instances. nevisAdmin 4 then combines the configuration and infrastructure information, to generate the configuration files and to transfer them to the correct target system(s).
Connecting a project with an inventory file is also the moment when project variables get their actual value. Which value this is, depends on the settings in the inventory file and thus on the deployment environment.
nevisAdmin 4 currently supports two types of deployment, the classic deployment and the Kubernetes deployment.
Classic Deployment (VM)
In case of a classic deployment, nevisAdmin 4 transfers the generated configuration files to the target systems via SSH. The target systems are usually virtual machines (VMs) running Red Hat Enterprise Linux 7 (RHEL 7). nevisAdmin 4 directly executes commands on the target systems to activate the configuration. The Nevis processes run directly on the OS, without using containerization technology such as Docker.
You can only deploy a configuration project in the classic mode through nevisAdmin 4 if the server infrastructure is physically available. So before you start deploying your projects, do the following:
- set up the infrastructure (servers) to be used for the Nevis environment, and
- pre-install the Nevis software on all servers.
Kubernetes Deployment (Cloud)
Currently supported is the Azure AKS service. Contact us for the support status of other platforms.
Kubernetes is open-source software that automates container operations. It provides a platform to schedule and run Docker containers on clusters of physical or virtual machines. Kubernetes eliminates many of the manual processes involved in deploying and scaling Nevis in the classic deployment mode. It standardizes the deployment of Nevis across all Nevis customers and helps leverage best practices in Nevis infrastructure and deployment scenarios.
For more information about Kubernetes, have a look at the official Kubernetes website: `http://kubernetes.io/In case of a Kubernetes deployment, nevisAdmin 4 directly connects to the Kubernetes API. Via the API, nevisAdmin 4 creates component instances in your Kubernetes cluster. The only thing that you need to prepare is the Kubernetes infrastructure and a few supporting systems.
The advantages of the Kubernetes mode over classic deployment are:
- There is no need to manually install/upgrade Nevis component software (except for the nevisAdmin 4 setup).
- You do not have to configure per-server DNS and networking settings.
- All Nevis-specific databases are initialized automatically.
- When you want to upgrade the Nevis software, database schema migrations happen automatically.
- Scalability and zero-downtime changes are provided out-of-the-box via Kubernetes clustering features. (However, some limitations apply. See the release notes.)
Further Reading
- Deployment of the Configuration