Forensic expert
The forensic expert analyzes detected, (potentially) harmful user requests (also called "cases"). This includes all user requests for which the normalized risk score is so high that it requires an action from the system.
Based on his analyses, the forensic expert may make statements about the security risks of the applications protected by nevisDetect, and take decisions regarding the correct security policies.
The most important use cases for the forensic expert are:
- Search for and analyze a detection case
- Further process a detection case
- Search for users with high risk score
Use case: Search for and analyze a detection case
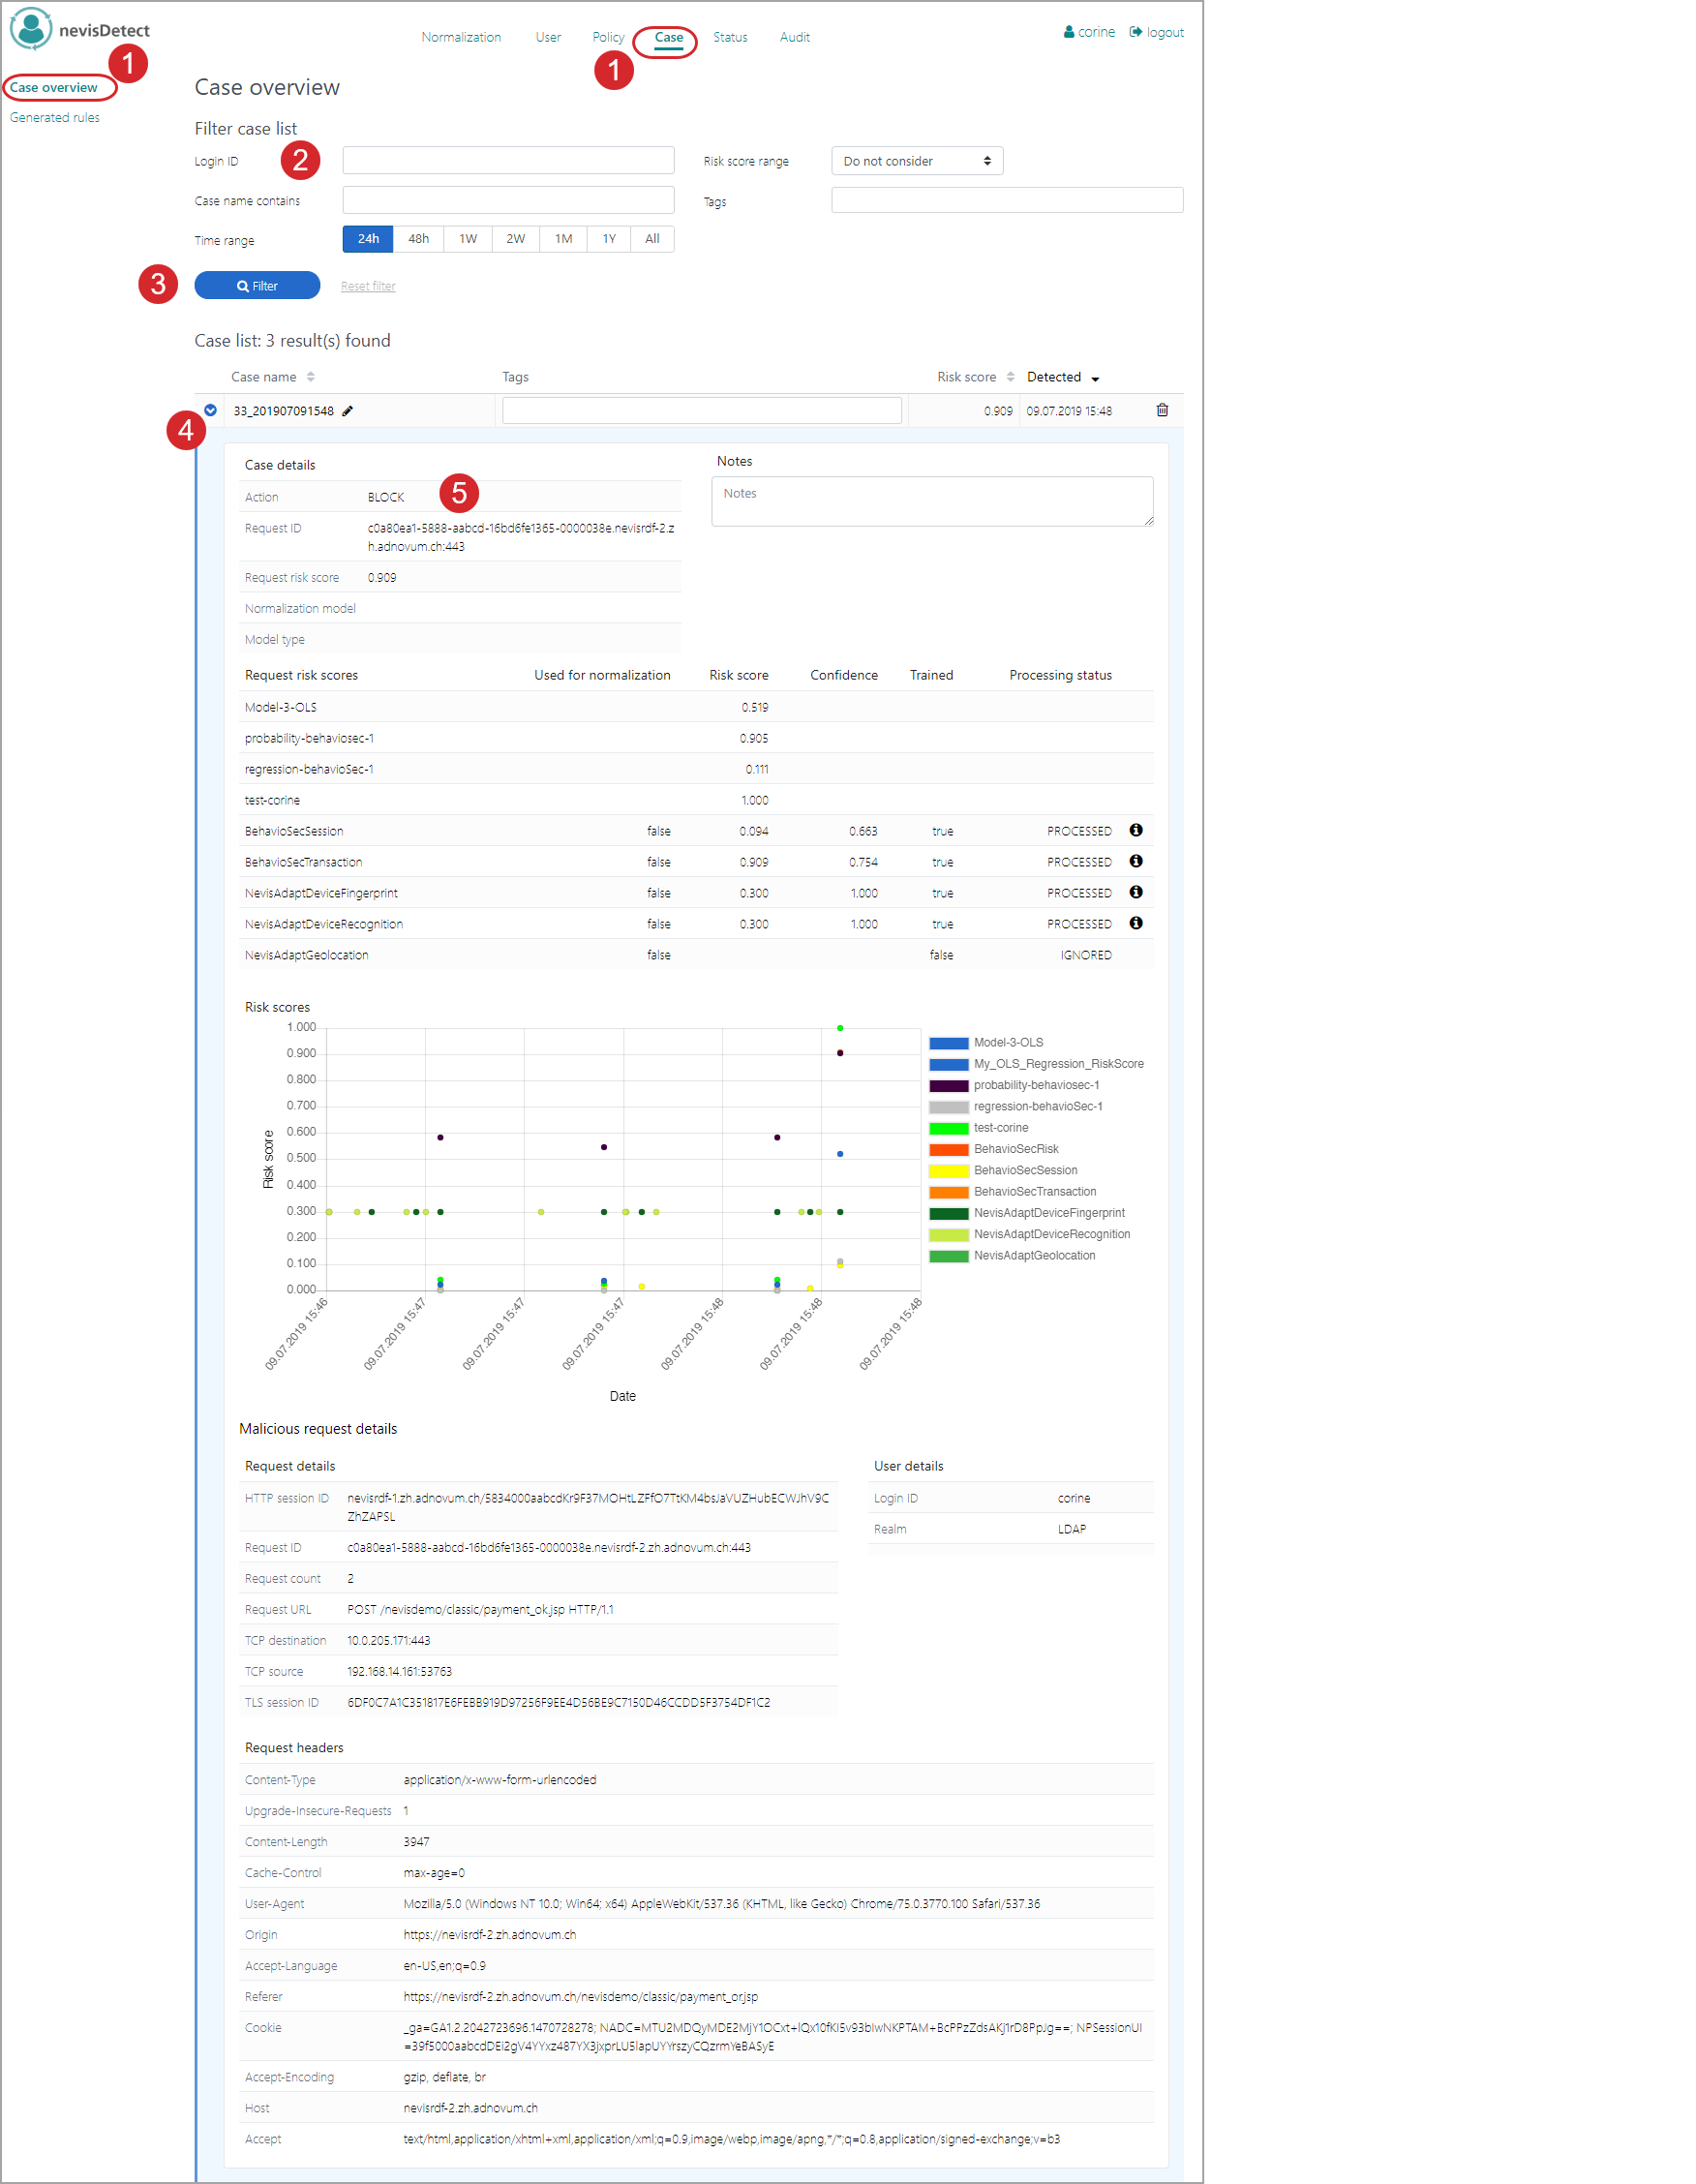
In nevisDetect, all suspicious user requests are logged as detection cases. In the nevisDetect web application, the Case overview view provides an overview of all detection cases. You can search for detected user requests in this view.
Proceed as follows (see the [figure below]:Proceed as follows (see the figure below - the numbers in the figure correspond with the numbered steps below):
- To open the Case overview view in the nevisDetect web application,
- Select Case from the top menu.
- Then select Case overview in the navigation on the left.
- In the Filter case list part, specify your search criteria, such as the login ID of a certain user, (part of the) case name, time range, and so on.
- Click Filter to search for all cases that meet the search criteria.
- The Case list part displays all cases that fulfill the criteria.
- Click the Expand icon to view and analyze the details of a specific case.
- The case details appear in the field below the case entry.
For a description of the Case overview view, see the chapter Case section.
Use case: Further process a detection case
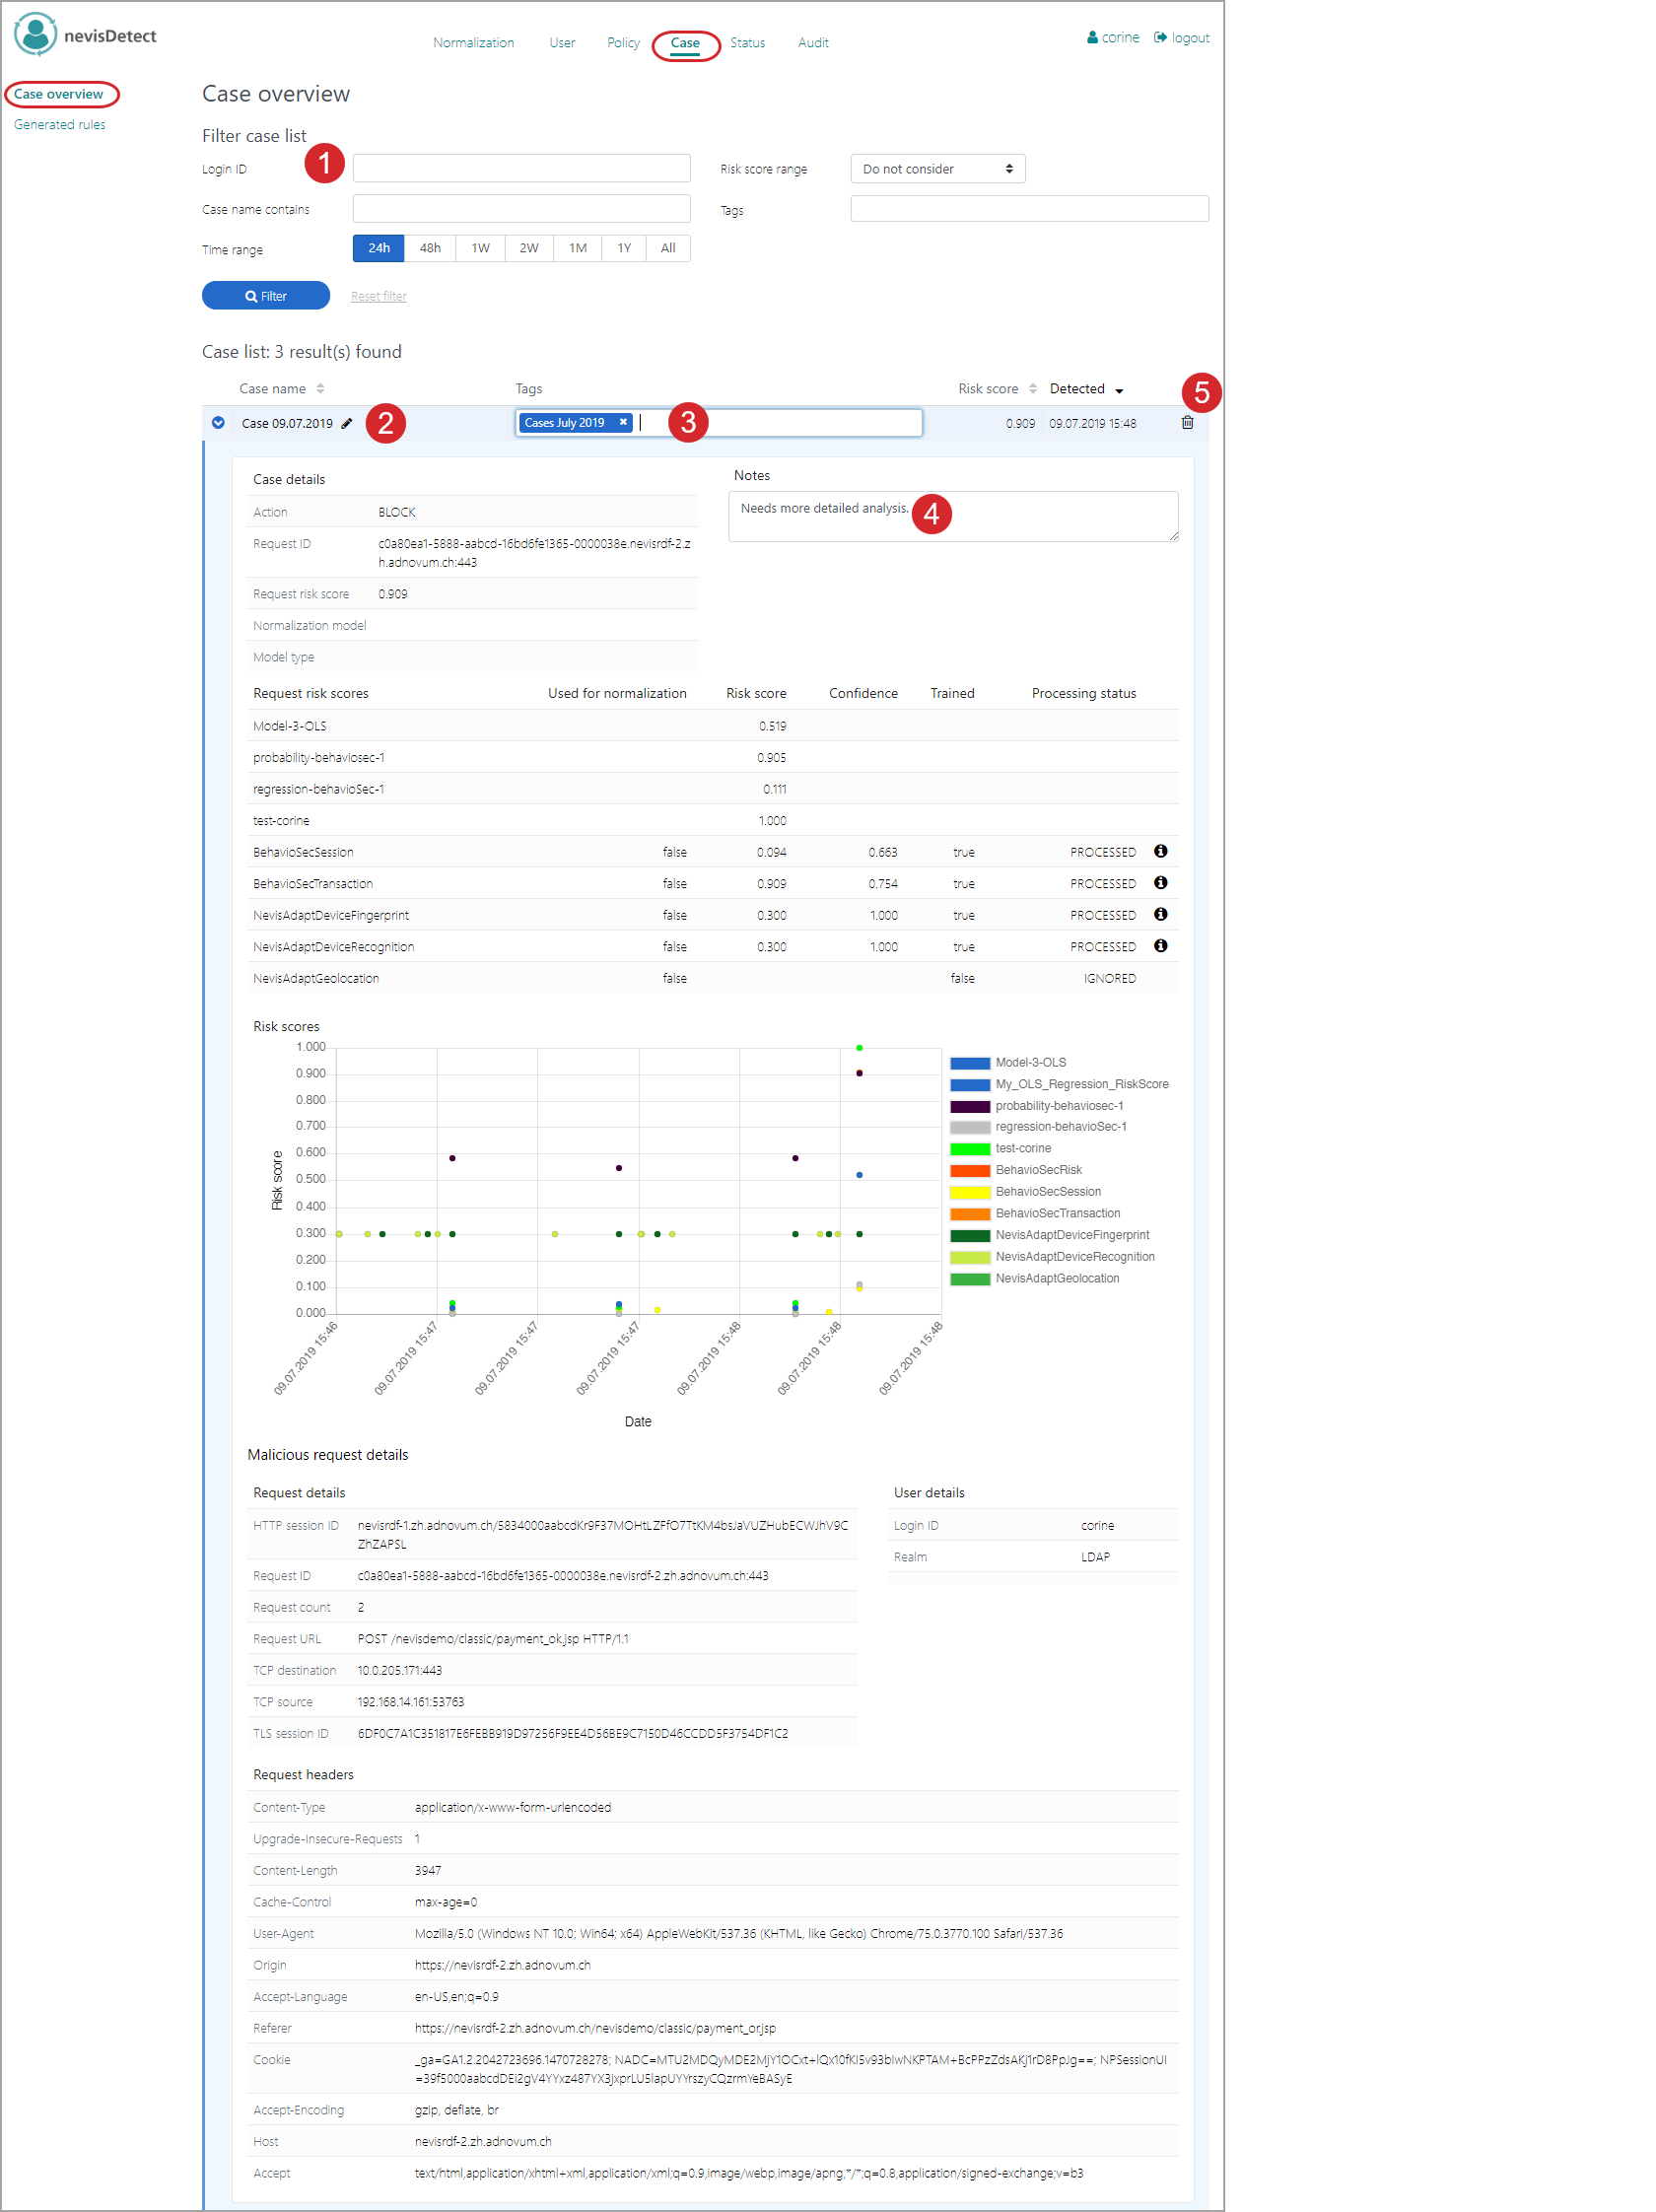
When analyzing a certain detection case, the forensic expert may want to rename a case according to a certain naming convention (nevisDetect gives each detection case an automatic name). It is also possible to tag the case, e.g., to categorize it. Additionally, the forensic expert may want to add notes to the case, e.g., to remind himself of further steps to take regarding this case. Finally, he/she may want to delete a detection case, because e.g., it occurred too far back in the past. To perform these tasks, execute the following steps, see the figure below:
- Open the Case overview view and search for the detection cases you want to analyze. For instructions, see the previous use case Search for and analyze a detection case.
- To change the name of the detection case, click the Pencil icon on the right of the Case name field.
- Enter the new name in the now editable field.
- Click the Save icon to save the new name.
- To assign a tag to the detection case,
- Enter the tag directly in the Tags field.
- Click Enter to save the tag.
- To add some remark to the detection case,
- Enter the text in the Notes text field.
- Click Enter to save the note.
- If you want to completely delete the detection case, click the Delete icon on the right of the case entry.
For a description of the Case overview view, see the chapter Case section.
Use case: Search for users with high risk score
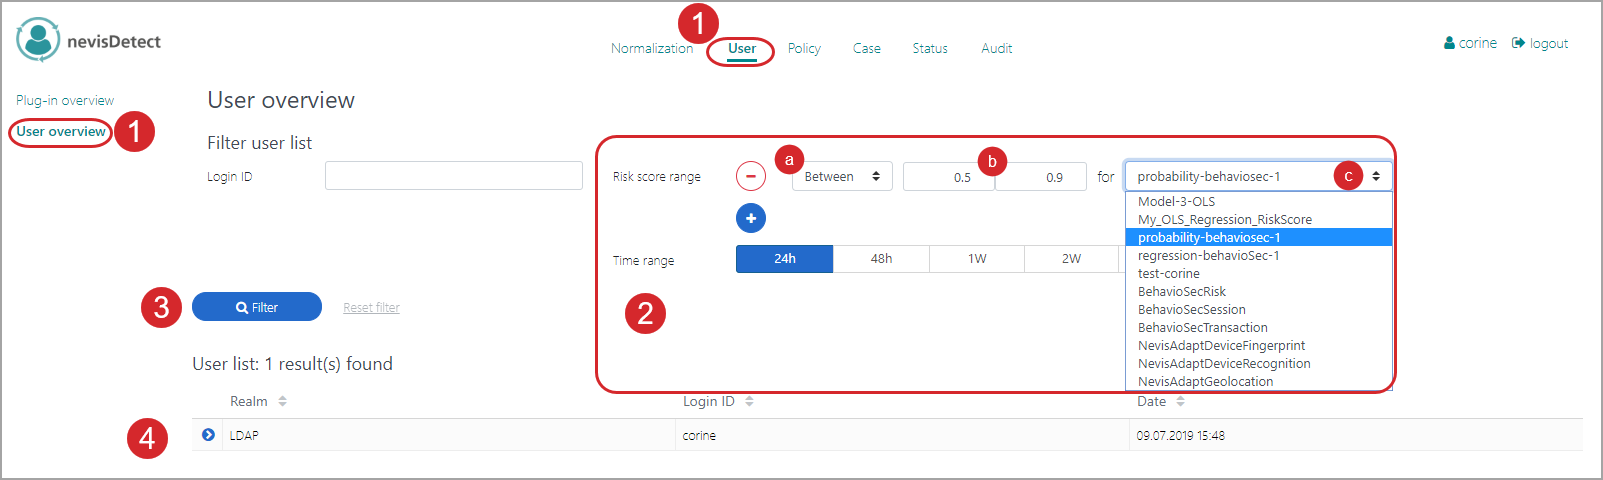
When analyzing a certain detection case, the forensic expert may be interested in the (number of ) users with a high risk score. To search for users with a certain risk score, execute the following steps (see the figure below - the numbers in the figure correspond with the numbered steps below):
- To open the User overview view in the nevisDetect web application,
- Select User from the top menu.
- Then select User overview in the navigation on the left. You can now define the search criteria.
- To define the risk score range, proceed as follows:
- Define the kind of risk score range in the Risk score range field. It is possible to show all users with risk scores above or below a certain value, or in between two values.
- Set the risk score values.
- Select the kind of plug-in risk score, for example the BehavioSecSession risk score.
- Click Filter to search for all users that meet the search criteria.
- The User list part displays all users that fulfill the criteria.
For a description of the User overview view, see the chapter Users section.