Support desk user
The task of the support desk user is to help end users of nevisDetect-protected applications who are stuck, e.g., because nevisDetect (falsely) blocked the user after a specific user interaction and the user cannot do anything anymore. The support desk user will first try to find out which rule is responsible for the situation. If he assesses the situation as risk-free and safe, he can adjust the rule.
So the common use case of the support desk user is to adjust a rule, to help an end user who is impacted by the rule.
Use case: Adjust a rule to help an end user
The Generated rules view of the Case section contains all rules generated by any policy. This is also where you search for and adjust a rule.
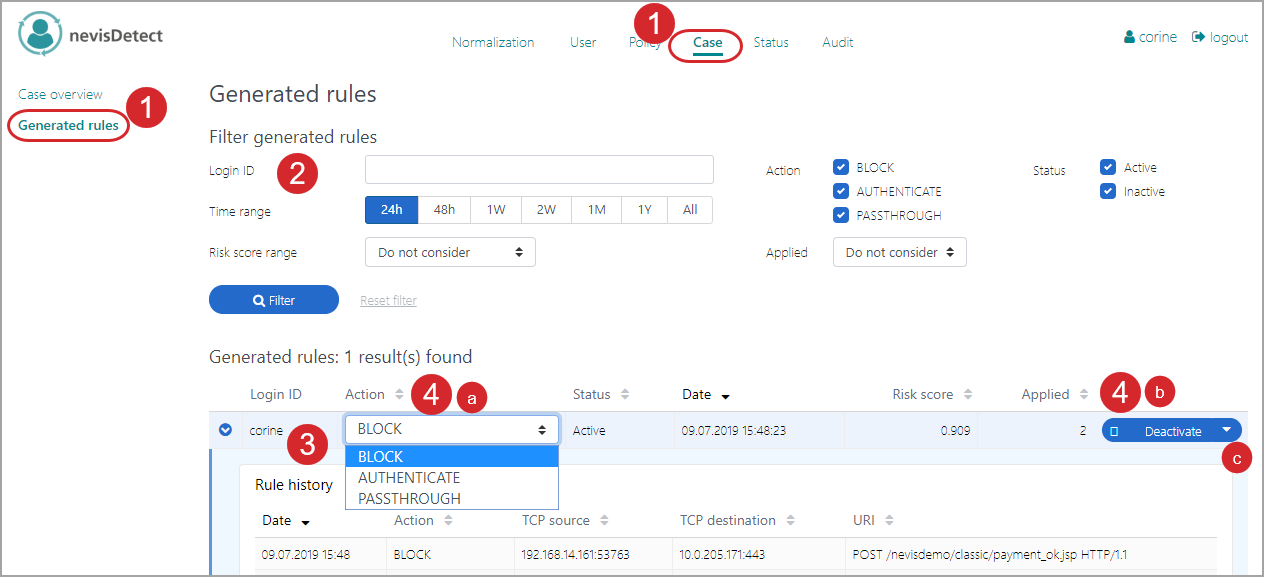
Proceed as follows (see the figure below - the numbers in the figure correspond with the numbered steps below):
To open the Generated rules view in the nevisDetect web application,
- Select Case from the top menu.
- Then select Generated rules in the navigation on the left.
Search for the rule that impacts the end user. Therefore, specify relevant search criteria in the Filter generated rules part. You can e.g, search for all rules with the user's login ID, or that were generated in the last 24 hours, or with action "BLOCK", and so on.
- Click Filter to search for all rules that fulfill your search criteria.
All rules that meet the search criteria are listed in the Generated rules part. Click the Expand icon to view the rule details and history. Based on the rule details and the information coming from the end user, the support desk user must decide whether it is safe to disable the rule.
- To get more information about the detection case connected to the rule, the support desk user can view the case's details in the Case overview view. For a description of the Case overview view, see the chapter Case section.
- To get more information about the end user in question, the support desk user can have a look at the risk score history of this user. This information is available in the User overview view. For more information about the User overview view, see the chapter User section.
There are three options to disable a rule:
- You can change the action triggered by the rule, e.g., from BLOCK to AUTHENTICATE or PASSTHROUGH. If you select AUTHENTICATE, the end user is not blocked anymore, but must re-authenticate to be able to continue working. If you select PASSTHROUGH, no action is required from the end user anymore. In both cases, the rule remains in the system. You change the action of the rule in the Action field/drop-down menu.
- You can deactivate the rule, by clicking the Activate/Deactivate button on the right side of the rule. The rule is not effective anymore, and the end user is unblocked. Also in this case, the rule still exists. It is possible to re-enable the rule.
- You can completely delete the rule. Therefore, click the Drop-down menu icon on the Activate/Deactivate button. Select Delete from the drop-down menu. In this case, the rule is removed and does not exist in the system anymore.
For more information on the Generated rules view, see the chapter Case section.