nevisFIDO Setup
After completing the Base Setup, you can now set up the nevisFIDO component.
nevisFIDO Component
Use cases implemented in the context of Nevis Mobile Authentication are based on an underlying protocol named FIDO UAF. If you want to find out more about this protocol, have a look at the following documentation:
The FIDO UAF protocol is implemented by the Nevis component called nevisFIDO, which is represented by the pattern nevisFIDO Instance.
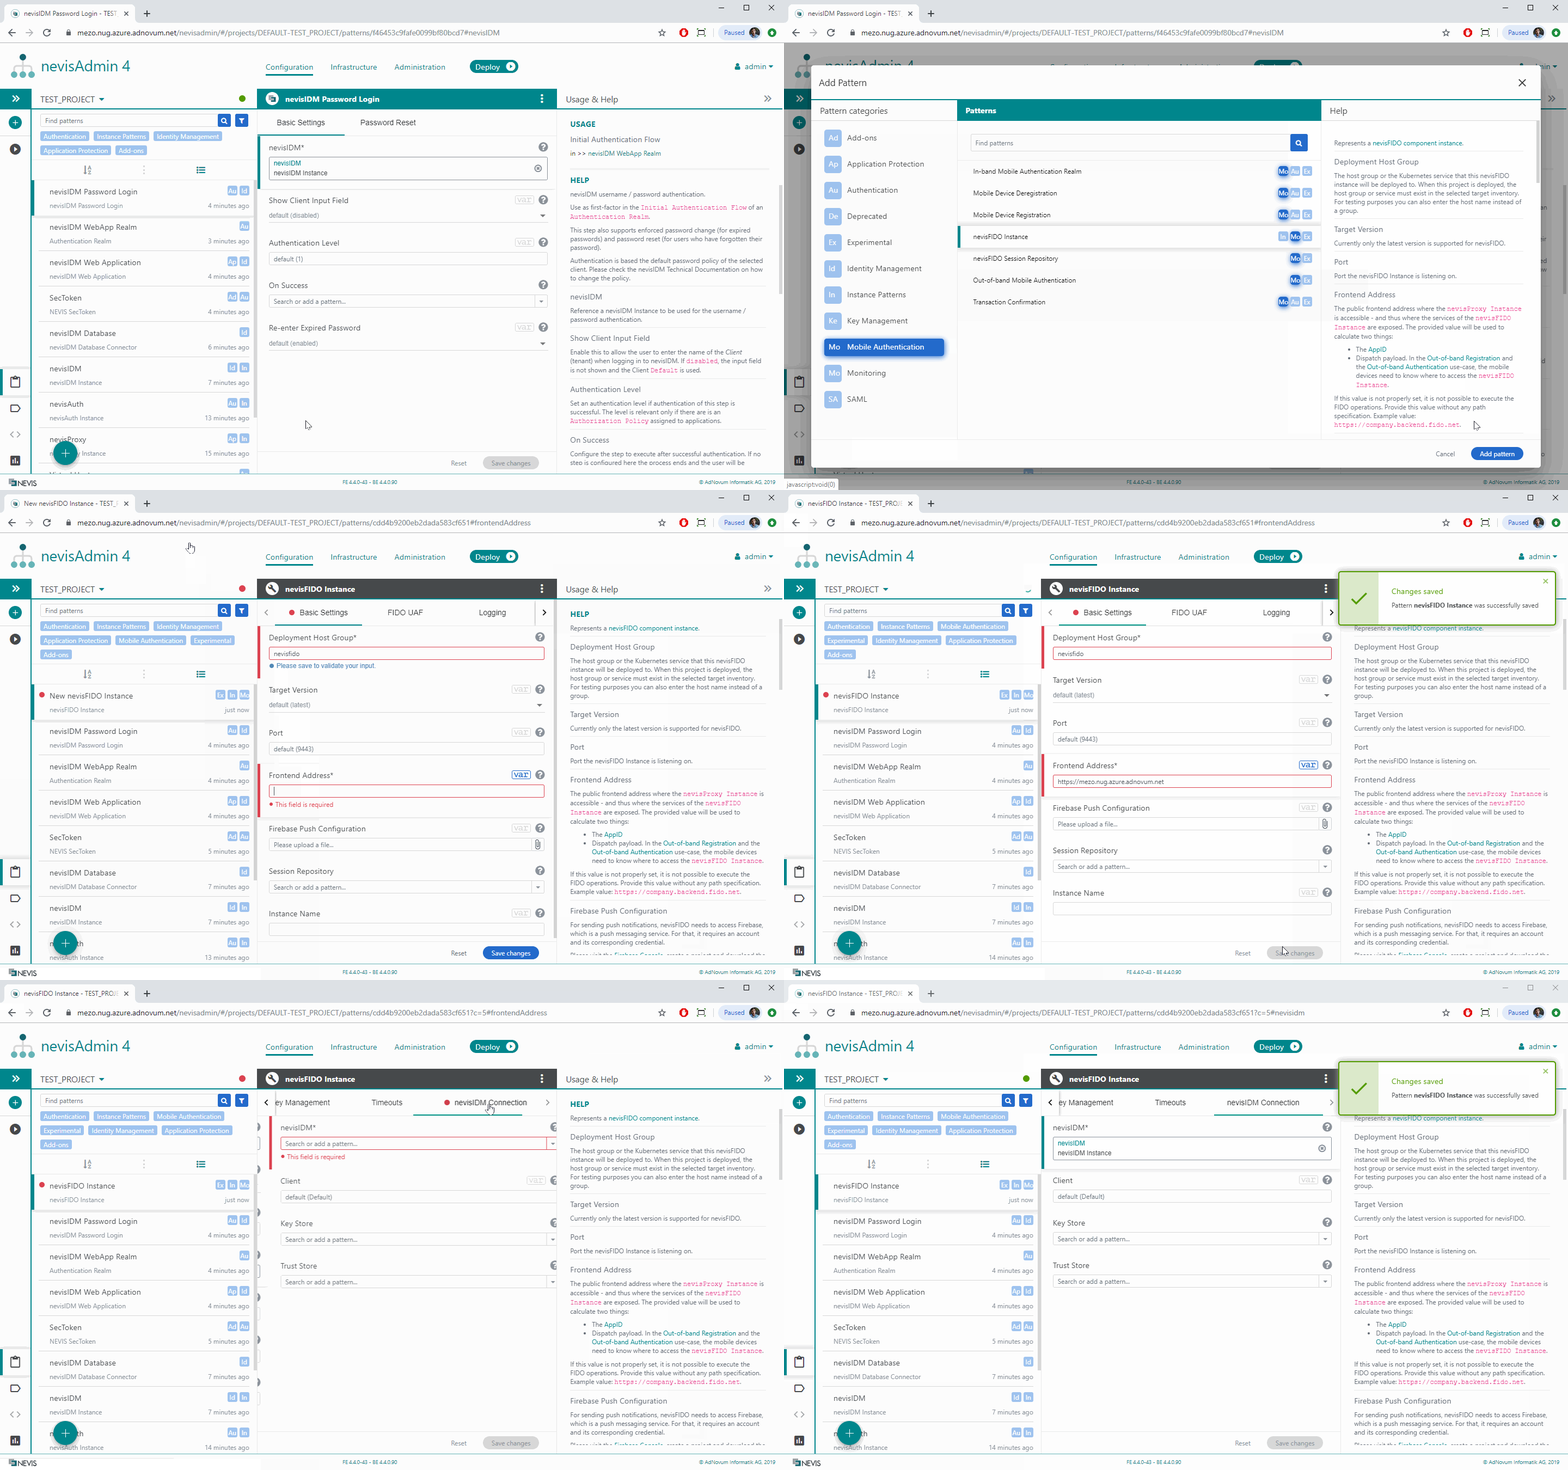
Configuring a nevisFIDO Instance
Every Mobile Authentication use case requires FIDO UAF services, and thus a nevisFIDO Instance:

The next sections describe the most important properties of the nevisFIDO Instance pattern in detail.
Basic Settings Tab
Frontend Address
The property Frontend Address defines the address where the nevisProxy endpoints are available for the clients.
If you have any proxy or gateway configured in front of nevisProxy (such as NGINX or F5), make sure to set a frontend address which is in line with this fact.
Push Tab (Firebase Push Configuration)
If you intend to send push notifications, you have to upload your Google Service Account account in the property field Firebase Push Configuration. Push notifications are a central element of Out-of-band Mobile Authentication.
FIDO UAF Tab
If you use the standard Nevis Access App, you can safely ignore the FIDO UAF tab.
If you use an access app that is custom-built, adjust the configuration accordingly in the FIDO UAF tab, if necessary. In this case, see the following pages:
- Application and facets: The facets set in the Facets property/field must reflect the facets implemented by the mobile application.
- UAF Protocol - Metadata & Policy: The policy and the metadata set in the Policy and Metadata properties/fields must reflect information about the FIDO Authenticators implemented by the mobile application.
nevisIDM Tab
Nevis Mobile Authentication uses nevisIDM to manage the mobile authentication credentials of your users.
If nevisIDM is set up by the same nevisAdmin 4 project, assign the nevisIDM Instance pattern to the nevisIDM setting in your nevisFIDO Instance pattern.
If nevisIDM is deployed by a different nevisAdmin 4 project, you have to assign a nevisIDM Connector pattern instead.
The nevisFIDO component connects to nevisIDM using 2-way TLS, and this connection may require configuration of a client certificate, and setup of a technical user.
You can skip the remainder of this chapter and proceed with Mobile Authentication Use Cases if:
- you are are deploying to Kubernetes,
- and you have assigned a nevisIDM Instance,
- and the nevisIDM Instance is using a Managed nevisIDM Database pattern for the database connection.
Create the Key Material
nevisFIDO needs to own a private key, whose matching certificate must be present in both:
- the nevisIDM's frontend truststore, and
- within nevisIDM, as the certificate credential of the "nevisfido" technical user.
The next command creates example key material that you can use to ensure a secure connection between nevisFIDO and nevisIDM.
openssl req -x509 -sha256 -nodes -subj '/CN=nevisfido,OU=auth,O=nevis,C=ch' -days 3650 -newkey rsa:2048 -keyout nevisfido-key.pem -out nevisfido-cert.pem
- The generated nevisfido-key.pem file contains a private key. It is referred to as "nevisFIDO Private Key" in these instructions.
- The generated file nevisfido-cert.pem file contains a public certificate. It is referred to as "nevisFIDO Certificate" in these instructions.
The key material generated this way is self-signed - it is not recommended using it in a production environment. To have properly signed key material available, contact a Certificate Authority.
Configuring the nevisfido Technical User in nevisIDM
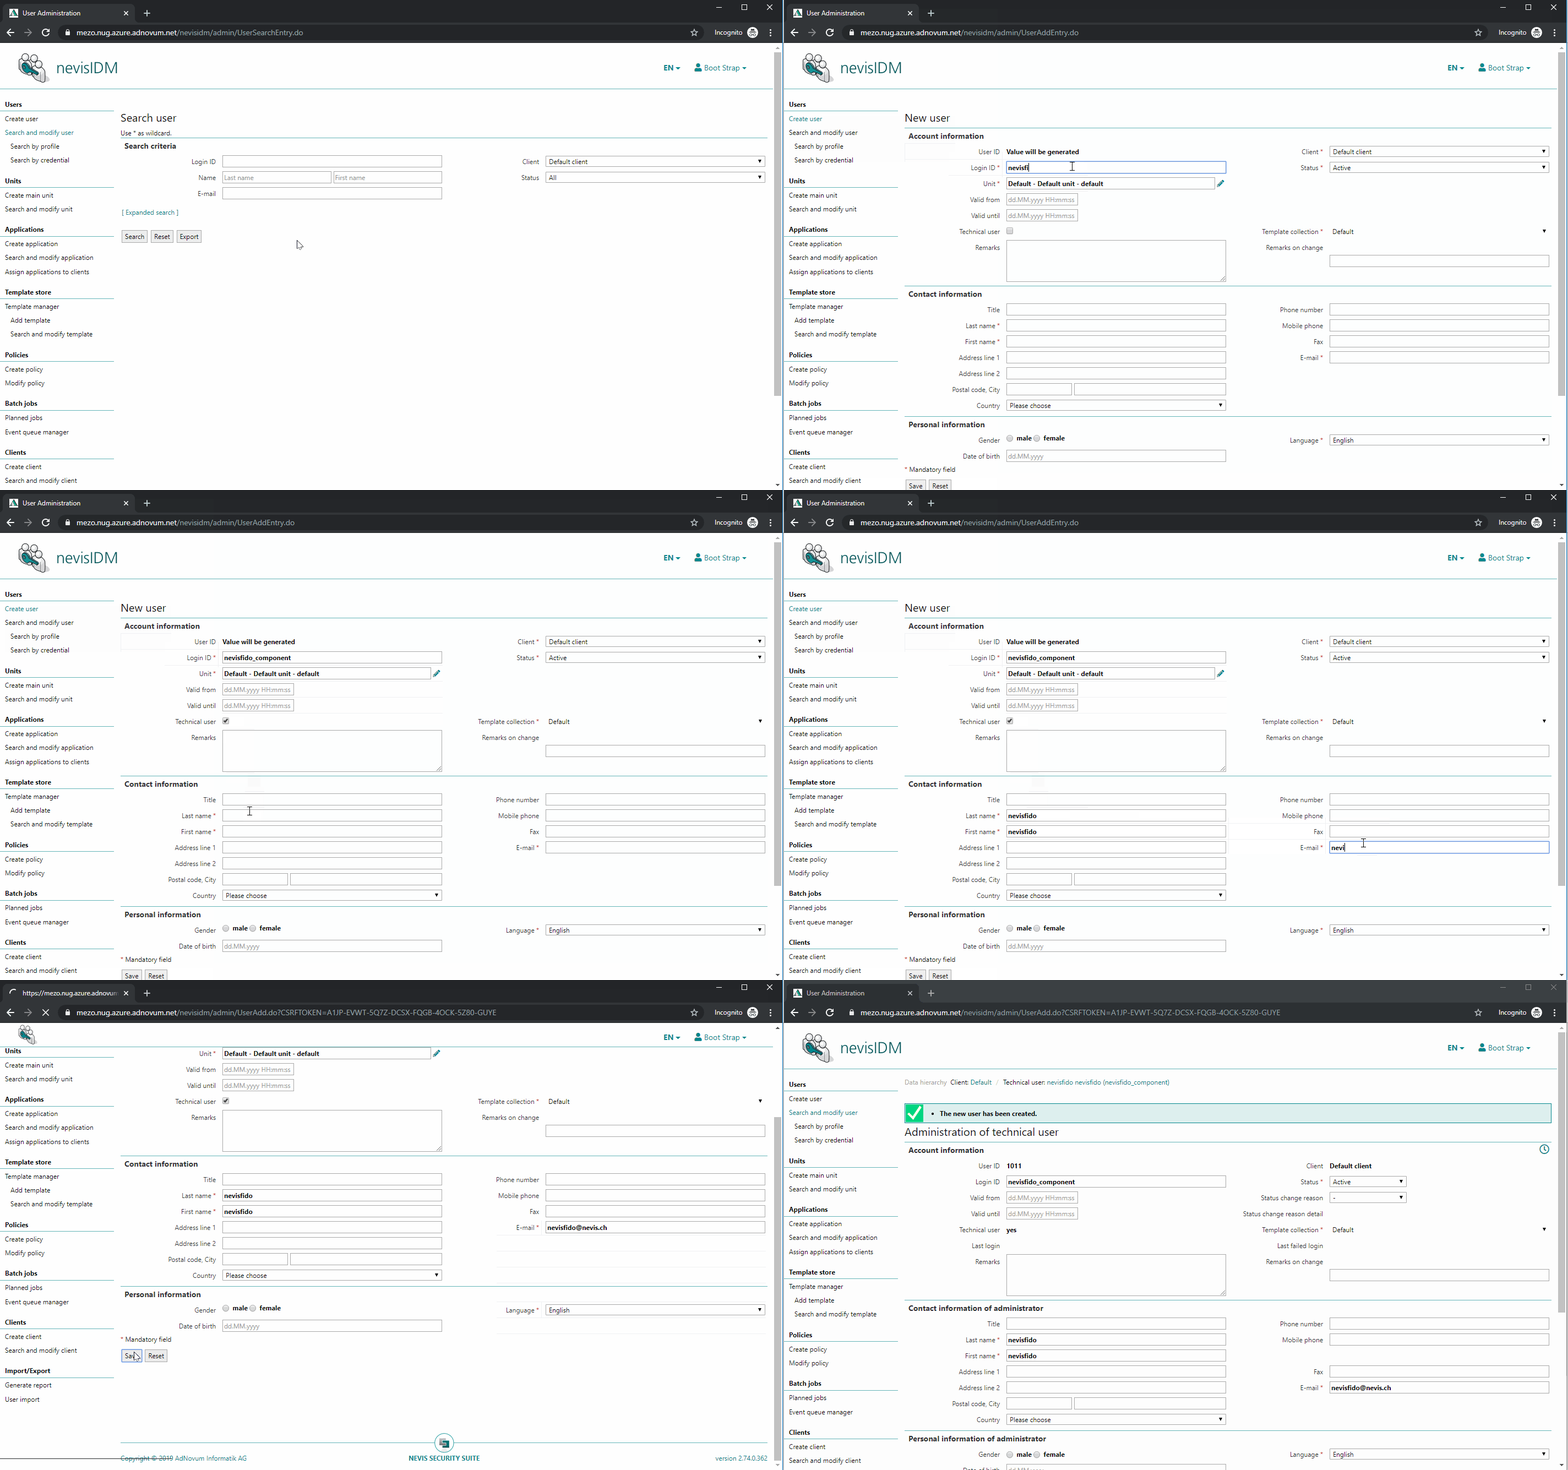
The next step is to create a technical user. nevisFIDO needs this user to be able to contact nevisIDM. To perform this step, deploy the project and access the nevisIDM Admin GUI.
The name of the user does not matter, as long as the user owns the role SoapTechAccess and the right certificate credential is created. However, it is recommended naming the user "nevisfido".

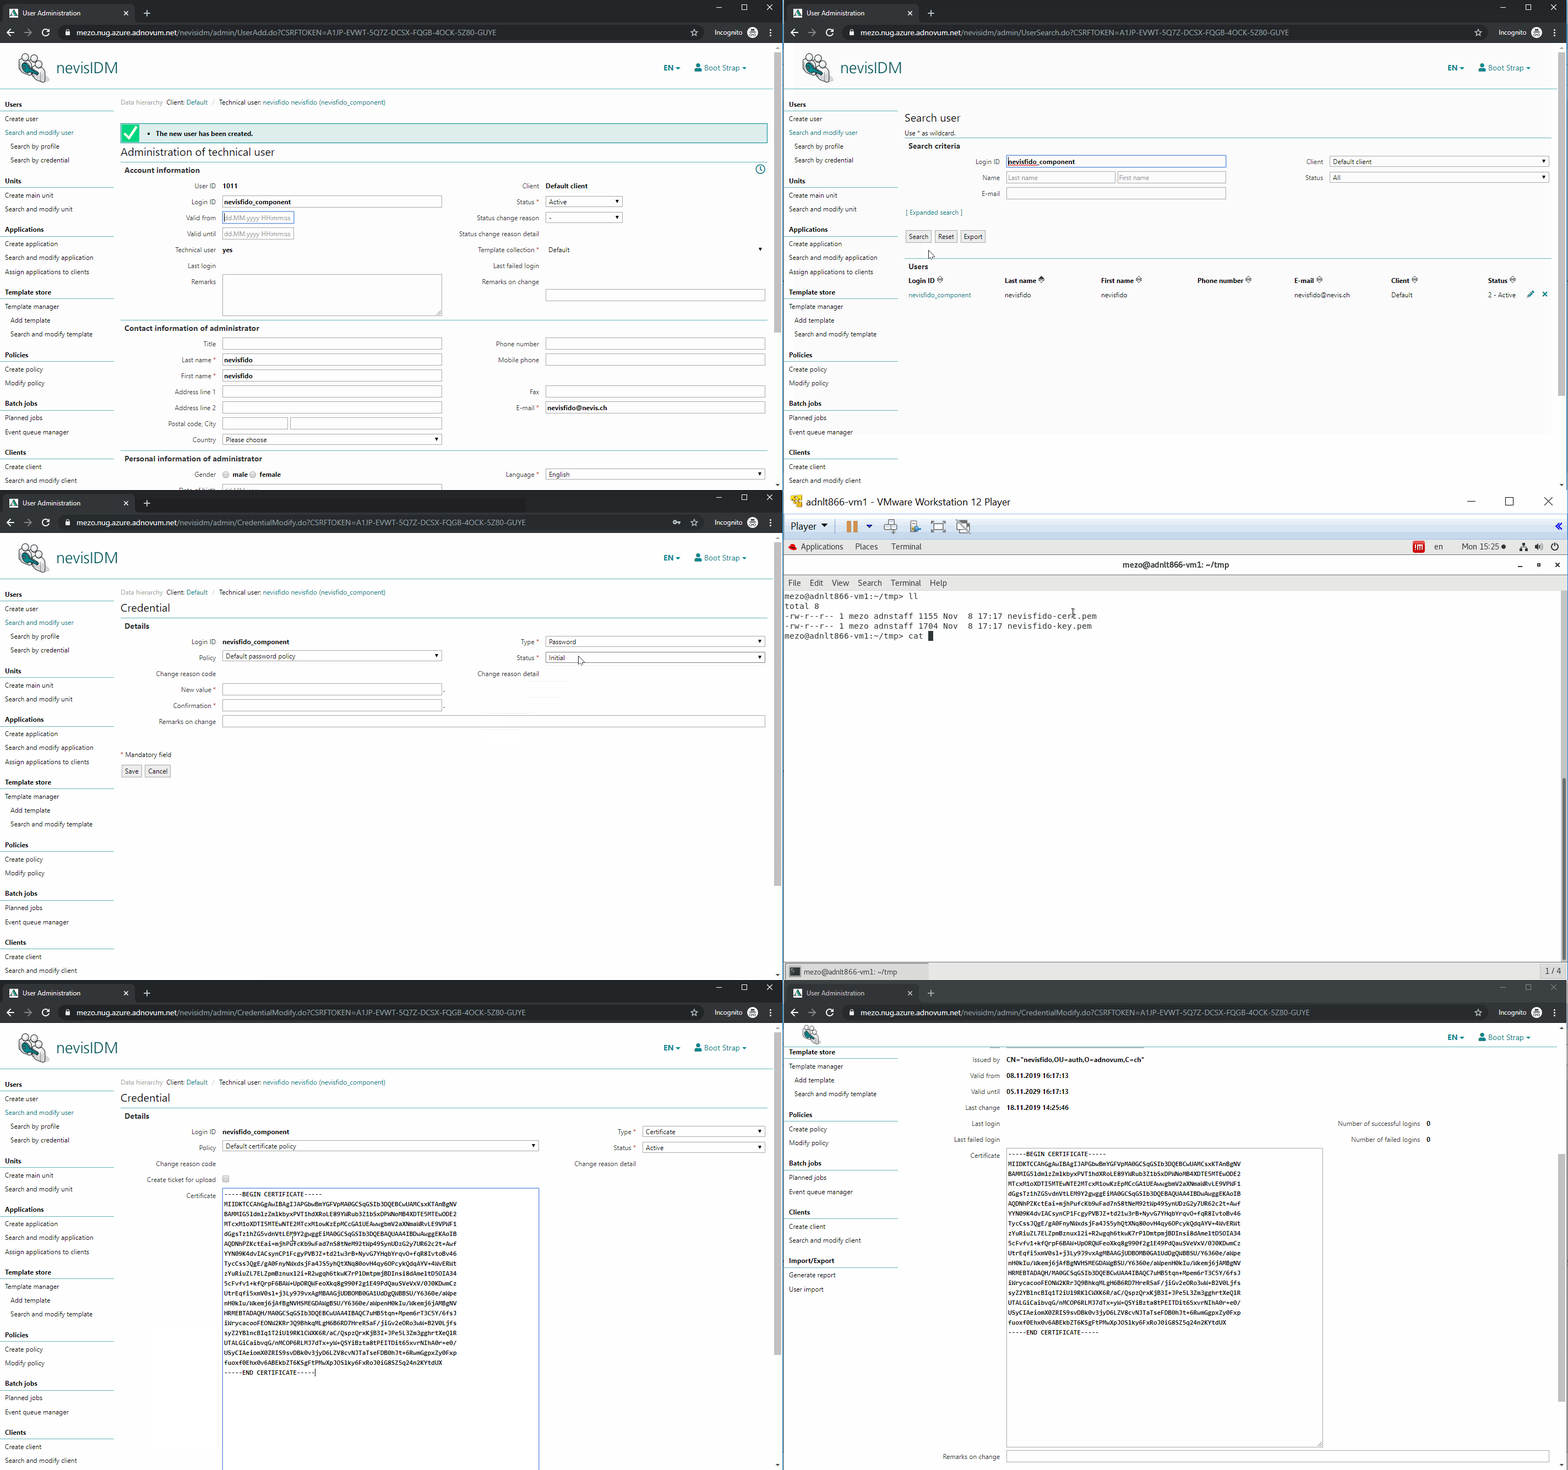
The previously generated public certificate "nevisFIDO Certificate" has to be present as a certificate credential of the just created nevisfido technical user. The next movie shows you how to do this:

Uploading the Key Material into the nevisAdmin 4 Project
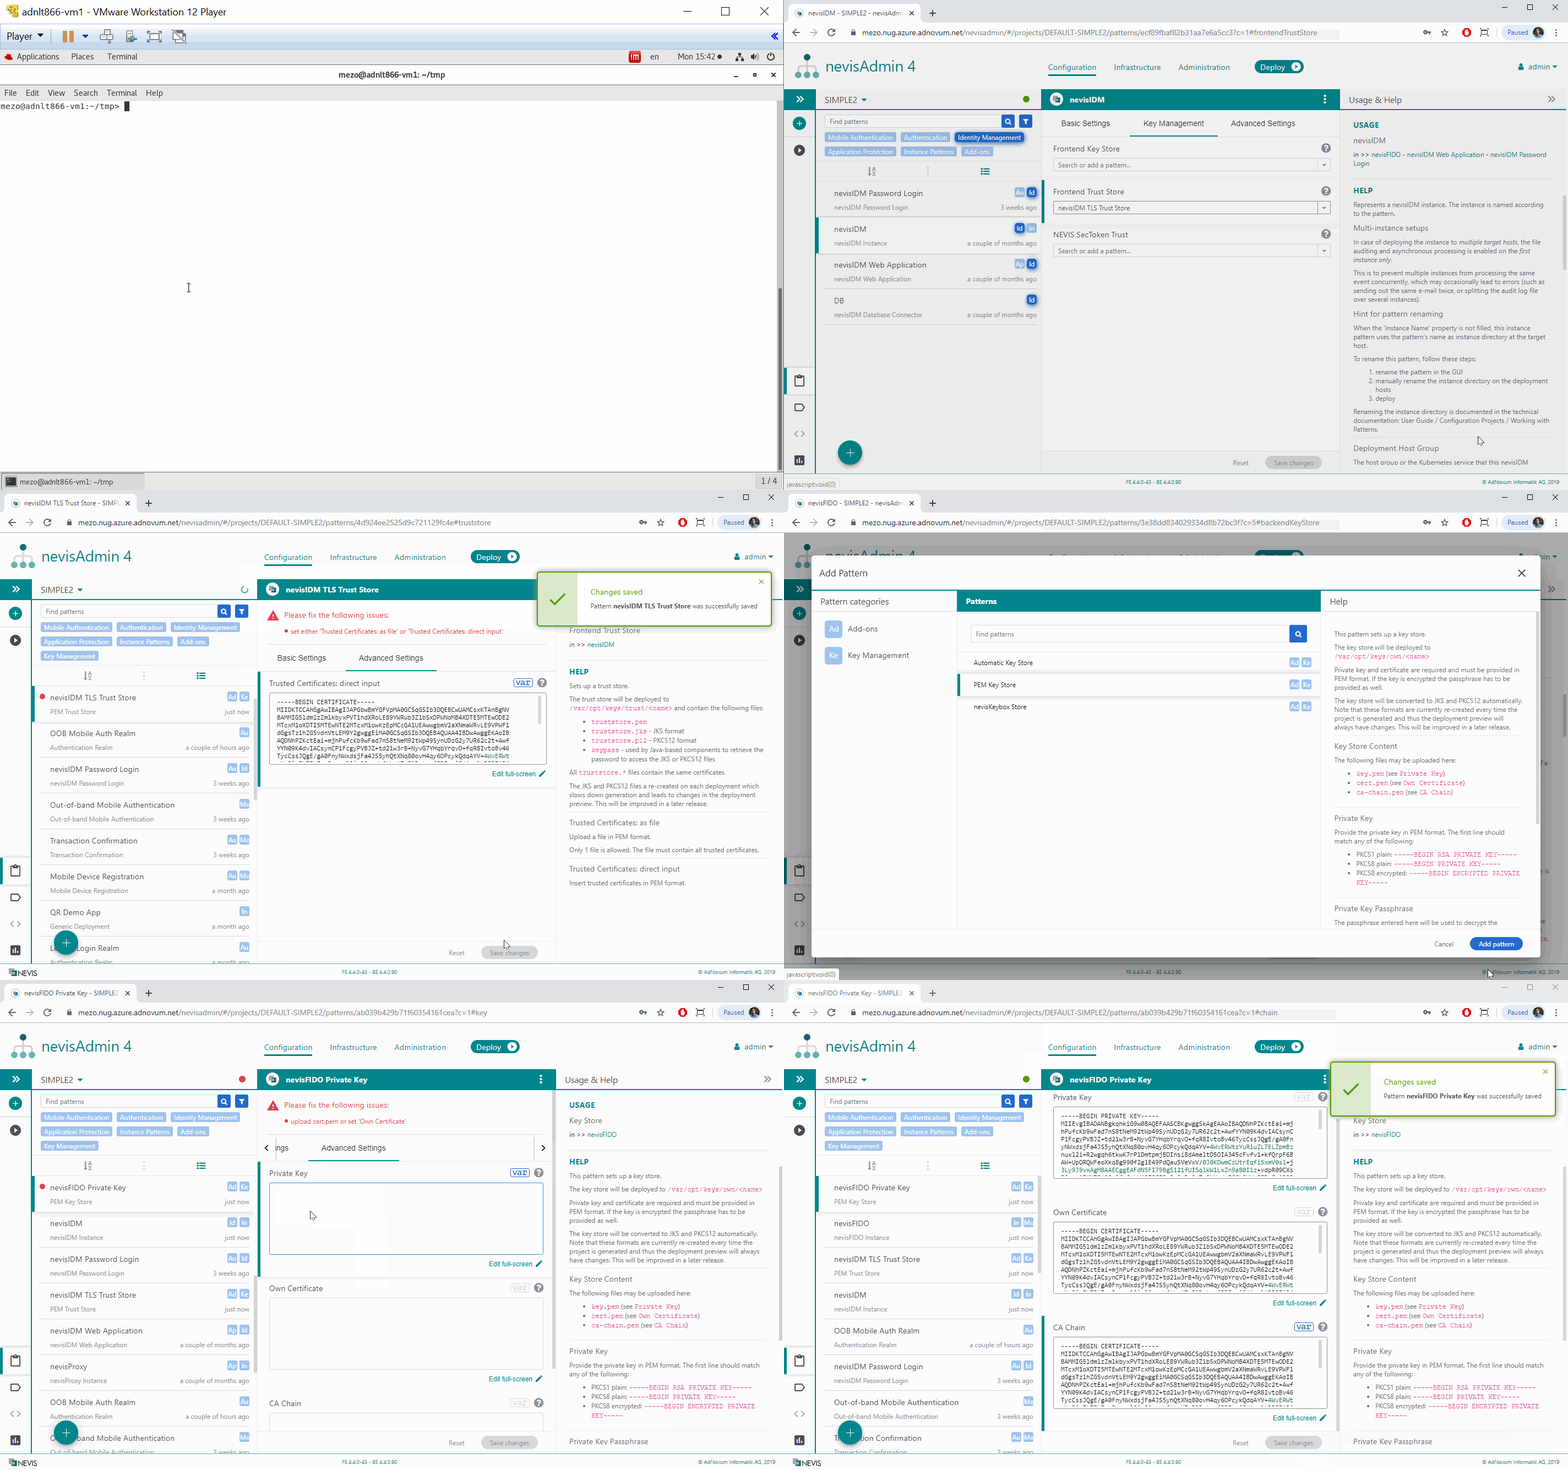
Now that you have generated and imported the key material into nevisIDM, you need to configure the nevisAdmin 4 patterns to use the keys. Therefore, upload the "nevisFIDO Private Key" into a PEM Key Storepattern used by the nevisFIDO Instance pattern, and the "nevisFIDO Certificate" into a PEM Trust Store pattern used by the nevisIDM Instance pattern. The next movie shows you how to do this:

You may need different key material depending on your inventory. For example: you use different key material for the DEV and the PROD stage. To support this, follow these steps:
- Create the same patterns as in the movie above, but instead of pasting the key material, you create variables. For more information, see Working with Variables.
- Within each inventory, add each variable and upload the key material to each variable as a file. For more information, see Working with Inventory File Attachments.
Mobile Authentication Use Cases
Now you are ready to configure the actual use cases. Go to Mobile Authentication Use Cases.