Server
A server is identified by its host name; see the Hostname setting within the figure Sample server view. The server's Hostname setting must be the full qualified host name of the server. Make sure that nevisAdmin can resolve the server's IP address to communicate with the nevisAgent on the particular server. A server must not be added more than once to nevisAdmin and may exist in a single zone only.
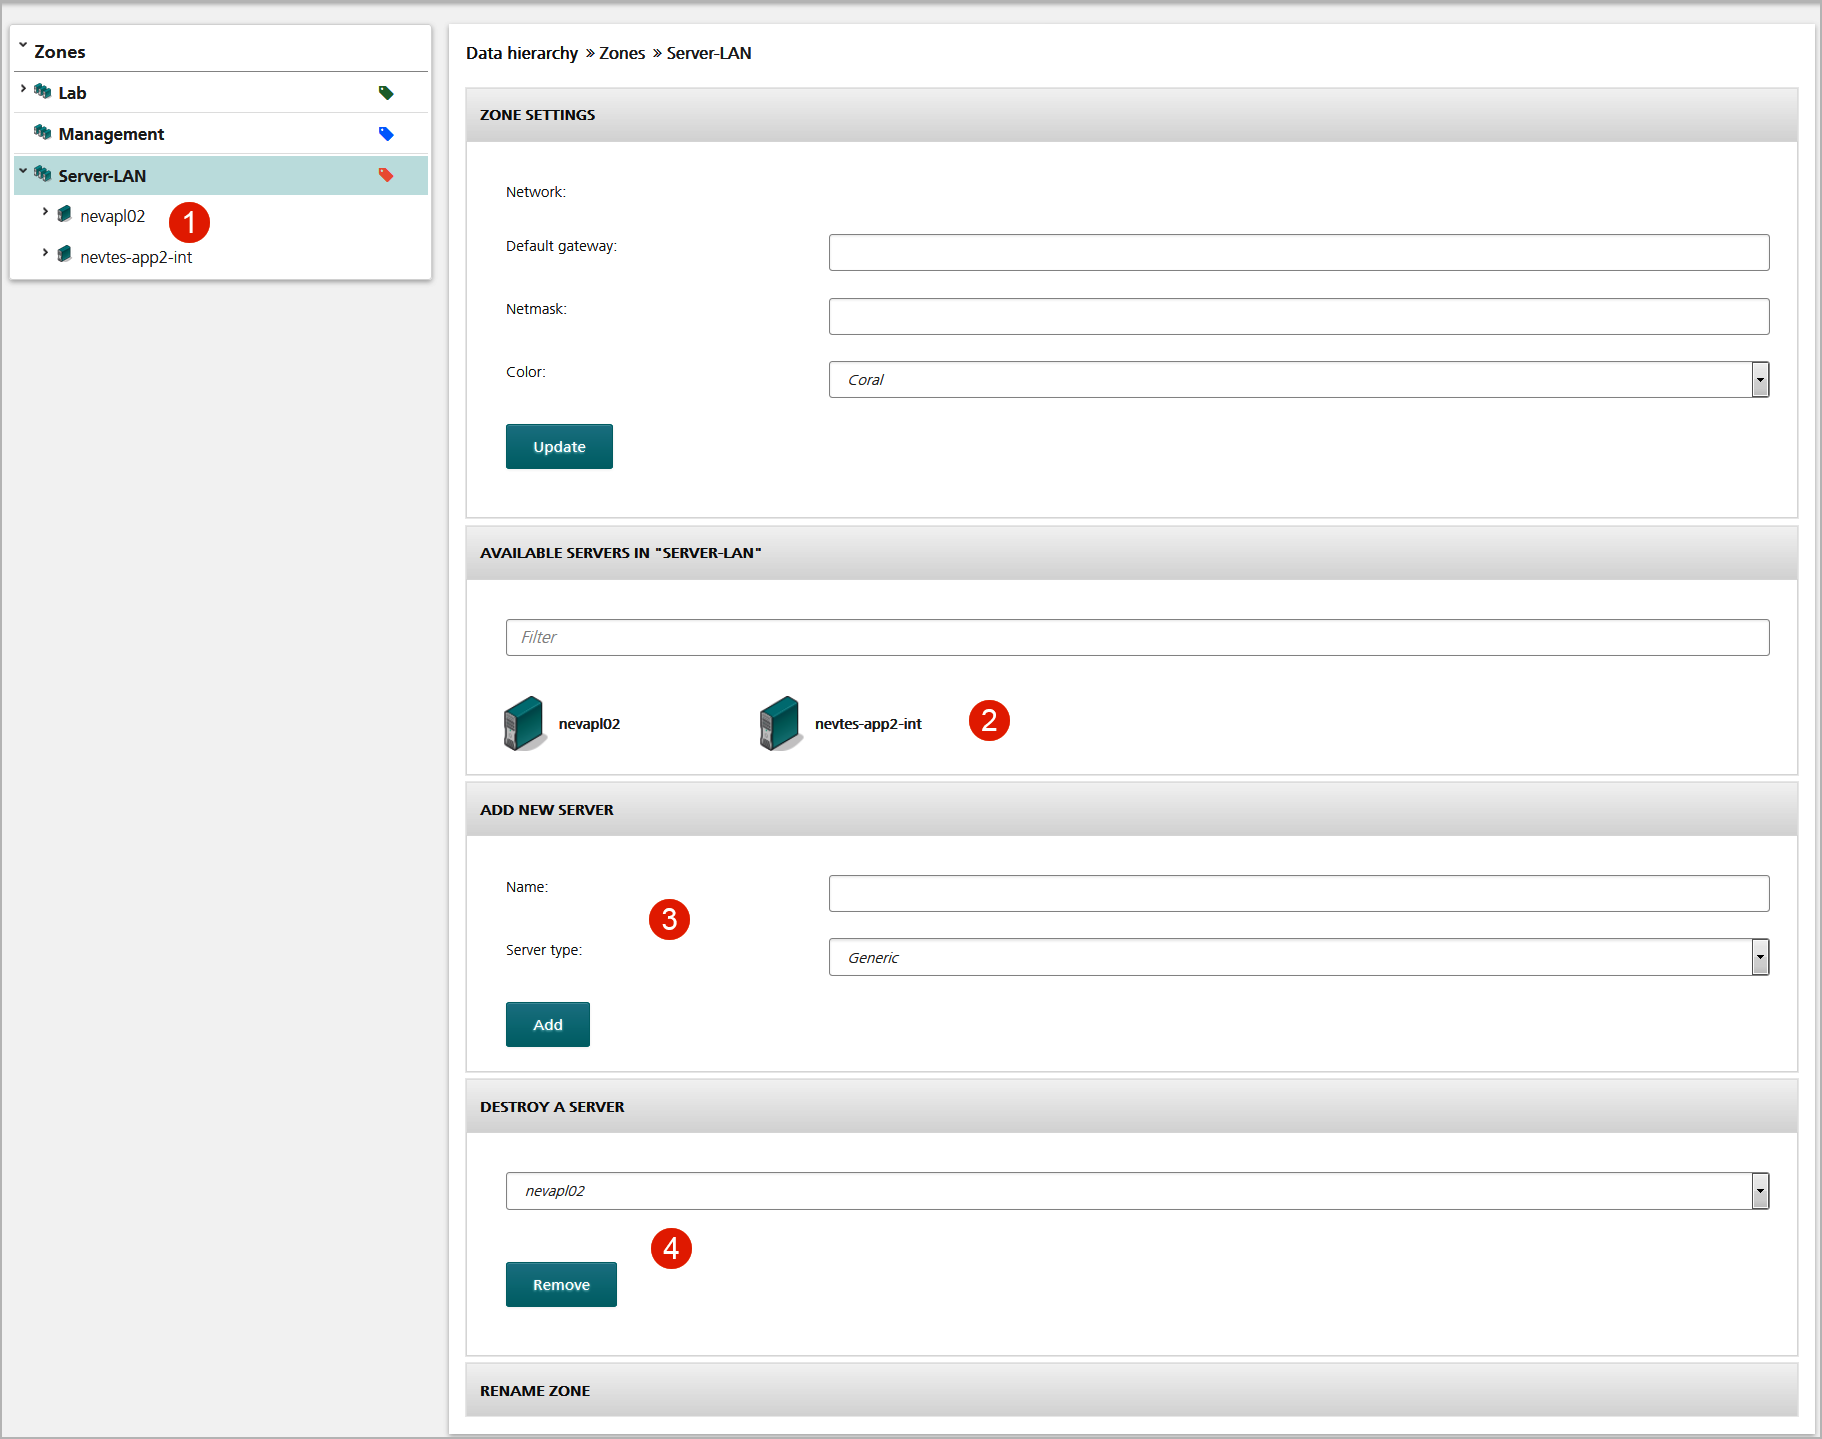
Each server hosting Nevis components should have its server certificate; see the chapter Key material per server. The host name must match the certificate's subject CN. The figure below shows a sample server configuration within the sample zone "Server-LAN" (marked green).
- The navigation pane at the left hand side lists the available servers for zone Server-LAN (no.1 in the figure).
- The available servers in the Server-LAN zone are also displayed in the zone's detailed view at the right hand side of the screen (no.2).
- You can add new servers to this zone, too (no.3). Define the name and server type for each new server.
- To remove a server from a zone, select the involved server from the drop-down list and click Remove (no.4 in the figure).
Instance
A server hosts one or multiple instances:
- A nevisKeybox instance is used to store and / or represent key material which is going to be used for the server. The instance has always the name "default".
- A nevisAgent instance is required if the server shall be remotely managed by nevisAdmin. It is mandatory if you are managing any Nevis component on the server.
- Other Nevis or non-Nevis instances as described in the next chapter Instance.
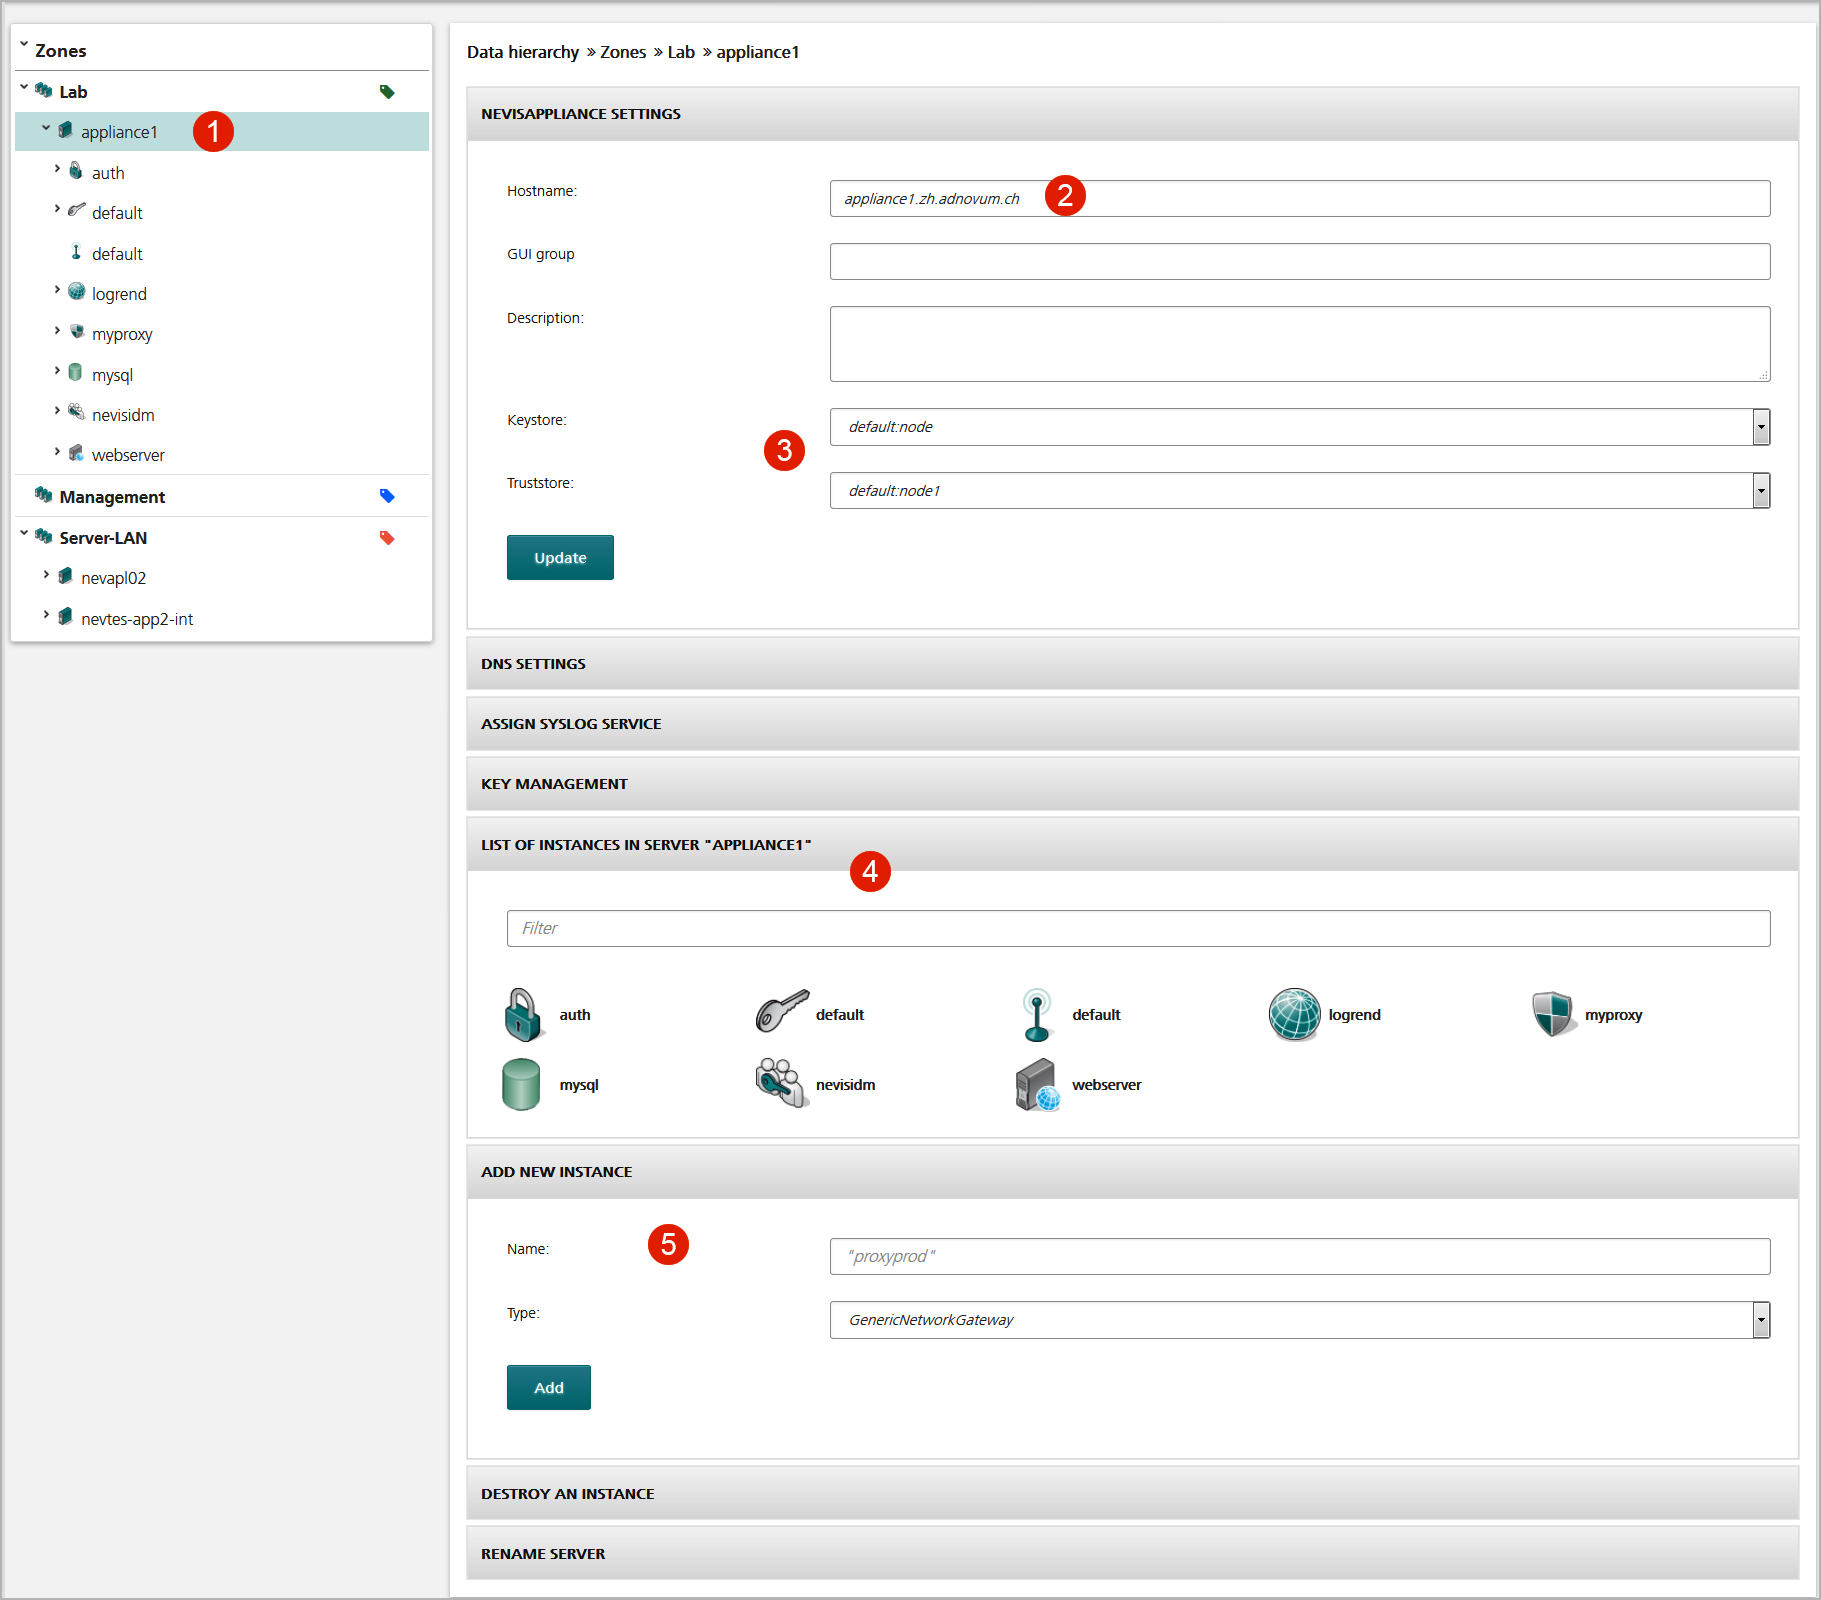
See the figure below for more details. The navigation pane shows you which server you are configuring (the server with a colored background. In our example, this is the "appliance1" server, no.1 in the figure). The Server view at the right displays the server details, such as
- The host name of the server (no.2 in the figure). The server host name is used for communication between nevisAdmin and the nevisAgent on the server. The host name must be unique.
- The key material used by the server when connecting to other servers (no.3).
- Instances hosted by this server (no.4).
You can also create a new instance for the server (see no.5 in the figure). Therefore,
- select the correct instance type from the drop-down list,
- enter an appropriate name for the new instance, and
- click Add.
DNS settings for a nevisAppliance
If you use a nevisAppliance, you can use nevisAdmin to compile a list of host names that will be added to /etc/hosts on the appliance server. To do so, open the DNS settings panel and hit the "Generate /etc/hosts file" button. Keep in mind that only hosts that can be resolved by nevisAdmin will be on the list. Edit the generated list to your needs and click on "update". These lines will be added to the /etc/hosts file when you commit and deploy the configuration. The entries for 127.0.0.1 and the server name itself will be omitted.
Note that already existing entries in the /etc/hosts file are not affected. The host entries generated by nevisAdmin will be written between tags as follows:
127.0.0.1  localhost.localdomain localhost
192.168.10.69 nevapl08.zh.adnovum.ch nevapl08
# Dynamically added by nevisAdmin, 2015-02-26 09:05:15
# nevisadmin, configuration engine 3.4.1.0, 2015-02-26 09:04:10
192.168.10.70 nevapl01.zh.adnovum.ch nevapl01
# End of nevisAdmin additions
Instance
An "instance" is a running process of a specified type of software. Most instances provide one or multiple services (host name and port where the instance's functionality is provided).
When installing Nevis you normally start by creating the main components nevisProxy or nevisAuth. Supplement components, such as nevisKeybox or nevisAgent, are then generated automatically.
- A nevisProxy instance is used to implement the secure reverse proxy acting as the entry server for your web applications. The nevisProxy instances are installed on the servers within the DMZ.
- nevisAuth instances provide a set of services required for user authentication, authorization, and handling of session states. They are either installed on the server within the DMZ or the application zone.
- nevisLogRend is the optional rendering service used by nevisProxy to interact with the end user. These instances are usually installed on the same server the nevisProxy instance has been configured on.
- nevisIDM is the authentication back end used by nevisAuth to verify the user's credential as well as to provide additional user specific attributes. Alternative authentication back ends are typically LDAPServer or RadiusServer instances.
- The webServer instance is used to represent the web server hosting the application. It is normally installed on servers within the application zone.
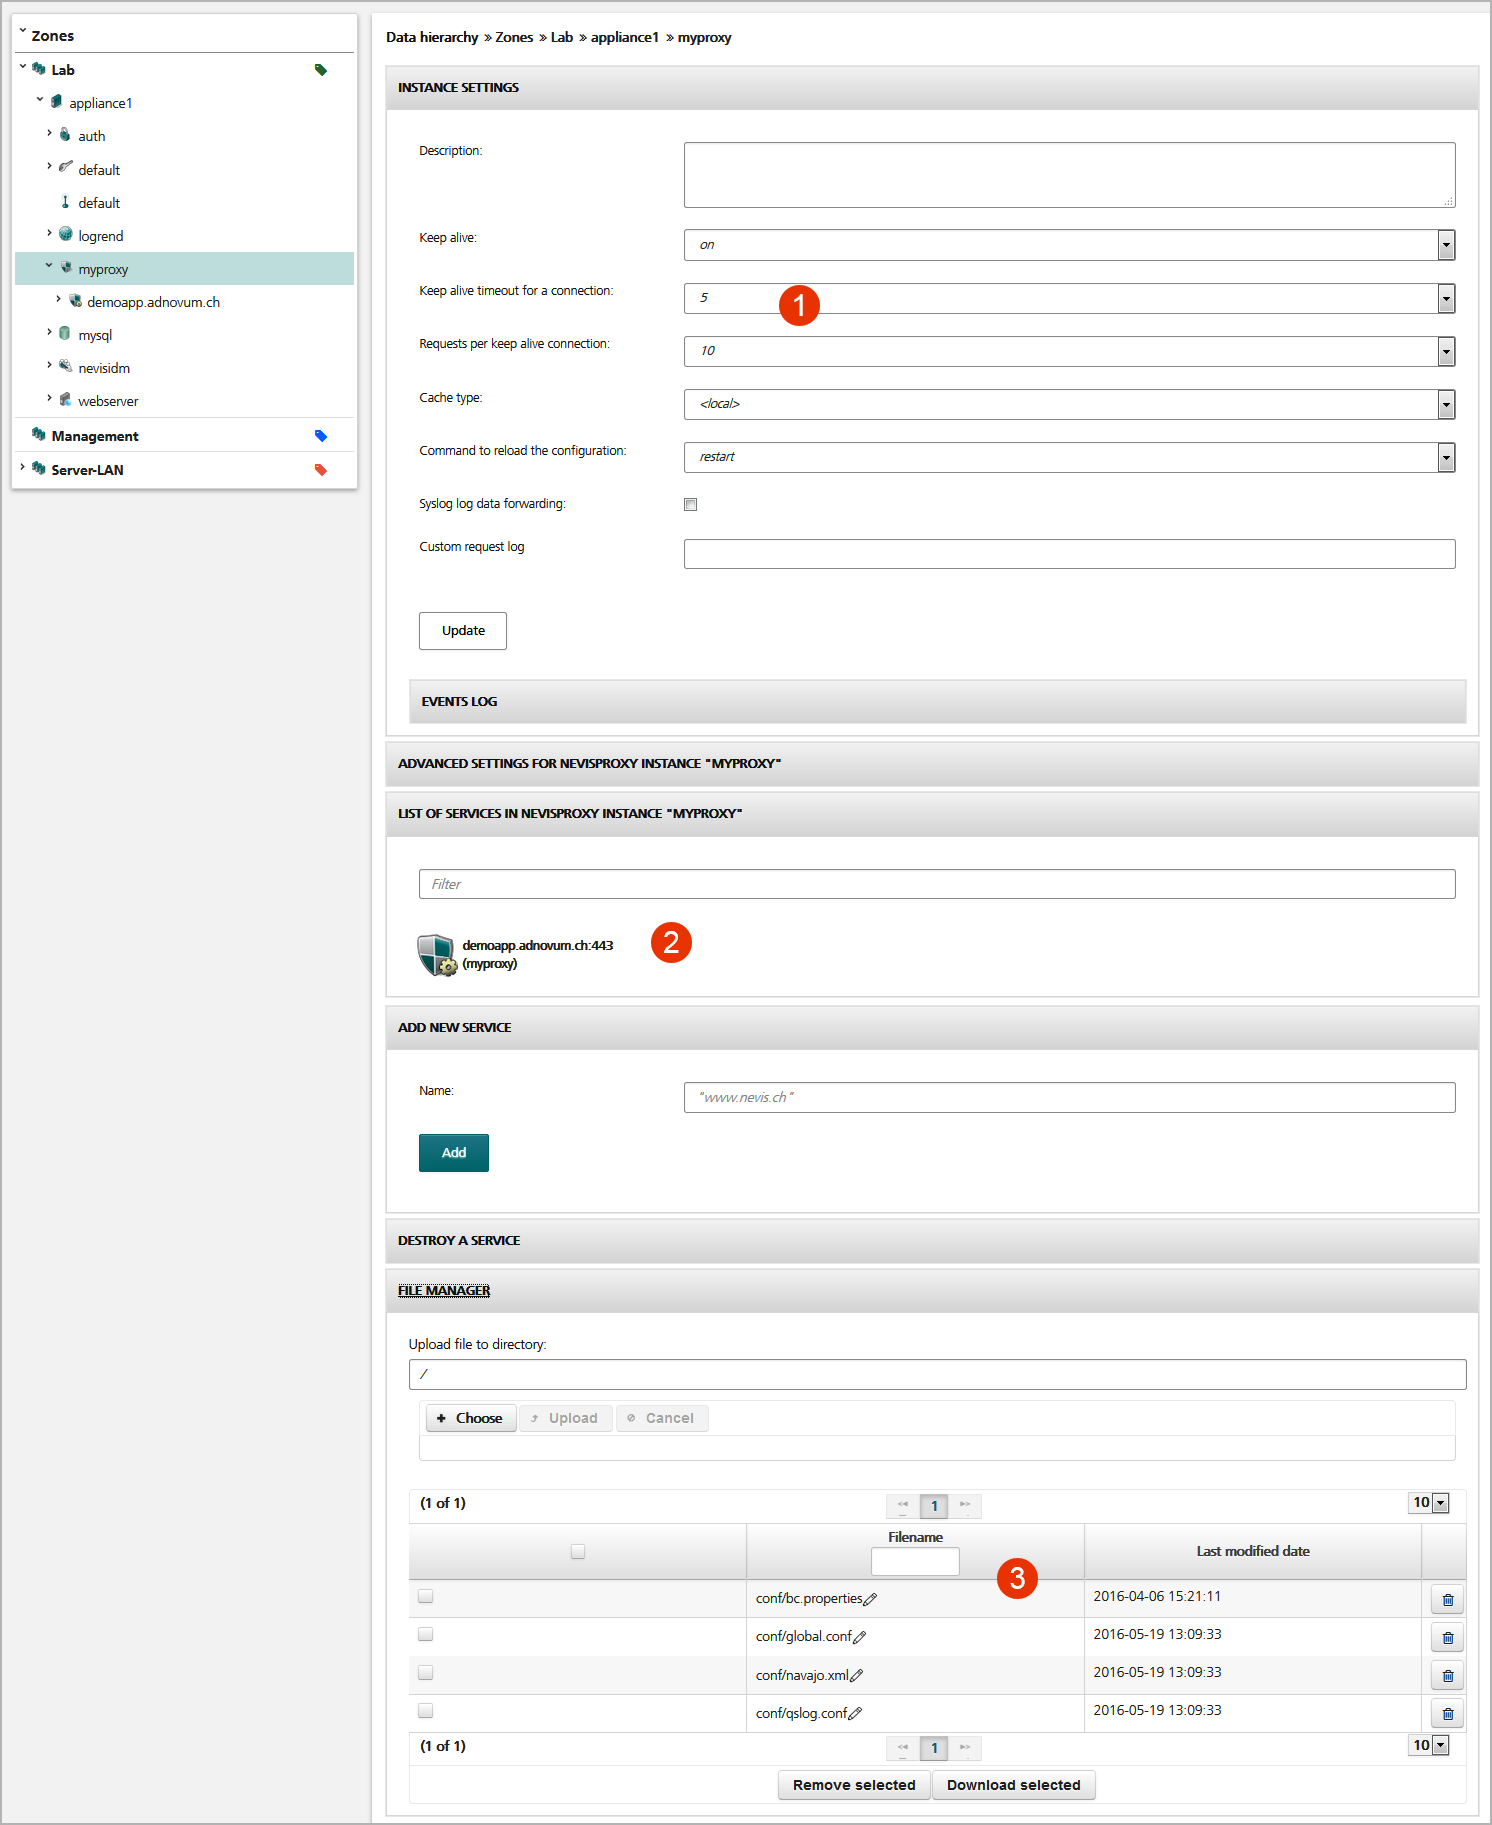
You may create other instance types on a server depending on your requirements. The [figure] below displays the Instance view for the sample instance "myproxy", which gives a detailed view of the instance's properties.
- The Instance Settings panel shows the basic configuration parameters of the instance (no.1 in the figure).
- The List of Services panel shows all services provided by this instance (no.2).
- The File Manager panel gives access to the files of the instance (no.3 in the figure). These are the files which can be deployed to the instance. Some of them are generated or updated when creating a new configruation snapshot.
Sample nevisProxy instance view