Kubernetes Infrastructure Inventory YAML file format
About the Kubernetes Inventory File
An inventory file is the place where the deployment environment is defined.
It is divided into different sections: services, vars, consts, deployment-repository and kubernetes-cluster.
- The
servicessection defines all Nevis components that are deployed. Each service will define one Nevis component. - The
varssection contains variables which are defined for the whole inventory. Variables can also be defined atservicelevel. - The
constssection allows you to create constants that can be reused in multiple variables. - The
deployment-repositorysection contains the configuration to connect to the Git deployment repository. Generated service configurations are transferred to Kubernetes via this repository. - The
kubernetes-clustersection contains the configuration to connect to the Kubernetes cluster for the deployment.
The deployment-repository and kubernetes-cluster sections are mandatory, whereas services, vars, consts are optional.
It is common practice to have more than one inventory file: namely one for each stage. For example: one inventory file describes the services used in your test stage and a second inventory file describes the services used in your production stage.
File format
The inventory file uses YAML syntax. To get familiar with the YAML syntax, use one of the many online tutorials. In YAML, indentation is a crucial part of the syntax and is done with spaces. If tab stops are used, that leads to syntax errors.
The integrated editor converts a tab stop automatically into two spaces, but be careful when copy-pasting from external editors. The syntax is automatically validated while you are editing the inventory file.
The green traffic light in the top right corner switches to red to indicate syntax violation. Hovering over the traffic light reveals details about the syntax violation.
A Kubernetes inventory file must contain the schemaType and schemaVersion:
- The
schemaTypedefines the deployment type. Set the value toKubernetesto indicate that it is a Kubernetes inventory. IfschemaTypeis not set, it will be considered aClassicinventory. - The
schemaVersiondefines the version of the inventory, which ensures that future format changes can be handled.
The manifestTarget defines the target of the generated Kubernetes manifests.
With Cluster the manifests will be directly upserted to the Kubernetes cluster, while with the Git option, the manifests will be only pushed to the deployment repository.
The later one allows the usage of GitOps tools such as ArgoCD to handle the actual deployment of the resources.
Optionally, you can define a color for the inventory.
This helps to distinguish between inventories at a glance, For example you can assign different colors for different stages.
The available values for color are: red, yellow, green, purple, brown, blue
The main part of the inventory file consists of the following sections: services, vars, consts, deployment-repository and kubernetes-cluster.
schemaType: Kubernetes
schemaVersion: 1

color: Red

services:
  <items>
vars:
  <items>
consts:
  <items>
deployment-repository:
  <items>
kubernetes-cluster:
  <items>
Services
The services section defines the Kubernetes services to be deployed. You can think about services as a list of Nevis components you want to deploy. Each service defines a logical set of Pods running a Nevis component. To get familiar with the Kubernetes concepts, use one of the many online tutorials.
Configurations options:
version: Defines the version of the component's Docker image to be deployed. By default, it will take the latest version that has been tested with the pattern library you're using. You can configure the pattern library in your project settings.git-init:version: Defines the version of the Docker image to be used for the git-init container.mirror:claim-name: Name of the persistent volume claim to use as fallback for your pods to read the configuration from, in case git becomes unavailable. Unlessstorage-class-nameis specified, an existing claim has to be used. The claim has to supportReadWriteManyaccess mode.storage-class-name: Name of the StorageClass to be used by the claim. If specified nevisOperator will attempt to create the claim if it does not exist. The StorageClass has to supportReadWriteManyaccess mode.size: Size of the created persistent volume claim. Default: 20Gi. For deleting the unused git tags see: Git mirror volume cleanup
replicas: Defines the number of Pods where the component will be replicated. By default, it will create one replica.requiredDBVersion: Defines the minimum version of the database schema required by the component. Warning: this is an advanced setting. We recommend that you do not change this setting. It means that the latest tested and supported version will be used.database:version: Defines the actual version of the database schema pushed to the database server. Caution: this is an advanced setting. We recommend that you do not change this setting. It means that the latest tested and supported version is used.labels: Additional custom labels for the database migration job and the corresponding pod(s).tolerations:Defines the tolerations to be added to the database migration pods. For more information see: https://kubernetes.io/docs/concepts/scheduling-eviction/taint-and-toleration/
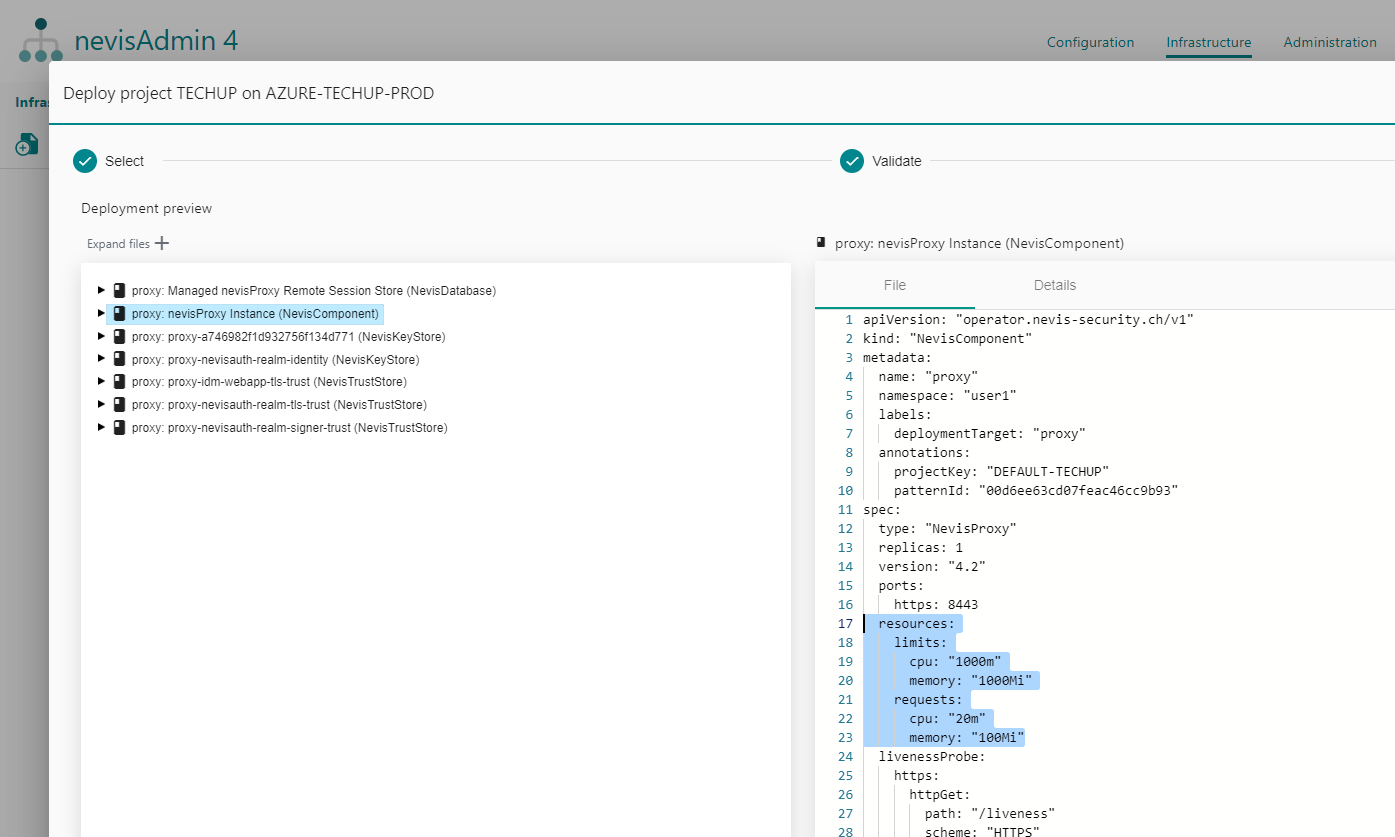
image-pull-policy: Defines the image pull policy for theNevisComponentandNevisDatabaseresources. If omitted, it defaults to thenevisOperatorconfiguration, which isAlwaysby default.resources: Defines how much memory and CPU a component Pod can use. The defaults for your version of the nevisAdmin 4 pattern library can be seen in the generated NevisComponent resources in the deployment preview.time-zone: Defines the time zone of the created Kubernetes pods. It expects a time zone string such asAmerica/Los_Angelesautoscaler:min-replicas: Defines the minimum number of replicas that the horizontal autoscaler uses.max-replicas: Defines the maximum number of replicas the horizontal autoscaler uses.- (Optional)
cpu-average-value-target: Defines the average CPU usage across the component Pods that the horizontal autoscaler tries to maintain, by downscaling or upscaling the deployment. By default, this value is set to 70% of the component CPU limit. - (Optional)
memory-average-value-target: Defines the average memory usage across the component Pods that the horizontal autoscaler tries to maintain, by downscaling or upscaling the deployment. For this to work properly, the memory has to decrease proportionally to the load in a reasonable timeframe. - (Optional)
cpu-average-utilization-target: Defines the average CPU utilization across the component Pods that the horizontal autoscaler tries to maintain, by downscaling or upscaling the deployment. Example value:80 - (Optional)
memory-average-utilization-target: Defines the average memory utilization across the component Pods that the horizontal autoscaler tries to maintain, by downscaling or upscaling the deployment. Example value:80
affinity: Defines the affinity settings to be used for the component in Kubernetes format. A special placeholder{{postfix}}can be used to refer to the current side-by-side postfix.custom-volumes: Can be used to define custom volumes for the deployment. A list ofvolumeMount-volumepairs, see yaml example below.volumeMount: VolumeMount definition, see: https://kubernetes.io/docs/reference/generated/kubernetes-api/v1.26/#volumemount-v1-corevolume: Volume definition, see: https://kubernetes.io/docs/reference/generated/kubernetes-api/v1.26/#volume-v1-core
pod-disruption-budget:-
min-available: The number of pods that has to be available. It can be either an absolute number or a percentage. -
max-unavailable: The number of pods that can be unavailable. It can be either an absolute number or a percentage. By default, it is set to 50%, which means that with at least 2 replicas, one is always available. -
enabled: Set to "false" to disable the generation of the PDB.cautionIt's possible to set up the PDB in a way, that all pods have to be available at all times, which means that the operations that effect nodes, such as node drain, cluster upgrade etc. fail. Make sure to read https://kubernetes.io/docs/concepts/workloads/pods/disruptions/#pod-disruption-budgets and https://kubernetes.io/docs/tasks/run-application/configure-pdb/, paying a special attention to how the rounding is handled, before specifying a PDB.
After the PDB is created, it can be further verified by checking that the allowed disruptions is at least one in the created resource.
-
tolerations:Defines the tolerations to be added to the pods. For more information see: https://kubernetes.io/docs/concepts/scheduling-eviction/taint-and-toleration/topology-spread-constraints: Defines the topology spread constraints to be used for the deployment. For more information see: https://kubernetes.io/docs/concepts/scheduling-eviction/topology-spread-constraints/pod-security:policy: Pod Security Standard policy to comply with. Supported values:restricted,baselineautomountServiceAccountToken: If enabled, the service account token will be mounted to the running Pods.fsGroup: Defines thefsGroupfor the Deployment.runAsUser: Defines therunAsUserfor the Deployment.seccomp:localhost-profile: Use a custom seccomp profile with typeLocalHostinstead of the defaultRuntimeDefault
labels: Additional custom labels for the Deployment.canary: By default, components deployed in canary deployments mirror thereplicas,resources, andautoscalersettings of their respective primary deployments. Adding acanaryblock allows overriding these settings for canary deployments. This allows creating canary deployments that use less resources. During promotion, the canary deployments will be scaled up to match their respective primary deployments, before the ingress switches over.- Note that services introduced newly by a canary deployment (without a primary counterpart) will have nothing to scale up to, therefore, their settings will remain unchanged during promotion, which may not be what you want. We recommend, that you introduce new services with either a primary deployment, or a canary deployment where there is no
canaryblock defined for the new service. - You can not change the resource allocation of the primary deployment by promoting a canary that had different allocations set in its
canaryblock. The canary in this case will always scale to the primary during promotion, so your resource settings in the canary block are "lost" when you promote. If you want a replica/resource change, deploy it directly on primary, or alternatively, deploy it on canary, but without a canary block, and then promote. - Git deployments are not supported. The
canaryblock will be ignored in this case. - The default values for
canary.replicas,canary.resources, andcanary.autoscalerare the same as they are forreplicas,resources, andautoscaler.
- Note that services introduced newly by a canary deployment (without a primary counterpart) will have nothing to scale up to, therefore, their settings will remain unchanged during promotion, which may not be what you want. We recommend, that you introduce new services with either a primary deployment, or a canary deployment where there is no
services:
- ebanking-proxy:
    kubernetes:
      version: "3.14.0.1-32"
      git-init:
        version: "1.2"
        mirror:
          claim-name: giteamirror
          storage-class-name: azurefile
          size: 30Gi
      replicas: 2
      requiredDBVersion: "0.1"
      database:
        version: "0.1"
        labels:
          custom-db-label-key: custom-db-label-value
      resources:
        limits:
          cpu: 1000m
          memory: 1000Mi
        requests:
          cpu: 20m
          memory: 100Mi
      time-zone: America/Los_Angeles
      autoscaler:
        min-replicas: 2
        max-replicas: 4
        cpu-average-value-target: 600m
        memory-average-value-target: 1000Mi
      custom-volumes:
      - volumeMount:
          name: tz-istanbul
          mountPath: /etc/localtime
        volume:
          name: tz-istanbul
          hostPath:
            path: /usr/share/zoneinfo/Europe/Istanbul
      pod-disruption-budget:
        max-unavailable: 50%
      labels:
        myKey: myValue
      pod-security:
        policy: restricted
        localhost-profile: profiles/audit.json
      affinity:
        podAntiAffinity:
          preferredDuringSchedulingIgnoredDuringExecution:
          - weight: 100
            podAffinityTerm:
              labelSelector:
                matchExpressions:
                - key: deploymentTarget
                  operator: In
                  values:
                  - ebanking-proxy{{postfix}}
              topologyKey: kubernetes.io/hostname
      topology-spread-constraints:
      - maxSkew: 1
        topologyKey: zone
        whenUnsatisfiable: DoNotSchedule
        labelSelector:
          matchLabels:
            deploymentTarget: ebanking-proxy{{postfix}}
      canary:
        replicas: 1
        resources:
          limits:
            cpu: 200m
            memory: 200Mi
          requests:
            cpu: 10m
            memory: 50Mi
- ebanking-auth
Default resources visible in the Deployment preview screen:
In case you want all your services to have the same version and replicas, you can define these attributes as global inventory attributes:
services:
- ebanking-proxy
- ebanking-auth

kubernetes:
  version: "3.14.0.1-32"
  replicas: 2
Vars (Variables)
The vars section defines variables that are valid for the entire inventory. This means that they are defined for every service in the services section. It is common practice to define variables at this level.
The names of the variables are defined in the project. In the inventory the values are assigned to these variables.
In case some services need different values for the same variable, they can be configured at the corresponding service level. Keep in mind that variables defined on service level override variables defined on inventory level. Try to keep the confusion at a minimum by defining the variables at the appropriate level, rather than using precedence.
Variable names consist only of letters, numbers, underscores and dashes.
Variables do not only support simple key/value pairs, but also more complicated structures, such as lists, dictionaries and even nested structures.
vars:
  proxy_bind_address: https://www.siven.ch/

  proxy_alias:
    - https://www.nevis.ch/
    - https://www.nevis-security.ch/
    - https://www.nevis-security.de/

  # property with multiple value
  session:
    ttl_max_sec: 43200
    inactive_interval_sec: 1800

  # variable example for key-value property
  log-level:
    - EsAuthStart: INFO
    - org.apache.catalina.startup.HostConfig: Error
Secrets and files
Once defined, secrets and files can be referenced multiple times. You may manage your secrets in the Secret & Files screen. Secrets created using the buttons below the editor can only be referenced in the inventory they were created in. If you want to create ones that can be used in multiple inventories, create a global secret (or global file) on the Secret & Files screen.
Secrets
Secrets are used for protecting sensitive information (such as tokens) in inventories. Use the Insert Secret button to create a new secret, or to insert an existing one. The secret will be placed at the caret.
Kubernetes Secrets
Secrets defined directly in Kubernetes, using the kubectl create secret command, can also be referenced
in inventories. To do so, use the format k8s-secret://<Kubernetes secret key>:<keymap key>/,
where <Kubernetes secret key> is the name given to the Kubernetes secret, and
<keymap key> is the key of the individual secret stored in the Kubernetes secret. Do not forget
to include the trailing / character at the end of the reference.
Only assign Kubernetes secrets to variables that are used exclusively for setting secret fields (secret properties)
of patterns. Do not use Kubernetes secrets in places that are read during validation, or the deployment process
(such as deployment-repository.url, or variables used for pattern drop-downs), as they are only going
to be substituted later, at the end of the deployment process.
Certificates
Certificates can be used when PEM-based keystores or truststores are present in your project. They work similarly to Secrets. Click the Attach certificate button to add a certificate at the caret. The uploaded certificate has to have .pem extension.
Files and Secret Files
If your project requires confidential files in some pattern fields, you may create an inventory variable for them, and assign a secret file to them using the Attach Secret File button. Uploaded files are encrypted and stored in the database. They will not be published to Git or exported to Zip. When using Kubernetes, secret files have to be smaller than 1MB, and they may not be used anywhere else than variables used exclusively for setting secret pattern fields, otherwise they will not be encrypted. If the file does not require encryption, you may use the Attach File button instead.
Kubernetes secret files
Secrets defined directly in Kubernetes, using the kubectl create secret command, can be referenced in inventories.
To do so, use the format k8s-secret-file://<Kubernetes secret key>:<keymap key>/,
where <Kubernetes secret key> is the name given to the Kubernetes secret, and
<keymap key> is the key of the individual secret file stored in the Kubernetes secret. Do not
forget to include the trailing / character at the end of the reference.
Only assign Kubernetes secret files to variables that are used exclusively for setting secret fields (secret properties)
of patterns. Do not use Kubernetes secret files in places that are read during validation, or the deployment process,
as they are only going to be substituted later, at the end of the deployment process.
Consts (Constants)
Constants allows you to create one constant and use it in multiple variables. What you only need to do is to link your constant to variables by inserting a reference in the following formats:
- For local constants:
${const://constantVariableName} - For global constants:
${g-const://constantVariableName}
This will also give you a possibility to manage your variables efficiently. If you need to update the value of your variable later on, you will no longer need to update it in multiple places where it is used, but simply you update the constant and this will apply to all variables which are referencing to the given constant.
Constants cannot be referenced in another constants.
Local constants
Local constants can be created and used only in the given inventory. To create and use local constants, define consts section in the inventory file and list the constants in that section. To use a constant in your variable, insert its reference as a variable value.
consts:
  c1: nevis.net
  c2: nevis
  c3: 8080
  c4: true
  c5: secret://cd445cb0e611e26f8f6480c2

vars:
  var1: ${const://c1}                         # resolved: nevis.net
  var2: http://${const://c1}:${const://c3}    # resolved: http://nevis.net:8080
  var3: https://${const://notfound}           # resolved: https://${const://notfound}
  var4: ${const://c3}                         # resolved: 8080 (note: 8080 as a number, not as a string)
  var5: ${const://c4}                         # resolved: true (note: true as a boolean, not as a string)
  var6:
    varKey: ${const://c2}                       # resolved: nevis
  var7:
    - ${const://c1}                           # resolved: [ nevis.net, portal.nevis.com ]
    - portal.nevis.com
  var8: ${const://c5}                         # resolved: secret://cd445cb0e611e26f8f6480c2
Global constants
Unlike local constants, the global constants can be created in Global Constants screen and used in multiple inventories. To use a global constant in your variable, insert its reference as a variable value. You can insert the reference in three ways:
- By using Insert global constant button
- By copy-pasting it (copy it from Global Constants screen)
- By manually typing it in the format of
${g-const://constantVariableName}
Deployment repository
In the deployment-repository section, the configuration of the version control repository used during the deployment is defined.
During deployment, the generated Nevis configuration files will be pushed to this repository. Subsequently, the configuration will be fetched from within the Kubernetes cluster, to initialize the pods.
The version control repository url and the branch must be defined.
deployment-repository:
branch: acceptancetest
Kubernetes cluster
In the kubernetes-cluster section, the configuration required to connect to the Kubernetes cluster is defined.
You need to define the url of a running Kubernetes cluster, the namespace within the cluster and the token required to authenticate to the cluster.
For security reasons, it is highly recommended adding the token as a secret.
If nevisAdmin 4 runs on Kubernetes, or the manifestTarget is set to Git, then the token and url are not required.
kubernetes-cluster:
  url: https://siven.kubernetes.cluster:443
  namespace: siven-nva4
  token: secret://0af63020f0dd51194ae100df
Disable patterns
Instance patterns can not be disabled in Kubernetes deployments.
If you want to exclude some patterns from the deployment, you can disable them. For example, this allows you to apply a pattern in one stage while skipping it in another. The following predefined variables can be used:
__disabled_patterns: There are two ways to disable a pattern: by its name or by referencing its ID. It is possible to combine both options on the same list. Pattern name supports wildcard character asterisk*which matches zero or any number of characters. It can be used multiple times in pattern name.__disabled_pattern_types: Disables all the patterns of a certain type. Pattern types are defined by their fully-qualified class name.
vars:
  __disabled_patterns:
    - "SSO Realm"
    - "*Step*"
    - "PEM*"
    - "*Dev"
    - "Generic*Settings"
    - "pattern://d3f51b1fcbd3eaf433588645"

  __disabled_pattern_types:
    - "ch.nevis.admin.v4.plugin.nevisauth.patterns2.LdapLogin"