Policy handling
One of the tasks of the security expert is the handling of policies. A policy determines how the system must react to a user request, depending on the request's risk scores.
Each policy consists of an Action plug-in, a risk score and several ranges and associated actions. The ranges represent the possible values of the chosen risk score. Each range corresponds with a certain risk level and is connected with a certain action. In most cases the intention of the policy is to execute a countermeasure to a malicious user request. In that case, the NevisProxyActionPlugin has to be selected as Action plug-in, and it's actions PASSTHROUGH, AUTHENTICATE and BLOCK must be assigned to certain ranges of the selected risk scores. You can define as many policies as you like. If more than one policy is matching, the most significant action of the NevisProxyActionPlugin is selected.
The policy handling task includes the following use cases:
- Create a new policy
- View the details of a policy
- Activate or deactivate a policy
- Modify an existing policy
Use case: Create a new policy
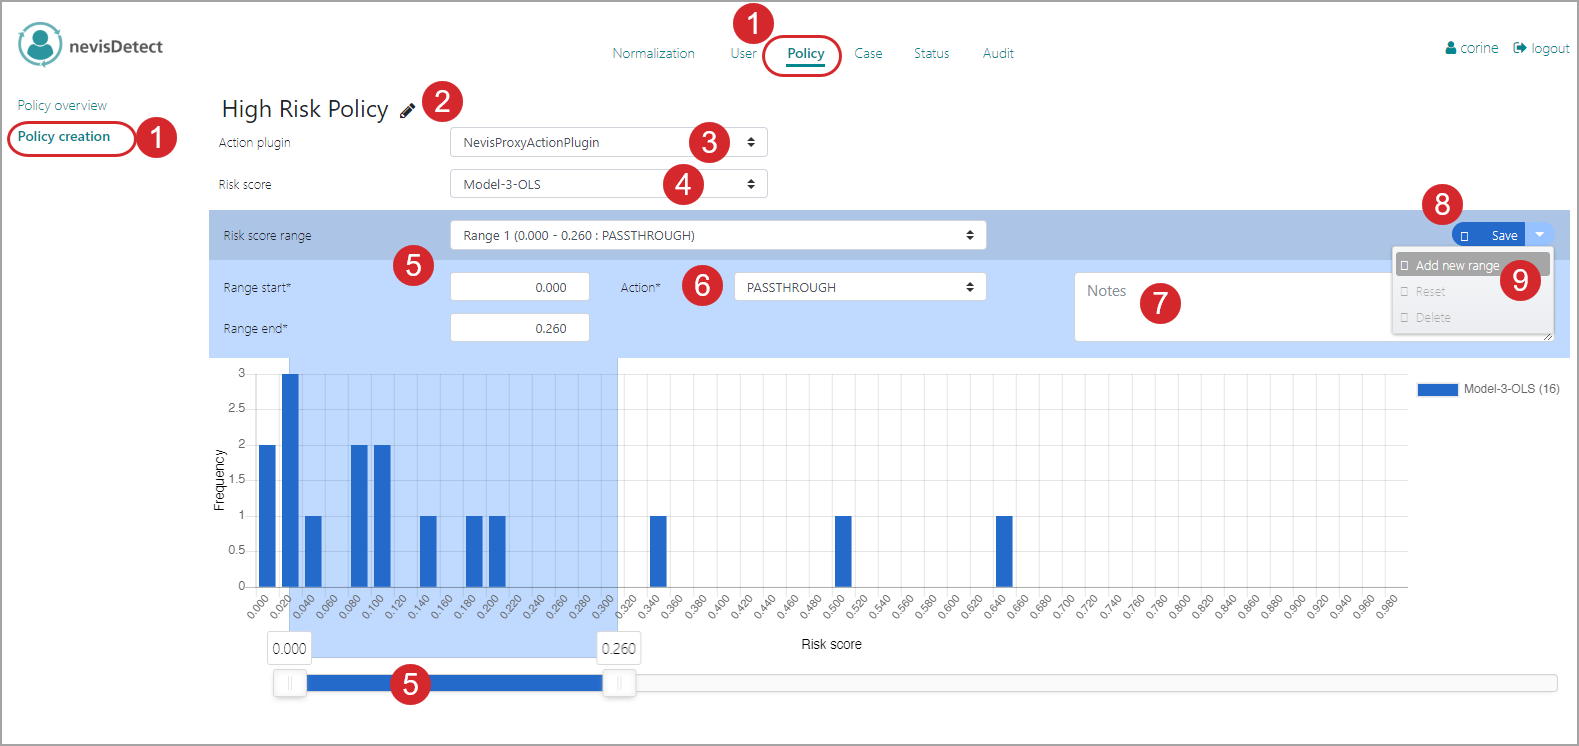
You create a new policy in the Policy creation view of the Policy section. Proceed as follows, see the figure below:
- To open the Policy creation view in the nevisDetect web application,
- Select Policy from the top menu.
- Then select Policy creation in the navigation on the left.
- To set the name of the new policy,
- Click the Pencil icon on the right of the name field.
- Enter the name in the now editable field.
- Click the X icon to save the name.
- Select the Action plug-in in the drop-down menu.
- Select the Risk score in the drop-down menu.
- The Risk score range field shows the risk score range to define. If you create a new policy, this field automatically shows "Range 1". To define the start and end risk score values of the range,
- Either enter the start value in the Range start field and the end value in the Range end field, or
- Use the slider on the bottom of the field to set the range.
- Specify the action to connect to this risk score range in the Action field.
- You can enter a description in the Notes field.
- Click the Save button to save this range.
- To add the next range, click the Drop-down menu icon on the Save button, and select Add new range from the drop-down menu.
- Repeat the previous steps, until you have defined all the ranges of your policy.
Sample policy
The next figure shows an example of a policy. Here, the first range covers normalized risk scores between 0.0 and 0.2. This is considered as a low risk and associated with the action "PASSTHROUGH" (shown in the chart as a blue block).That is, if for a specific user interaction nevisDetect calculates a normalized risk score in between 0.0 and 0.2, no protective action is required. The user can continue doing what he was doing ("PASSTHROUGH").
However, if nevisDetect estimates the risk of this user interaction somewhere in between 0.2 and 0.5, there is a medium risk that this user request is malicious. In this case, the user needs to re-authenticate (action "AUTHENTICATE" - shown in the chart as a green block). If the calculated risk for this user interaction lies in between 0.5 and 1.0, nevisDetect considers this as a high risk and blocks the user (action "BLOCK" - shown in red in the chart). The user cannot do anything anymore.
This example only pertains to users that are not considered as untrained by the system.

For a description of the Policy creation view, see the chapter Policy section.
Use case: View the details of a policy
The Policy overview view in the Policy section lists all available policies.
To view the details of a policy, proceed as follows (see the [figure below]:
To open the Policy overview view in the nevisDetect web application,
Select Policy from the top menu.
Then select Policy overview in the navigation on the left.
The available policies are listed in the view.
Click the Expand icon to display a policy's details.
The policy details appear in the Policy details field.
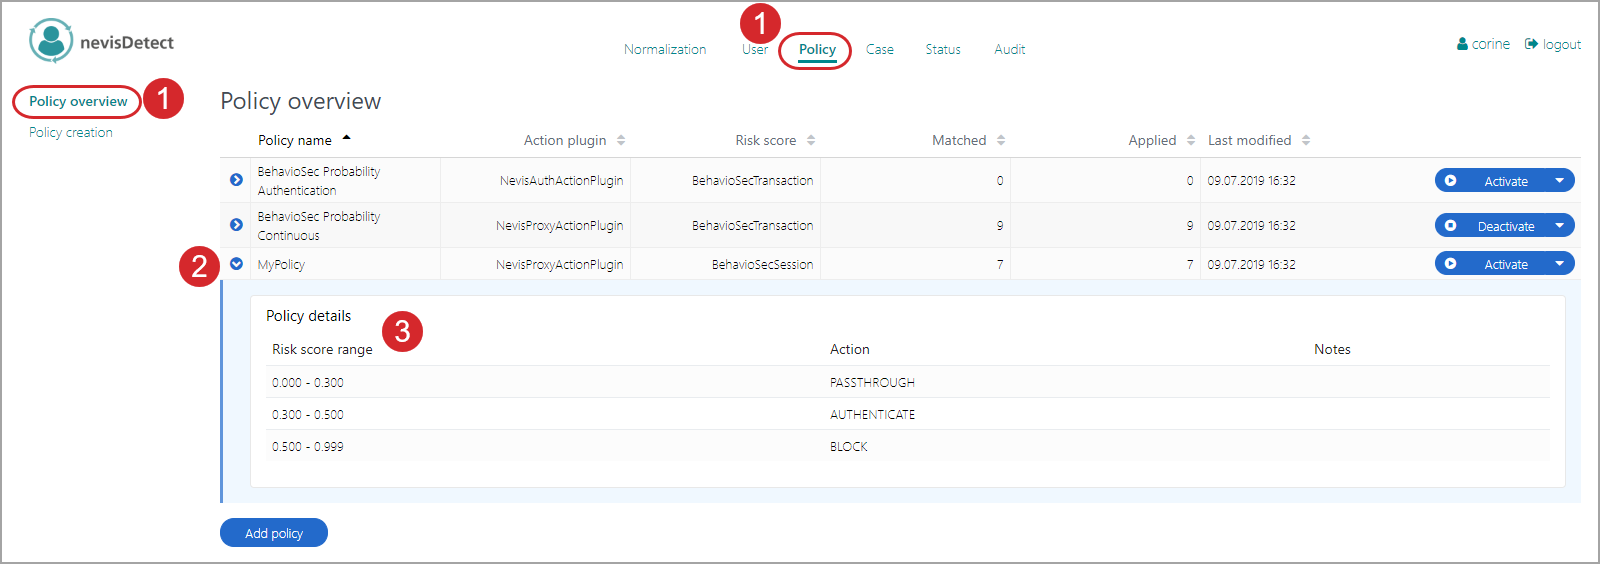
For a description of the Policy overview view, see the chapter Policy section.
Use case: Activate or deactivate a policy
The Policy overview view in the Policy section lists all available policies. In the same view, you can activate or deactivate a policy. There can only be one policy valid (active) at a time.
Proceed as follows, see the figure below - the numbers in the figure correspond with the numbered steps below:
- To open the Policy overview view in the nevisDetect web application,
- Select Policy from the top menu.
- Then select Policy overview in the navigation on the left.
- The Policy overview field lists all available policies. To activate or deactivate a certain policy, click the Activate/Deactivate button on the right side of the policy's entry.
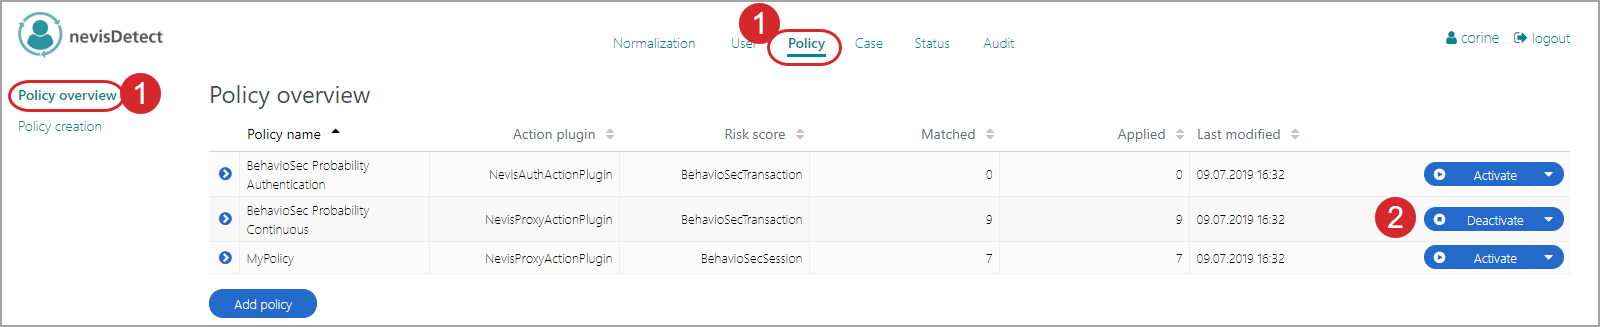
For a description of the Policy overview view, see the chapter Policy section.
Use case: Modify an existing policy
The entry point to modify an existing policy is again the Policy overview view. Proceed as follows:
To open the Policy overview view in the nevisDetect web application,
- Select Policy from the top menu.
- Then select Policy overview in the navigation on the left.
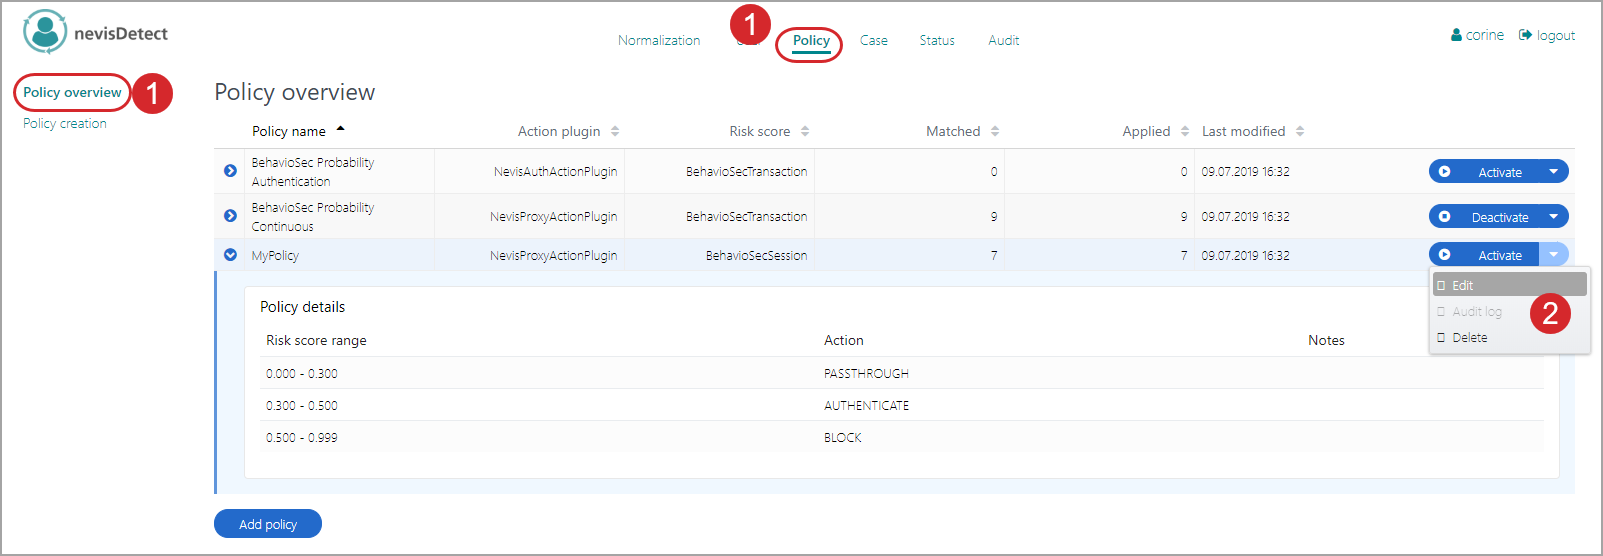
The Policy overview field lists all available policies. To modify a policy,
Click the Drop-down menu icon on the Activate/Deactivate button on the right side of the policy's entry.
If you want to edit the policy's settings, select Edit from the drop-down menu. This opens a view with the settings of the relevant policy. You can modify the policy settings in this view (which is the same screen as the [Policy creation].
For a description of the Policy creation view, see the chapter Policy section.
If you want to delete a policy completely, select Delete from the drop-down menu.