Users
The Users page lists the end users of the selected environment. Use it to find a specific person, check whether their account is active, and block or unblock them.
Getting here
- Click User management in the left sidebar.
- Click Users.
What you see
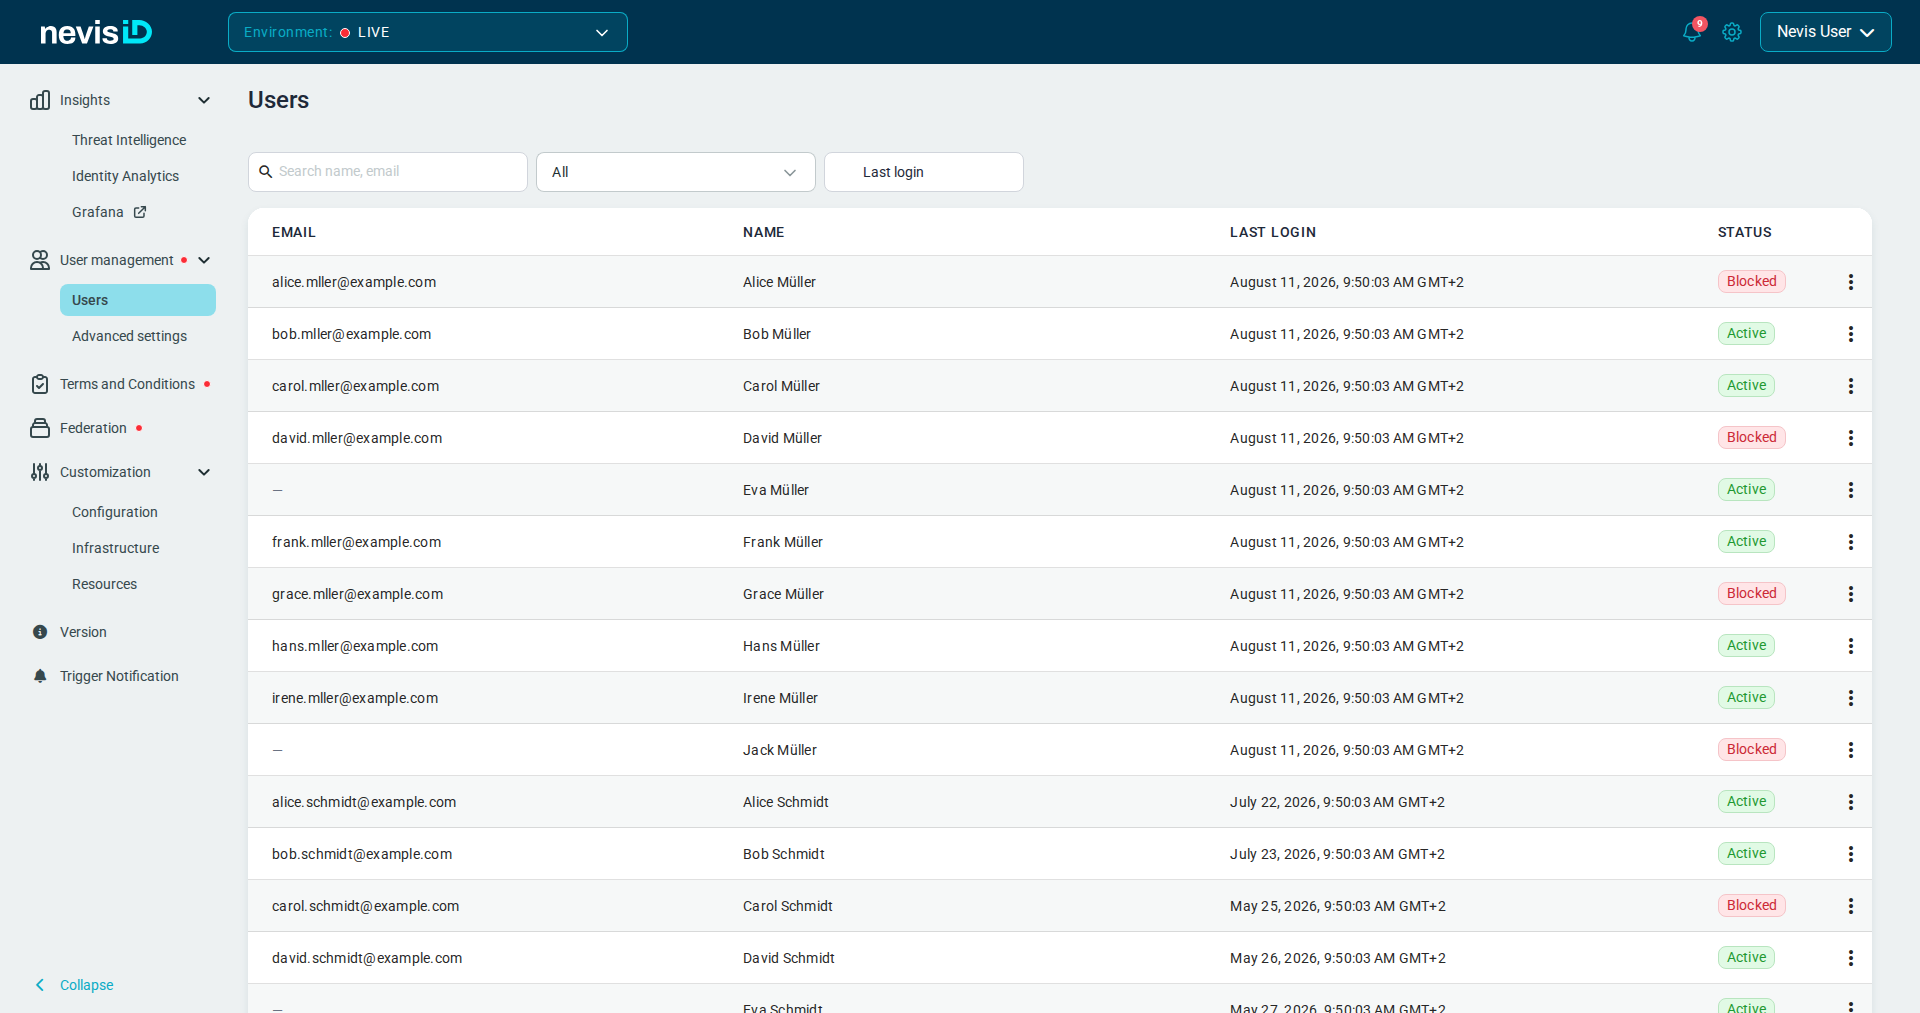
The list shows one row per user, ordered as returned by the identity store:
| Column | What it shows |
|---|---|
| The user's email address. Email is optional in nevisIDM — a user without one shows a dash (—) | |
| Name | First and last name. If the user has neither, their login ID is shown instead |
| Last Login | Date and time of the last successful login. Empty if the user has never logged in |
| Status | Active (green) if the user can authenticate, Blocked (red) if they cannot |
| ⋮ | Actions for that user — see Row actions |
The list is paginated. It shows 20 users per page by default; use the page-size selector at the bottom right to switch to 25, 35, or 50.
Finding a user
The three controls above the list combine: results match the search term and the status and the date range.
Search by name or email
Type in the Search name, email box. The list narrows as you type and matches any part of:
- first name
- last name
- login ID
- email address
Click the ✕ in the search box to clear the term and show all users again.
Filter by status
Use the status dropdown next to the search box:
| Option | Shows |
|---|---|
| All | Every user, blocked or not (default) |
| Active | Only users who can authenticate |
| Blocked | Only users whose account is blocked |
Filter by last login date
- Click the Last login button.
- In the Select last login date dialog, click the first day of the range in the calendar, then the last day. To filter on a single day, click that same day twice.
- Click Apply.
The button now shows the selected range, and the list contains only users whose last successful login falls inside it. The end day is included in full. If you select a start day and click Apply without picking an end day, the filter stays open-ended: the list shows every user who logged in on or after that day. Click the ✕ on the button to remove the date filter.
Filters are not remembered. Every time you open the Users page, the search box, status dropdown, and date range start empty.
Row actions
Click the ⋮ icon at the end of a row:
| Action | Result |
|---|---|
| Open user | Opens the user details page for that person |
| Block user | Blocks the account after confirmation — the user can no longer authenticate |
| Unblock user | Restores access to a blocked account after confirmation |
| Reset password | Not available yet |
The menu shows either Block user or Unblock user, depending on the account's current status.
Blocking or unblocking a user
- Click ⋮ on the user's row.
- Click Block user (or Unblock user).
- Check the name and email address in the confirmation dialog — this is your last chance to notice that you picked the wrong row.
- Click Block user (or Unblock user) to confirm, or Cancel to abandon the change.
The status chip in the list updates as soon as the change is stored. If it fails, an Error changing status message appears at the bottom of the screen and the account is left unchanged.
Blocking takes effect immediately and prevents all further authentication for that user. It does not end sessions that are already established, and it does not delete anything — unblocking restores the account exactly as it was.
Common workflows
Investigate a user who cannot log in
- Search for the user by email or name.
- Check the Status column. If it reads Blocked, that is the reason — unblock the account if it was blocked in error.
- If the status is Active, open the user and go to the Credentials tab to see whether the credential they are trying to use exists and is Active.
- Compare the credential's last login with the Last Login value on the account to see whether they ever succeeded with that method.
Block an account during a suspected compromise
- Search for the user by email.
- Click ⋮ → Block user and confirm.
- Open the user and note the User ID from the details page (use the copy button next to it) so you can hand an unambiguous reference to whoever continues the investigation.
Find accounts that have gone dormant
- Set the status filter to Active.
- Click Last login, select a range that ends well in the past, and click Apply.
- The remaining users are active accounts whose last successful login falls in that window.
Review users who registered recently
- Open a user from the list and read Created in the panel on the right of the General information tab.
The list itself cannot be filtered or sorted by creation date. To search on creation date, use the nevisIDM Administration interface under Advanced settings.