Batch user import - GUI walkthrough
-
Select the User import menu item in the Import/Export section of the navigation pane. This opens the File upload view, see the figure.
-
From File upload view, you can download the pre-generated, empty Excel template with columns for all supported user attributes as well as for user properties. The template also contains the supported credential attributes if the administrator has the authorization to create credentials.
- Click the Download template button to download the Excel template. If nevisIDM is run in multi-client mode, you are prompted to select the relevant client first.

-
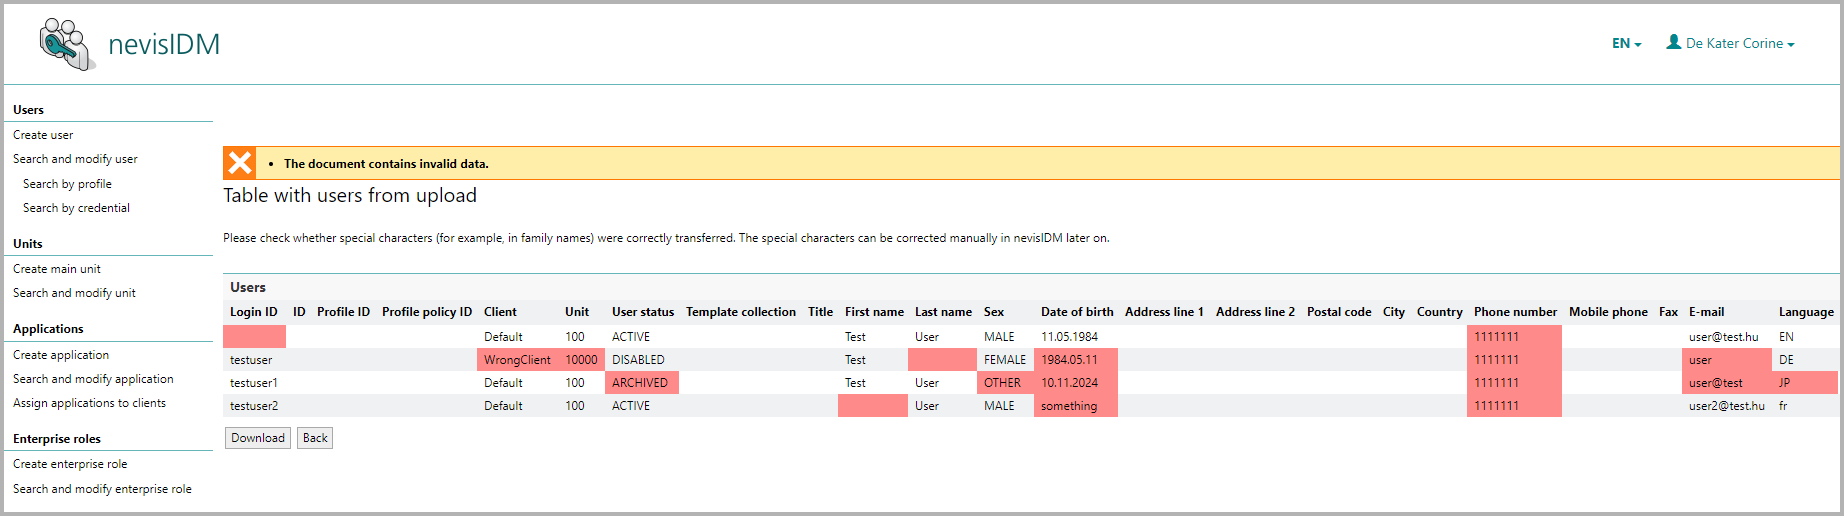
Fill the Excel template file with the user data you want to import. Click the Browse button in the File field to browse to the template file, and then click the Upload button to actually upload the template file. During the opload of the file, validation checks are carried out. If the uploaded template contains invalid entries, an error message will be shown. A new view lists the imported user entries and highlights the Excel cells with invalid data (see the figure below). Thus, the administrator can correct the invalid data and upload the file again.
- If the value of theuserBulkImport.ignoreInvalidEntries parameter in the client policy is "true", it is possible to import the correct user entries in the Excel file even if there are some invalid ones. The system just ignores the invalid entries. If the parameter is set to "false", the system will only import user entries if all data in the Excel file is valid.
- Click on the Record all valid users button or Record all users button, respectively, to create the corresponding user records out of the imported user entries.
- After the creation of the users, a confirmation view displays:
- An error message if not all users could be created successfully.
- A confirmation box in case all users were created successfully.
- A summary of the number of records
- That were processed in total.
- That were created successfully.
- That were not created (Failed records).
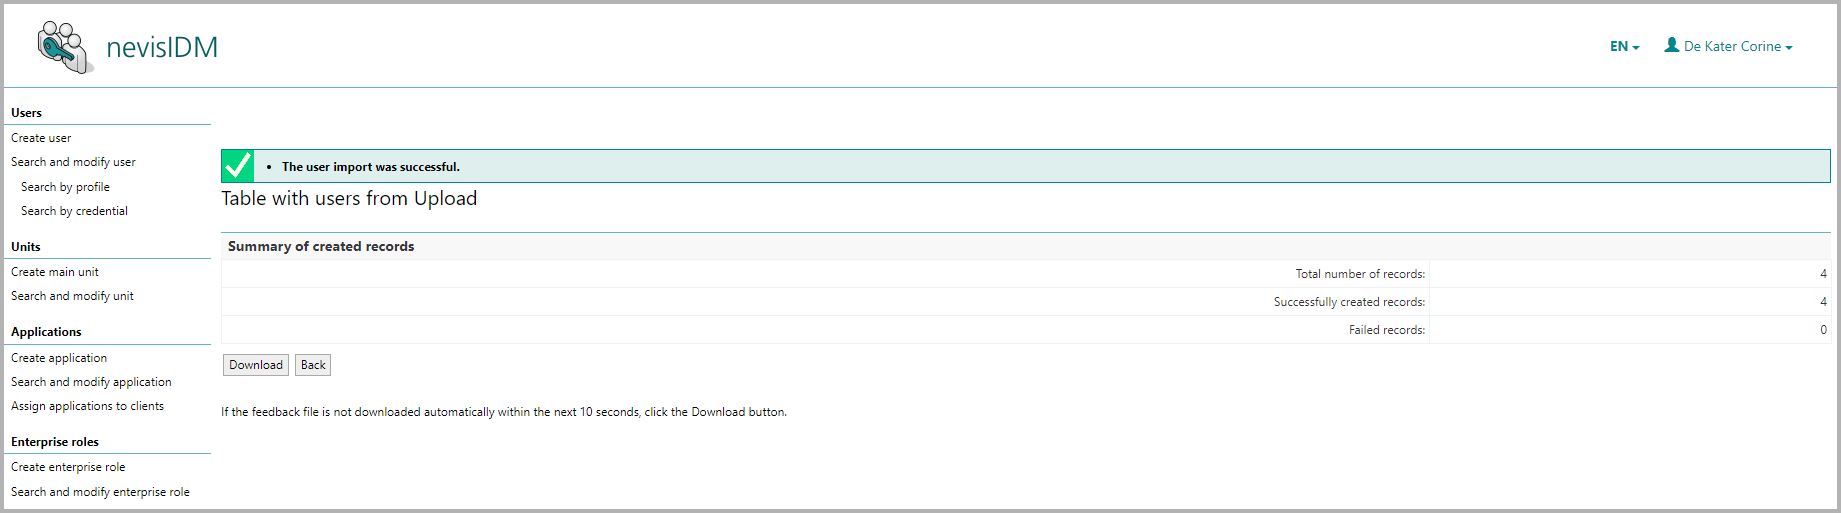
- Click Download to download the Excel template after the creation of the user records. The template lists all records again. Additionally, it shows the values of user attributes generated during the creation of the user records by nevisIDM (see the figure below), e.g., ID, Profile ID and whether a certain record was successfully created (Status code). If the users are created with credentials, the credential external ID fields will be filled with the generated values, if they were not set in the uploaded Excel file.

- If some users were created during the first import run and some were not because of invalid data, you can correct the invalid data in the same file. Upload the file again after correcting the invalid entries. nevisIDM will automatically skip the already created users.