Manage error pages
nevisProxy handles error conditions using a functionality called "ErrorFilter". It is necessary to configure and assign this filter to each mapping (see also the figure Resource list of the Mapping view in the chapter Basic protection).
The filter may either use HTML documents hosted by another web server (source type "Remote") or pages stored locally (source type "File") on nevisProxy, usually within the /errorpages directory. You can upload your error pages directly to the filter object, which installs them to the involved nevisProxy services when creating a configuration snapshot.

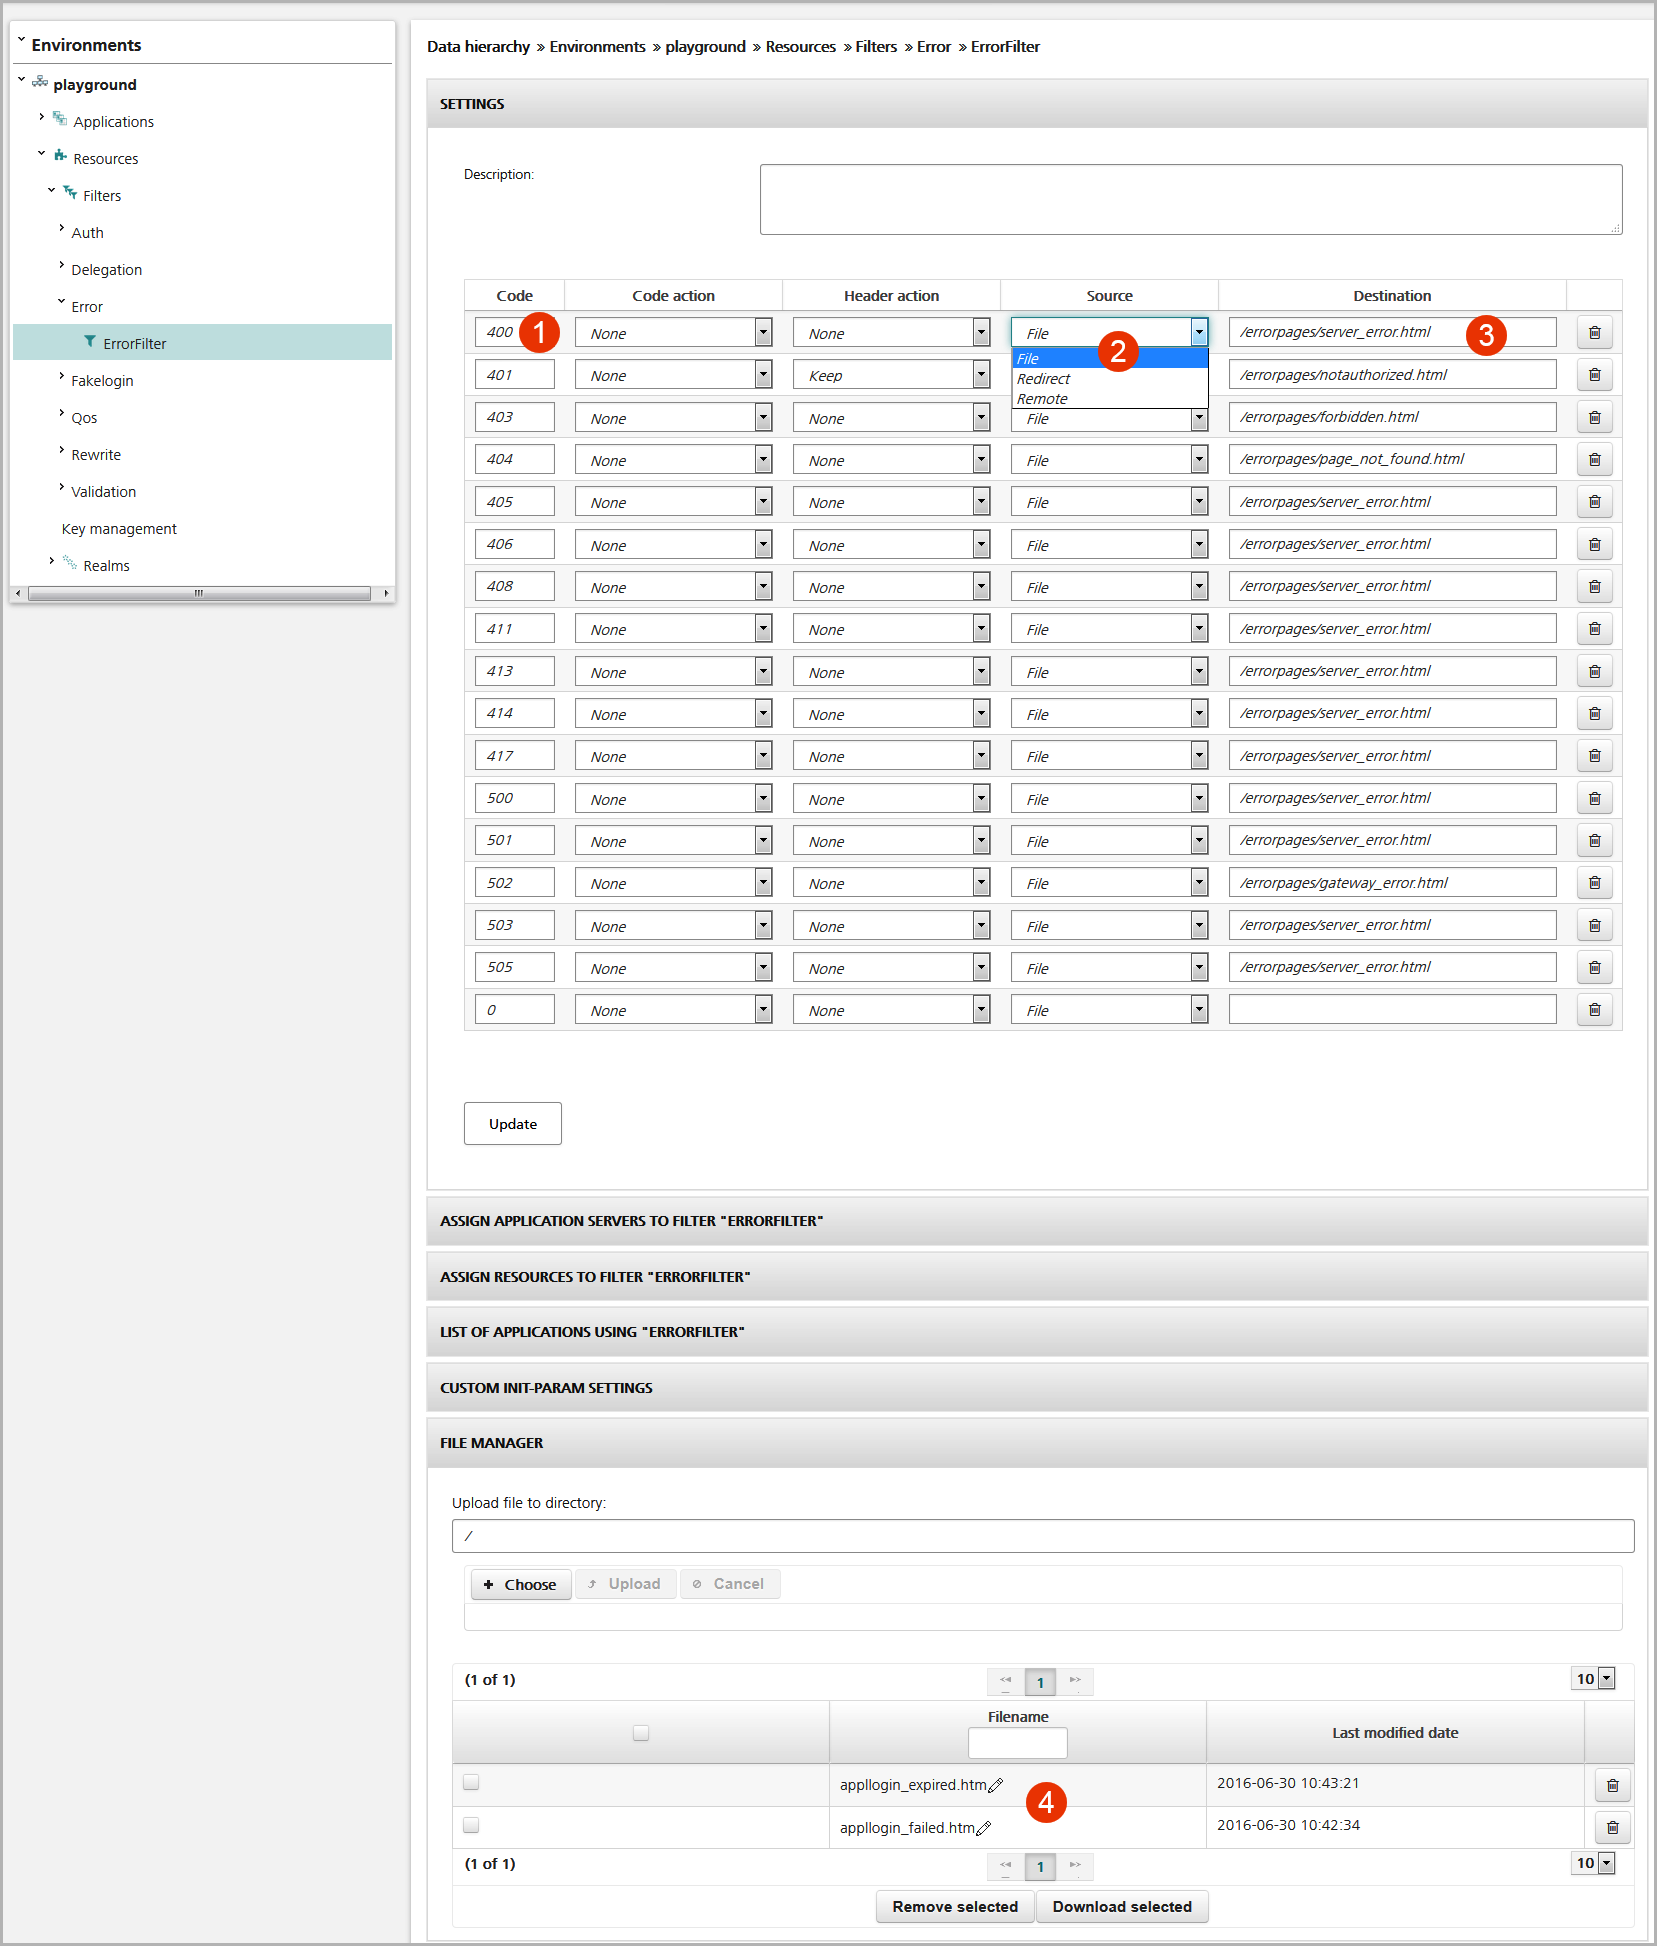
The figure above shows the ErrorFilter view with sample settings. The Settings panel lists the available error pages. The Code column at the left side of the view lists the relevant HTTP response codes, the Destination column on the right displays the corresponding error pages (that is, the path of the HTML page in question) – see no.1 and no.3 in the figure above. The Source column (no.2) shows whether the error page is located on a remote host ("remote"), or stored locally in the nevisProxy file system ("file"). Select "redirect" if you want the browser itself to fetch the error page. By means of the File Manager panel, you can upload the error pages into the error filter (no.4 in the figure).
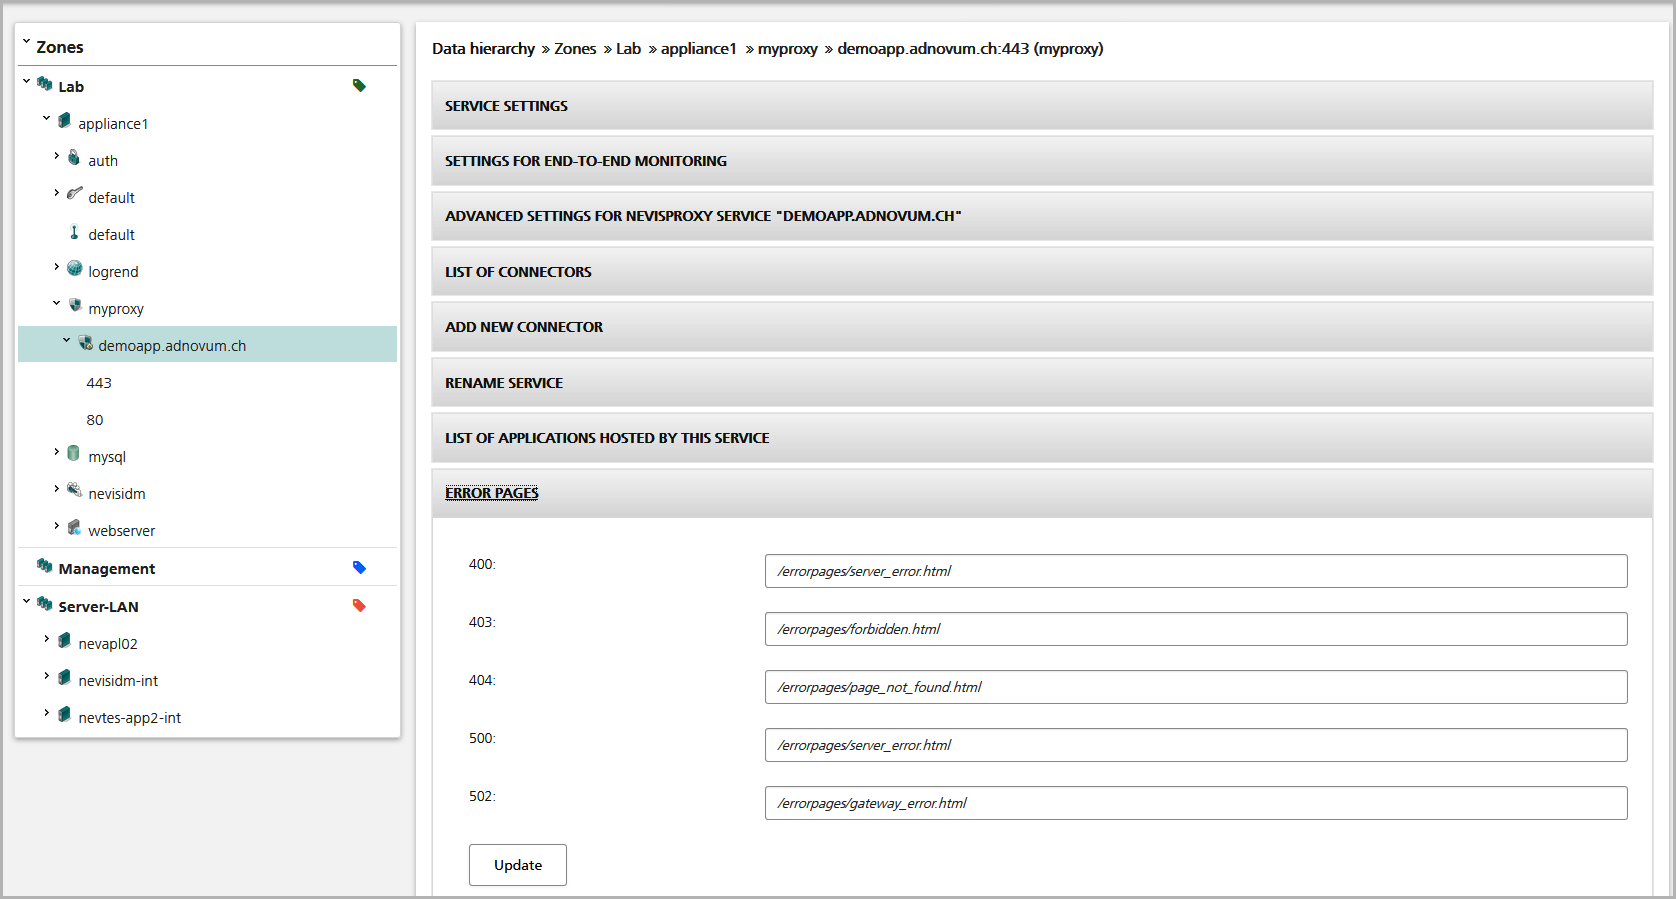
Each nevisProxy service also hosts globally configured error pages by default. You manage them within the Error Pages panel of the nevisProxy service view (see the next figure.
