Setting up an OAuth 2.0 Authorization Server
This chapter explains how to set up an OAuth 2.0 Authorization Server. There is no dedicated pattern for this case, but you can use standard nevisAuth patterns. Here, we use the following patterns:
- Generic Authentication StepThis pattern configures an AuthorizationServer AuthState. Check the [nevisAuth documentation] for further information.
- Standalone Authentication FlowThis pattern exposes the Generic Authentication Step pattern on a nevisProxy virtual host.
Preconditions
Have set up nevisMeta. For more information, see the chapter Setting up a nevisMeta Instance.
The nevisAuth host must be able to reach the nevisMeta API.
Have defined an OAuth 2.0 setup.
You need an Authentication Realm pattern to host the Authorization Server.
You also use this initial authentication flow later on, when you configure the Generic Authentication Step pattern.
Quick Start
This quick start shows how to set up an OAuth 2.0 Authorization Server.
This quick start is kept as simple as possible for illustration purposes.
Be aware of the following potential issues:
- The user will not be asked for confirmation if no ConsentState AuthState is configured.
- You may have to configure key management, because:
- As input for the AuthState(s): Parameters field in Generic Authentication Step pattern, you may want to use a variable and define the values in the inventory. See the pattern's Help tab for details. Perform the following steps:
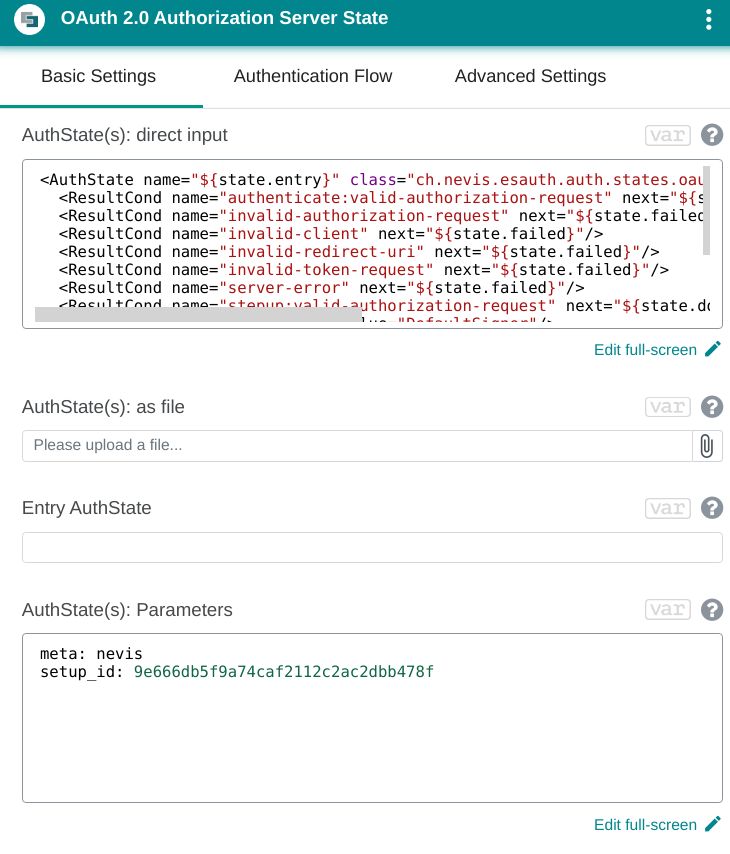
- Add a Generic Authentication Step pattern. Configure the pattern as follows:
- Configure the AuthorizationServer AuthState in the AuthState(s): direct input field. Use the configuration from the code block below.
- Use the AuthState(s): Parameters field to externalize an environment-specific configuration, such as:
- the host name of nevisMeta, or
- the ID of the OAuth 2.0 setup in nevisMeta.
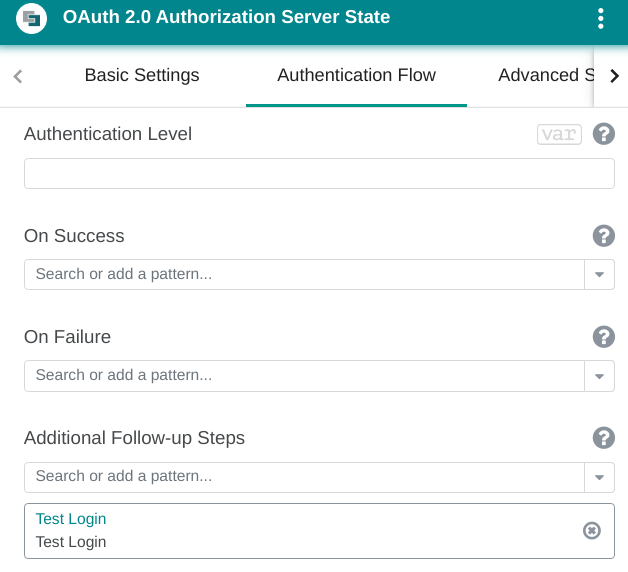
The Additional Follow-up Steps field defines the first step of the initial authentication flow. This step is executed if the user is not authenticated yet.
Use the same authentication flow as the one in the Initial Authentication Flow field of the relevant Authentication Realm pattern. You have configured this pattern as a precondition, see the section Preconditions above.
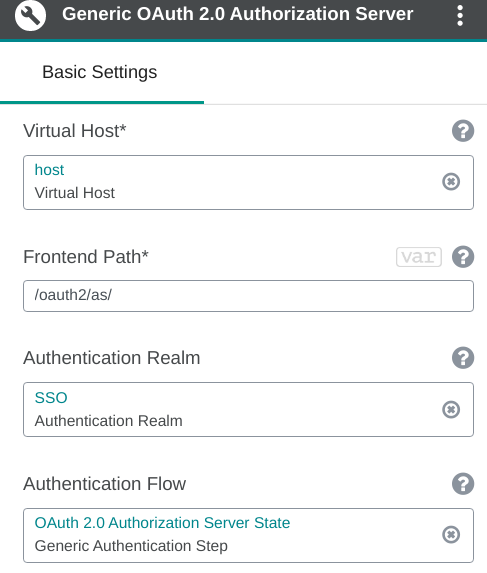
Add a Standalone Authentication Flow pattern. Configure the pattern as follows:
Assign a nevisProxy virtual host to the Virtual Host field.
Enter a frontend path in the Frontend Path field.
Assign the previously configured authentication realm to the Authentication Realm field (see also the section Preconditions].
Assign the Generic Authentication Step pattern that you created in step 1 to the Authentication Flow field.
AuthState(s): direct input
<AuthState name="${state.entry}" class="ch.nevis.esauth.auth.states.oauth2.AuthorizationServer" final="false">
 <ResultCond name="authenticate:valid-authorization-request" next="${state.exit.1}"/> <!-- execute the first assigned Additional Follow-Up Step -->
 <ResultCond name="invalid-authorization-request" next="${state.failed}"/>
 <ResultCond name="invalid-client" next="${state.failed}"/>
 <ResultCond name="invalid-redirect-uri" next="${state.failed}"/>
 <ResultCond name="invalid-token-request" next="${state.failed}"/>
 <ResultCond name="server-error" next="${state.failed}"/>
 <ResultCond name="stepup:valid-authorization-request" next="${state.done}"/>
 <property name="keyobjectref" value="DefaultSigner"/>
 <property name="keystoreref" value="DefaultKeyStore"/>
 <property name="dataSource" value="nevismeta"/>
 <property name="nevismeta.location" value="https://${param.meta}:8996/nevismeta/rest/modules/oauthv2/setups/Setup_${param.setup_id}/entities"/>
</AuthState>
The following figure shows the required patterns in an example configuration: