Overview of the User Interface
You configure and deploy your Nevis environment in the nevisAdmin 4 web application. During this process, you perform the following steps:
- Defining the overall architecture, configuring specific features, integrating external systems.
- Set up the server infrastructure, or the inventory in nevisAdmin 4 terminology. An inventory consists of servers and server groups, or in nevisAdmin 4 technology hosts and host groups.
- Deploy the configuration, by linking your configuration with an inventory and transferring configuration files and instructions to the target servers. The servers execute the instructions to create the relevant Nevis instances.
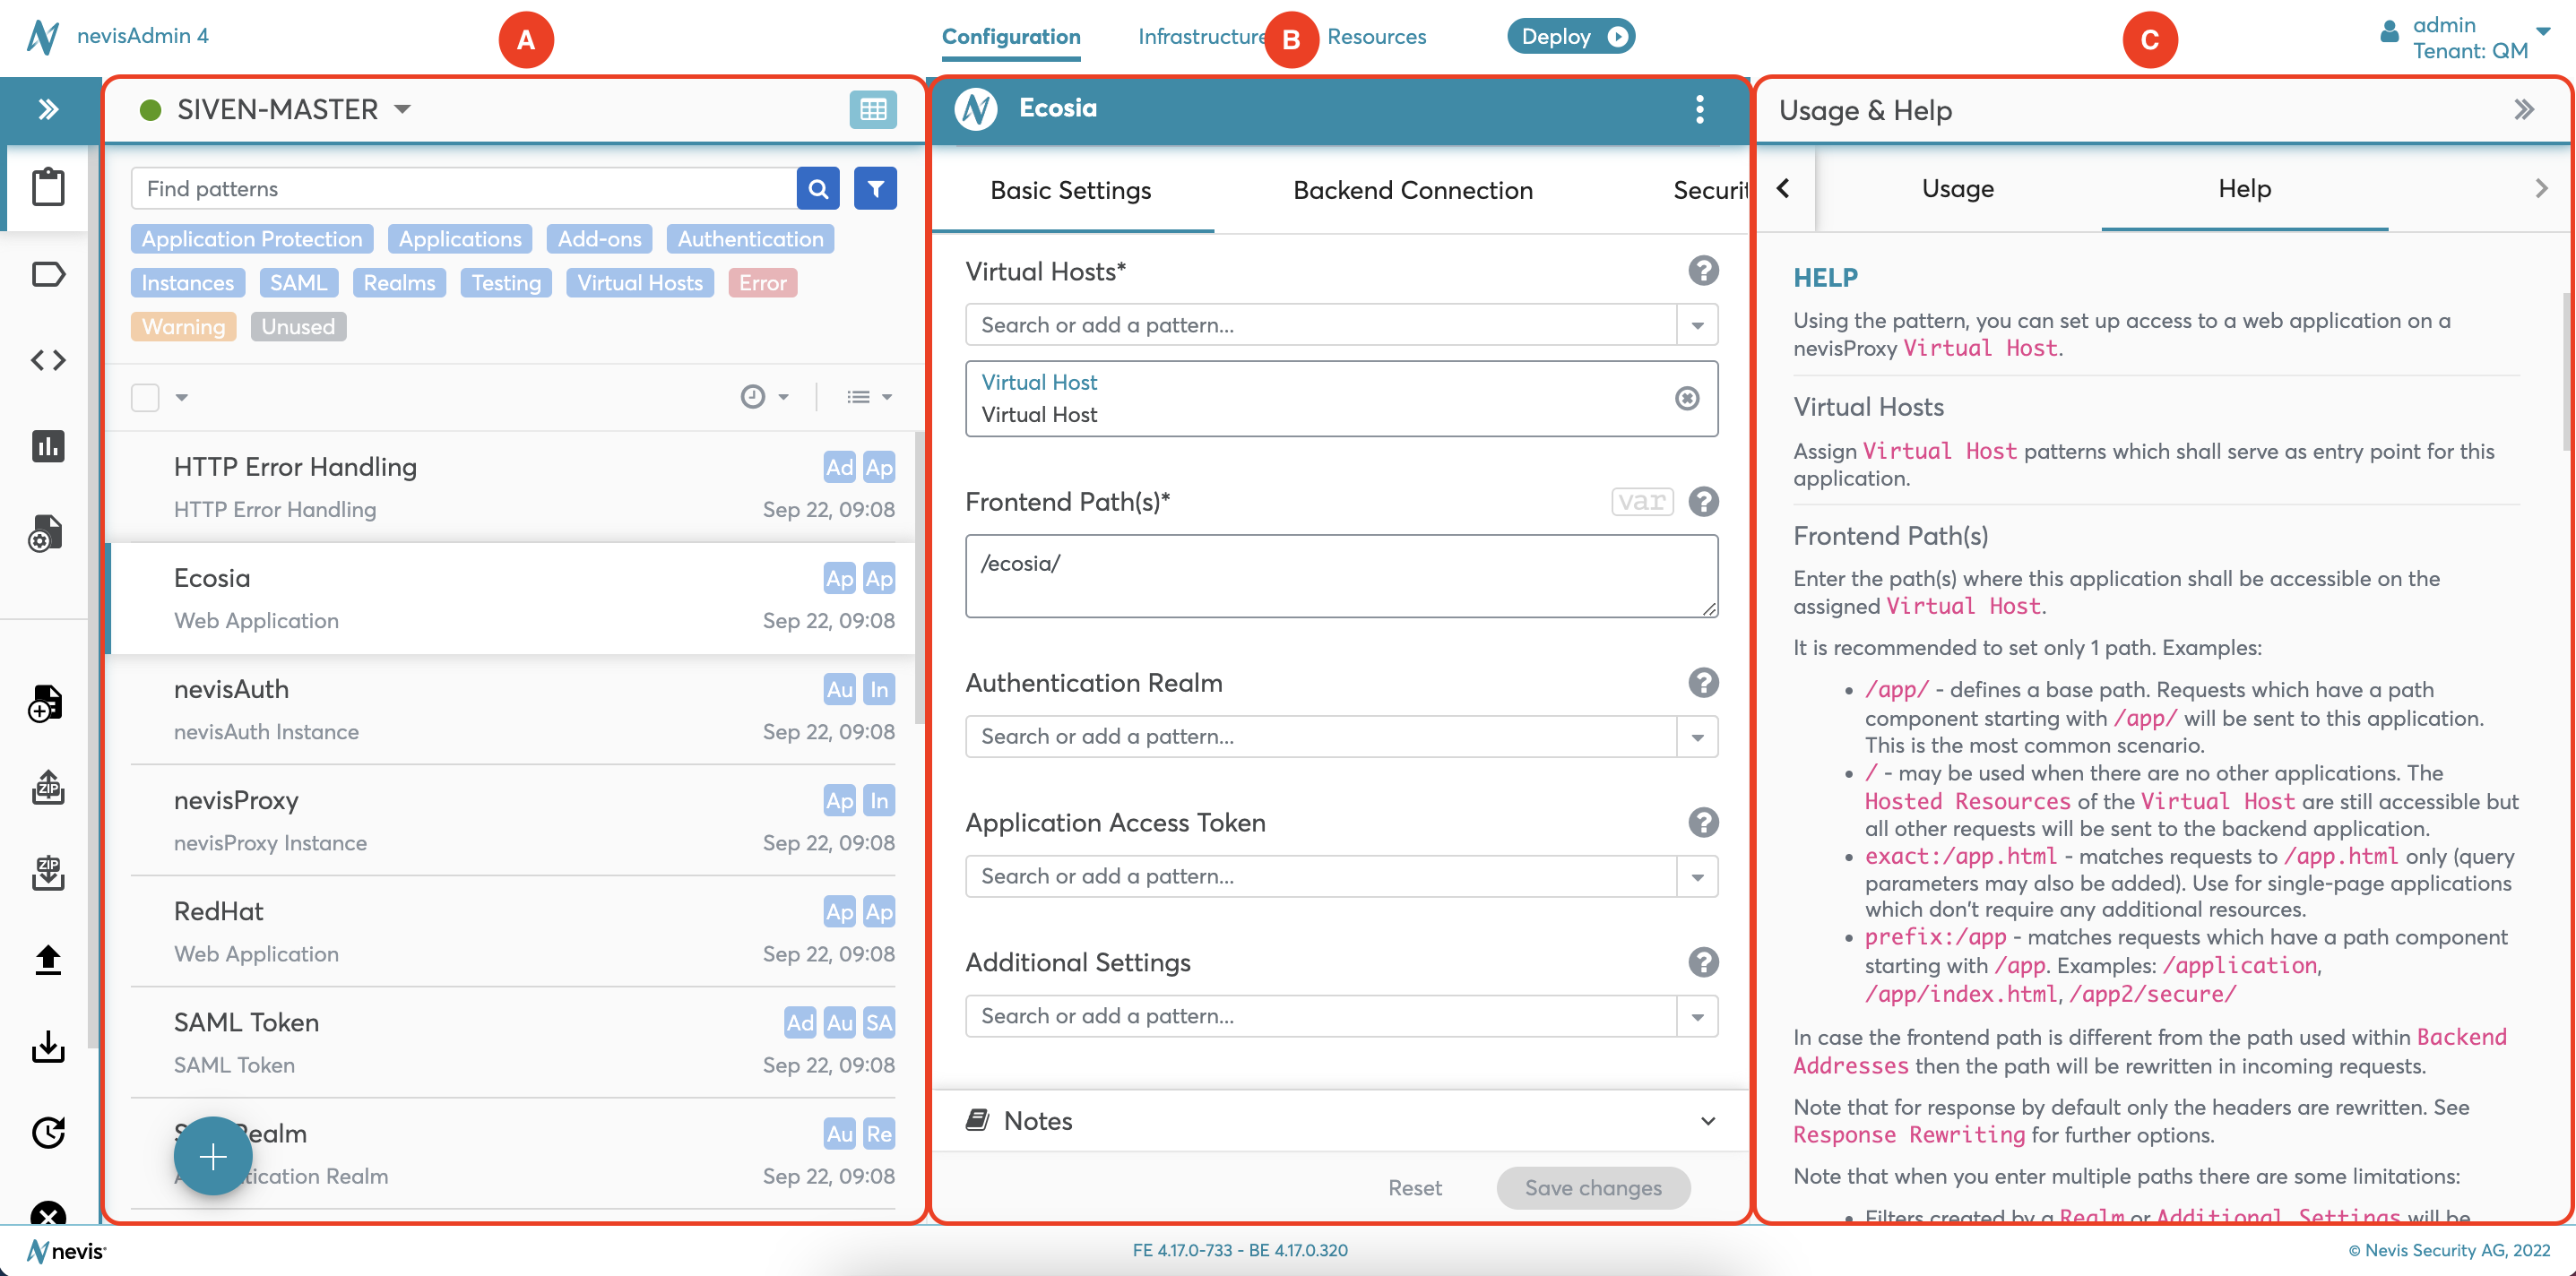
The top navigation of the nevisAdmin 4 user interface mirrors these steps (see also "B" in the next figure, Configuration tab - Patterns screen). It consists of the Configuration, Infrastructure and Resources tabs, as well as a Deploy button to trigger the Deployment wizard. The next sections shortly describe the corresponding screens.
Configuration Tab
You define the configuration of your Nevis environment in the Configuration tab of the nevisAdmin 4 user interface, by specifying patterns and projects. Patterns are configuration elements that represent Nevis functionalities based on use cases. Projects are a combination of patterns that are used to represent a Nevis configuration.
Each project consists of several patterns, which specify the behavior of the Nevis components within the Nevis environment represented by the project. The Patterns screen of the Configuration tab focuses on the patterns:
- The left part of the screen ("A" in the figure) lists all patterns that belong to a certain project.
- The middle part ("B" in the figure) shows the properties of the selected pattern "Ecosia".
- nevisAdmin 4 offers support when you specify the property values in the input fields. The Help section on the right ("C" in the figure) guides you through the process. It explains the meaning of each input field.
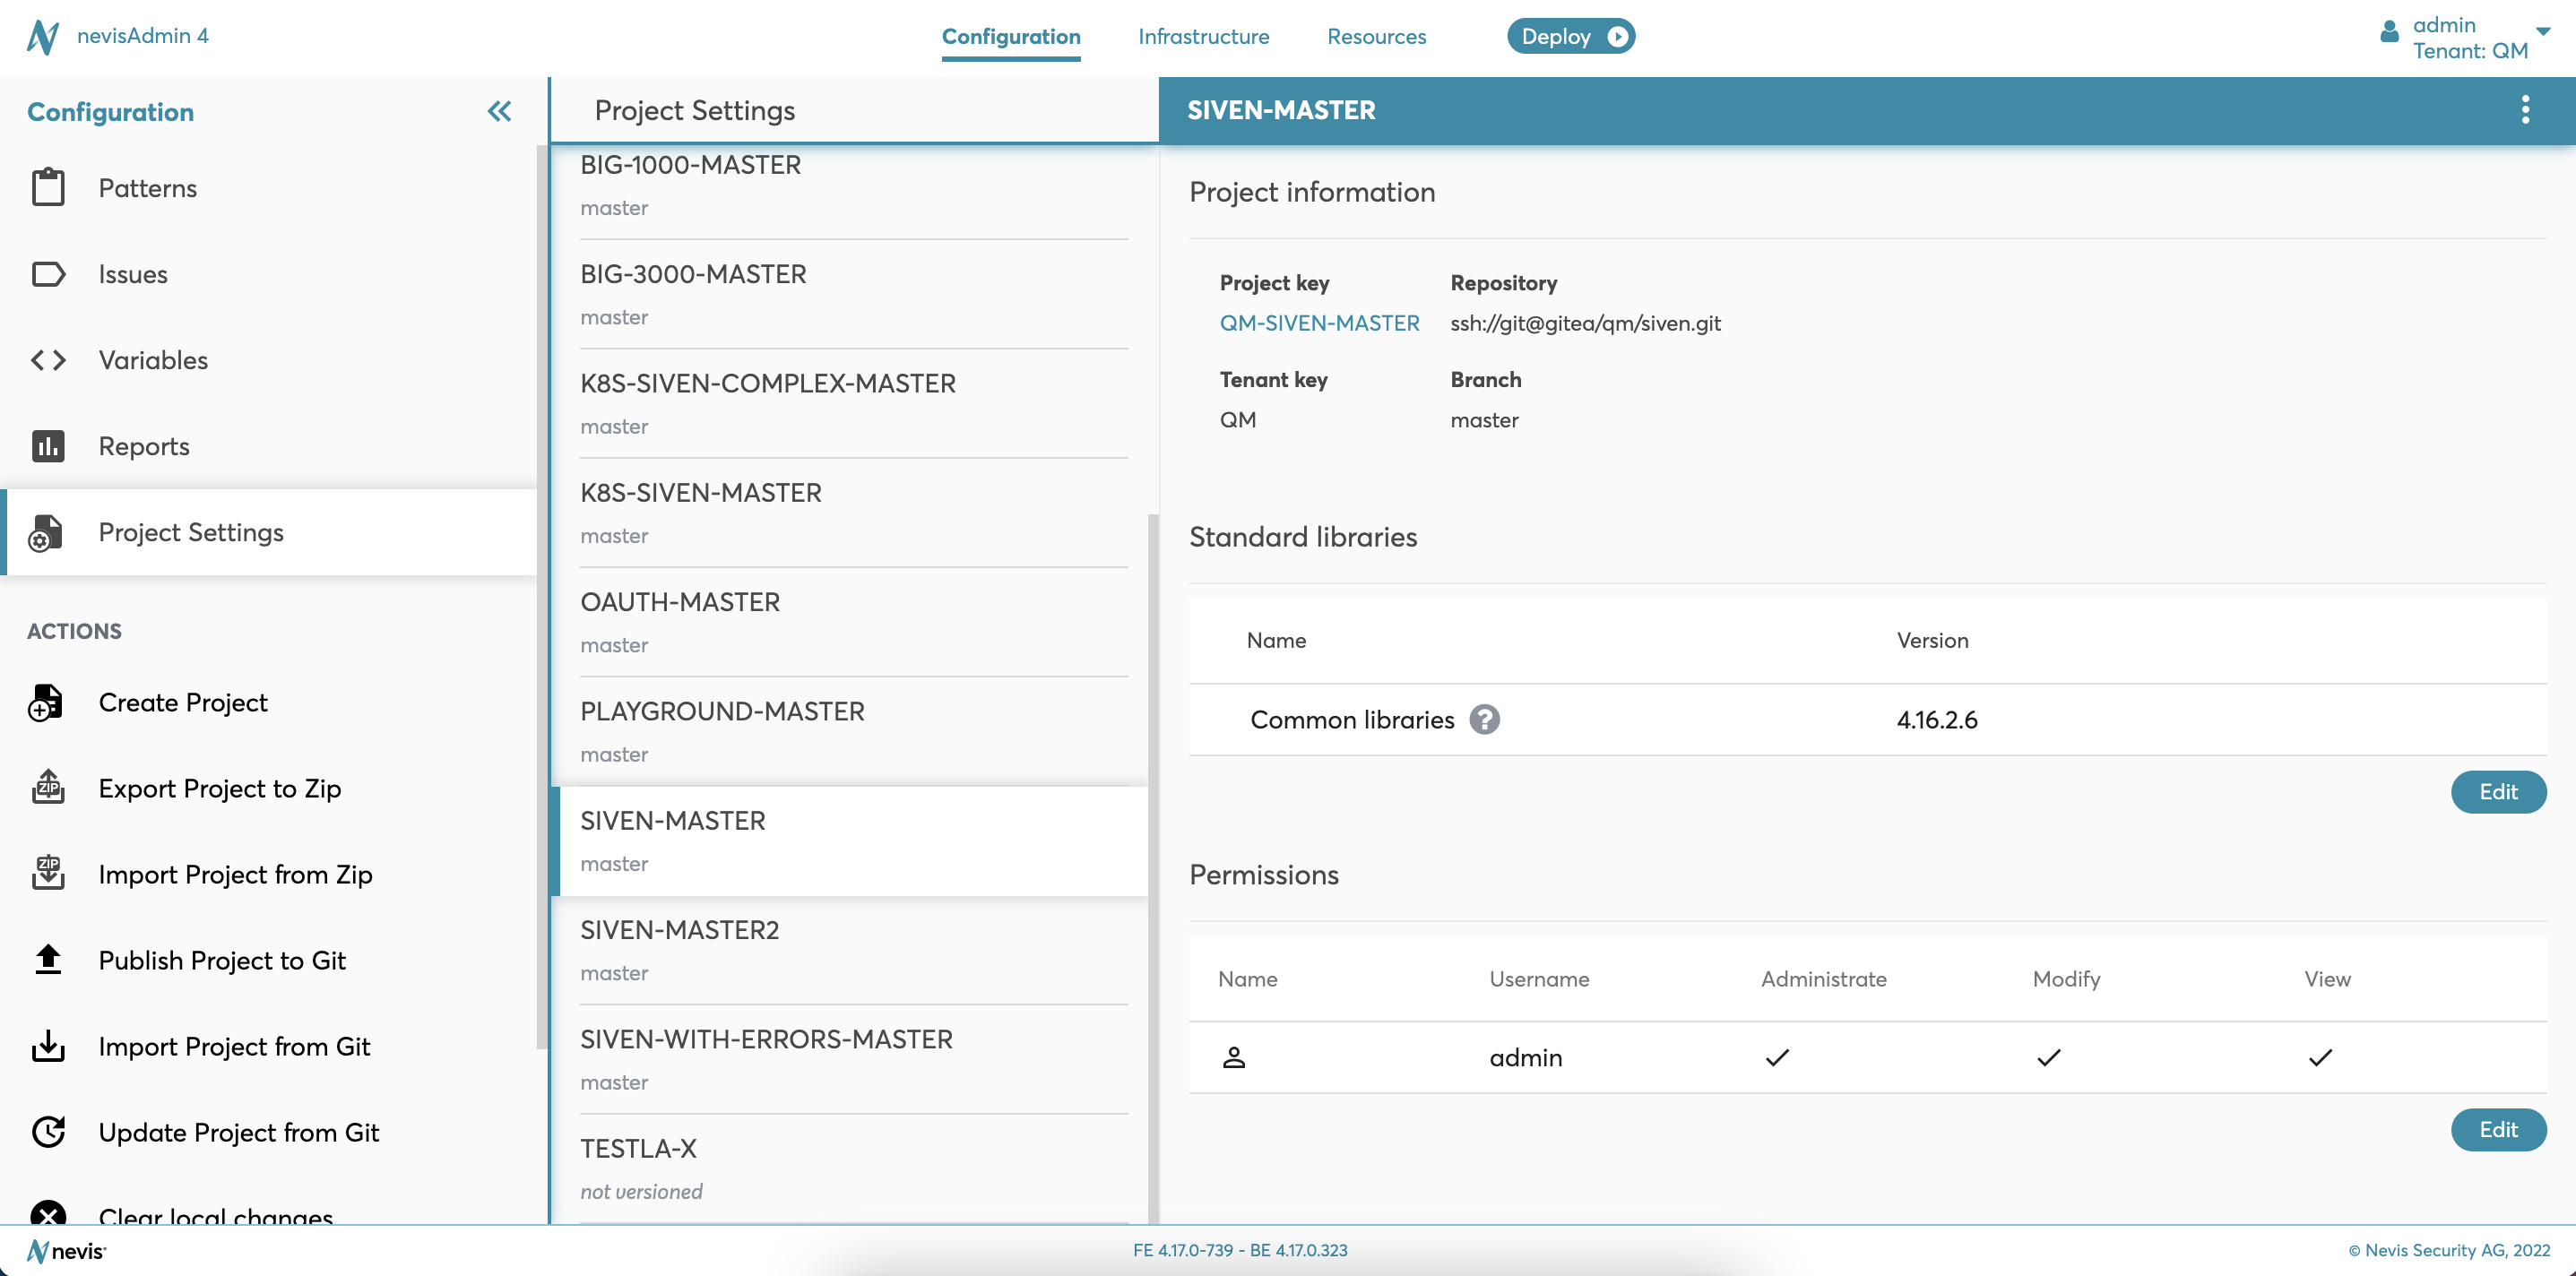
The Project Settings is also available from Configuration tab. The screen contains the details of the project including the project- and tenant key, standard libraries and permissions. You can switch to the settings of other projects, too, by clicking on one of the projects listed in the left part of the screen.
For detailed instructions on how to work with projects and patterns, see Configuration Projects.
Infrastructure Tab
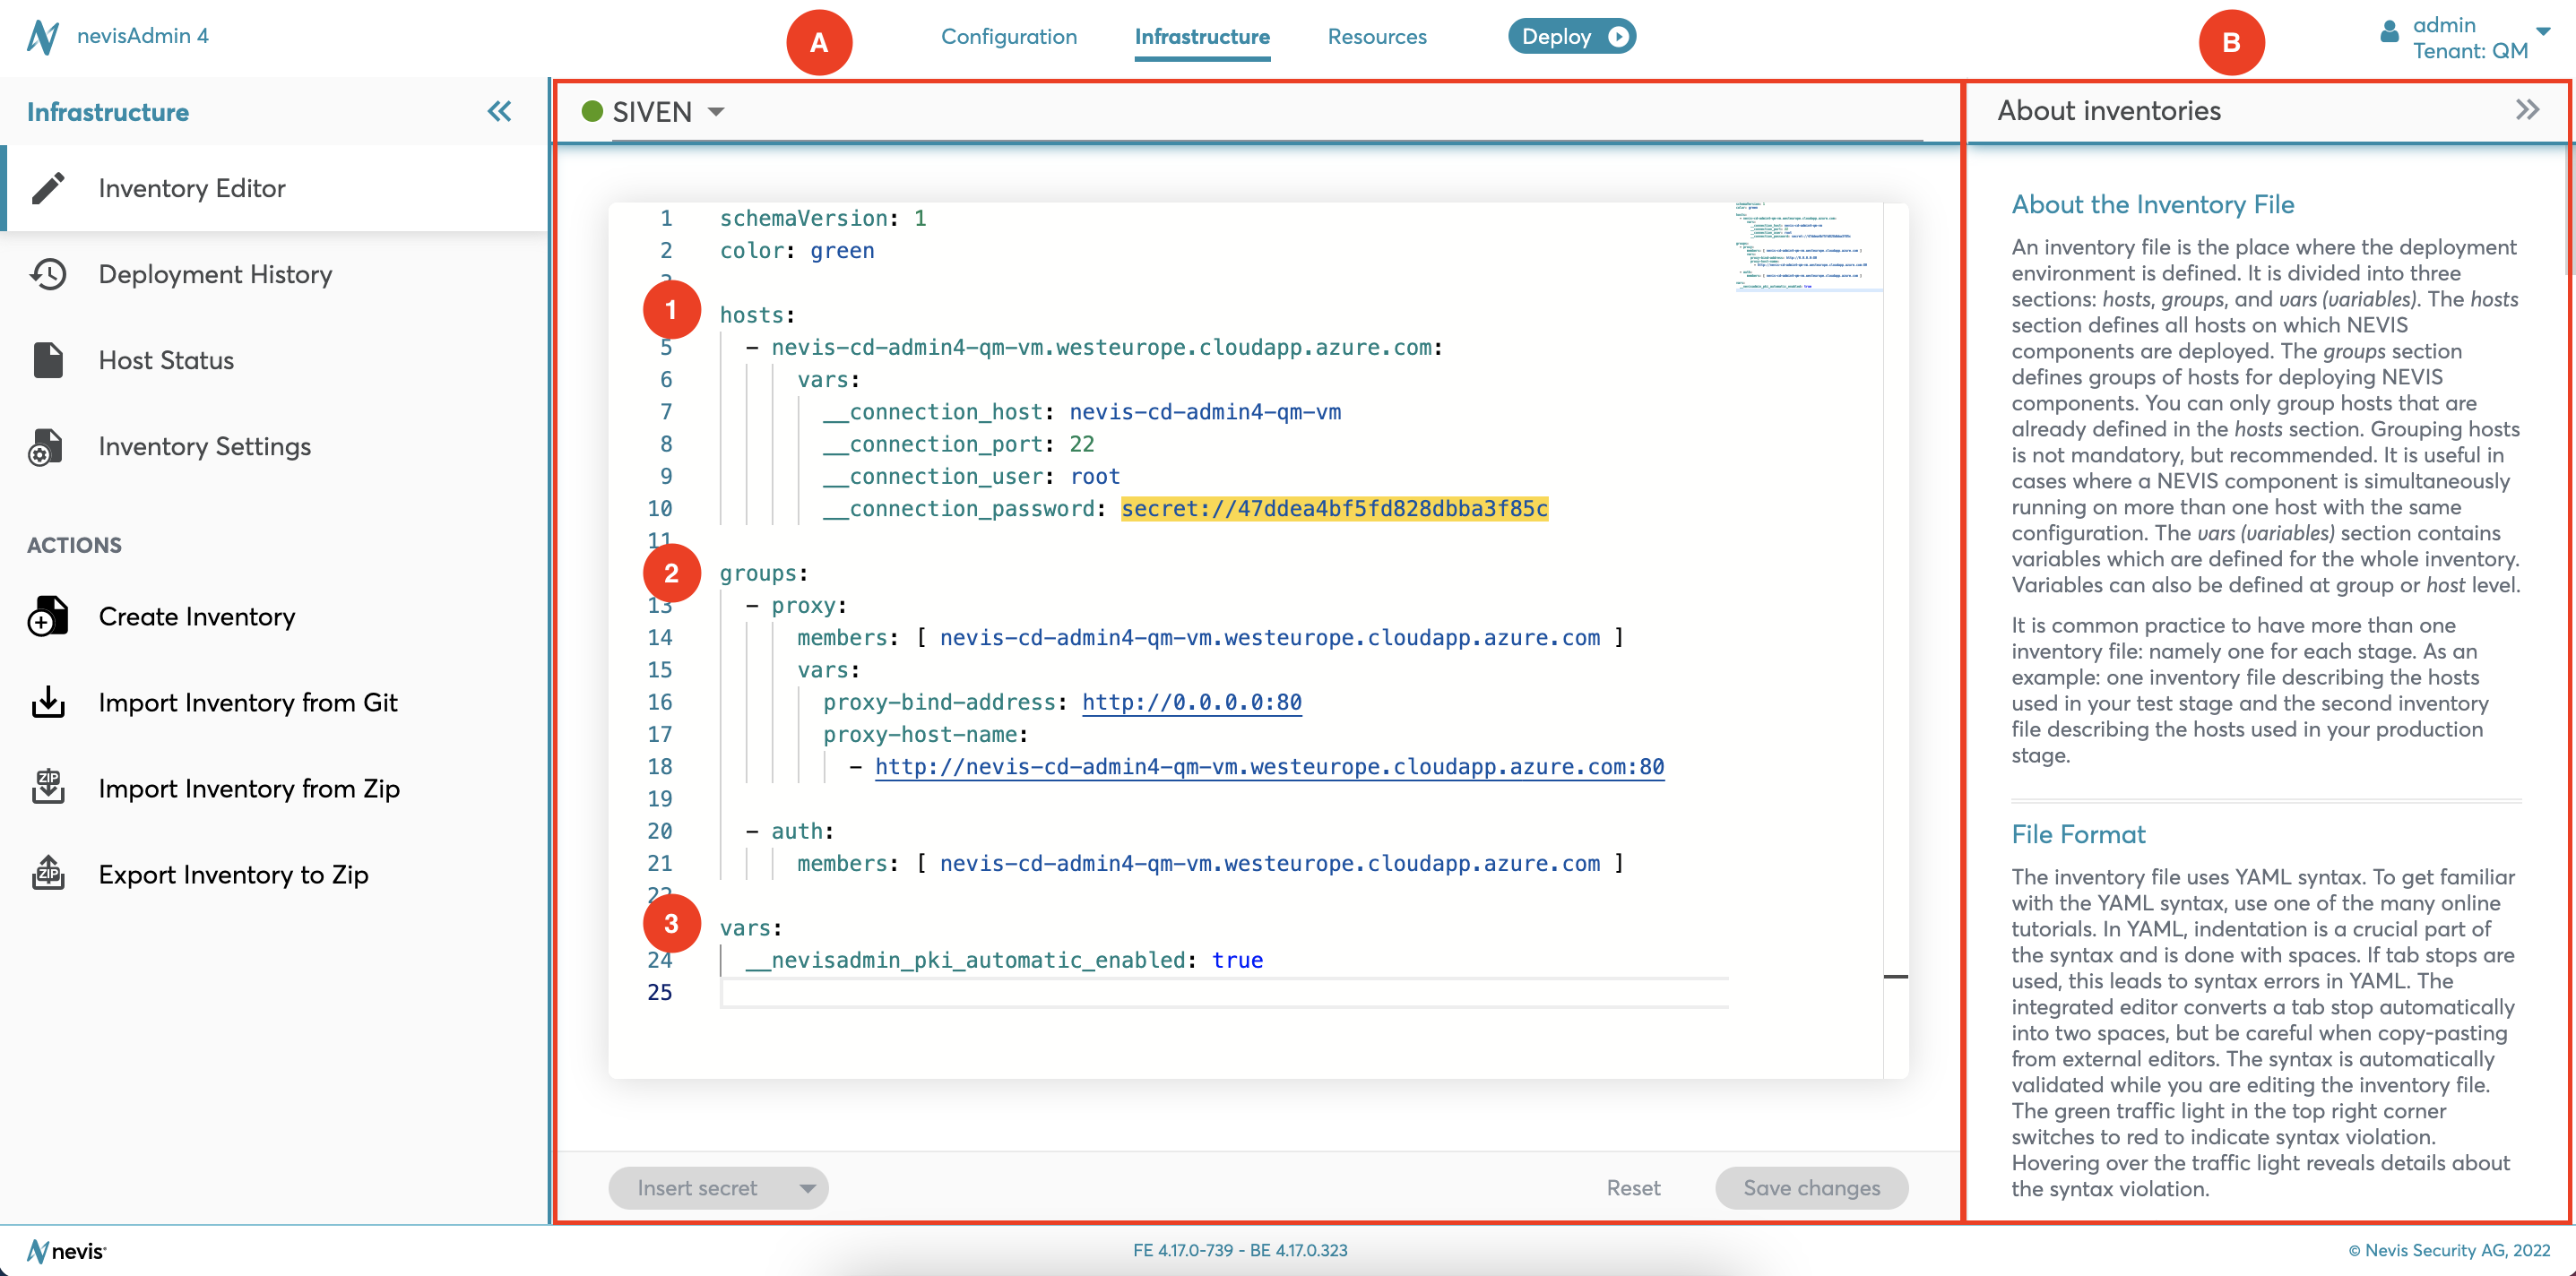
Within nevisAdmin 4, the inventory file is the place where the deployment environment is defined (see "A" in the next figure). Inventory files are accessed via the Infrastructure tab.
An inventory file is divided into three sections: hosts, groups, and vars (variables).
- The hosts section defines all hosts on which Nevis products are deployed (no. 1 in the figure).
- The groups section defines groups of hosts for deploying Nevis products (no. 2 in the figure).
- The vars (variables) section contains variables that are defined for the whole inventory (no. 3).
The right part of the screen (see "B" in the figure) contains detailed information about the format of the inventory file. The same information can be found here: "Classic Infrastructure Inventory YAML file format".
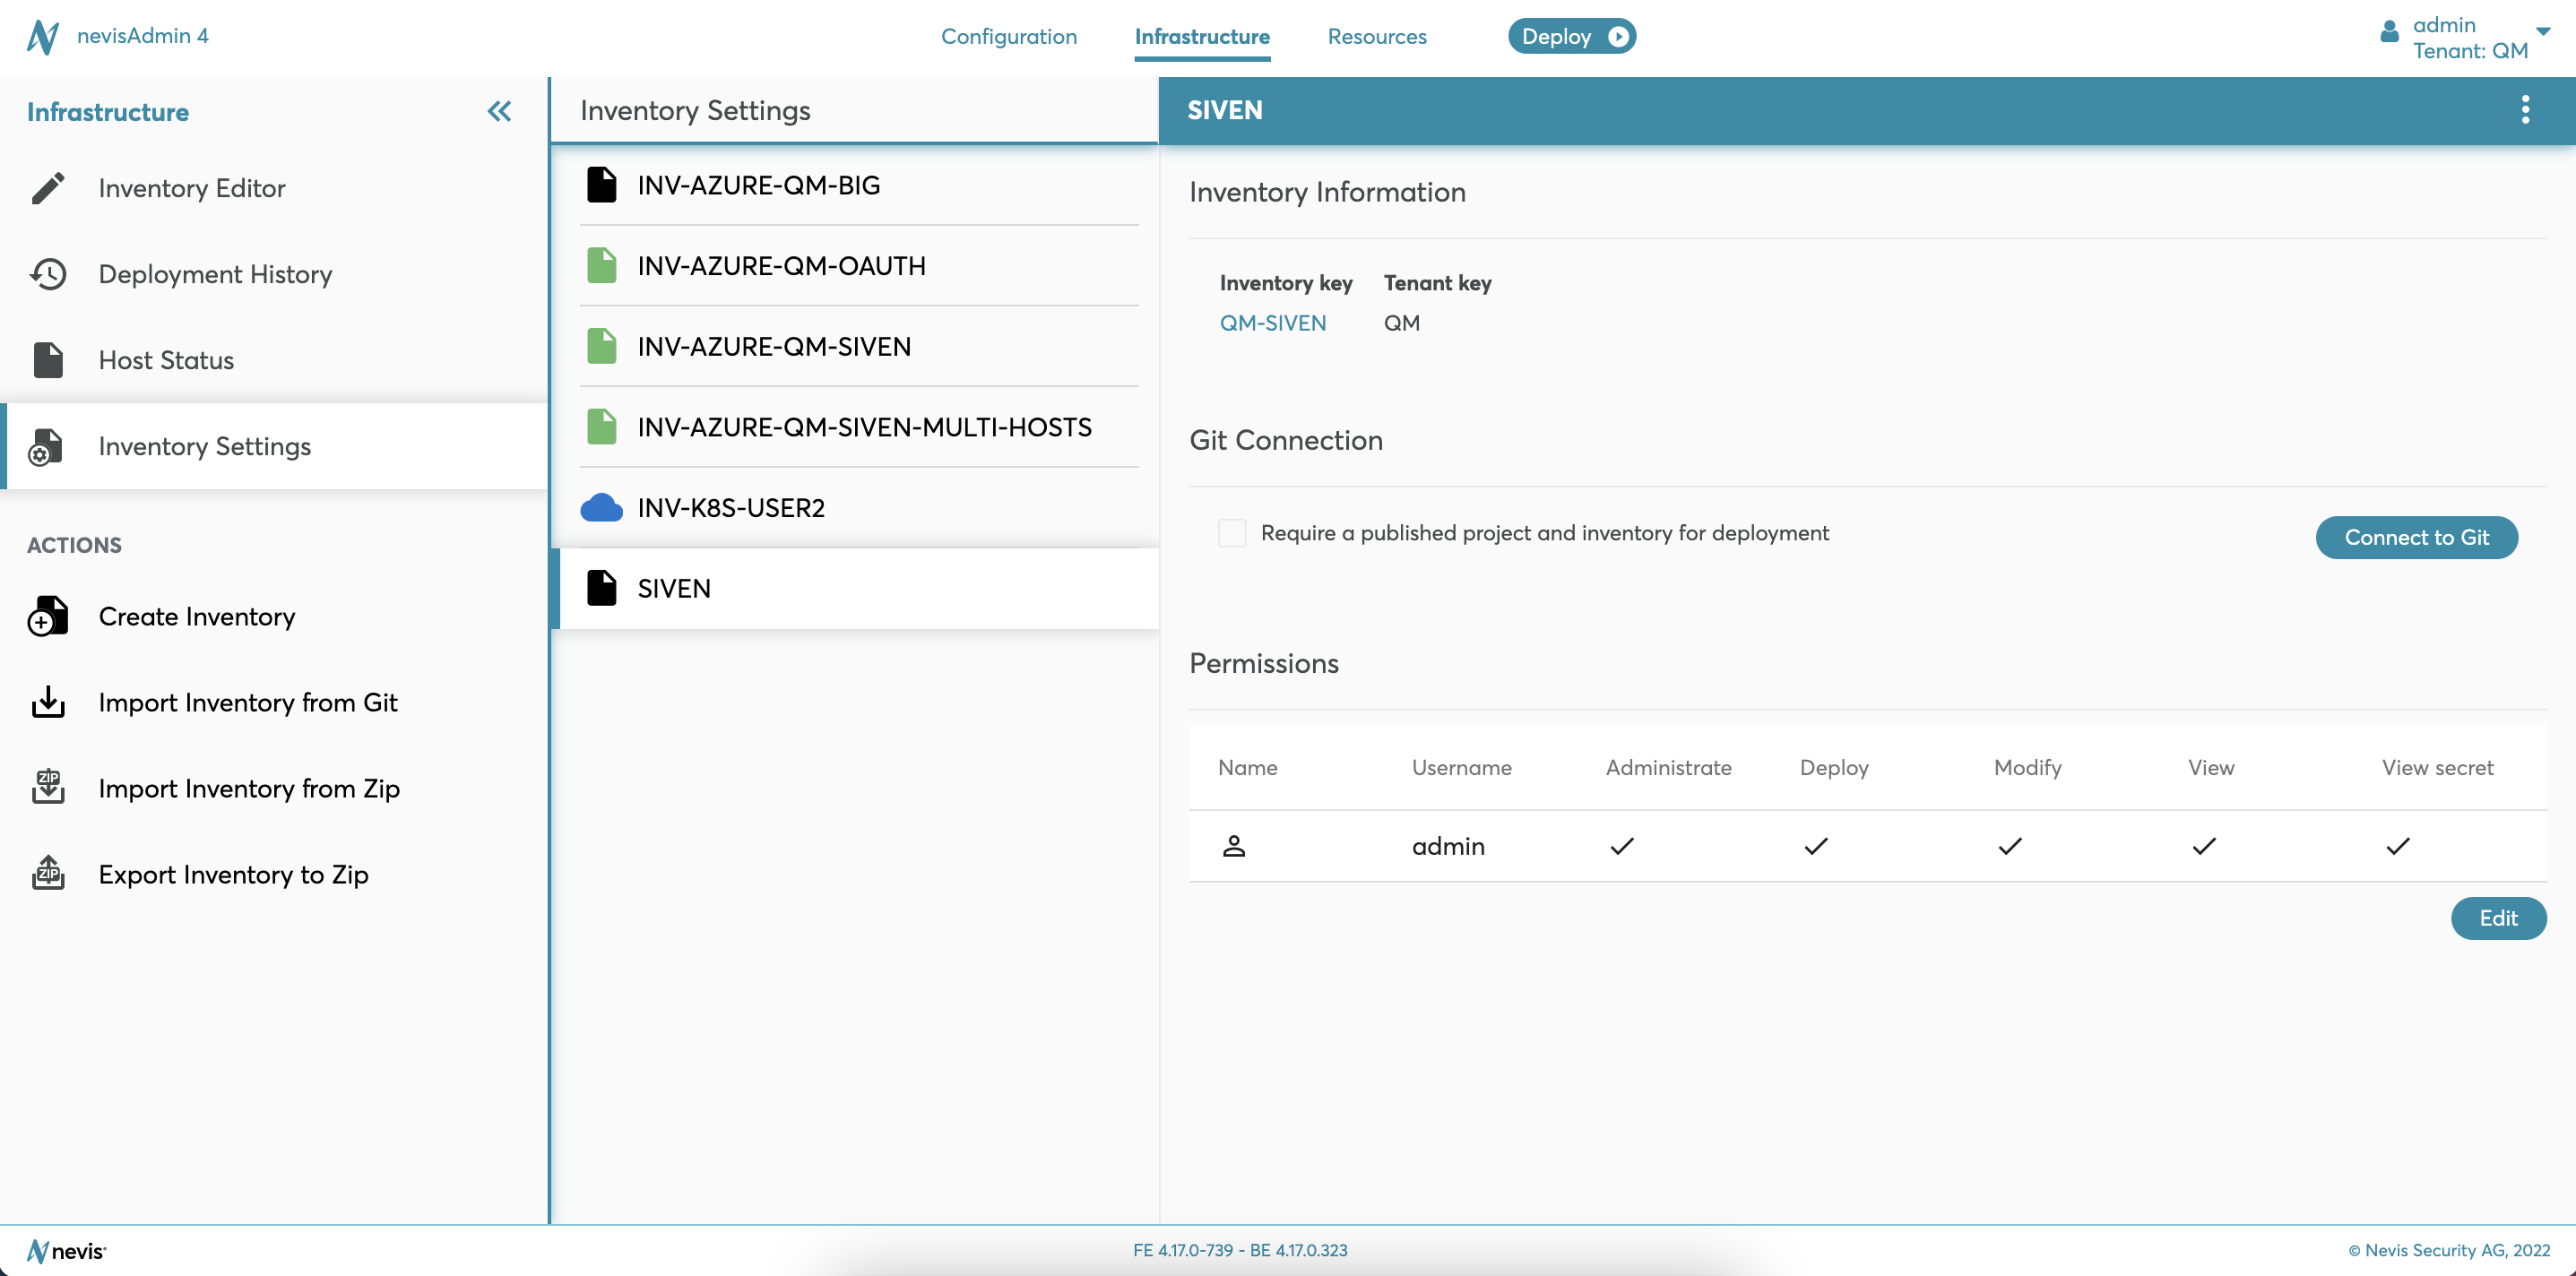
The Inventory Settings is also available from Infrastructure tab. The screen contains the details of the inventory including the inventory's key and permissions. You can switch to the settings of other inventories, too, by clicking on one of the inventories listed in the left part of the screen.
For detailed instructions on how to work with inventories, see Infrastructure Inventories.
Resources Tab
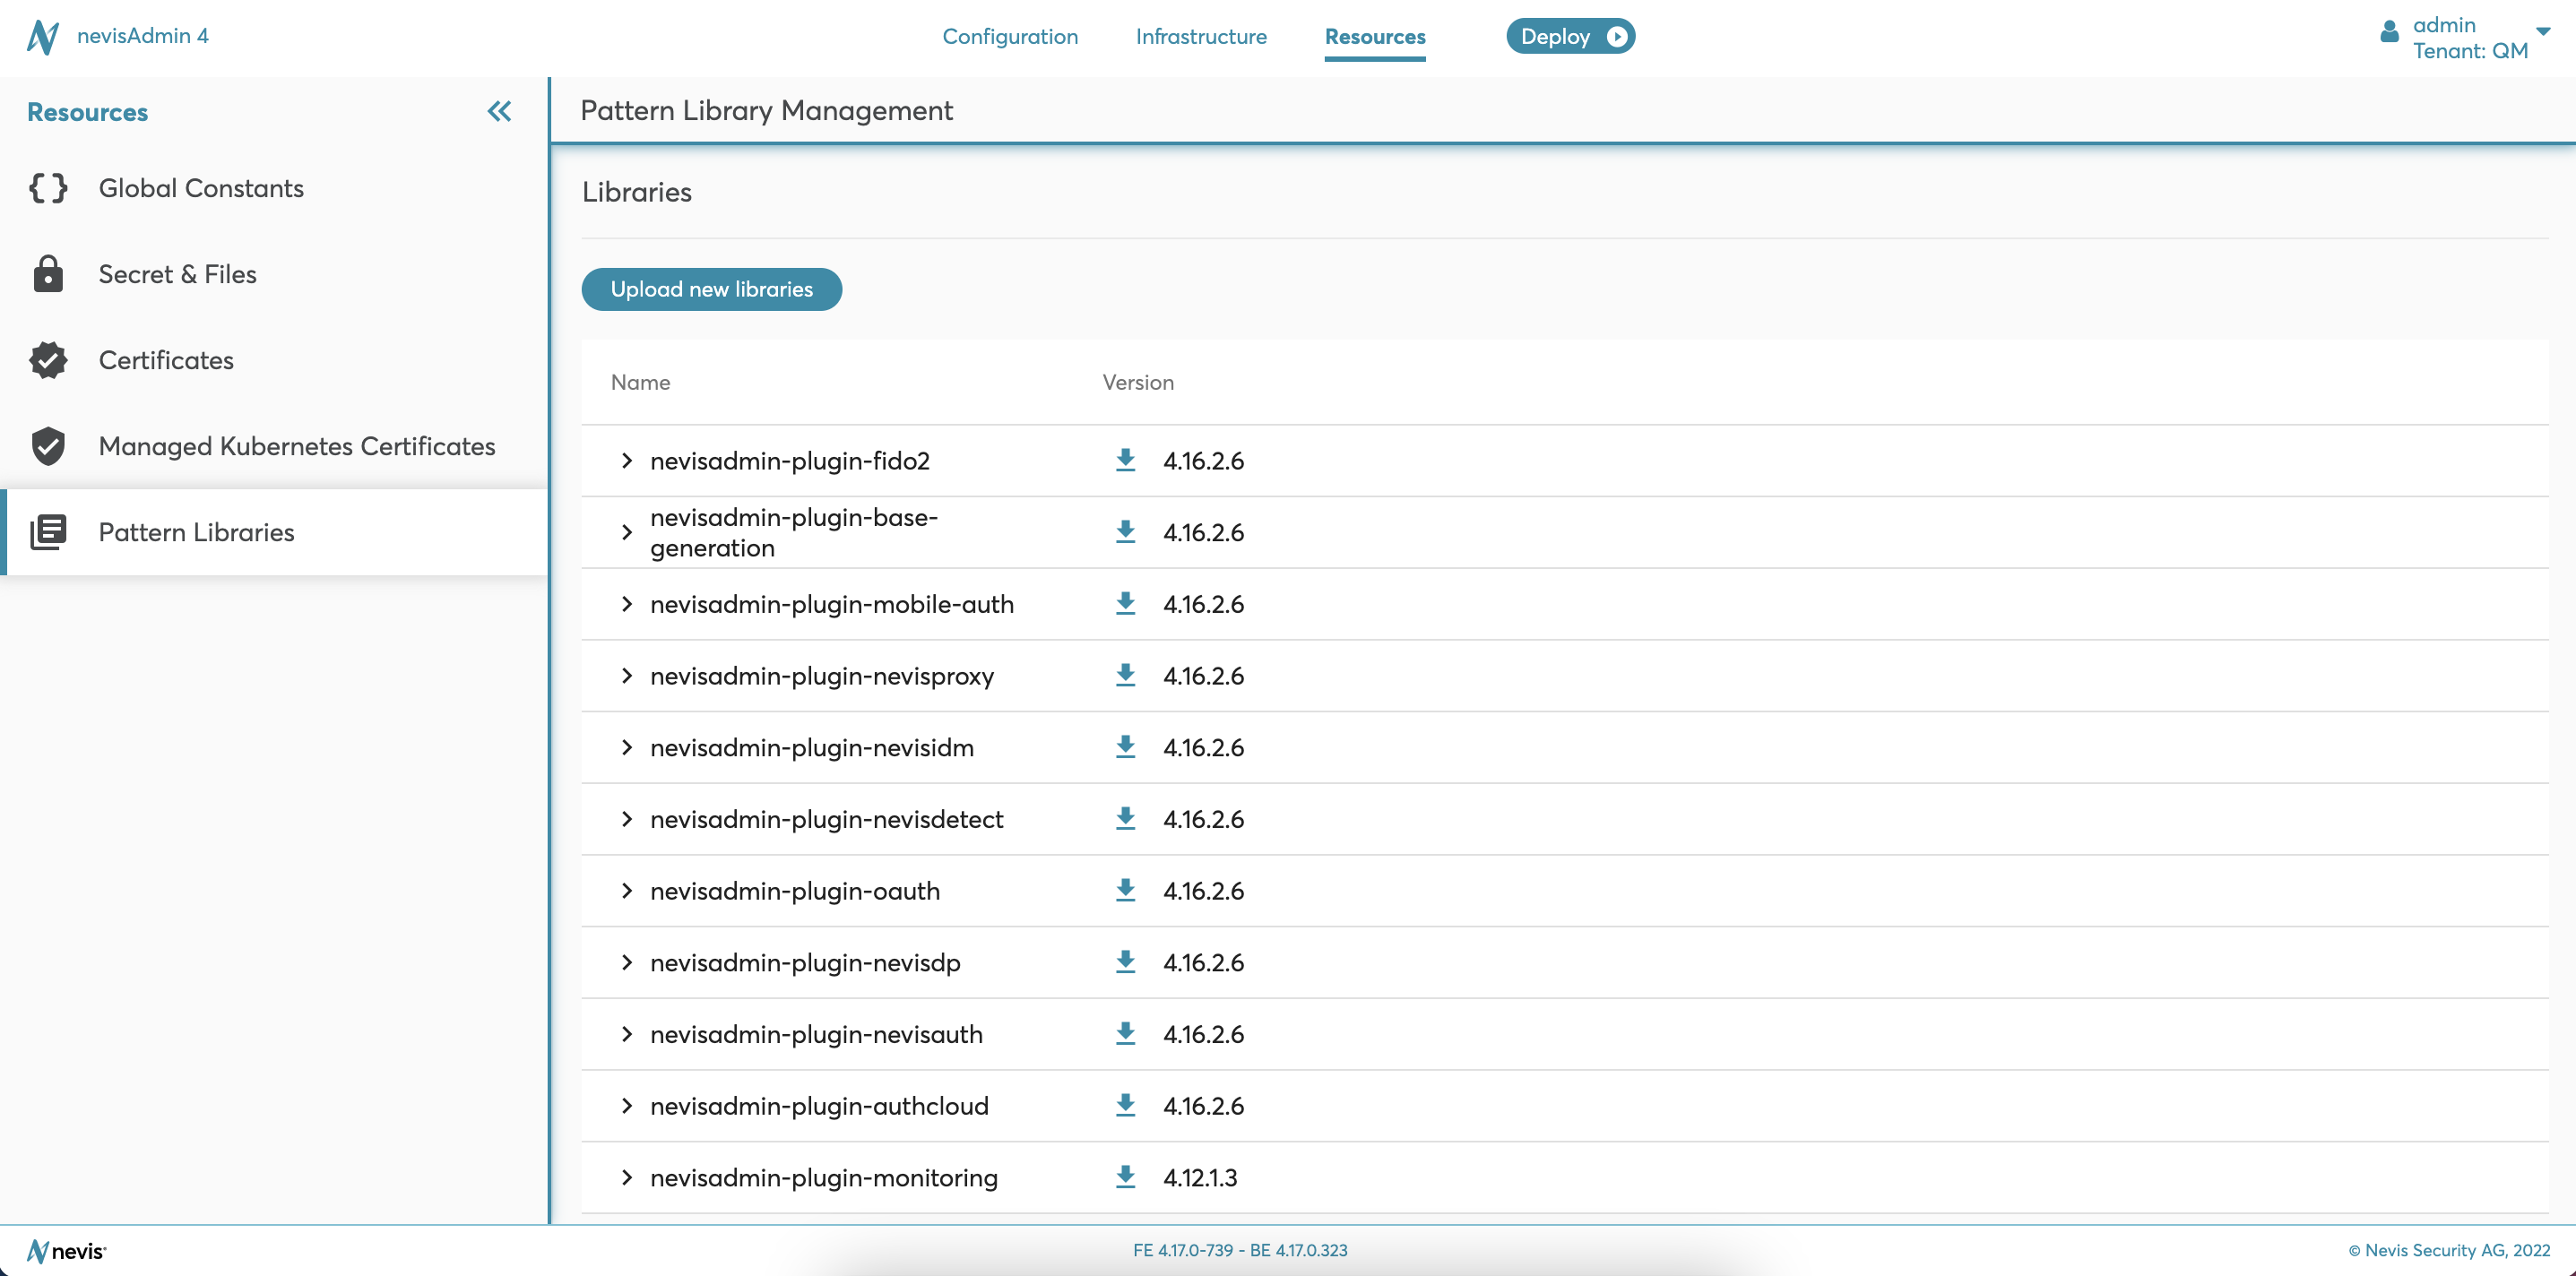
You can access the global resources such as global constants, secrets, files and certificates under the Resources tab.
The Pattern Library Management is also available under this tab, from where you can upload and download libraries to and from the application. Find more information in "Pattern Library Management".
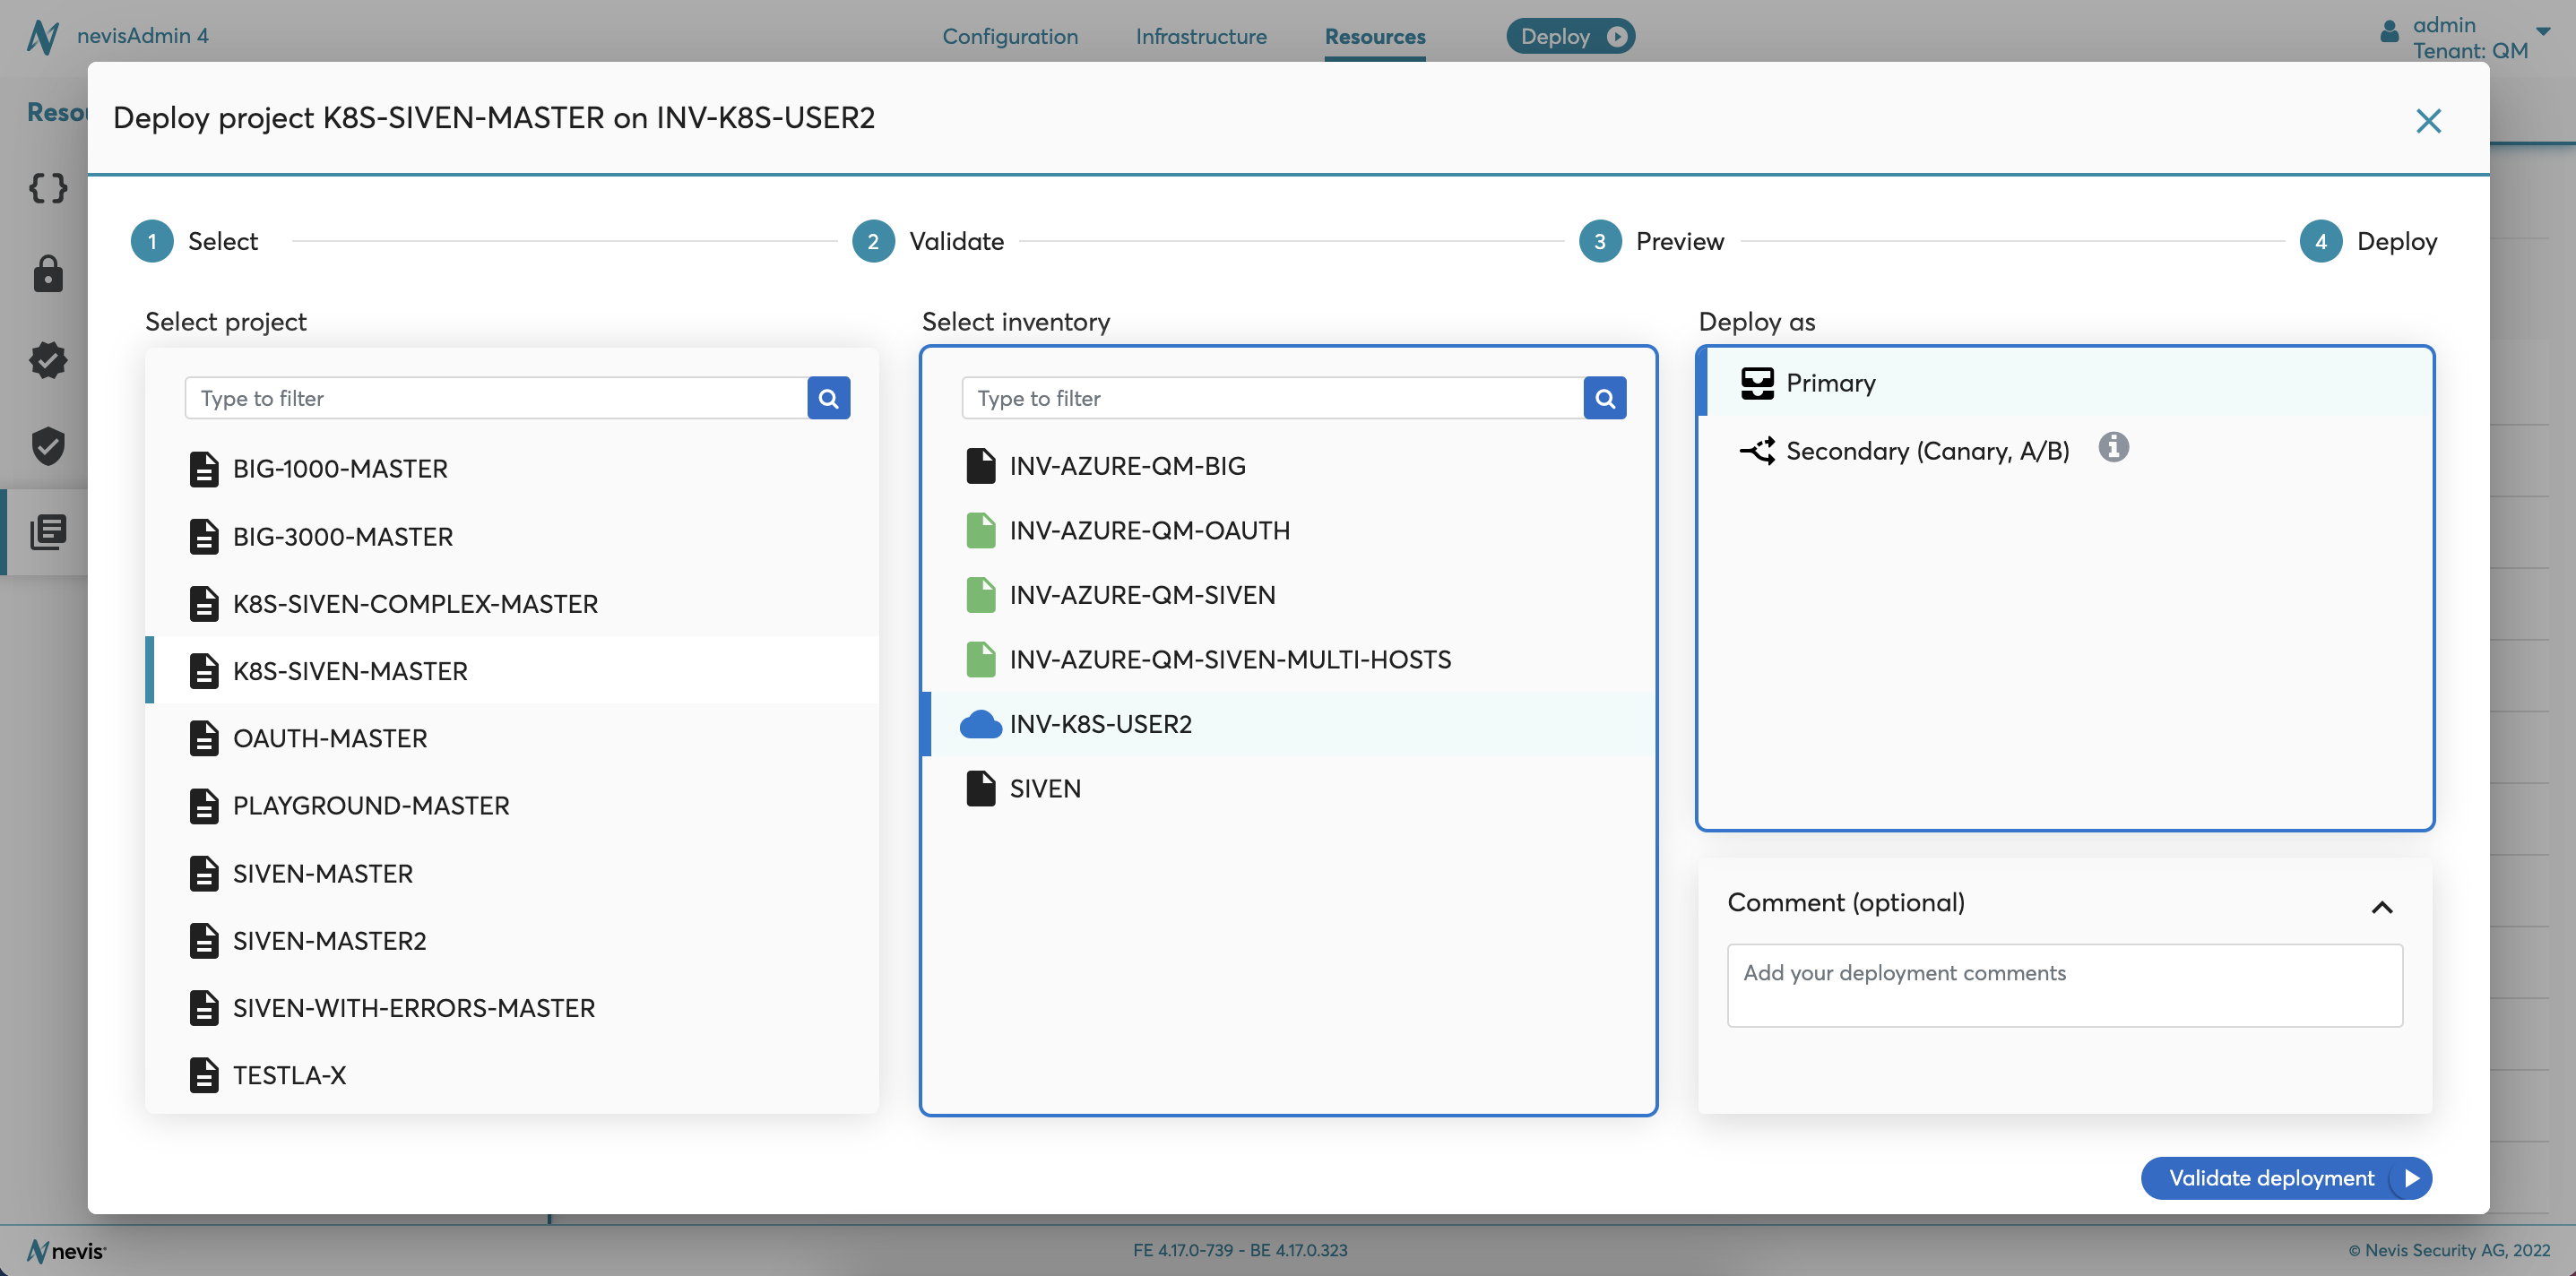
Deployment Wizard
Deployment is the process of activating or updating a configuration (defined in a configuration project) on one or multiple server(s). In the nevisAdmin 4 GUI, a Deployment Wizard guides you through the process. The next figure gives you an impression of the Deployment Wizard.
For detailed instructions on how to deploy a project, see "Deployment of the Configuration".
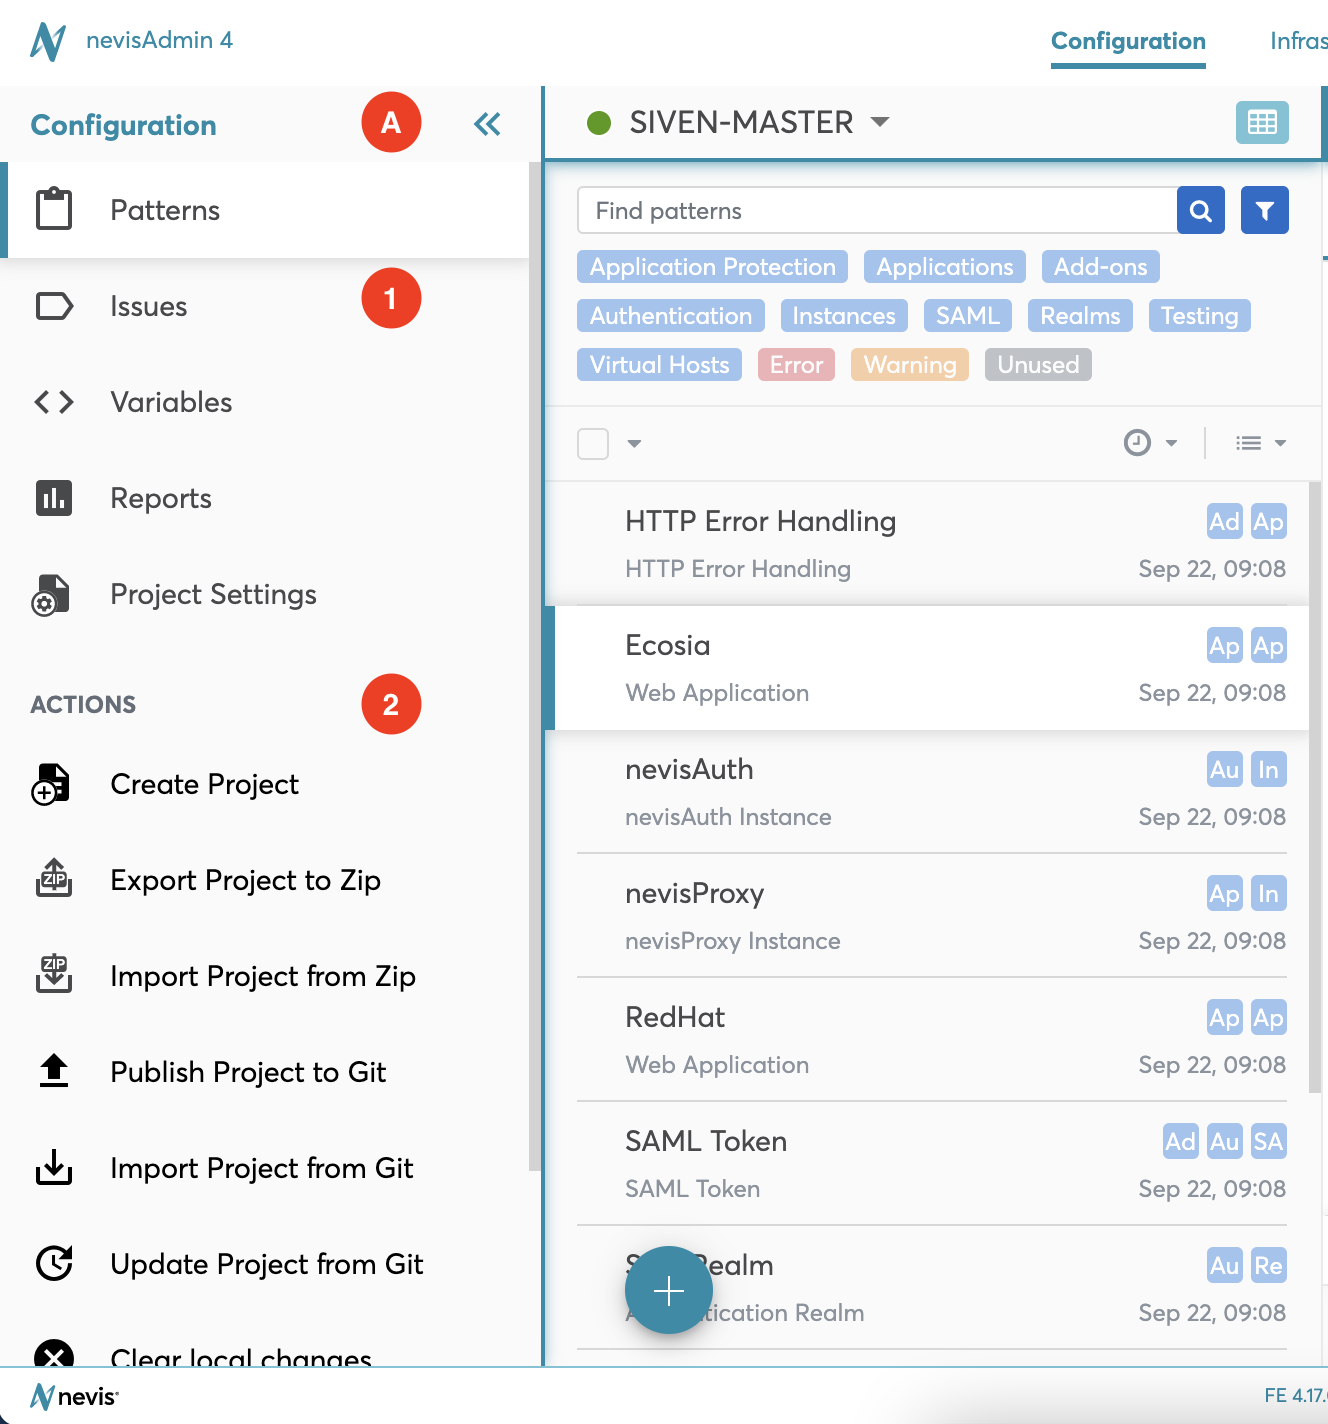
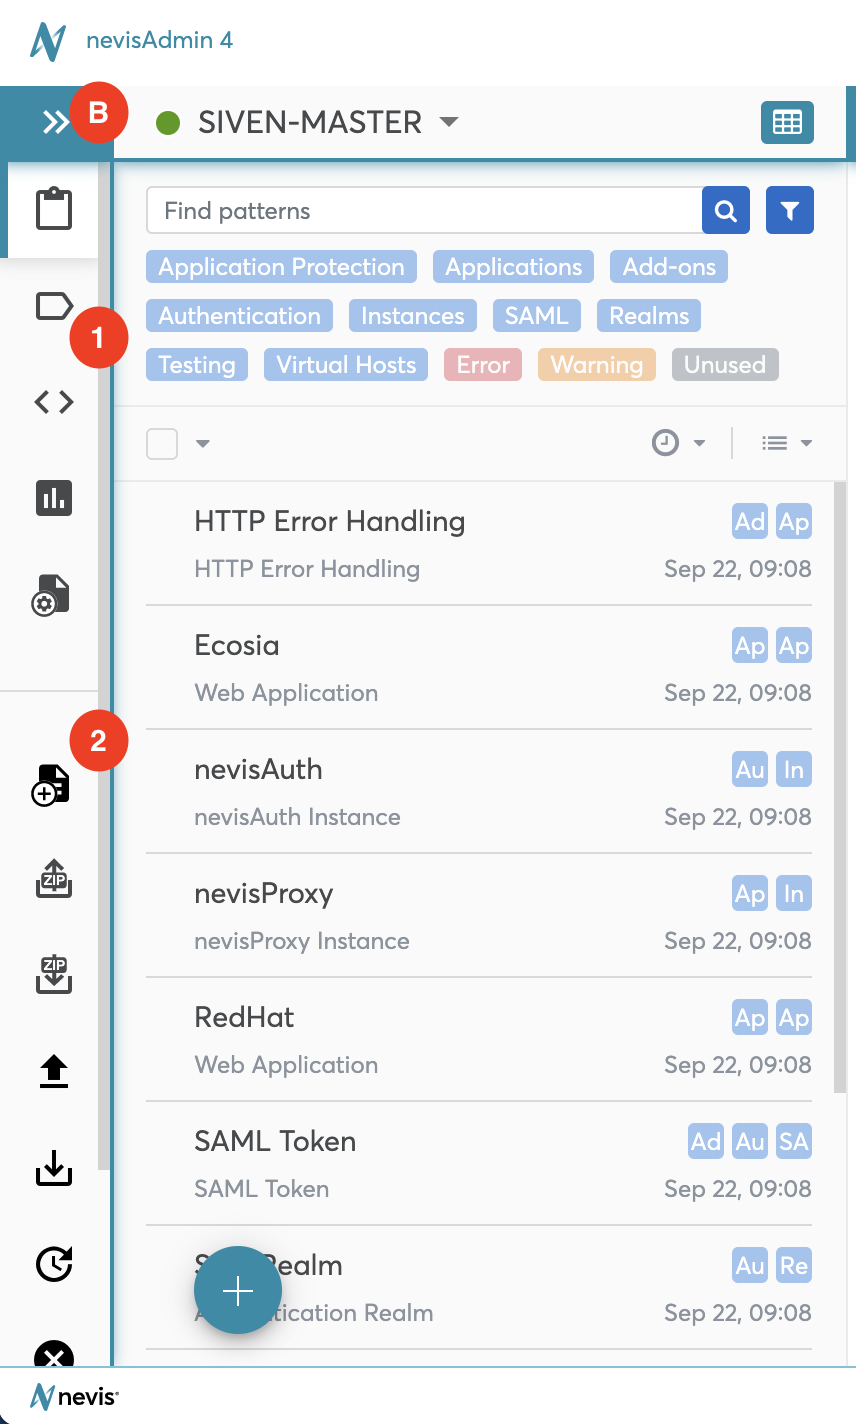
Sidebar Menu
The sidebar menu offers additional functionality when working within a tab. The menu can be expanded ("A" in the figure) or collapsed ("B" in the figure), depending on your preference.
The sidebar menu is divided into two sections:
- Navigation menu section (no. 1 in the figure): The Navigation menu allows you to navigate through the different areas within each tab. The Navigation menu of the Configuration tab, for example, lets you switch from a project's Patterns screen to the Variables screen or Issues screen. The Navigation menu of the Inventory tab, for example, makes it possible to navigate from the Inventory Editor to the Deployment History screen.
- Action menu section (no. 2 in the figure): The Action menu shows all actions that you can execute for the current tab, that is, the tab you are currently working in. For example, if you are currently defining a project in the Configuration tab, the Action menu will include the action Add Pattern. If you currently have a look at inventory settings in the Administration tab, the action Export Inventory to Zip will be part of the Action menu.