Re-create nevisAdmin 3 CA
This chapter explains how to re-create the nevisAdmin 3 CA.
You should re-create the CA when:
- it is expired (check neviskeybox list -slot default on a target server), or
- it has been created with nevisAdmin version 3.1.3 or older. Since nevisAdmin version 3.1.4, the CA certificate has the proper extensions.
Renewing the CA is a complex process and can be time consuming. Create a backup of nevisAdmin 3 first, e.g., create a snapshot of the VM.
nevisAdmin CA
First, shut down nevisAdmin with the following command:
nevisadmin stopImportantnevisAdmin stores the repository when you shut down. Never edit the repository files without shutting down nevisAdmin first!
Remove the exsting CA:
rm /var/opt/nevisadmin/default/nevisadmin/repository/cert/ca_*
rm /var/opt/nevisadmin/default/nevisadmin/repository/cert/nevisadmin_*
Edit the following configuration file:
/var/opt/nevisadmin/default/nevisadmin/repository/cert/ca.properties
initialized=false
Start nevisAdmin again:
nevisadmin startLogin as admin user and go to the Administration tab, Key managementview:

- Adapt the settings as required. Click Generate.
Key material
Note that existing key material is not re-generated automatically.
Infrastructure
Note, that you have to perform the instructions in the following sections for each server.
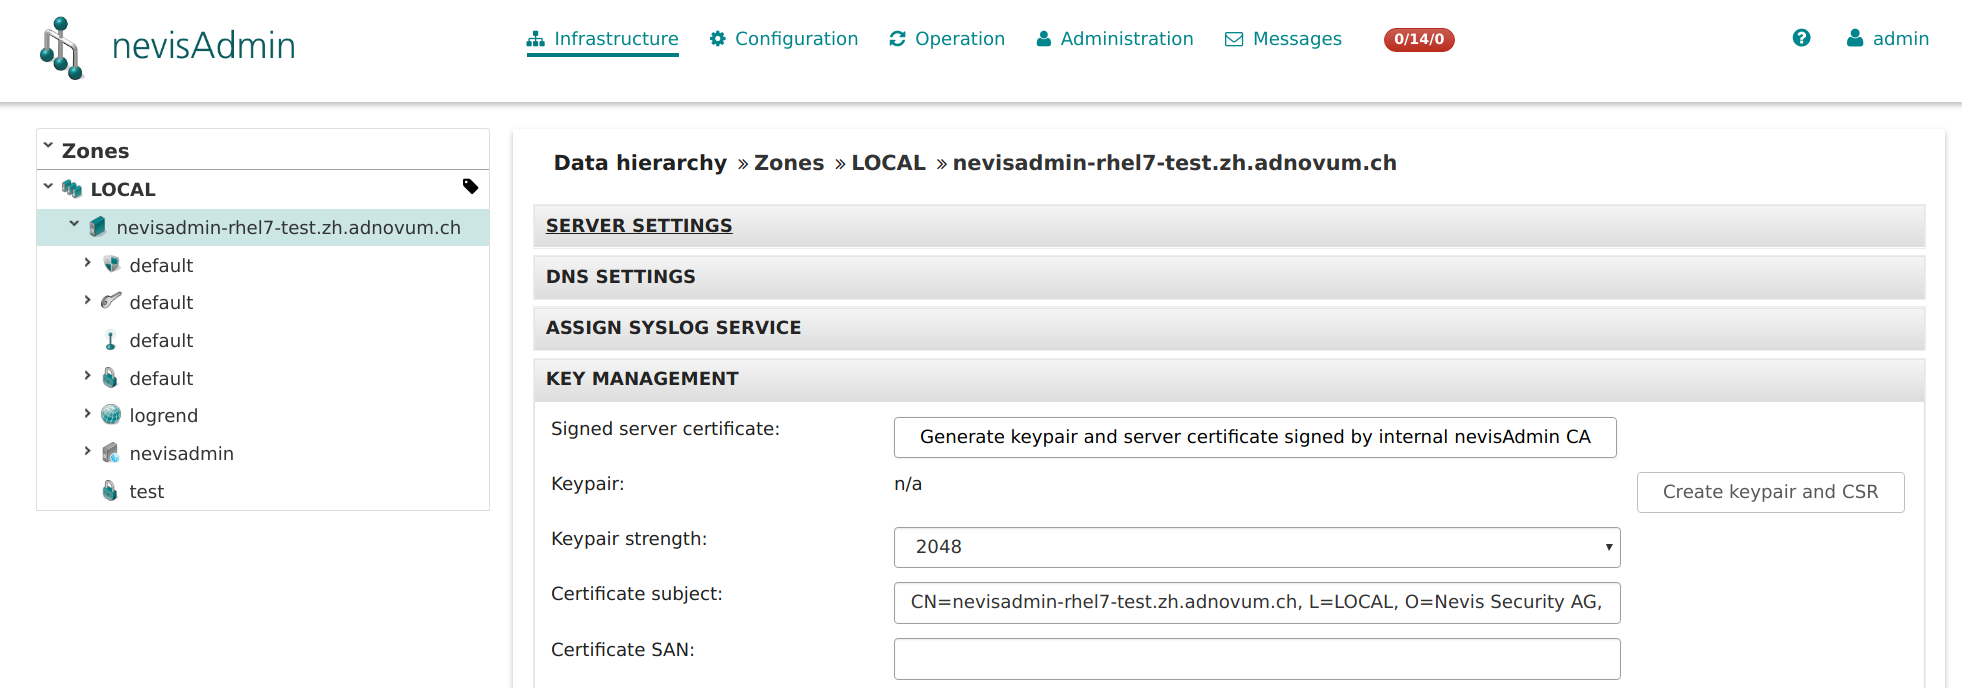
Server
- In the Infrastructure tab, go to the relevant server.
- Open the Key Management panel.
- Click the button Generate keypair and server certificate signed by internal nevisAdmin CA.
nevisAgent
The key material that nevisAdmin uses to connect to nevisAgent is configured in the file domain.xml: /var/opt/nevisadmin/default/nevisadmin/config/domain.xml
See also the next sample code:
<jvm-options>-Dch.nevis.nevisadmin.ssl.keyStore=/var/opt/nevisadmin/default/nevisadmin/repository/cert/nevisadmin_keystore.jks</jvm-options>
<jvm-options>-Dch.nevis.nevisadmin.ssl.keyStorePassword=/var/opt/nevisadmin/default/nevisadmin/repository/cert/nevisadmin_keypass</jvm-options>
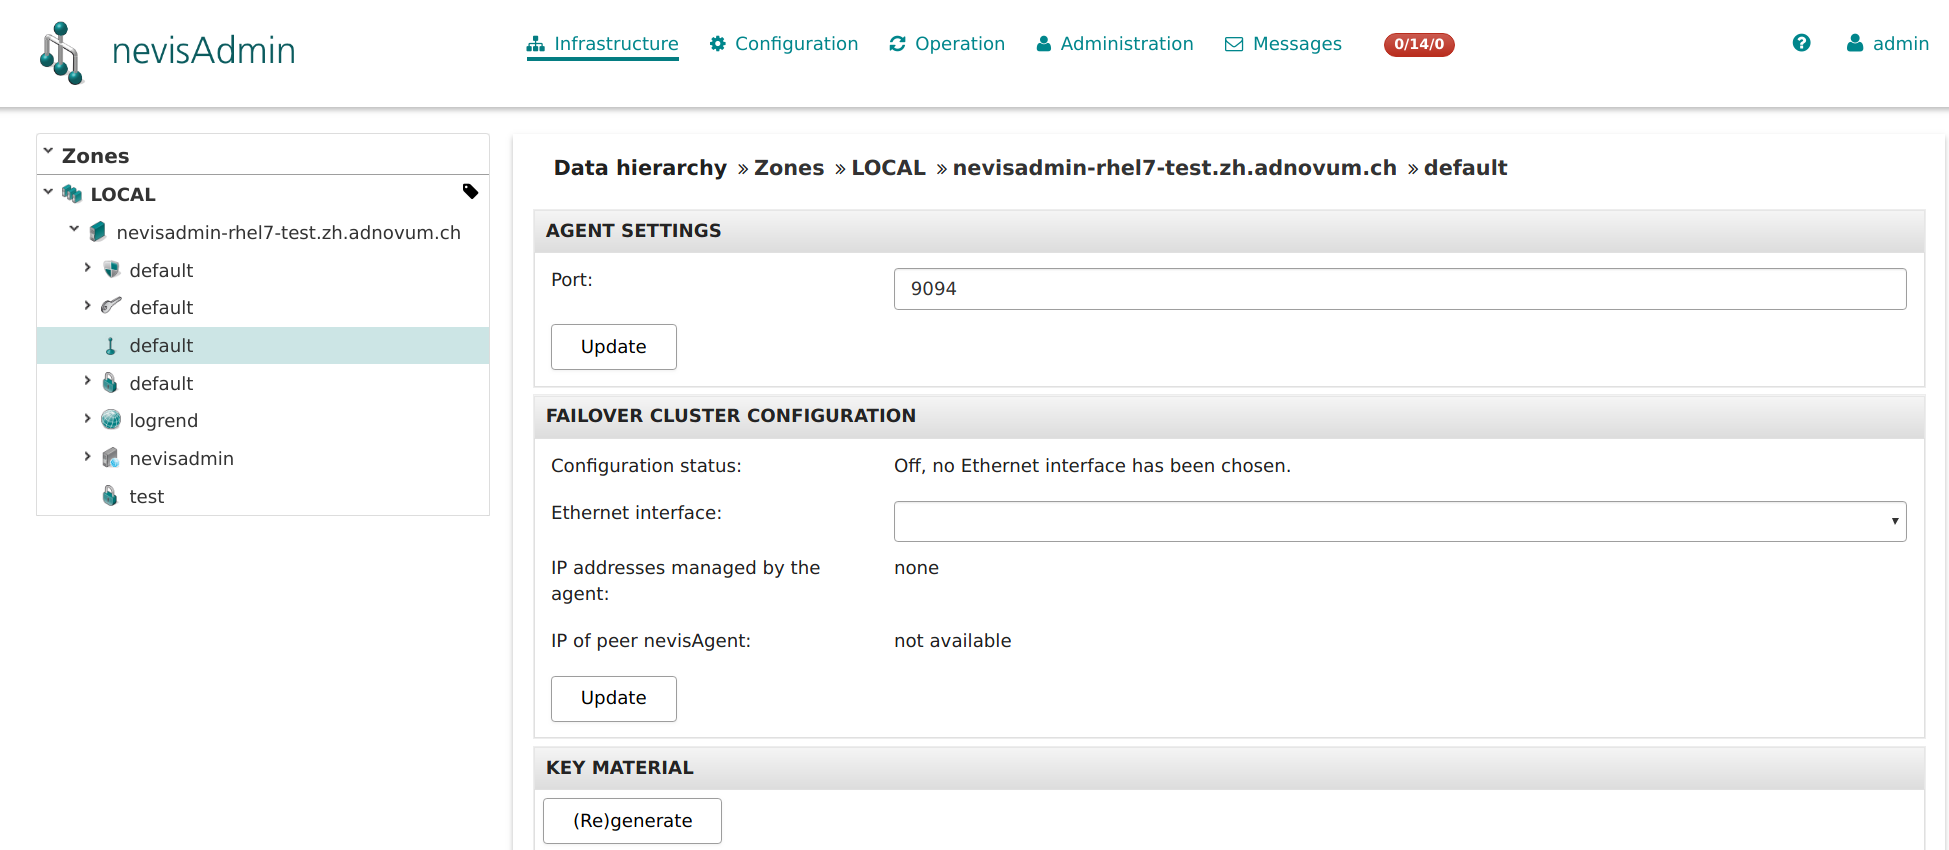
- In the Infrastructure tab, go to the relevant nevisAgent instance (see also the next figure).
- Open the Key Material panel.
- Click the button (Re)generate:
Copy the generated key material to the target server.
- To find the path where to store the key material, run the next command:
nevisagent config vmargs
Environment
Note that you have to perform the instructions in the following sections for each environment.
Realm
- In the Configuration tab, go to the Key management view of the relevant environment (see the next figure).
- Click Destroy to delete the existing signer certificate(s) (panel Destroy Authsigner Keystore).
- In the panel Generate Authsigner Keystore, enter a common name (CN) in the field authSigner certificate common name (CN). Click Generate.
- Assign the signer certificate using drag-and-drop.

nevisProxy service
Service certificates used by nevisProxy should have been signed by an external CA. Thus, these certificates should not be renewed.