Variables
Within nevisAdmin, you can use variables in parameters that define mappings, filters and realms. Variables enable environment-specific parameter values. The variables often refer to environment-specific names, e.g., the name of a server used in the infrastructure of a configuration.
The variables appear as place holder strings in the value expression of a parameter. When committing the configuration, nevisAdmin replaces the variable by the exact value.
A variable string always starts and ends with an @ sign.
E.g.,*connection1=ldap://@LDAP_HOST1@:@LDAP_PORT1@*.
Here, @LDAP_HOST1@ and @LDAP_PORT1@ are variables.
There are two types of variables:
- Default variables: These are predefined variables.
- User-defined variables: These are specific variables defined by the user.
Default variables
The default variables are predefined variables that nevisAdmin "knows". nevisAdmin can both generate and resolve these variables itself. It depends on the object context which default variables you are allowed to use in the parameter's value expression.
To find out which default variables you may use when configuring a certain object, click on the Help button on top of the window to open the context-sensitive Help page. The Help page includes a list of variables that can be used in this view.
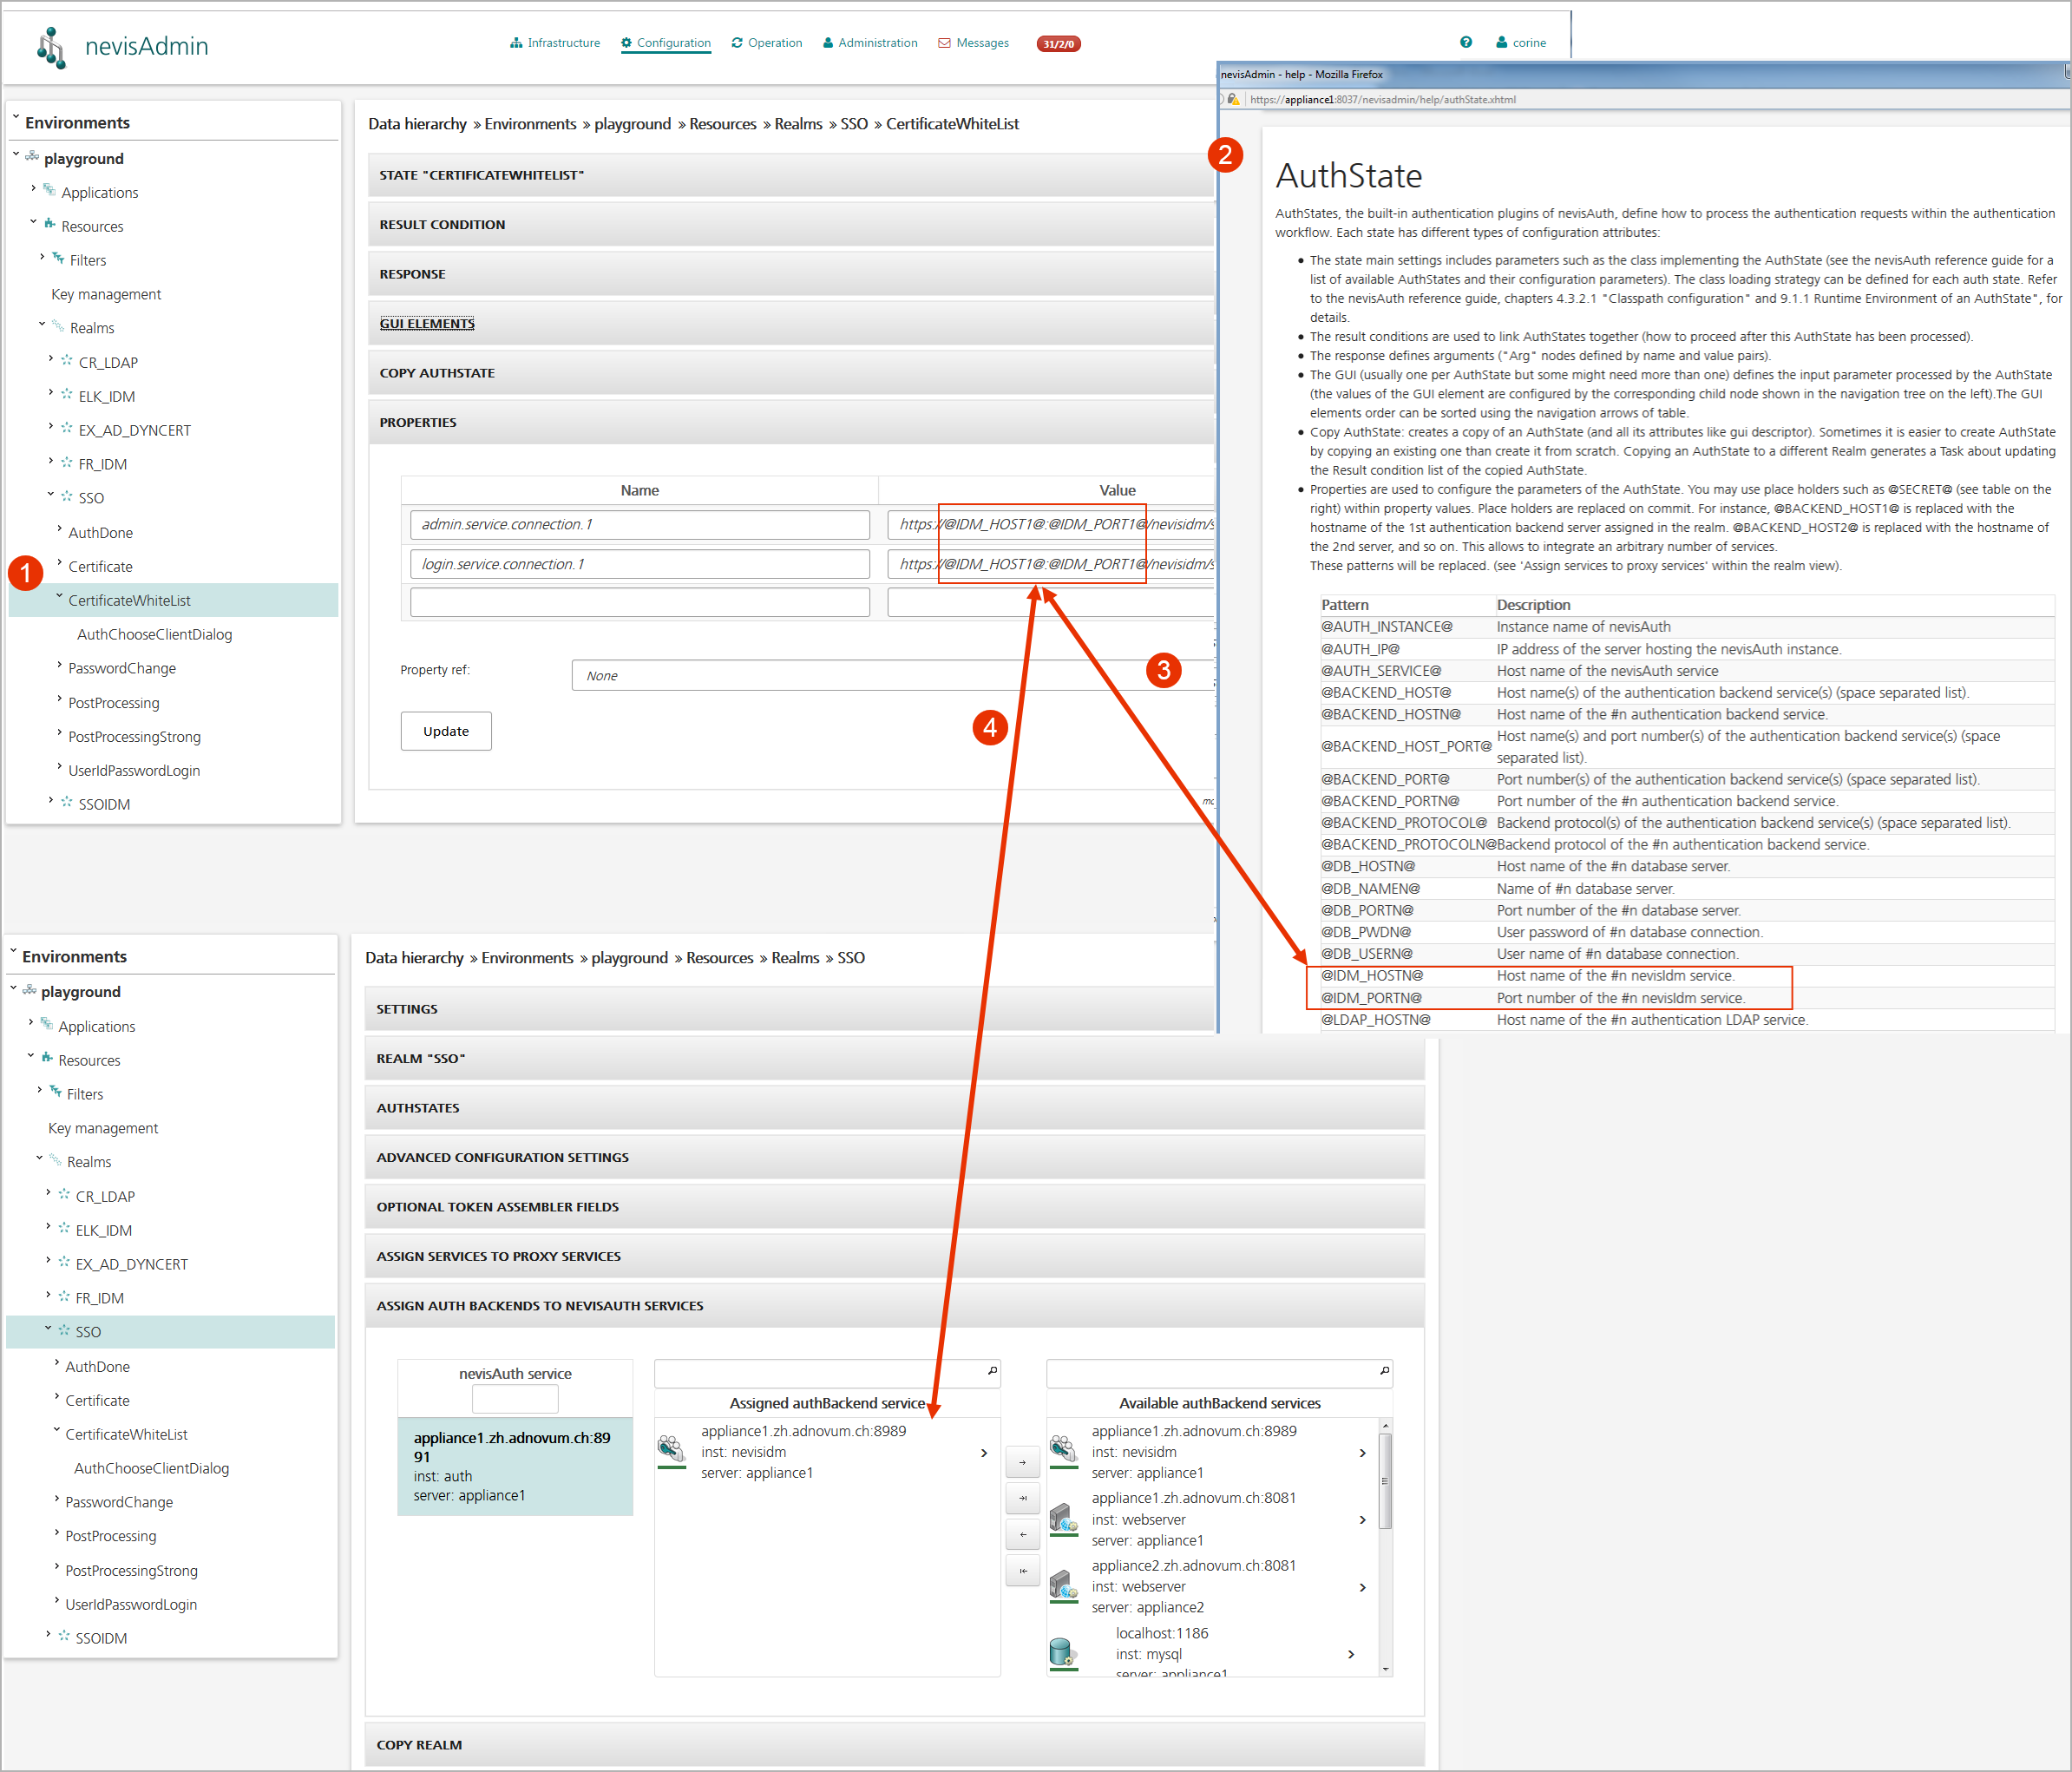
The figure below depicts an example. This view displays the configuration of the CertificateWhiteList AuthState that belongs to the SSO realm of the playground environment (no.1 in the figure). The Help page lists the predefined, default variables you are allowed to use to configure this AuthState (no.2). The Properties panel shows the properties admin.service.connection.1 and login.service.connection.1. The value expressions of these properties contain the default variables (no.3 in the figure). On commit, the system automatically replaces these predefined default variable strings by the exact host name and port of the nevisIDM service assigned to nevisAuth (no.4) within the context of the realm.
User-defined variables
The user-defined variables come in addition to the default, predefined variables. You have to define them yourself. Also specify their value. Otherwise, nevisAdmin would not know how to resolve this variable on commit.
There are two types of user-defined environment variables: global environment variables and local ones. Global environment variables allow you to define variables that can be used within any environment, whereas local ones apply to a specific environment only. Local variables take precedence over global ones. Hence, a global variable can be overridden by a local one.
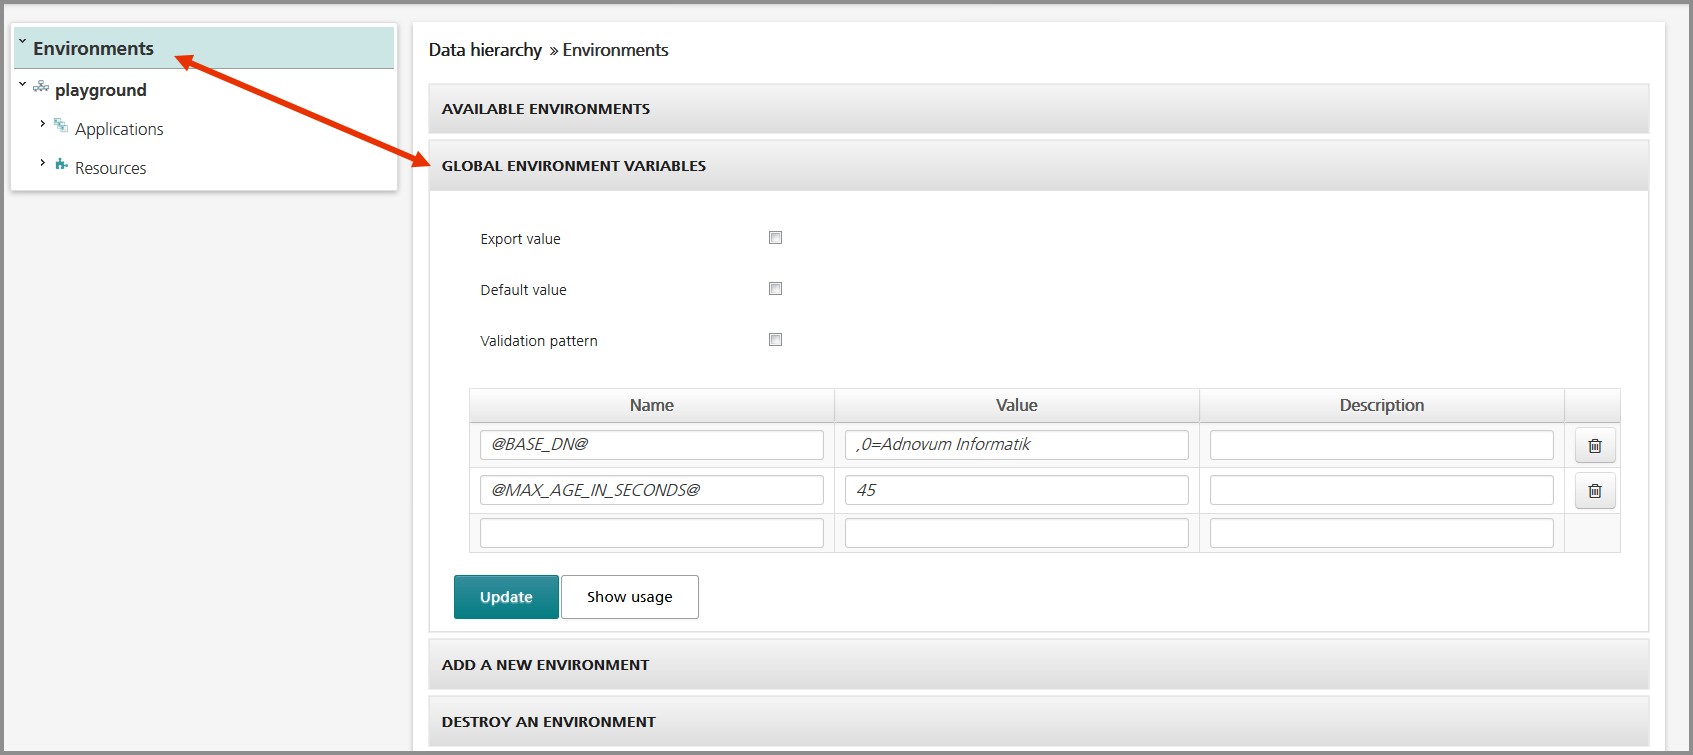
You define the global environment variables in the Global Environment Variables panel of the Environments view. The figure below shows some sample user-defined global environment variables. You can use these variables in all environments you configure with this nevisAdmin instance.
You define the local environment variables in the Environment Variables panel of the view of the corresponding environment. The figure below shows the user-defined local environment variables for the playground environment. You can use these variables in the playground environment only.
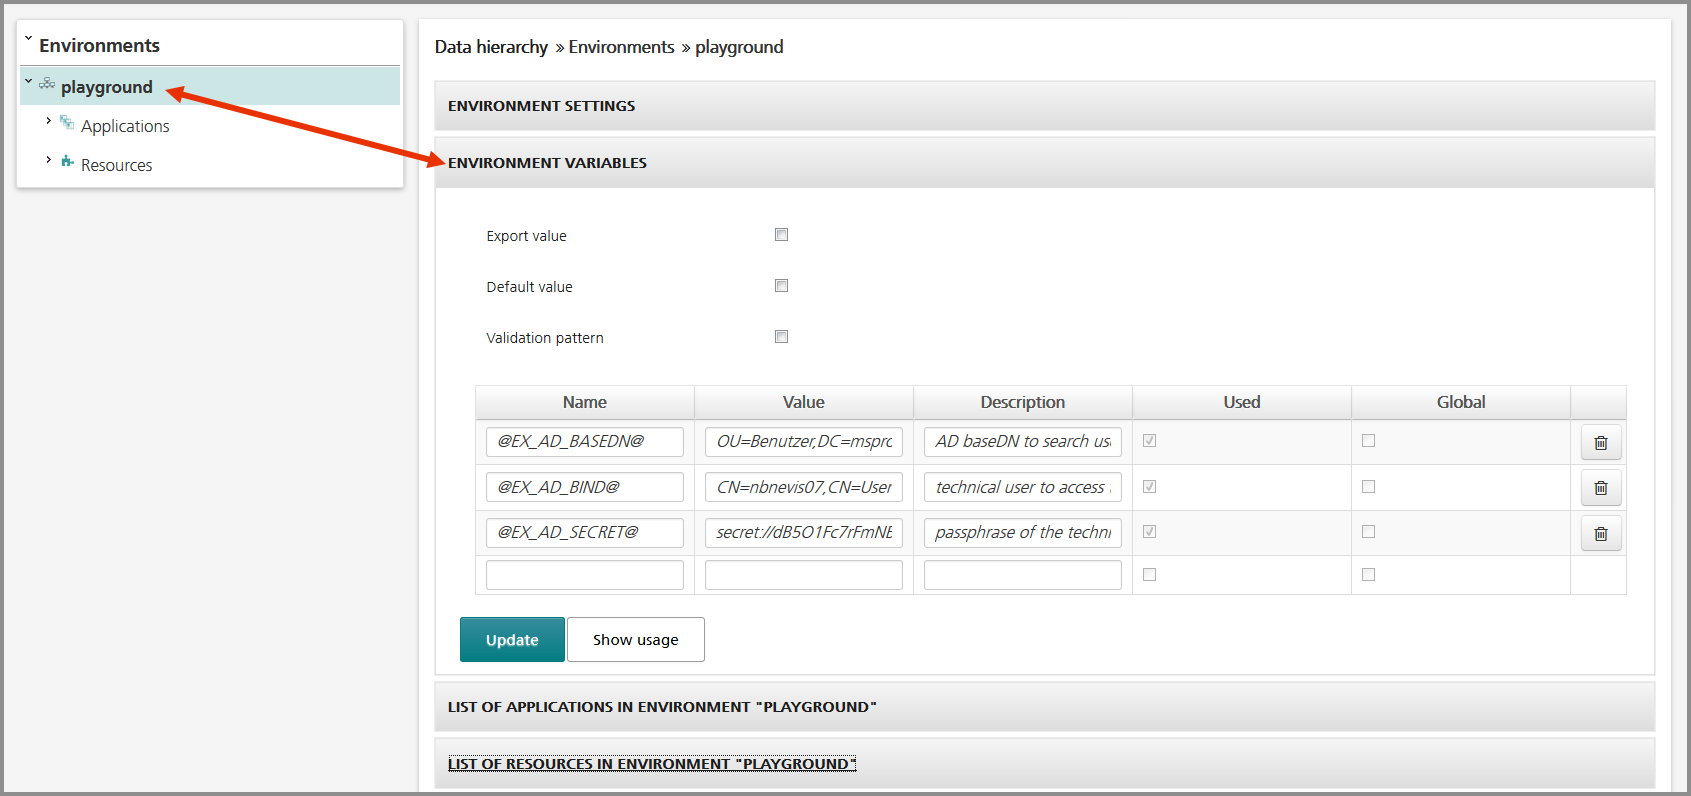
To find out whether a global or local variable is actually in use within any realm, filter or mapping, click the Show usage button on the bottom of the panel (see the figure above. Here, all local environment variables are used).
Controlling the export and import of variables
The Export value, Default value and Validation pattern checkboxes in the upper part of the (Global) Environment Variables panel allow you to control the export and import of variables. Let's assume that an application uses a SendMail AuthState to send notification messages to the user via e-mail. The figure below shows the environment variables used to define the SMTP settings:
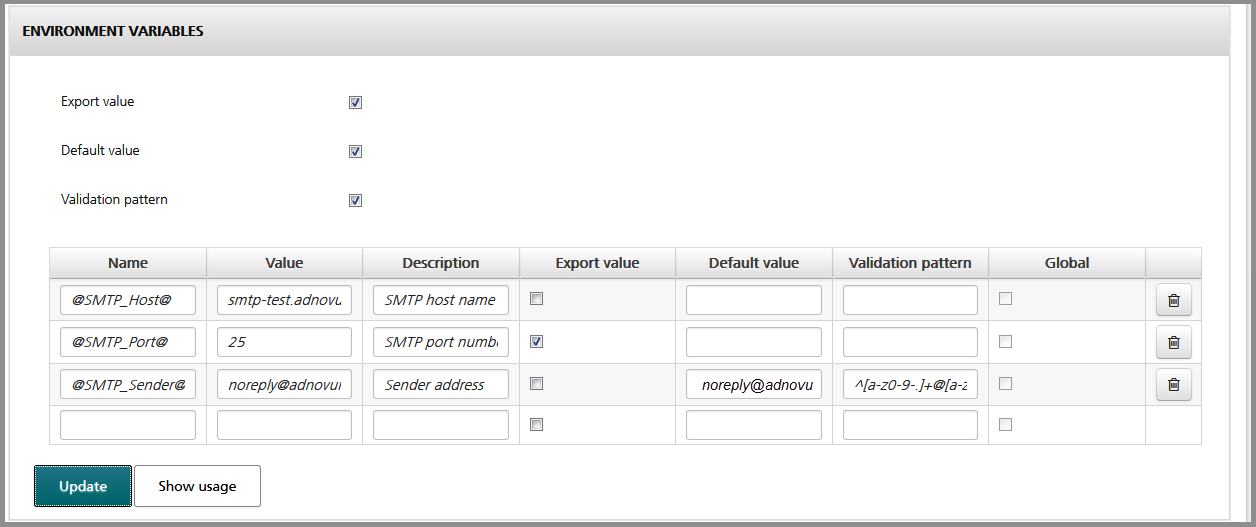
Suppose you want to export these variables to other environments. Because the SMTP settings differ between the various environments, you need to adjust the variables during the import in the other environment. This is how it works:
If an environment variable has the same value in every environment, there is no need to change the value of the variable during import. In this case, enable the Export value checkbox. Upon import, user interaction is not possible. In our example, the value of the variable is static and valid across all environments. It can be imported as it is. Here, it makes sense to enable the Export value checkbox (see the figure above).
noteThe value exported here will not overwrite existing variable values in the target environment during import.
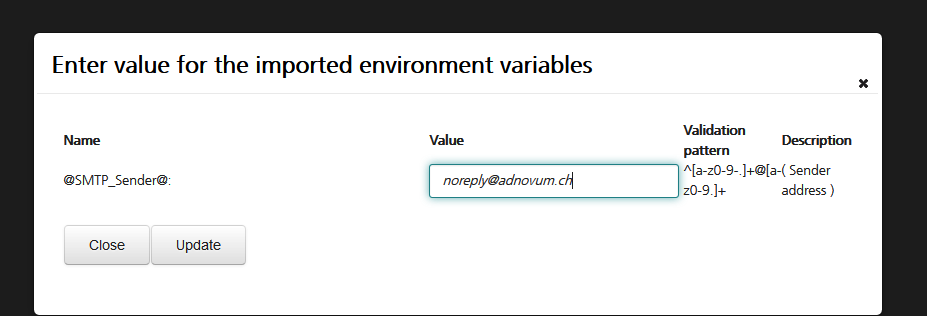
Enable the Default value checkbox to set a default value for the variable. You do this in the Default value field. During the import of the variable, the system proposes this value in the import dialog. You can modify it if you want. In our example, a default value is set for the variable; see the figure above and the figure below.
noteThe default value you set here will overwrite the default value of the target environment's matching variable during import.
If you enable the Validation pattern checkbox, the system validates the value of the variable against the predefined validation pattern during the import. Enter the required validation pattern in the Validation pattern field (see the figure above).
If you do not enable any checkbox, the user must set the value for each variable by hand during import.
Click the Update button in the import dialog to apply any change you made to the variable value during the import. If the same environment variable already exists, it is not affected by the import.
