SAML Integration
Introduction
nevisAdmin 4 supports secure authentication with SAML. This is the recommended setup for enterprises that want to control access to nevisAdmin 4 in a centralized way, or enable second factor authentication.
When SAML is configured, nevisAdmin 4 creates users in its database as soon as they log in. During the login process, nevisAdmin 4 also updates the user's group memberships and attributes within the database.
The main steps to integrate SAML are as follows:
- Prepare the Identity Provider to integrate with nevisAdmin 4. See the Azure AD setup as an example.
- Follow the steps below.
Change the Configuration
The settings below are configured in /var/opt/nevisadmin4/conf/nevisadmin4.yml.
Restart nevisAdmin 4 after making changes to the nevisadmin4.yml file:
nevisadmin4 stopService
nevisadmin4 startService
Enable SAML Authentication
Enable the saml profile in /var/opt/nevisadmin4/conf/env.conf by extending the JAVA_OPTS.
-Dnevisadmin.profiles=jpa,mariadb,saml,health
Apply the below settings to enable authentication against an Identity Provider. These properties can be found in the default configuration file /var/opt/nevisadmin4/conf/nevisadmin4.yml.
nevisadmin:
  saml:
    idp:
      metadata-uri: https://login.microsoftonline.com/...
    sp:
      private-key: file:/var/opt/nevisadmin4/keys/saml.key
      certificate: file:/var/opt/nevisadmin4/keys/saml.crt
Create service provider key material
openssl req -nodes -x509 -newkey rsa:4096 -keyout saml.key -out saml.crt -sha256 -days 3650
Default admin group
In SAML authentication the login with local users are not allowed, therefore the local admin user neither can login.
Enabling the saml profile automatically creates a group named __admin on start-up. This group has the same permissions as the local admin user.
The __admin group can be assigned to users via assertion attributes. See it in the next chapters.
Synchronization During Login
nevisAdmin 4 creates users in its database as soon as they login. Based on the provided attribute mappings, nevisAdmin 4 then extracts the following user attributes during login:
- userKey
- groupKeys
- first name
- last name
The default mappings can be overwritten with nevisadmin.saml.attribute.* properties.
nevisadmin:
  saml:
    attribute:
      user-key: http://schemas.xmlsoap.org/ws/2005/05/identity/claims/emailaddress
      group-keys: http://schemas.microsoft.com/ws/2008/06/identity/claims/role
      email: http://schemas.xmlsoap.org/ws/2005/05/identity/claims/emailaddress
      first-name: http://schemas.xmlsoap.org/ws/2005/05/identity/claims/givenname
      last-name: http://schemas.xmlsoap.org/ws/2005/05/identity/claims/surname
Supported SAML Properties
See nevisadmin.saml.* properties at Configuration Properties in the nevisadmin4.yml File.
Troubleshooting
Logging
To debug your SAML setup, perform the following steps:
Add the lines from the next code block to the
logback.xmlfile. You find this file at/var/opt/nevisadmin4/conf/logback.xml.<logger name="ch.nevis.admin.v4.infra.spring.rest.util.SAMLAuthenticationSuccessHandler" level="debug" additivity="false">
<appender-ref ref="STDOUT" />
<appender-ref ref="FILE" />
</logger>
<logger name="ch.nevis.admin.v4.infra.spring.rest.util.SAMLUserInfoFilter" level="debug" additivity="false">
<appender-ref ref="STDOUT" />
<appender-ref ref="FILE" />
</logger>
<logger name="ch.nevis.admin.v4.infra.spring.rest.util.SAMLAssertionValidator" level="debug" additivity="false">
<appender-ref ref="STDOUT" />
<appender-ref ref="FILE" />
</logger>
<logger name="org.springframework.security" level="debug" additivity="false" >
<appender-ref ref="STDOUT" />
<appender-ref ref="FILE" />
</logger>Configuration is automatically synchronized every 5 seconds.
Try to log in with a SAML account.
Check the nevisAdmin 4 log file, which you find at
/var/opt/nevisadmin4/logs/nevisadmin4.log.
Identity Provider metadata change
If the Identity provider's metadata value is changed then nevisAdmin 4 has to be restarted to pick up the new configuration on startup.
For example: when the Identity Provider's certificate expires and needs be renewed.
Azure AD setup
Prerequisites
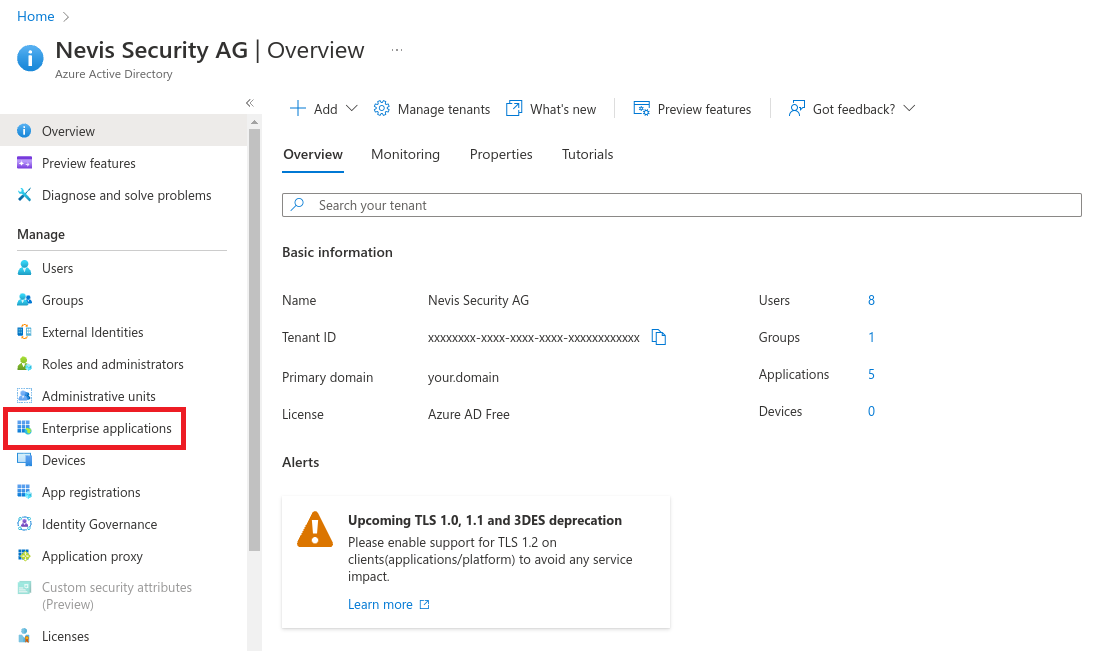
- Sign in to your Azure Account through the Azure portal.
- Select Azure Active Directory.
Create an application with Azure AD
Select Enterprise applications.
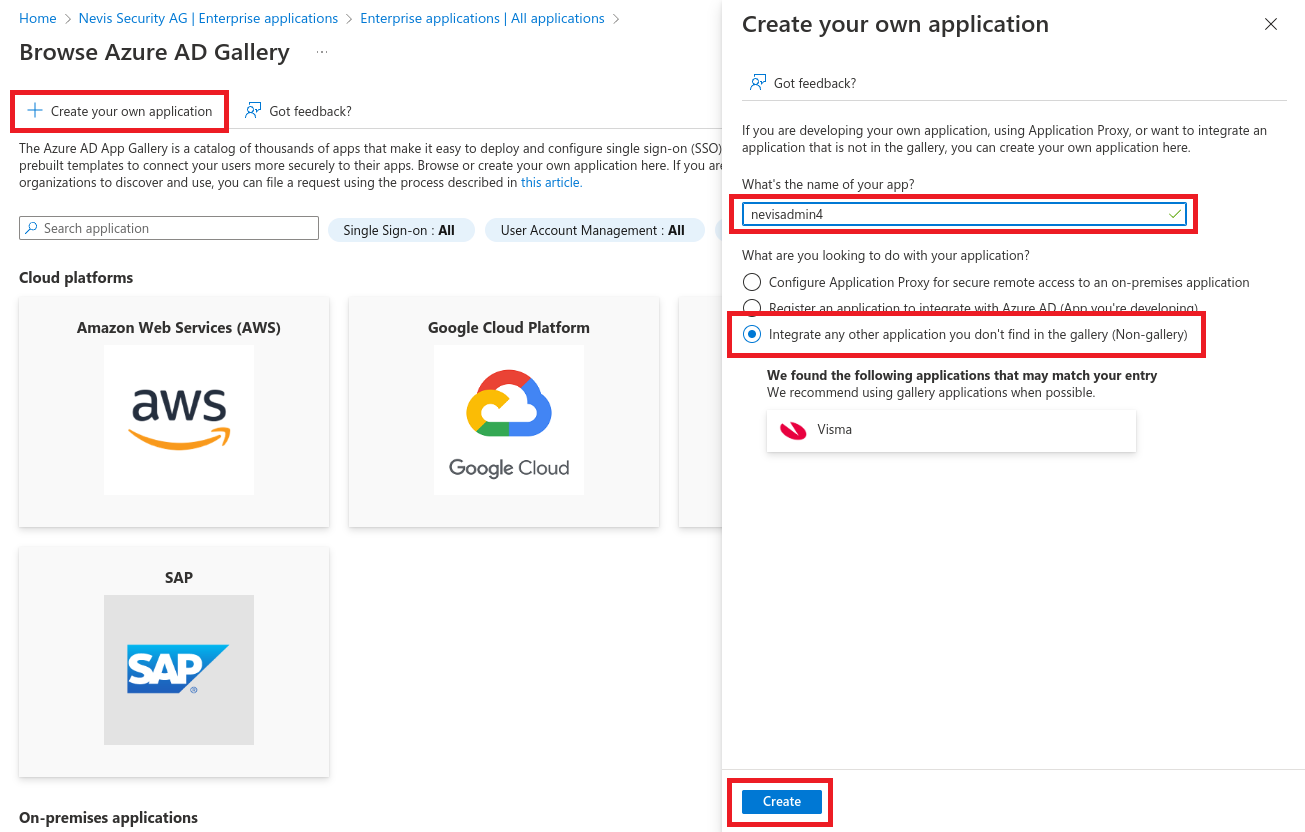
Select New application.
Select Create your own application.
Create Application Roles
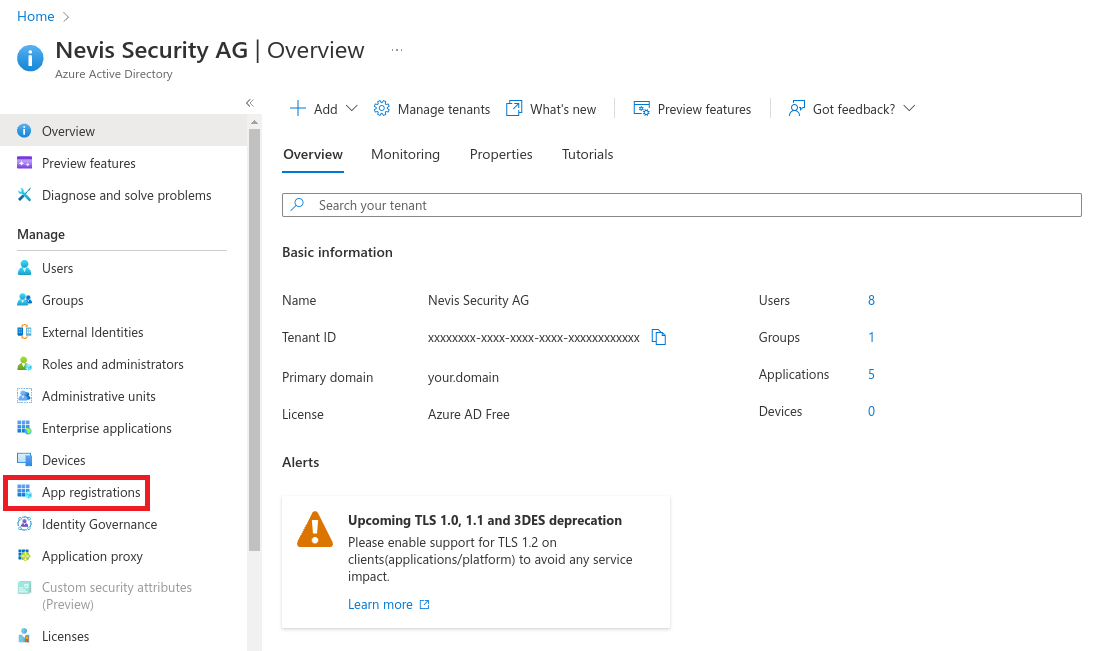
Select App registrations.
Navigate to All applications > nevisadmin4 > App roles.
Select Create app role.
Create Admin role with value
__admin(double-underscore). The__admingroup is available by default in nevisAdmin 4 and must be used for initial setup.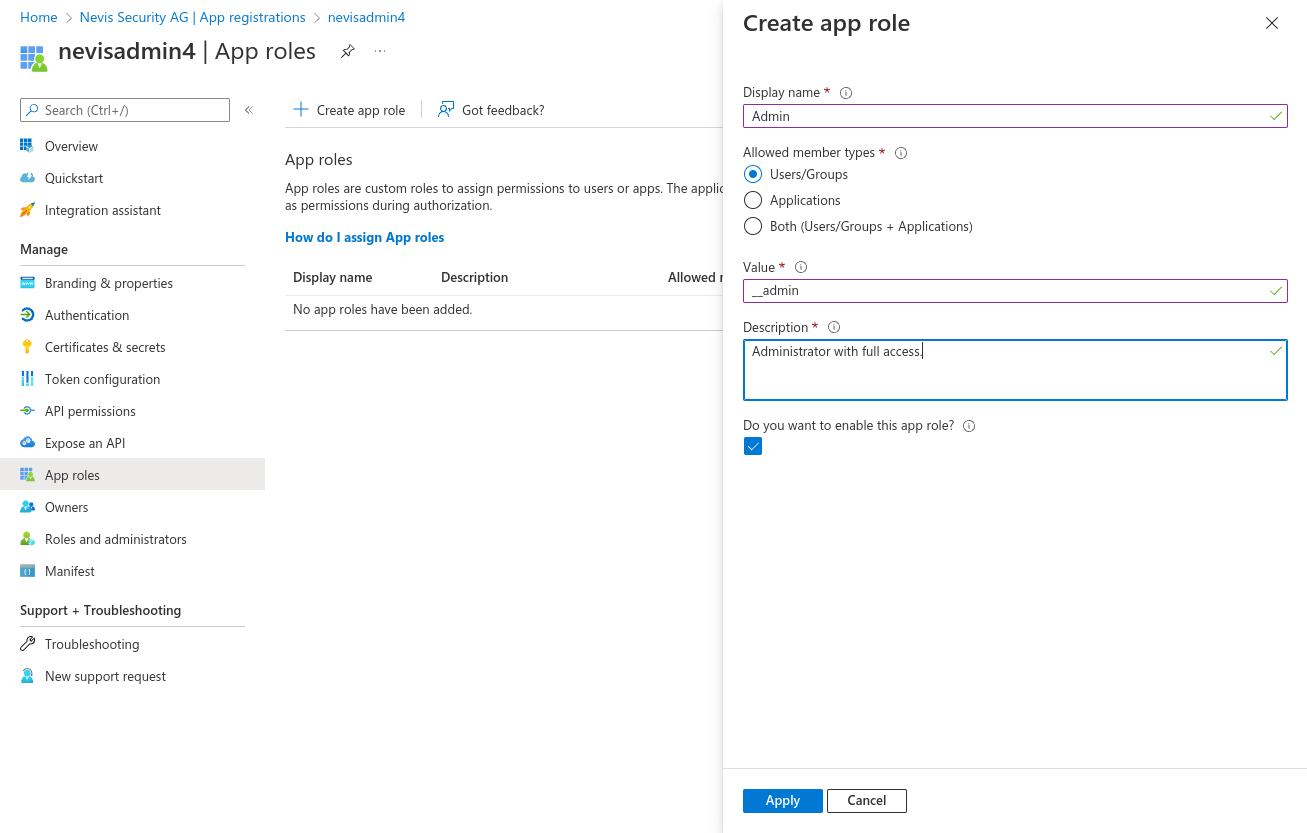
Assign Users and Roles
Navigate to Enterprise applications > nevisadmin4 > Users and groups.
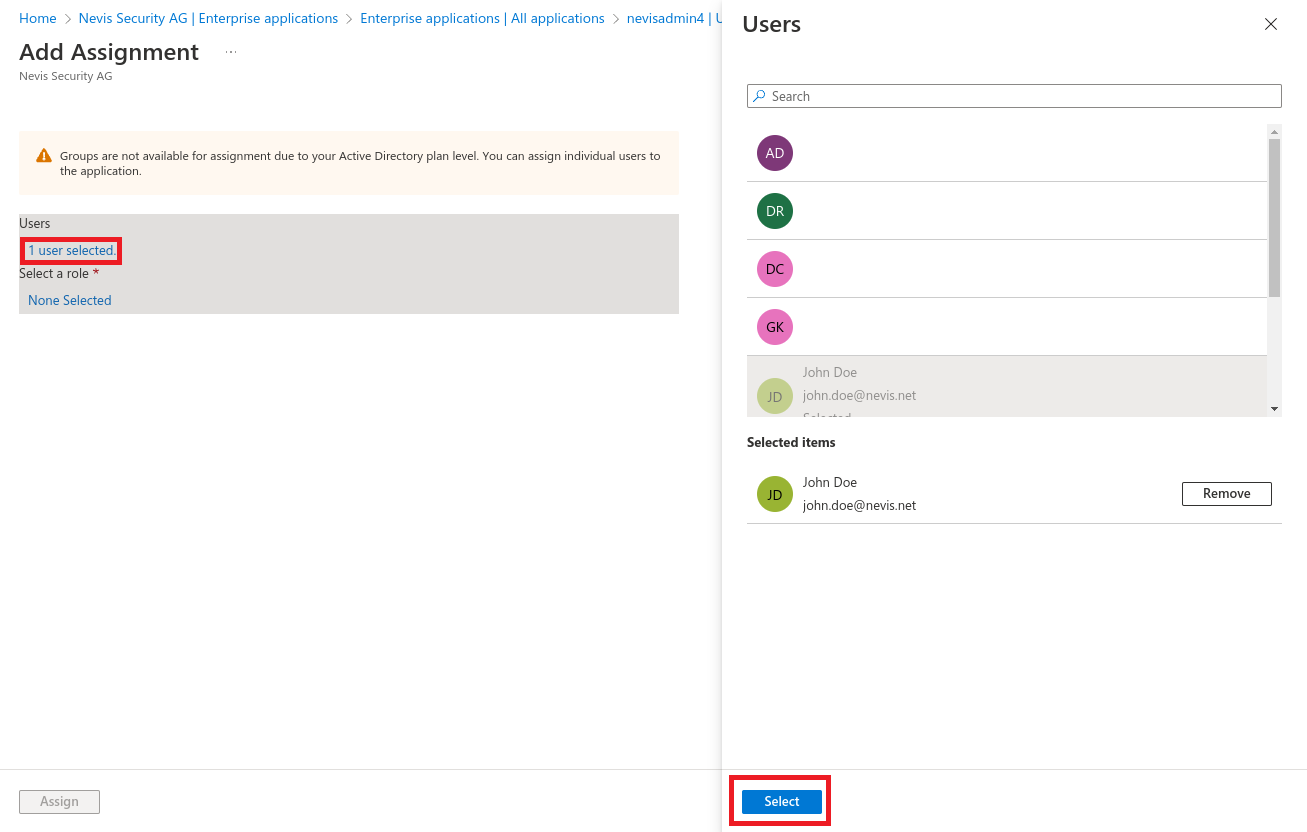
Select Add user/group.
Choose users then click Select.
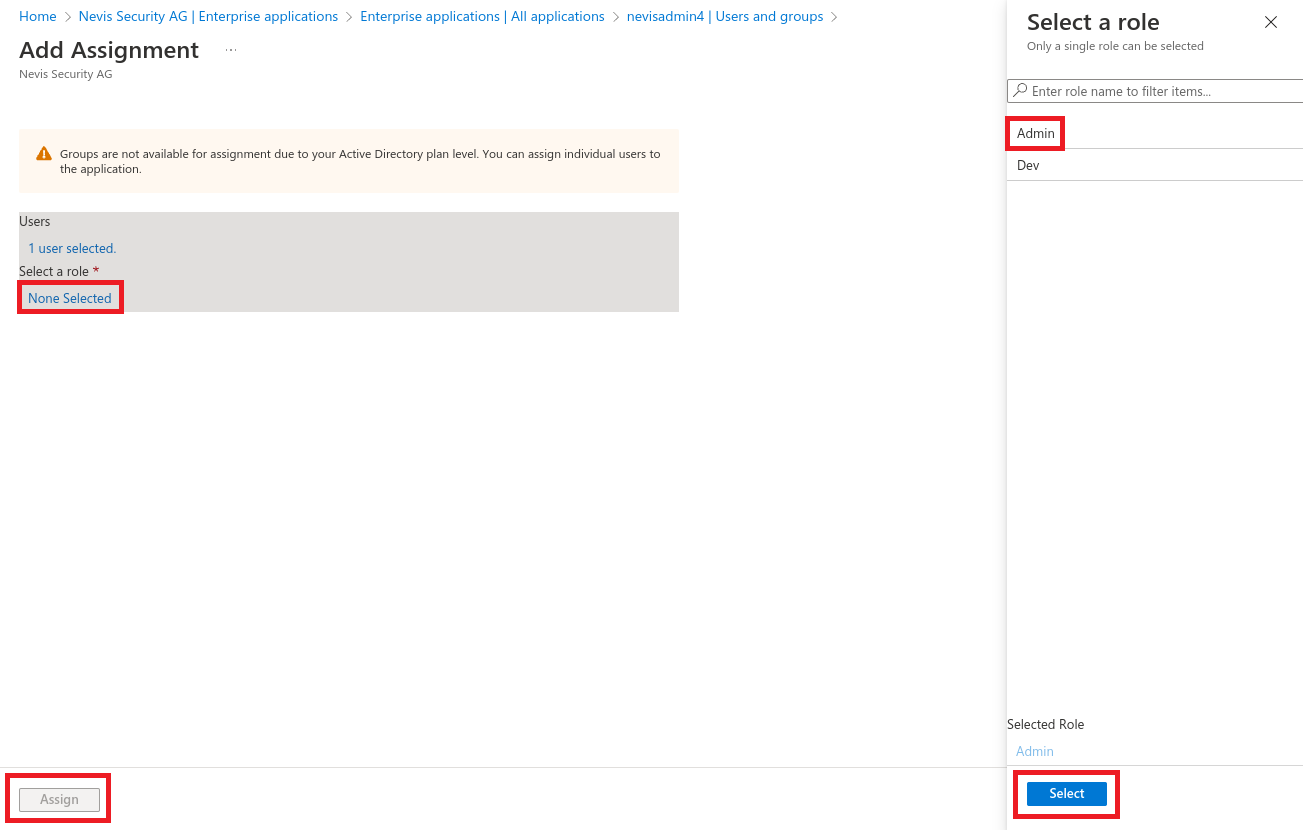
Select Roles
Enable Single sign-on
Navigate to Enterprise applications > nevisadmin4 > Single sign-on > SAML.
Edit the Basic SAML Configuration.
Url templates:
https://{your.domain}/nevisadmin/saml2/service-provider-metadata/nevisadmin
https://{your.domain}/nevisadmin/login/saml2/sso/nevisadmin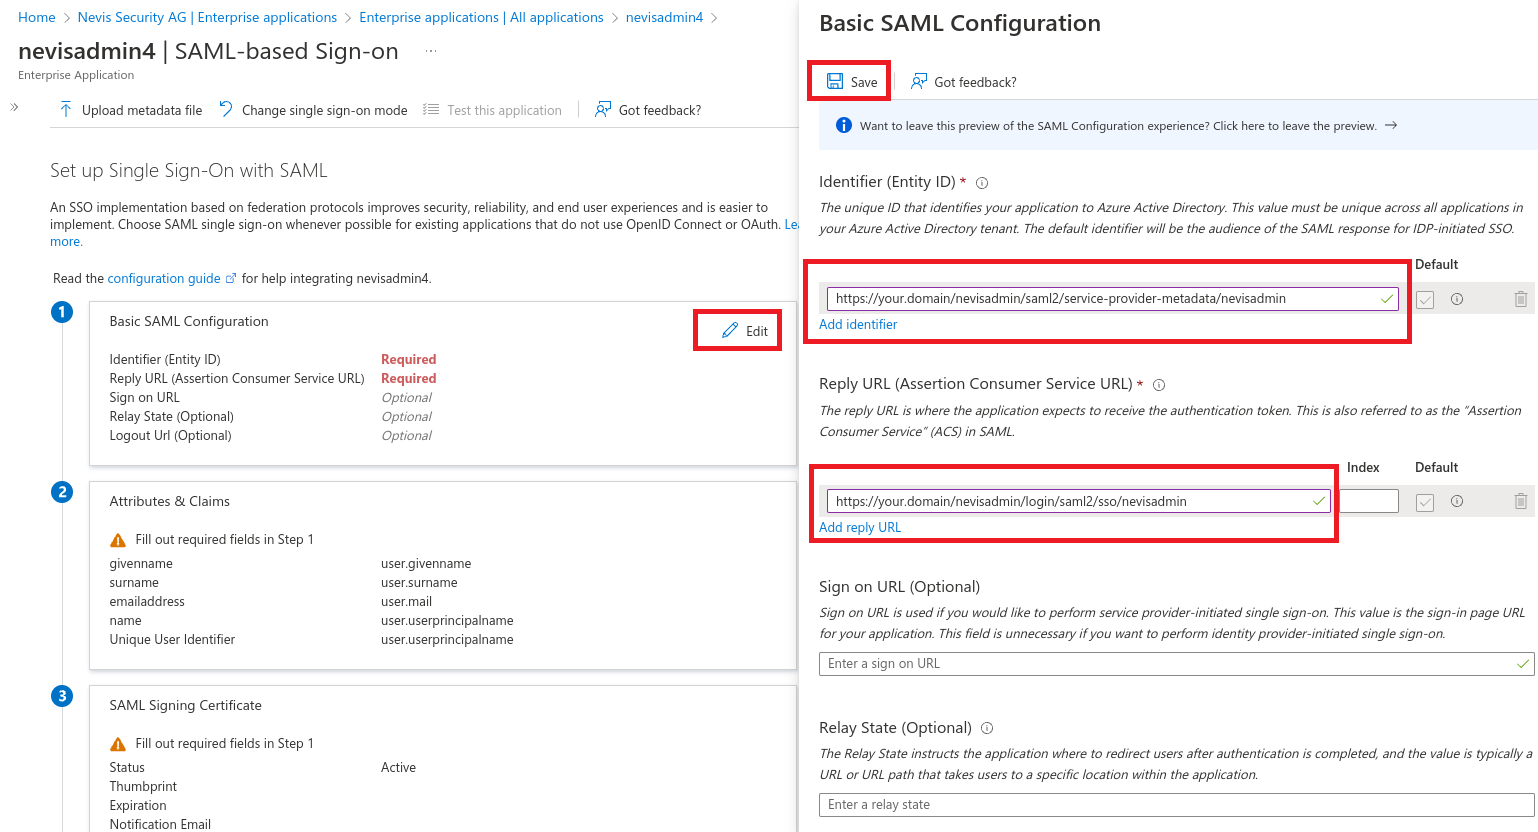
Copy the App Federation Metadata Url and set it as
nevisadmin.saml.idp.metadata-uriin thenevisadmin4.ymlfile.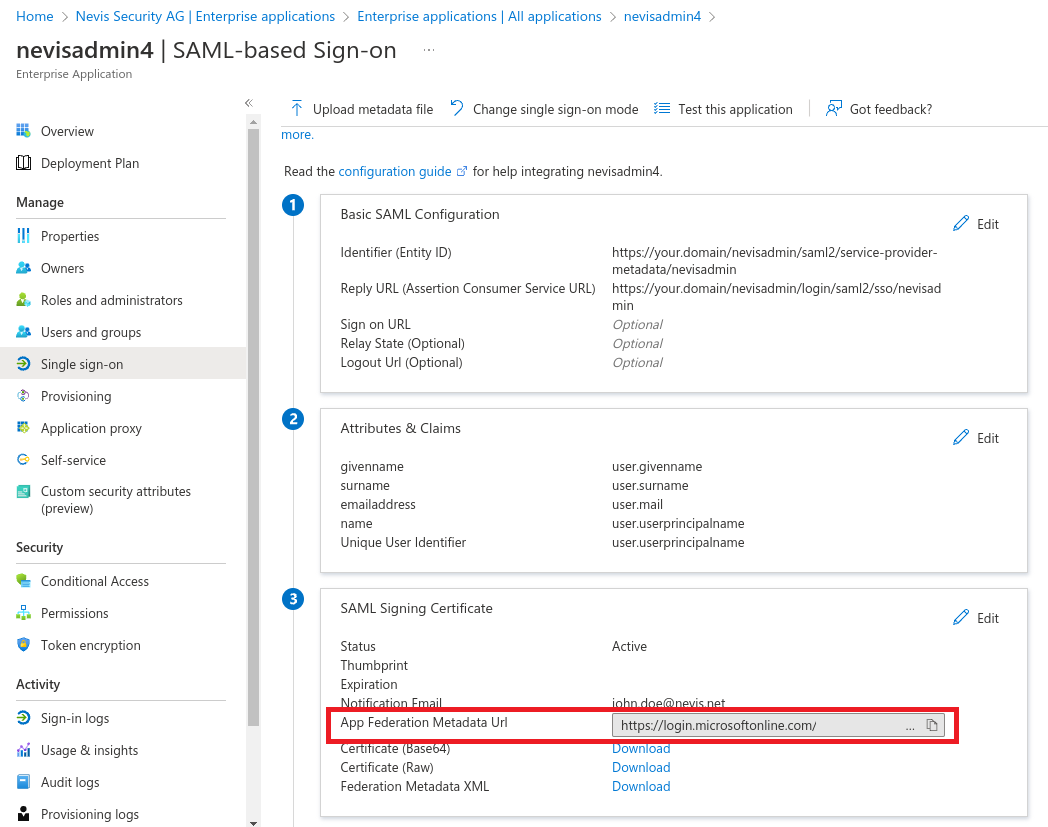
Custom userKey attribute (optional)
By default the email address is used as userKey in nevisAdmin 4.
There are multiple ways to customize it.
- See the official Azure documentation about how to customize claims issued in the SAML token for enterprise applications.
- Use your own attribute extension. See below.
Create Attribute extension
Run Windows PowerShell as administrator
#Install AzureAD module if not available yet
Install-Module AzureAD
Import-Module AzureAD

#Set TenantId
$TenantId = "xxxxxxxx-xxxx-xxxx-xxxx-xxxxxxxxxxxxx"

#Connect to your Azure AD tenant
Connect-AzureAD -TenantId $TenantId

#Search for the nevisadmin4 application to determine the ObjectId
Get-AzureADApplication -SearchString "nevisadmin4"

#Set Application ObjectId
$AppObjectId = "xxxxxxxx-xxxx-xxxx-xxxx-xxxxxxxxxxxxx"

#Create "userKey" extension property
New-AzureADApplicationExtensionProperty -ObjectId $AppObjectId -Name "userKey" -DataType "String" -TargetObjects "User"

#Set ExtensionName
$ExtensionName = "extension_xxxxxxxxxxxxxxxxxxxxxxxxxxxxxxxx_userKey"

#List users in your tenant to determine the ObjectId for your user
Get-AzureADUser

#Set User ObjectId
$UserObjectId = "xxxxxxxx-xxxx-xxxx-xxxx-xxxxxxxxxxxxx"

#Set a value for the extension property on the user.
Set-AzureADUserExtension -ObjectId $UserObjectId -ExtensionName $ExtensionName -ExtensionValue "your-custom-user-key"

#Verify that the attribute was added correctly.
Get-AzureADUser -ObjectId $UserObjectId | Select -ExpandProperty ExtensionProperty
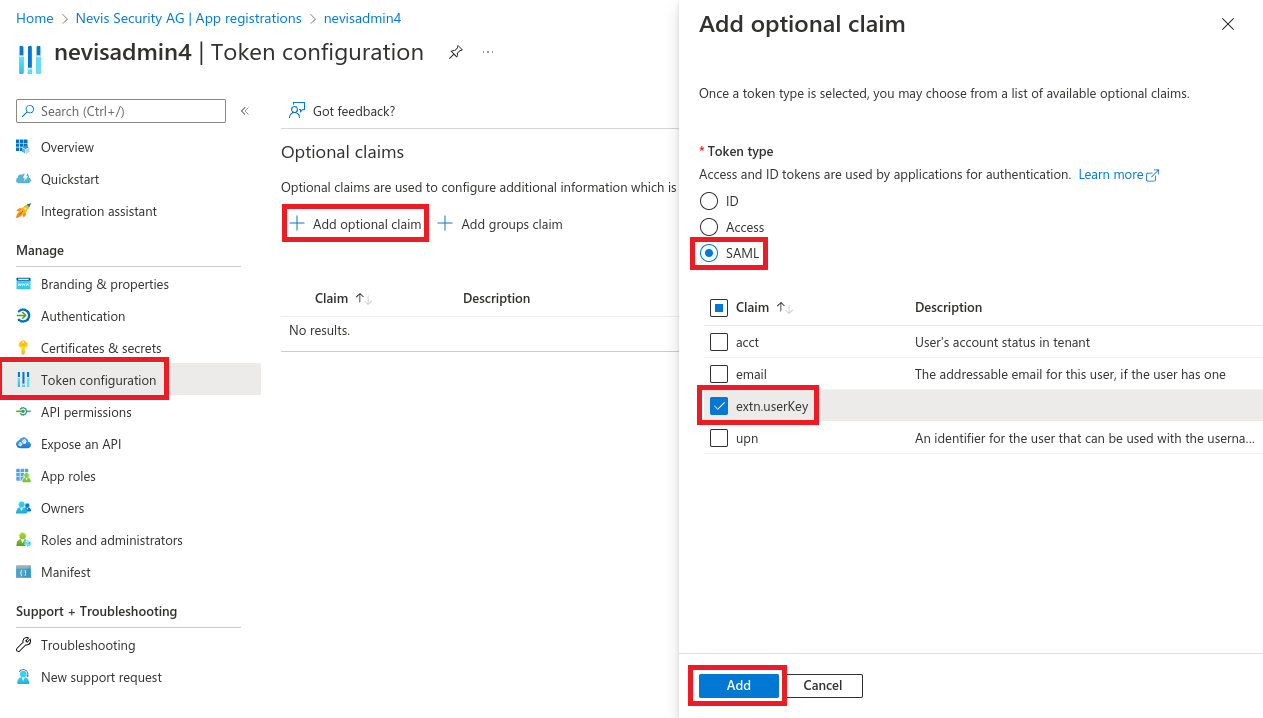
Configure optional claims
Navigate to App registrations > All applications > nevisadmin4 > Token configuration.
Select Add optional claim.
Define attribute mapping
nevisadmin4.yml snippet:
nevisadmin:
  saml:
    attribute:
      user-key: http://schemas.microsoft.com/identity/claims/extn.userKey