Accessing the nevisIDM Administration Application
The nevisIDM Web Application pattern is used to configure the access to the nevisIDM administration web application.
For information on how to configure nevisIDM user identity propagation to 3rd party web application, refer to Authentication with nevisIDM User and Password.Preconditions
- Make your web application accessible via nevisProxy.
- Add a nevisIDM Instance pattern as explained in Setting up a nevisIDM Instance.
Quickstart
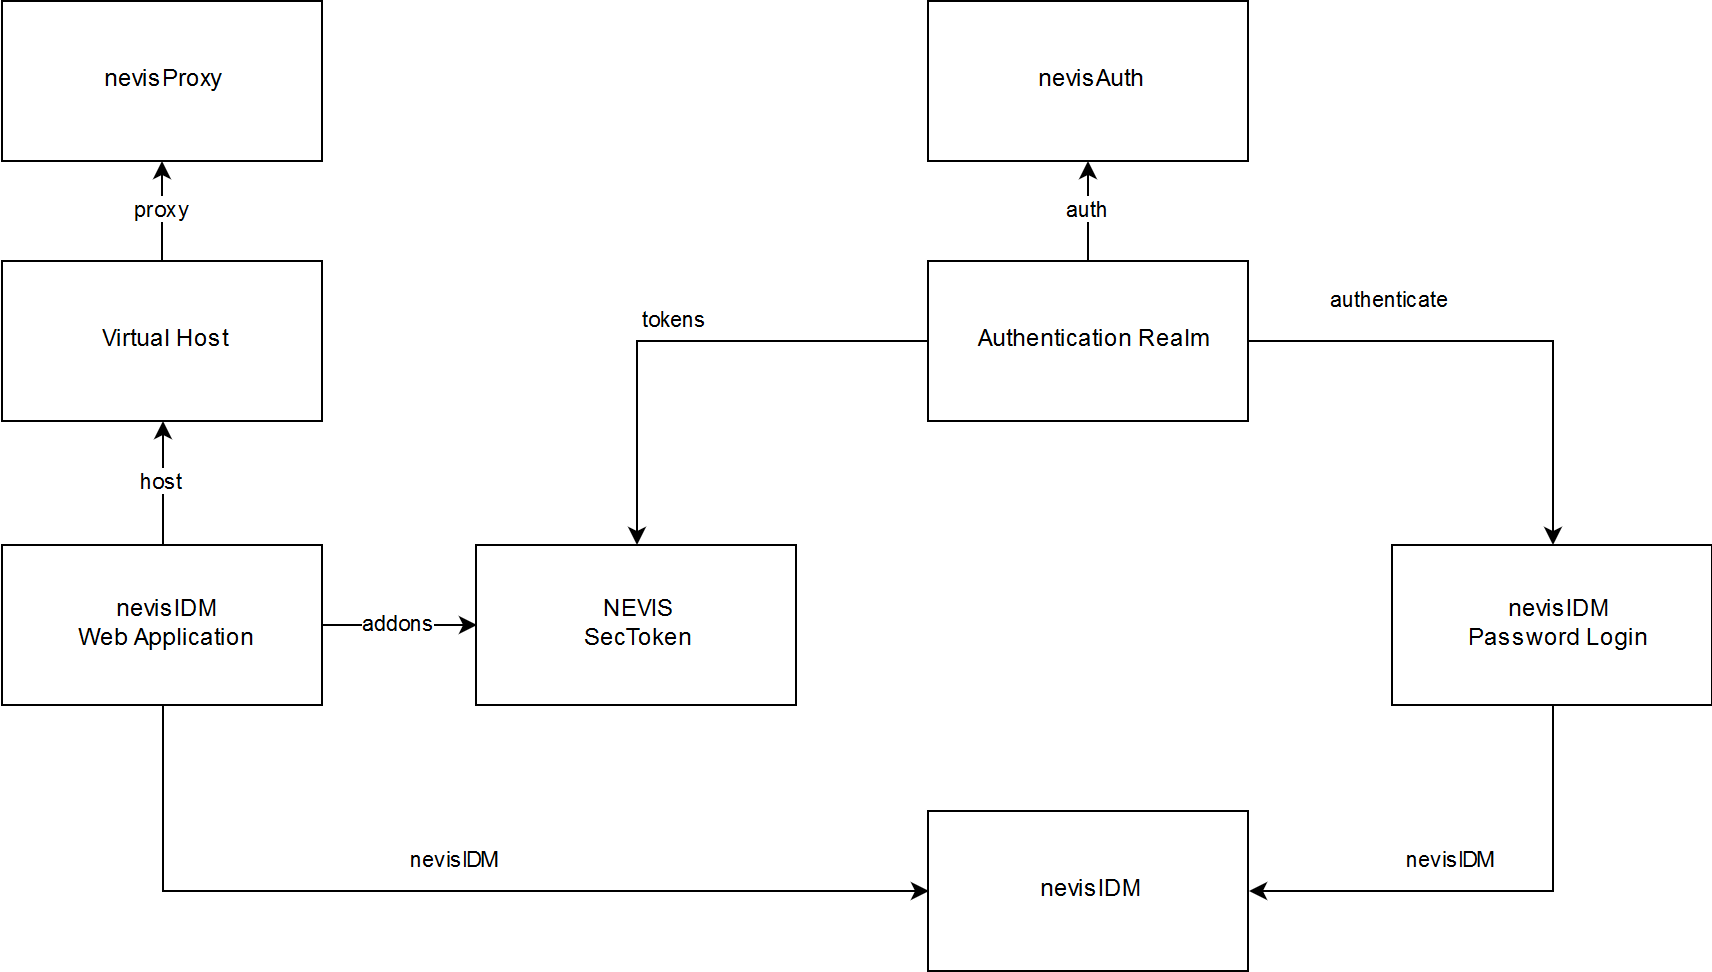
- Add a new nevisIDM Web Application pattern to your project.
- Assign an Authentication Realm pattern to the nevisIDM Web Application pattern.
- Assign the nevisIDM Password Login pattern to the Authentication Realm pattern.
- Assign the nevisIDM Instance pattern to the nevisIDM Password Login pattern.
- Assign a Nevis SecToken pattern to the Authentication Realm pattern.
- Assign the same Nevis SecToken pattern to the nevisIDM Web Application pattern.
After you have deployed the pattern, the application will be available on the /nevisidm/admin frontend path.
For more information about the nevisIDM administration web application, see the nevisIDM Technical Documentation.Overview
The next diagram gives an overview of the patterns involved and their relationship.
nevisIDM Self-Administration
The nevisIDM self-administration web application is not accessible by default. Map the /nevisidm/selfadmin frontend path with the pattern Generic Service or Host Context Settings to make the application available. Proceed as follows:
- Open the relevant nevisIDM Web Application pattern in the nevisAdmin 4 web application.
- In the screen with the details of the nevisIDM Web Application pattern, create the pattern Generic Service or Host Context Settings in the Additional Settings field.
- You define the settings for the Generic Service or Host Context Settings pattern in the Generic Service or Host Context Settings pattern screen. Enter the following code block in the Filters and Mappings field of this screen:
<servlet-mapping>
 <servlet-name>Connector_${service.name}</servlet-name>
 <url-pattern>/nevisidm/selfadmin/*</url-pattern>
</servlet-mapping>
In the nevisAdmin 4 nevisIDM plug-in 1.1.0 version, the connector naming is different. In this case, use the following naming for the servlet-name attribute: ${service.name}Connector