Defining Classic Inventory Files
You need classic inventory files if you operate nevisAdmin 4 in a classic deployment mode.
A classic inventory file consists of the sections hosts, groups and vars. In these sections, you define the hosts, host groups and variables valid for this specific inventory.
Defining Hosts
You define the hosts available for deployment in the hosts section of the inventory file, as a list. The following movie shows you how to do this:
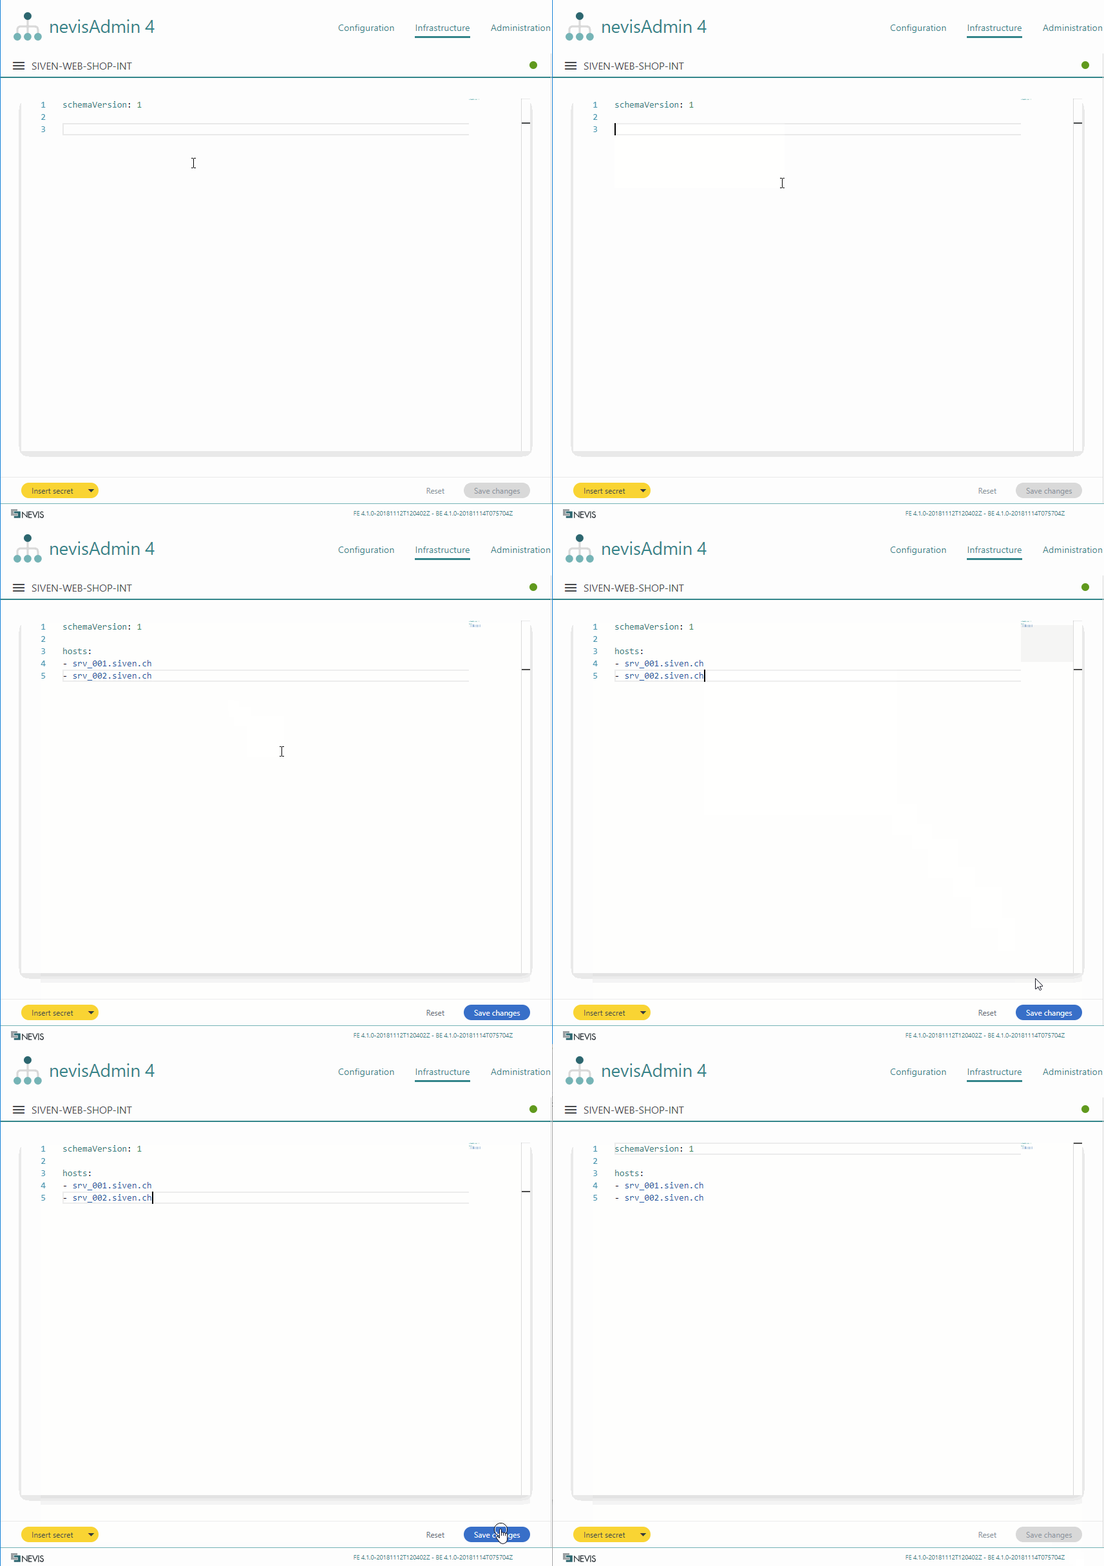
There are three ways to define a host:
- You can reference a host by its DNS name.
- You can define an abstract name.
- You can use the host's IP address as identifier.
Here is an example that illustrates all variants:
Example
hosts:
- nevis-host1.muvonda.ch
- proxy-prod
- 192.168.136.1
Defining Host Variables
You can define variables in the inventory file on three levels:
- On host level
- On host group level
- On inventory level
Host variables are more specific than group and inventory variables.
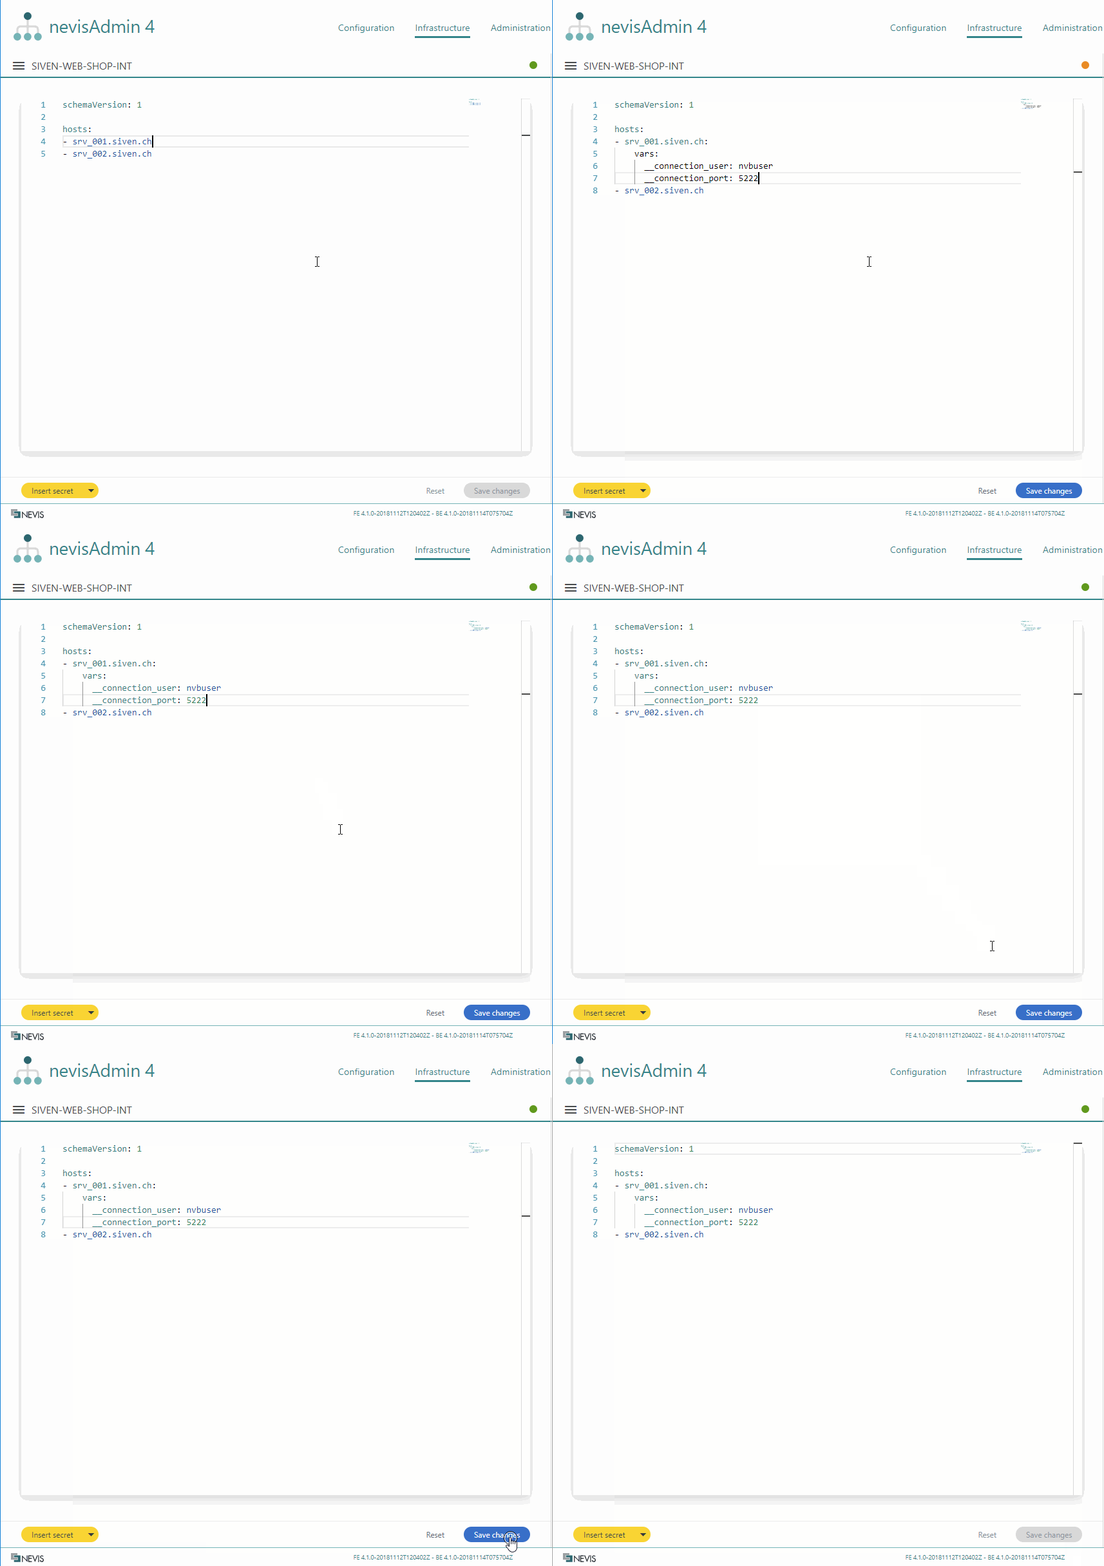
This section explains how to define host variables. Host variables are defined in a list, right below the host identifier. The following movie shows you how to proceed:
Configuring Host Connections
You can configure the connection to a host using the following predefined variables:
- __connection_host: Defines the name or IP address of the host. This variable must be defined if nevisAdmin 4 cannot resolve the primary host name.
- __connection_port: Defines an alternative port to use for deployment. If this variable is not set, port 22 is used, which is the default port for SSH.
Set the following variables to define a username and password for the SSH connection:
- __connection_user: Defines the user name to use for deployment. If not set, this defaults to root.
- __connection_password: Defines the user's password. If this variable is not set, the [configured SSH private key] will be used for authentication.
Use the secret:// mechanism to hide the password from the inventory. See Working with Secrets for details. In general, we recommend using key-based authentication instead of a password for the SSH connection. See Deployment via SSH for details. Do not set the variable __connection_password if you use the key-based mechanism.
The following code block shows an example including two hosts with custom connection settings:
Example
hosts:
- nevis-host3.muvonda.ch:
 vars:
 __connection_port: 5222
 __connection_user: root

- proxy-prod:
 vars:
 __connection_host: nevis-host4.muvonda.ch
 __connection_port: 5222
 __connection_user: techuser
 __connection_password: secret://ce3463466730c380fa2b3160
It is possible to globally set the host connection variables in the top-level vars section. This is useful if you use the same port or user for all hosts.
Defining Host Groups
You can organize the previously defined hosts into one or more groups. You do this in the groups section of the inventory file.
Consider the following when you want to organize your hosts in groups:
- Groups allow you to organize your inventory logically.
- You can structure the hosts in groups according to their functions within the Nevis Security Suite.
- You can also group them according to their physical location (for example, geographically separated data centers).
- A combination of both approaches is possible, too.
Adding Host Groups
You define host groups in a list, in the groups section of the inventory file. The following movie shows you the steps to perform.
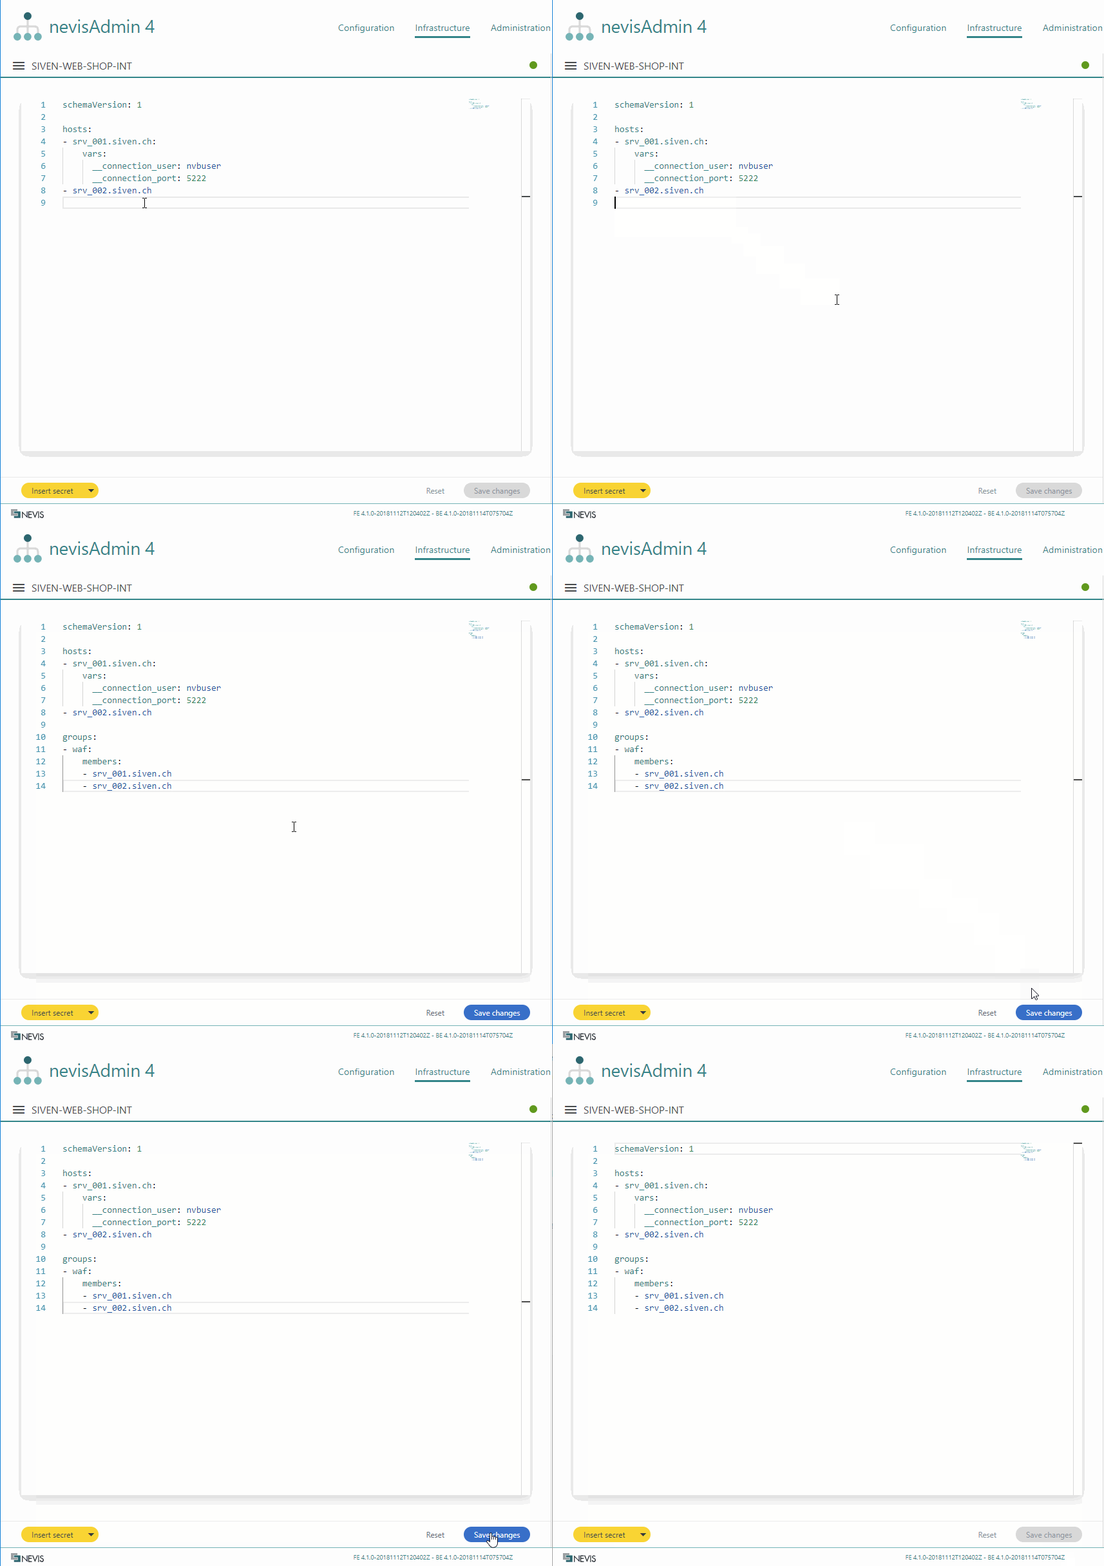
You list the members of a host group by referencing the hosts defined in the hosts section.
Adding Variables to Host Groups
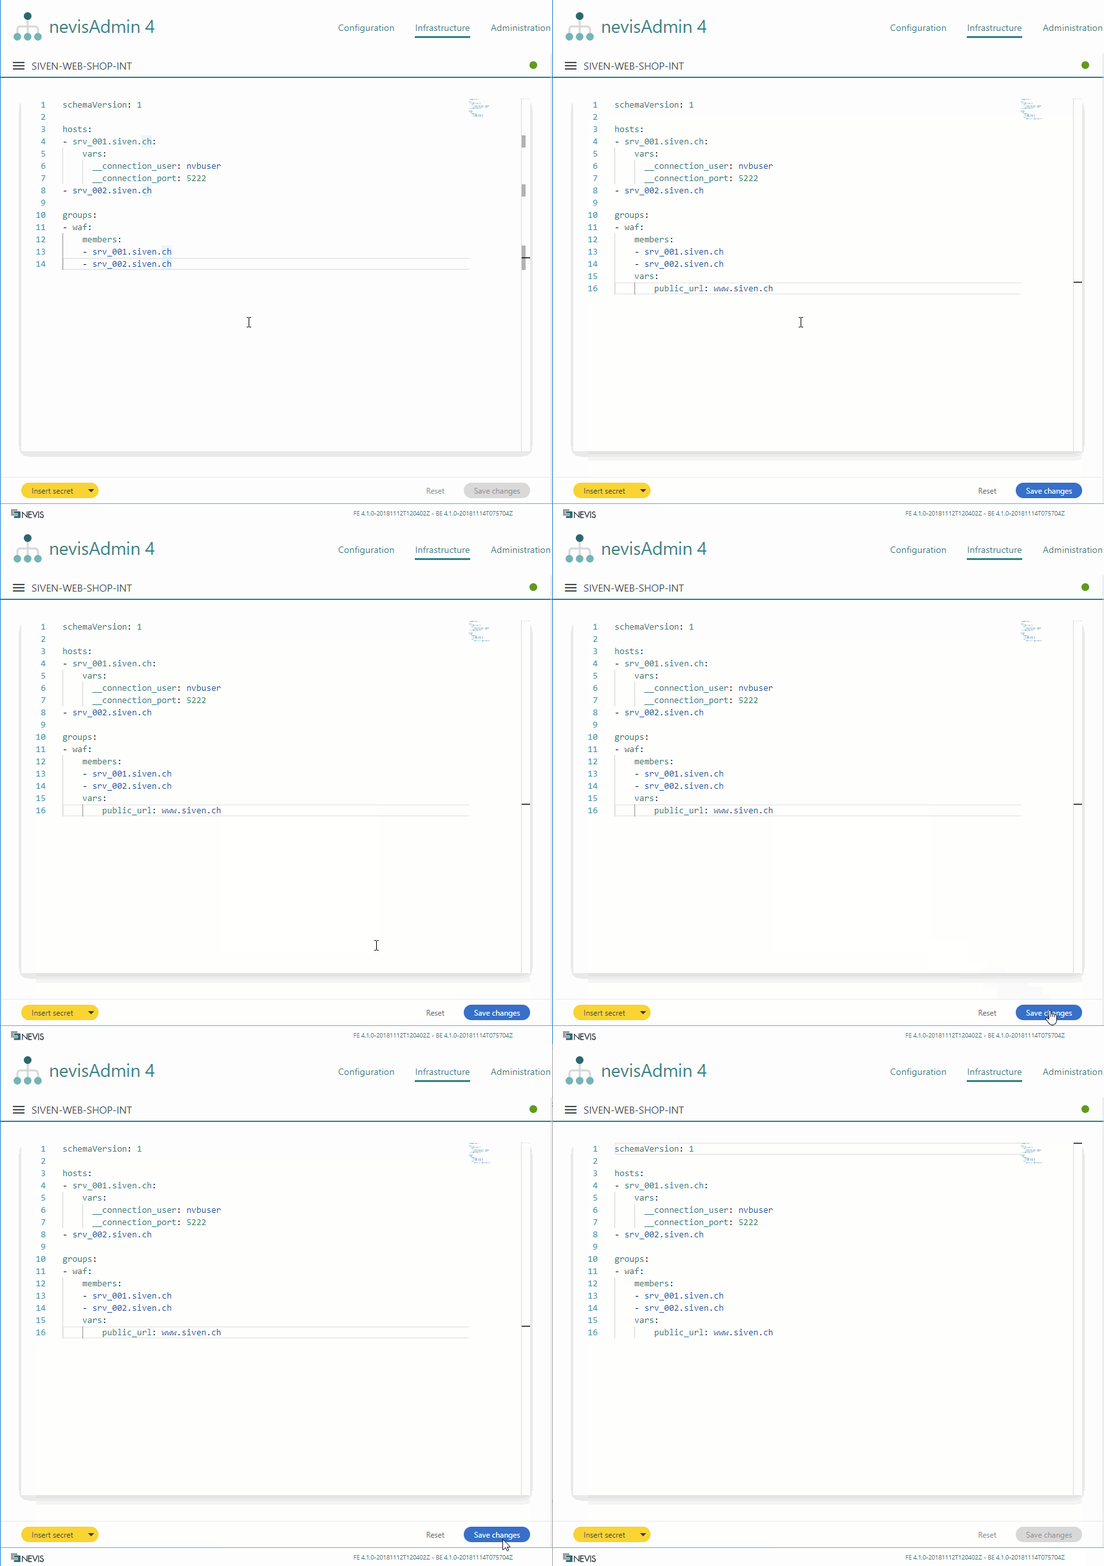
Variables can also be defined at group level. The following movie shows you how to do this:
Defining Variables
You can define global variables in the vars section of the inventory file. There are two ways to do this:
Inserting Variables from a Project
If you have created variables in a project, you can add these variables together with their sample values to an inventory. The following movie demonstrates how this is done:
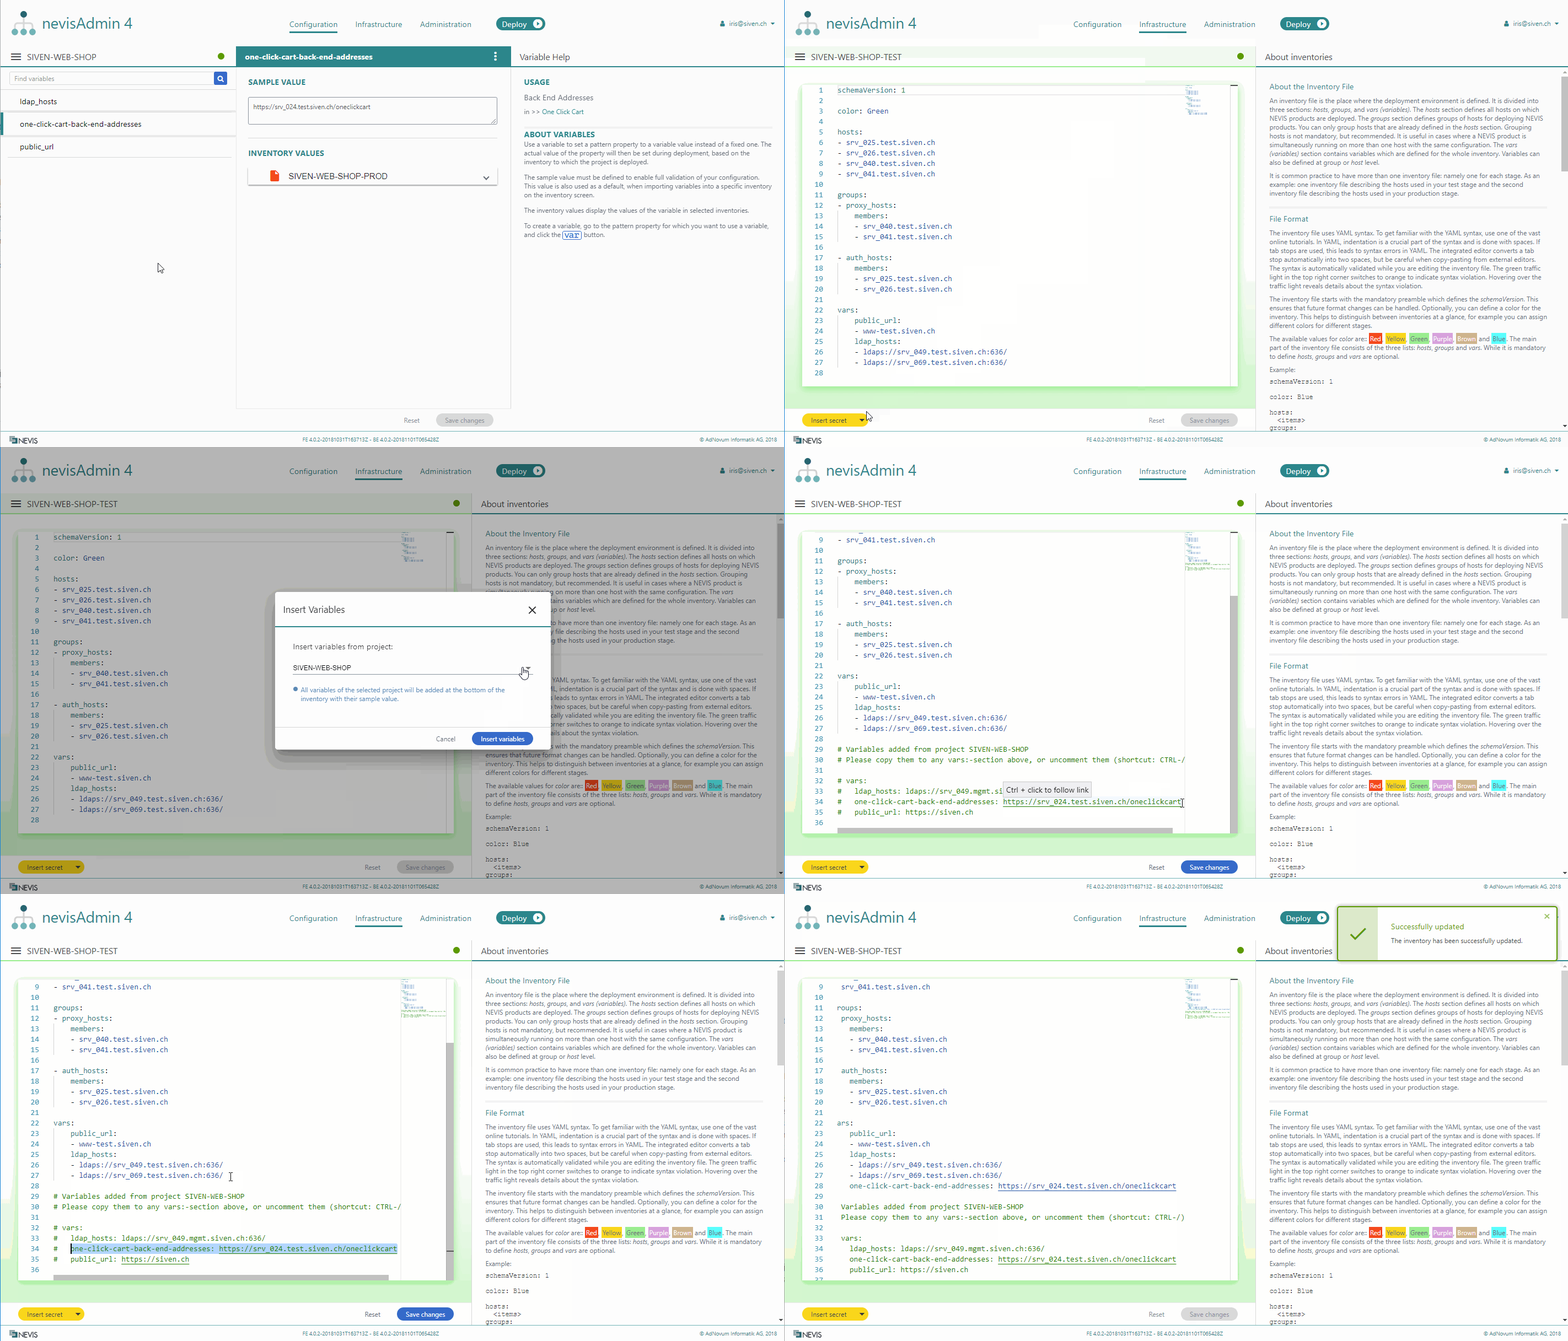
Perform the following steps to insert variables from a project into an inventory:
- First click in the inventory file, then click the triangle arrow icon on the Insert secret button. You find this button in the lower left corner of the inventory file.
- Select Insert variables from the drop-down menu.
- The Insert Variables dialog opens. Select a project from the dialog's drop-down list and click Insert variables. All variables from the selected project will be added to the inventory, even if they are already present in the inventory.
- The variables with their sample values are inserted at the bottom of the inventory file, commented out. You can copy-paste the variable, and its sample value pairs, to each level in the inventory file. Variables in the vars section are valid for the entire inventory.
- If you do not have a global vars section yet, you can uncomment the whole inserted section. To do this, select the section and press CTRL-/.
- Review the sample values and update them before saving.
Manually Defining Variables in an Inventory
Instead of inserting variables from a project, you can also manually define variables directly in the vars section of the inventory file. Variables that you define in the vars section are valid globally, that is, for the entire inventory.