Creating a Project
The Create Project Function
You create a project with the Create Project function. This function is available:
- in the Welcome screen, and
- in the Project Settings screen.
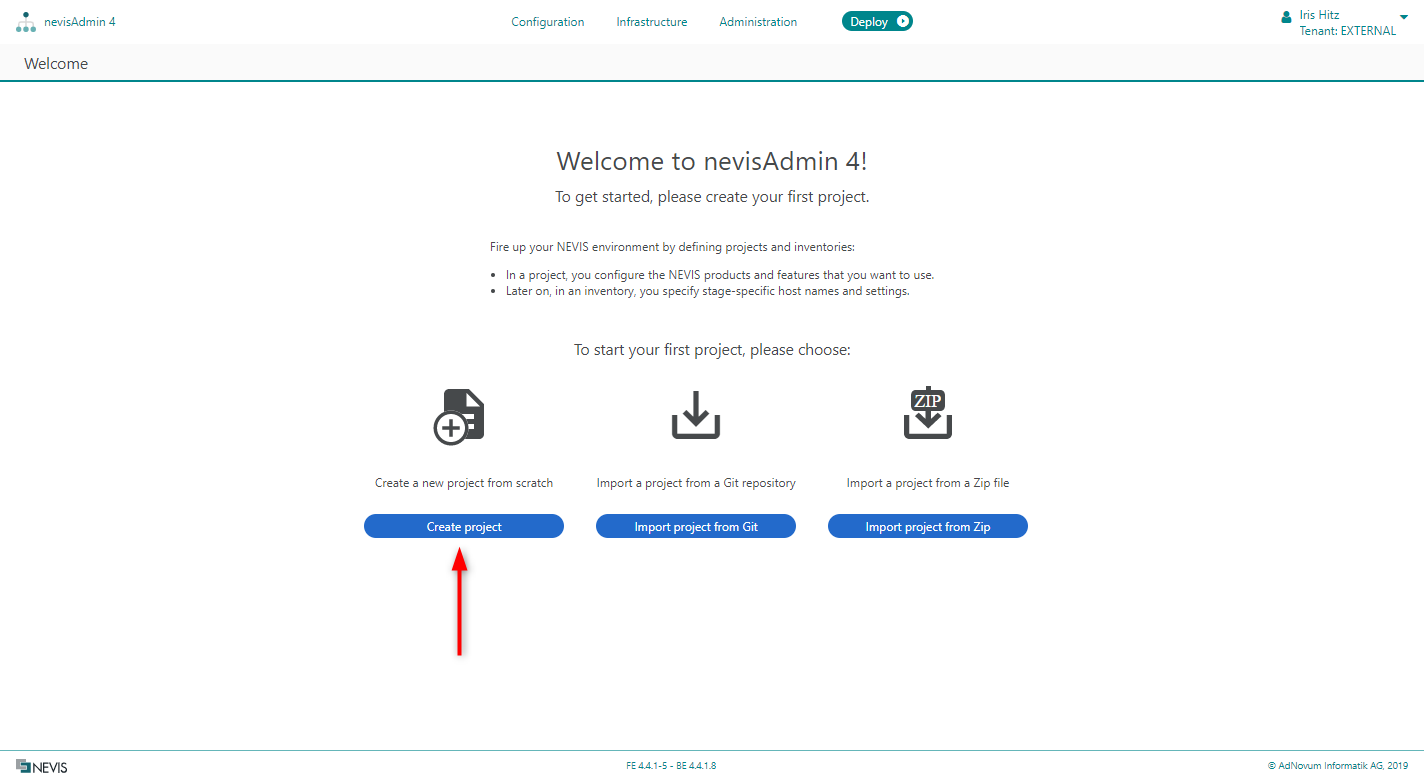
Creating a Project - In the Welcome Screen
The Welcome screen appears:
- when nevisAdmin4 does not contain any projects yet, or
- when you do not have the permission to view any of the existing projects.
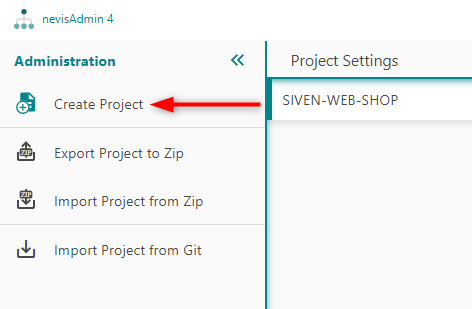
Creating a Project - In the Project Settings Screen
The Create Project function is also part of the Action menu of the [Project Settings] screen. You find the Action menu in the upper part of the screen's sidebar menu (see also the next figure).
Note that the Project Settings screen is only available when projects exist already.
Creating a Project
When you create a new project, you can connect this project to a Git-based version control system. Of course you can also create projects without version control. This section first explains how to create an unversioned project. Then it describes how to create a project that is connected to a version control system.
Creating an Unversioned Project
The next movie shows you how to create a project without version control.
For more details about unversioned projects and how to connect them to a version control system, see Connecting Projects to Git.
The Create Project Dialog - Unversioned Project
You specify the details of your new unversioned project in the Create Project dialog (see the next figure).
This dialog appears after you selected the Create Project function in the Welcome screen or in the Project Settings screen.
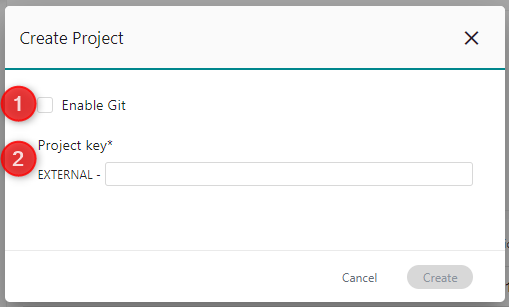
The following fields in the Create Project dialog are of relevance when you create an unversioned project:
- The Enable Git checkbox (no. 1 in the previous figure) Disable the checkbox if you do not want version control.
- The Project key field (no. 2) Define the key for the new project in this field. Note that the project key must be unique. This field is mandatory to be able to create a project.
The project key always starts with the relevant tenant. In the previous figure, this is "INTERNAL-". For more information about tenants, see Tenants.
Creating a Project with a Connection to Git
See also Git Setup and Best Practices.The next movie shows you how to create a project with a connection to Git.

You can only create a project that is connected to Git if the selected repository/directory in Git is empty. If this is not the case, then:
- import the existing project instead, or
- manually empty the target folder with Git tools, or
- change the directory, branch or repository such that they point to an empty folder.
The Create Project Dialog - Versioned Project
You specify the details of your versioned project in the Create Project dialog (see the next figure). This dialog appears after you selected the Create Project function in the Welcome screen or in the Project Settings screen.
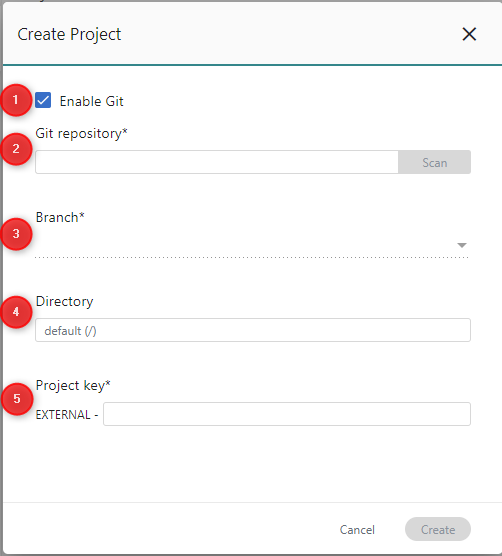
The following fields in the Create Project dialog are of relevance when you create a project with version control:
- The Enable Git checkbox (no. 1 in the previous figure) Enable the checkbox to activate version control.
- The Git repository field (no. 2 in the figure) Enter the Git URL of the project in this field. Click Scan to get immediate feedback on whether the repository exists. This field is mandatory.
- The Branch drop-down menu (no. 3) The Branch drop-down menu lists the available branches from the Git repository. By default, the master branch is selected. If this is not appropriate for your project, select the correct branch. This field is mandatory.
- The Directoryfield (no. 4) In this field, you specify the name of the directory in the repository in which you want to store the project files. This field is optional.
- The Project key field (no. 5) Define the key for the new project in this field. Note that the project key must be unique. This field is mandatory.
The project key always starts with the selected tenant. In the previous figure, this is "INTRANET-". For more information about tenants, see Tenants.