Case section
The Case section provides an overview of all detected, (potentially) harmful user requests (also called "cases"). The Case section contains two views: Generated rules and Case overview.
nevisDetect regards a certain user request as "detected", if the normalized risk score for this request is so high that it requires an action from the system. This can either be a re-authentication, that is, the user must re-authenticate himself (action AUTHENTICATE). Or the user is completely denied access (action BLOCK). Which action is triggered depends on the value of the normalized risk score as well as the valid policy.
Each time an action is required, nevisDetect creates a rule and sends it to nevisProxy. The rule connects the action with the user that sent the HTTP request. The rule is necessary to trigger the action (through nevisProxy). The Generated rules view lists all rules that were generated by any policy.
For each generated rule, a case exists. The case is a kind of report that shows all the details regarding the rule and the corresponding detection case. You find an overview of all detection cases in the Case overview view.
Case overview
The Case overview view lists all detected, (potentially) harmful user requests and their details. It contains a filter to search for particular cases. The user can see the details of a case.
This view is important for the forensic expert, because it helps him to analyze cases, to make statements about the risk a certain application bears, and/or to adjust the policies together with the security expert. The view is also important for support desk users that help other users who got stuck, e.g., because nevisDetect (falsely) blocked the user after a specific user interaction and the user cannot do anything anymore.
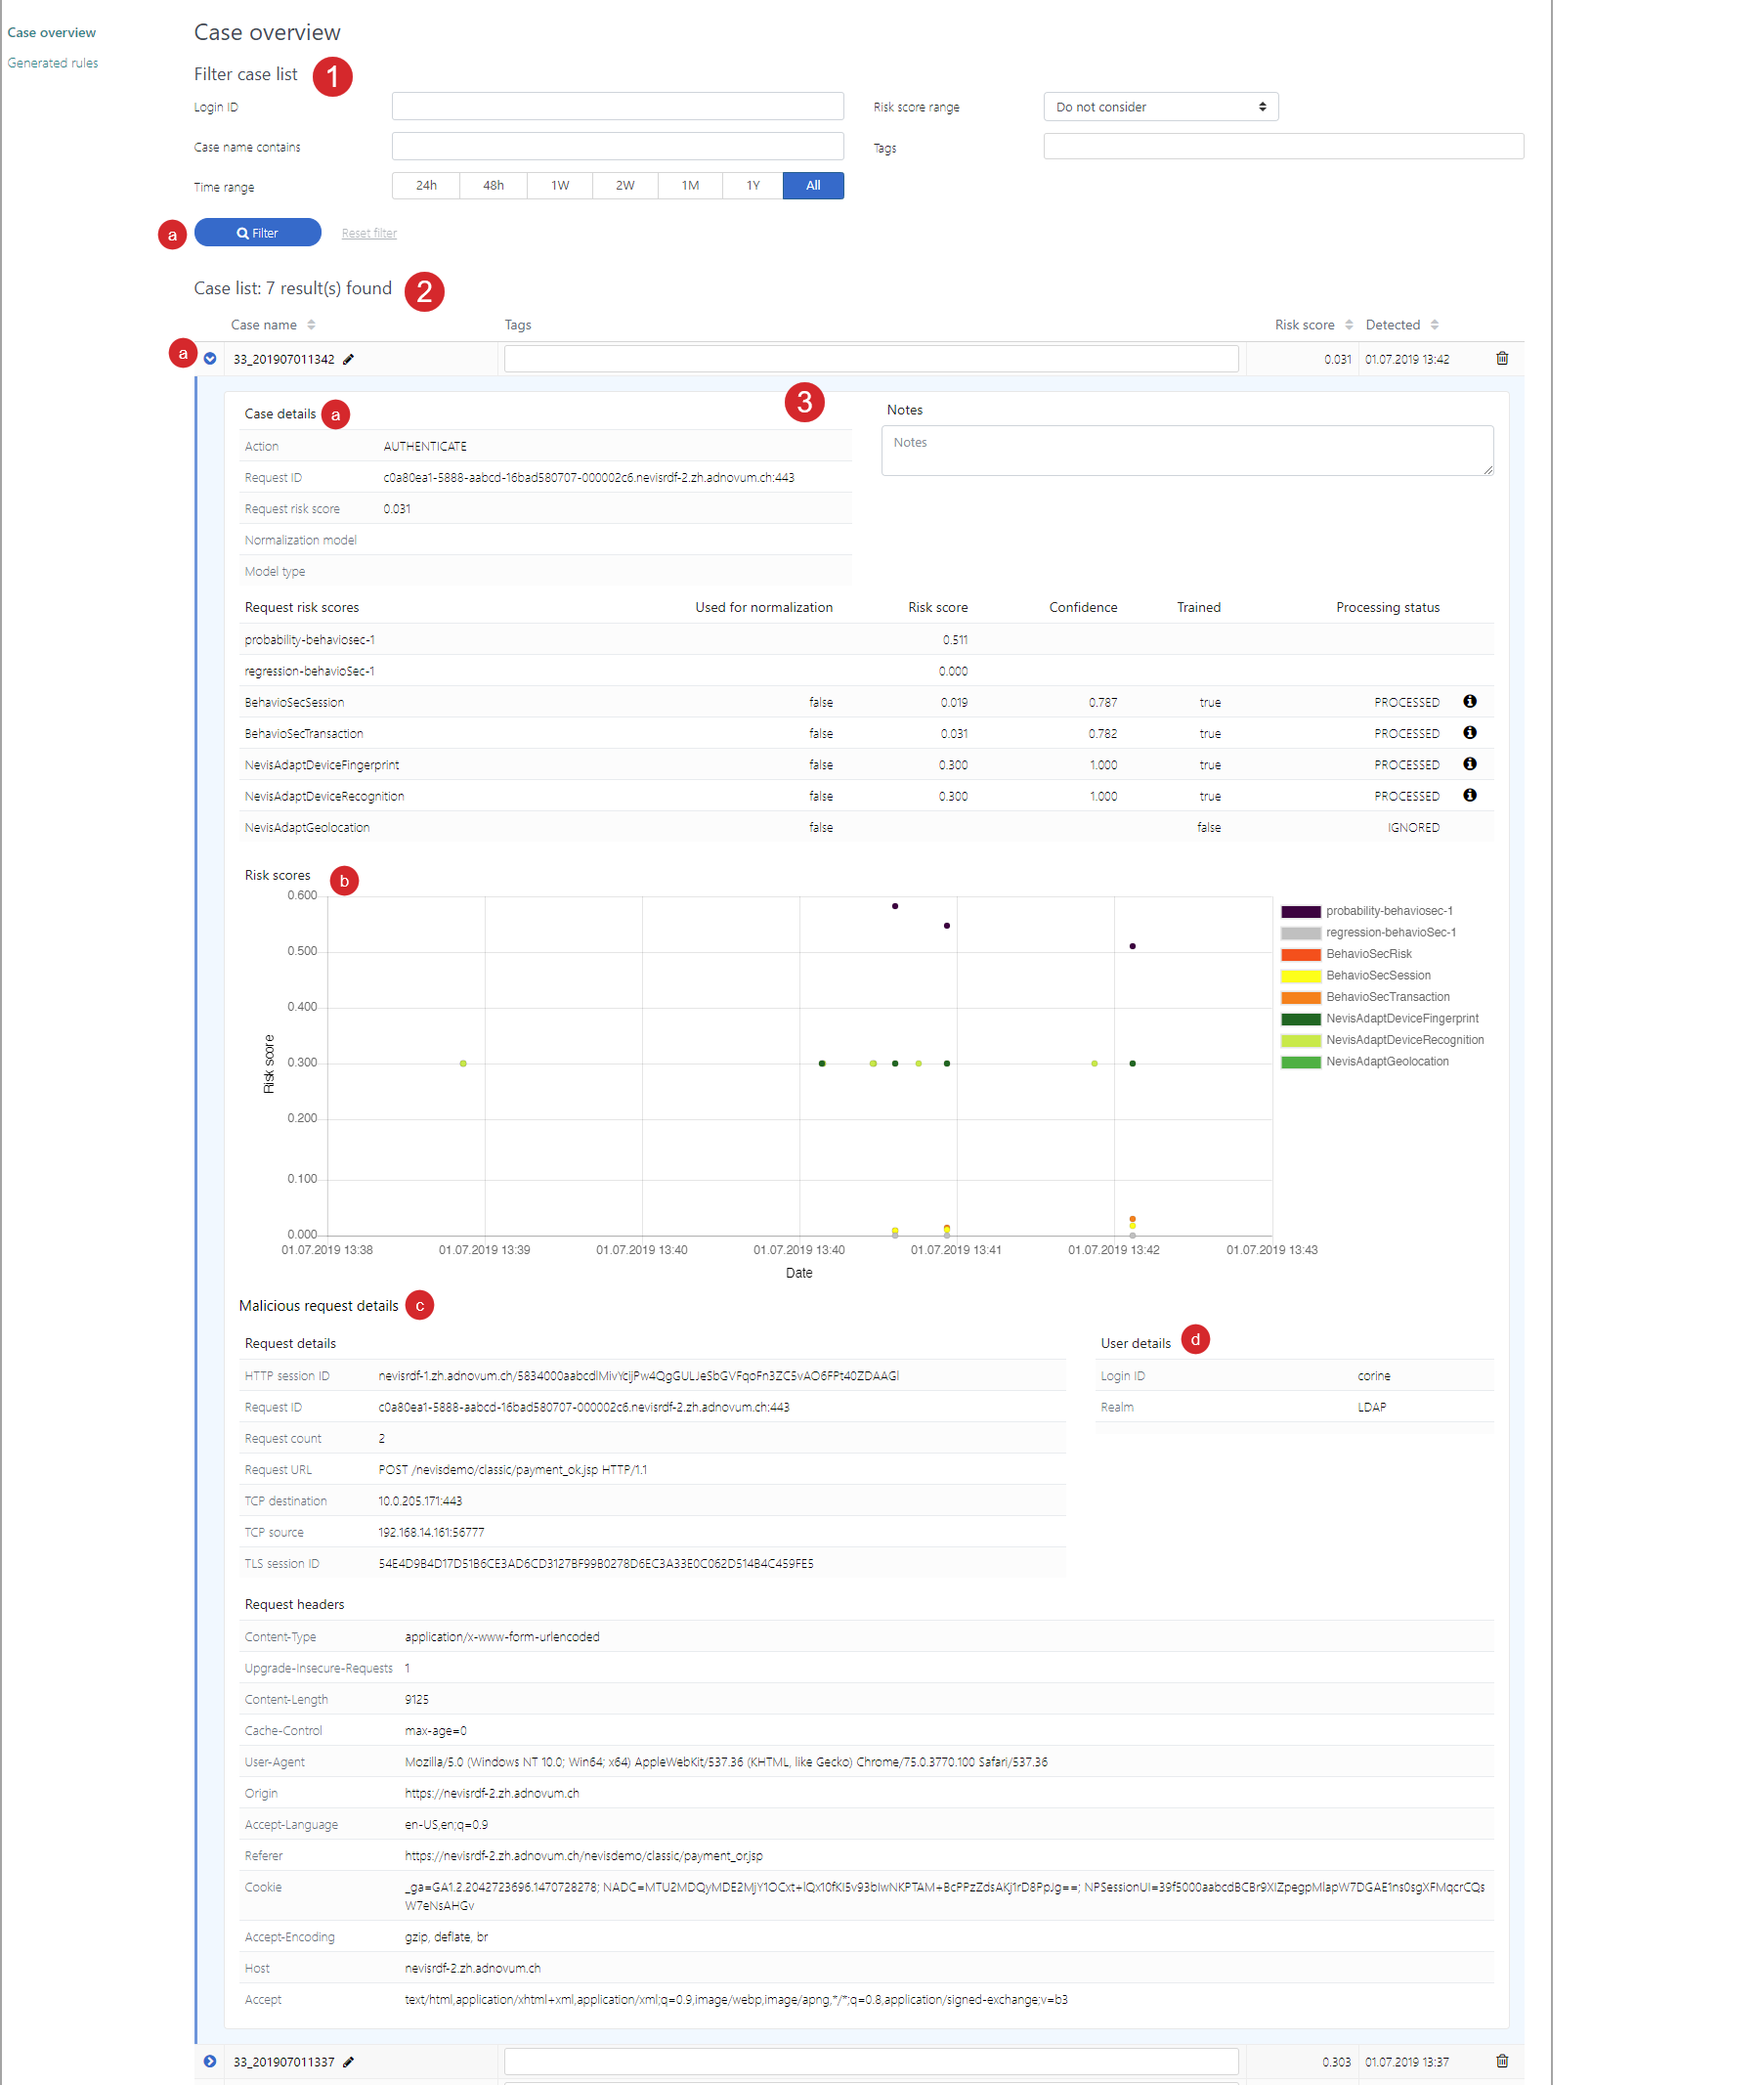
The Case overview view consists of several parts (see the figure above - the numbers in the figure correspond with the numbers below).
- The Filter case list part allows you to search for specific cases, for example, all cases connected to a user with a certain login ID, with a certain case name, having occurred within a certain time period (up until now) or within a certain risk score range.
- Click the Filter button to apply your search criteria on all available cases.
- The Case list part lists all cases that fulfill your search criteria. Each entry includes the case name, the risk score that caused the detection and the time of the detection. You can tag cases in the field Tag.
- Click the Expand icon to view the details of a certain case.
- The expanded overview shows:
- The details of the case itself (the ID of the user request behind the case, the request risk score per plug-in, the triggered action).
- All risk scores of the relevant user, per plug-in and for a certain time frame.
- The details of the malicious request (including the request headers).
- The user details (ID, realm).
If you want, you can change the name of the case by clicking the Pencil icon, or enter a relevant tag in the Tags field.
For more information on how to use the Case overview view, see the chapter Forensic expert.
Generated rules
The Generated rules view provides an overview over all rules generated by any policy. nevisDetect generates a rule if the risk score for a certain user request is so high that it requires an action from the system.
This view also allows to manage the rules, for example, to deactivate an active rule, or to delete a rule entirely.
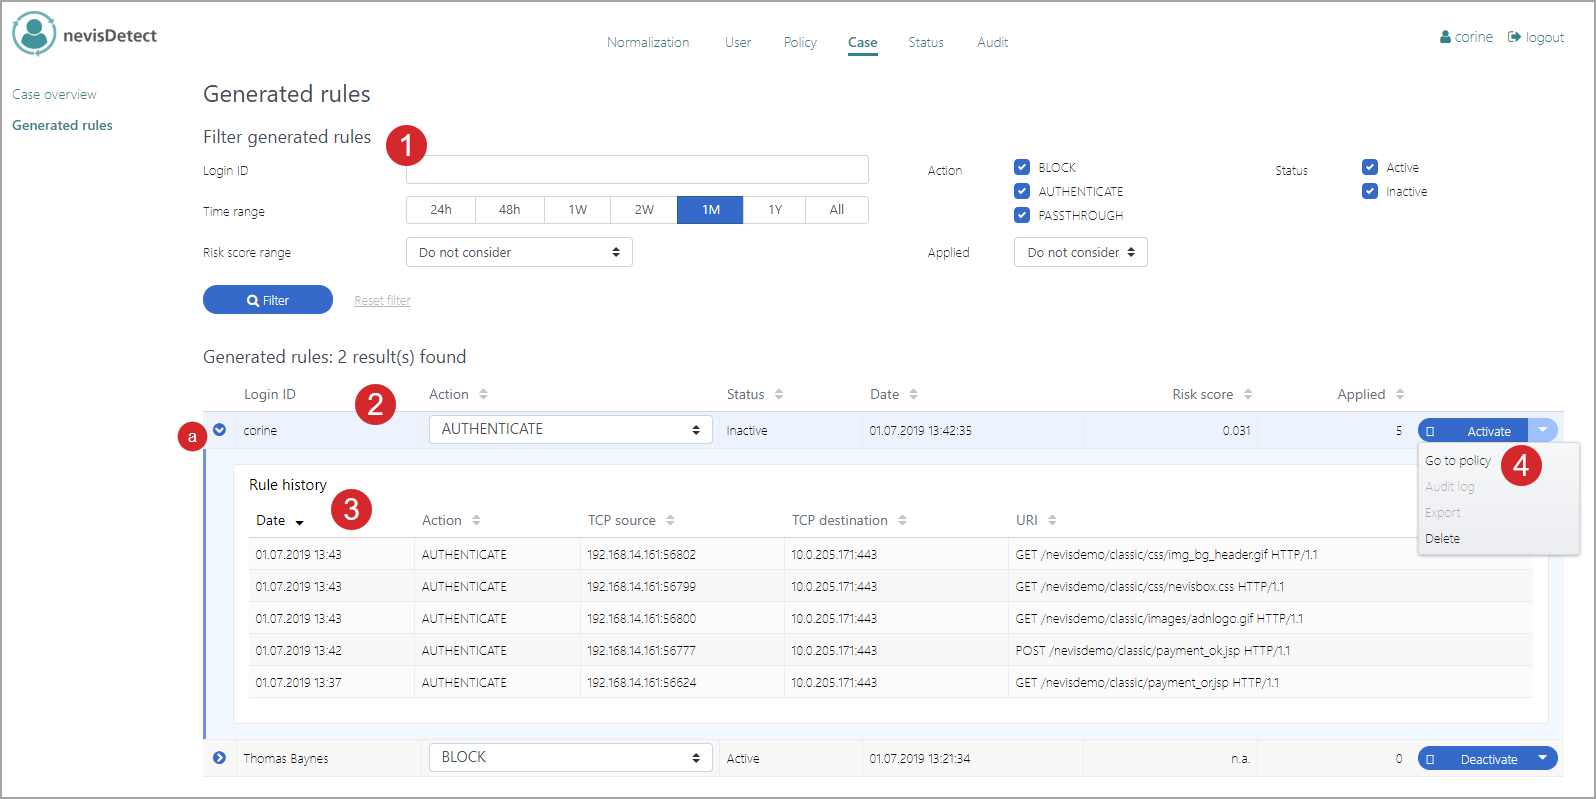
The Generated rules view consists of several parts (see the figure above - the numbers in the figure correspond with the numbers below).
The Filter generated rules part allows you to search for specific rules. The following search criteria are available:
- Login ID of the user to whom the rule applies.
- Time range (for example, all rules having occurred in the last 24 hours, week, month, etc.).
- The risk score that caused the rule.
- The action triggered by the rule (AUTHENTICATE or BLOCK).
- Whether the rule is active or not (rule status).
- How often the rule has been applied.
Click the Filter button to apply your search criteria on all generated rules.
The Generated rules part lists all rules that fulfill your search criteria. Each entry shows the login ID of the user to whom the rule applies, the action triggered by the rule, the status of the rule, the date and time of the initial rule generation, the risk score that caused the rule as well as how often the rule has been applied.
- Click the Expand icon to view the history of the rule.
The Rule history field lists all appliances of this one specific rule, including the date and time per appliance, the corresponding action, the TCP source and destination as well as the URI of the suspicious user request causing the rule.
You can manage a rule with the Activate/Deactivate button and the corresponding drop-down menu. You can for example deactivate an active rule or entirely delete a rule. You need these options if, for example, a user has been falsely blocked by a rule and unblock him.
For more information on how to manage rules, see the chapter Support desk user.