Policy section
You define the basic values of nevisDetect's detection and mitigation process in the Policy section. In this section, you configure and add new policies as well as view and modify existing policies.
The Policy section consists of several views: Policy overview and Policy creation.
Policy overview
The Policy overview view lists all available policies and their details (see the figure below):
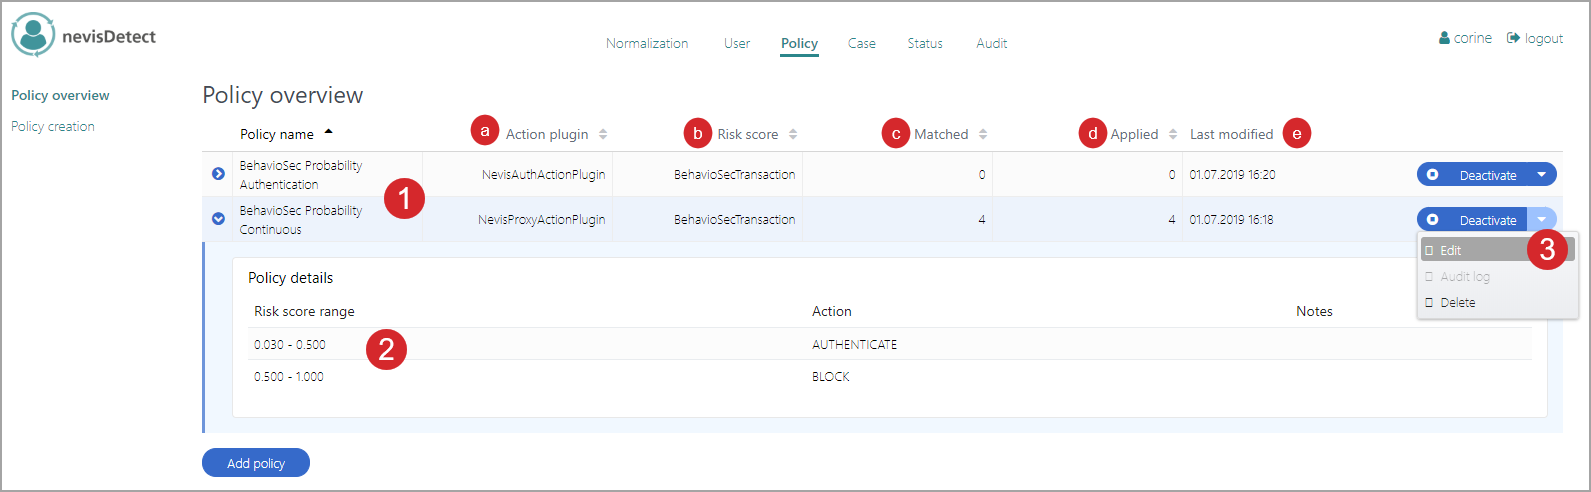
The Policy overview view consists of several parts (see the figure above - the numbers in the figure correspond with the numbers below).
-
The Policy overview view lists all available policies. Each policy entry consists of the policy name and
- the relevant Action plug-in name,
- the relevant risk score name,
- how often the policy has been matched,
- how often the policy has been applied (that is, how often the Action plug-in has been invoked), and
- when the policy has been modified for the last time.
-
To display a policy's details, click the Expand icon on the left of the policy entry. The Policy details overview opens, showing the available risk score ranges and associated actions of the respective policy.
-
You activate or deactivate a policy through clicking the Activate/Deactivate button. To edit or delete a policy, click the white triangle on the Activate/Deactivatebutton. This opens a drop-down menu with the relevant actions.
Policy creation
The Policy creation view allows to create and edit policies.
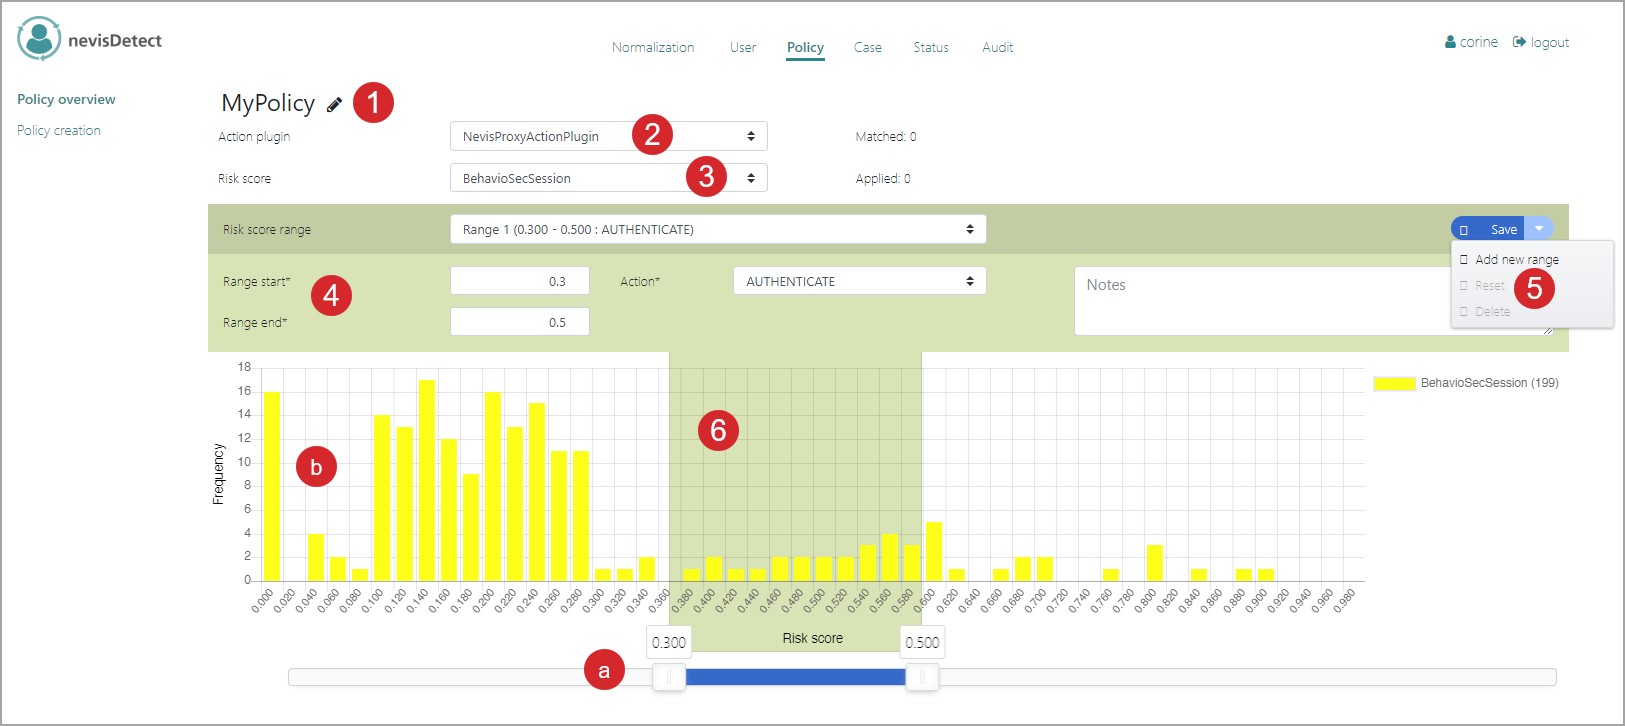
The Policy creation view consists of several parts (see the figure above - the numbers in the figure correspond with the numbers below).
- You set the name of the new policy on top of the view, by clicking the Pencil icon.
- You set the Action plug-in to be invoked in case of a match in the Action plugin field.
- You select the relevant risk score in the Risk score field.
- In the middle part of the view, you define the policy's details, such as its risk score ranges and the corresponding actions. The available actions depend on the selected Action plug-in. You can also add notes.
- The Save button and its drop-down menu allow you save the risk score ranges and add a new range.
- The chart in the lower part of the view gives a visual representation of the risk score ranges and their actions. Each action has its own color.
- You can use the slider on the bottom of the chart to set the start and end values of a range (instead of entering these values in the Range start and Range end fields).
- The current distribution of the normalized risk values is visible in the background of the chart. Click the Settings icon to modify the resolution and the time frame of the chart.
For more information on how to create a new policy, see chapter Security expert.