Configure and upload to Azure blob storage
Enable the branded and Authentication Cloud-specific user interface with the following steps. Make sure you have the templates downloaded in Download the templates for the branded user interface and custom policies.
- Open the project in your editor.
- Navigate to the policy folder.
- Open the
nevis.htmlfile. - Search for
@authentication_cloud_url@, and replace it with the URL of your Nevis Admin console:https://<instance_id>.mauth.nevis.cloud. - Save the changes to the file.
- Follow the instructions in Quickstart: Upload, download, and list blobs with the Azure portal to upload the
nevis.htmlfile in place ofcustomize-ui.htmlto your Azure blob storage. The Azure Blob storage account is created outside of the B2C Tenant because it is separate from the Azure Cloud. - Follow the instructions in Enabling CORS for Azure Storage to enable Cross-Origin Resource Sharing for this file.
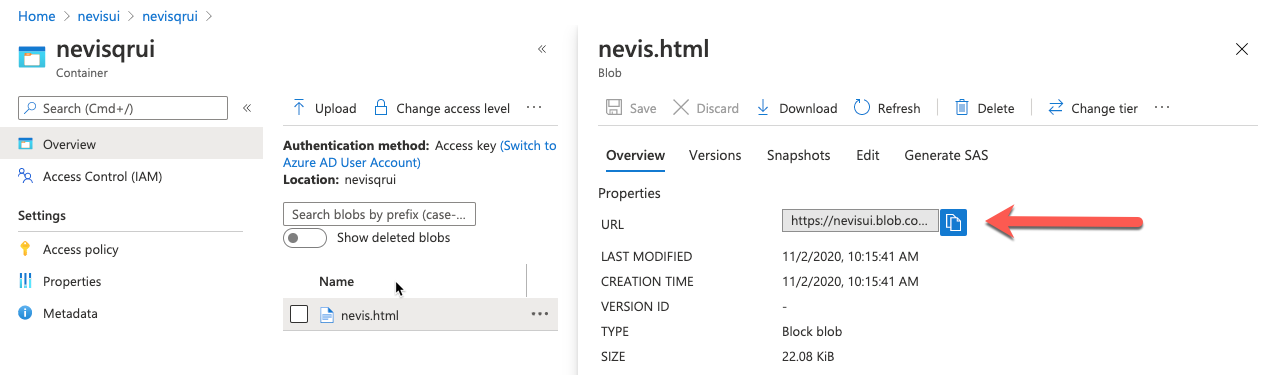
- Once the upload is complete and CORS is enabled, click the
nevis.htmlfile in the list. - In the Overview tab, next to the URL, click the copy link icon.
- Open the link in a new browser tab to make sure it displays a grey box.
- Note down the blob link for later use.
Verification
The setup of the blob and CORS may be a little tricky. The following screenshots help you with the verification.
- Test the CORS configuration according to the instructions from Microsoft. The settings should look similar to the following screenshot.

- You can find the copy URL link on the following screen.
- Accessing the Blob URL directly, in our example,
https://nevisui.blob.core.windows.net/nevisqrui/nevis.html, loads a page with a grey box like in the following screenshot.
