Customize and upload your custom policies
TrustFrameworkBase.xml
- In your editor, navigate to the policy folder.
- Open the
TrustFrameworkBase.xmlfile. - Replace
yourtenantwith your Azure tenant account name in theTenantId. - Replace
yourtenantwith your Azure tenant account name inPublicPolicyUri. - Replace all
@authentication_cloud_url@instances with the URL of your Nevis Admin console (https://<instance_id>.mauth.nevis.cloud/). - Save the changes to your file.
note
Syntax
Watch out for the correct syntax and delimiting when you copy the paste URL from Authentication Cloud:
One slash between the hostname and the URI section in the URL
No trailing slash before the colon of the port number 443
For example:
<InputClaim ClaimTypeReferenceId="url" DefaultValue="https://sandbox-qw234.mauth.nevis.cloud:443/" />
<Item Key="ServiceUrl">https://sandbox-qw234.mauth.nevis.cloud/api/v1/status</Item>
TrustFrameworkExtensions.xml
- In your editor, navigate to the policy folder.
- Open the
TrustFrameworkExtensions.xmlfile. - Replace
yourtenantwith your Azure tenant account name in theTenantId. - Replace
yourtenantwith your Azure tenant account name inPublicPolicyUri. - Under
BasePolicy, in theTenantId, also replaceyourtenantwith your Azure tenant account name. - Under
BuildingBlocks, replace@LoadUri@with the blob link URL of yournevis.htmlin your blob storage account. - Replace both instances of
IdentityExperienceFrameworkAppIdwith the application ID of the IdentityExperienceFramework application that you created earlier. - Replace both instances of
ProxyIdentityExperienceFrameworkAppIdwith the application ID of the ProxyIdentityExperienceFramework application that you created earlier. - Save the file.
SignUpOrSignin.xml
- In your editor, navigate to the policy folder.
- Open the
SignUpOrSignin.xmlfile. - Replace
yourtenantwith your Azure tenant account name in theTenantId. - Replace
yourtenantwith your Azure tenant account name inPublicPolicyUri. - Under
BasePolicy, in theTenantId, also replaceyourtenantwith your Azure tenant account name. - Save the file.
Upload your custom policies to Azure:
- Open your Azure AD B2C tenant home.
- Click Identity Experience Framework.
- Click Upload custom policy.
- Select the
TrustFrameworkBase.xmlfile you just modified. - Select the Overwrite the custom policy if it already exists checkbox.
- Click Upload.
- Do the same for
TrustFrameworkExtensions.xml. - Do the same for
SignUpOrSignin.xml.
Verification
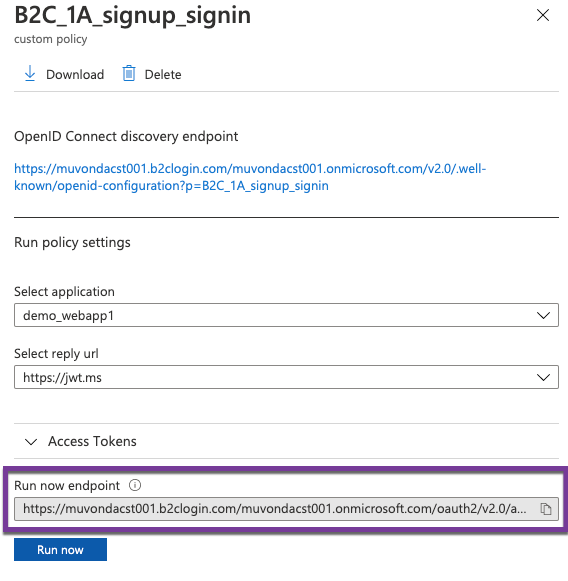
To verify the that the policies are correctly in place in the AD B2C tenant, check the following settings:
- After uploading the three custom policy files, they are listed as follows:

- You can find the copy URL link on the following screen:
