Password verification against LDAP
The user's password can also be checked against an LDAP server.
To make verification against LDAP possible, you have to configure the following additional properties within the realm configuration in the domain.xml file of nevisAdmin:
- ldaphost:
- A space-separated list of host names. If you do not use the standard port 389, also add the listening ports of the hosts.
- dn:
- The bind DN for authentication. This string must contain the placeholder ${userid}, which will be replaced by the username while binding to the LDAP server.
- In a default case, the value of the dn property is a complete DN. However, the value set here can also serve as a template for a nested user search. For more details, see Advanced LDAP Configuration.
The other properties (file, auth-type, and jaas-context) are required and must not be changed.
See the next code block for an example realm configuration:
<auth-realm name="nevisadminRealm" classname="ch.nevis.nevisadmin.container.jaas.NevisadminRealmImpl">
 <property name="ldaphost" value="ldap.siven.ch:389"></property>
 <property name="dn" value="uid=${userid},ou=people,o=SIVEN AG,c=ch"></property>
 <property name="file" value="/var/opt/nevisadmin/default/nevisadmin/config/keyfile"></property>
 <property name="auth-type" value="nevisadminRealm"></property>
 <property name="jaas-context" value="nevisadminRealm"></property>
</auth-realm>
When authentication against LDAP fails, the system tries to authenticate against the keyfile next.
The user "admin" cannot authenticate against the LDAP directory.
LDAPS
Using SSL for the communication to the LDAP server requires you to configure the default LDAPS port 636 within the realm configuration.
<auth-realm name="nevisadminRealm" classname="ch.nevis.nevisadmin.container.jaas.NevisadminRealmImpl">
 <property name="ldaphost" value="ldap.siven.ch:636"></property>
 <property name="dn" value="uid=${userid},ou=people,o=SIVEN AG,c=ch"></property>
 <property name="file" value="/var/opt/nevisadmin/default/nevisadmin/config/keyfile"></property>
 <property name="auth-type" value="nevisadminRealm"></property>
 <property name="jaas-context" value="nevisadminRealm"></property>
</auth-realm>
You also have to import the issuer certificate(s) of your LDAP server's certificate into the truststore.
The default passphrase of the truststore is "changeit". It is used by nevisAdmin.
/opt/adnjdk17/bin/keytool \
 -import \
 -keystore /var/opt/nevisadmin/default/nevisadmin/config/cacerts.jks \
 -file /root/ca_cert.pem
Advanced LDAP configuration
Using the login module to search for a user's DN
Instead of a direct bind using the configured DN, you can also configure the login module to search for the user's DN first.
This has two advantages:
- The user name does not necessarily have to be part of the DN used for authentication. This is important if you like to integrate a Microsoft Active Directory server where users can be authenticated by using their distinguished name only (you cannot use an arbitrary object attribute).
- The login module does also fetch the user's memberOf attributes from the LDAP directory server allowing an automatic group assignment.
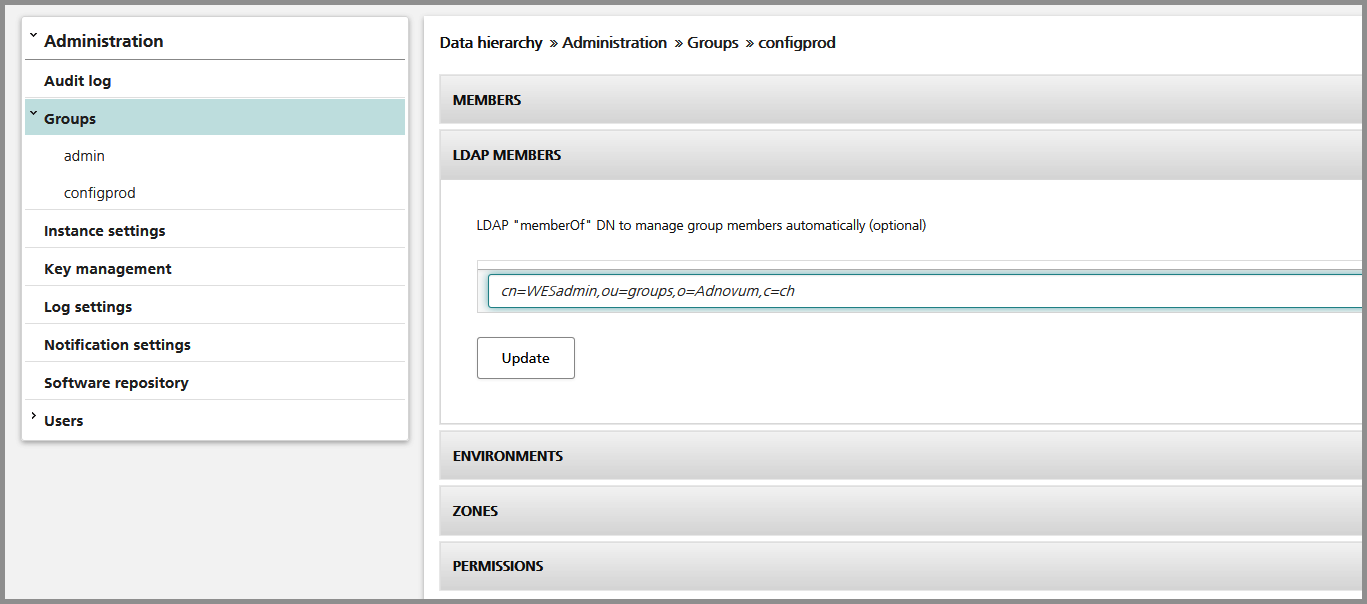
- If you use this configuration, users are automatically added or removed from the group depending on their memberOf attributes.
- To activate this feature for a group, enter the memberOf DN in the group's LDAP members panel:
Note:
- Configure a technical (read-only) user within the realm configuration so that nevisAdmin can connect to the LDAP server.
- nevisAdmin treats the dn property as a template, with which it searches for the user. In this context, the dn parameter value parts have the following meaning:
- The first name value pair has a filter function. It must contain the user's account name represented by the ${userid} placeholder.
- The remaining part is used as the base DN to do the search.
The following realm configuration properties are relevant for the advanced setup:
- ldaphost: Defines a space-separated list of host names.
- dn: Defines the search string to fetch the user's LDAP object. This string must contain the placeholder ${userid}, which will be replaced by the user name.
- techuser: Defines the DN of the technical user while searching for the user's object.
- techpwd: Defines the passphrase of the technical user.
Here is a simple example:
<auth-realm name="nevisadminRealm" classname="ch.nevis.nevisadmin.container.jaas.NevisadminRealmImpl">
 <property name="ldaphost" value="ldap.siven.ch:636"></property>
 <property name="dn" value="sAMAccountName=${userid},ou=people,o=SIVEN,c=ch"></property>
 <property name="techuser" value="cn=techadmin,ou=people,o=SIVEN,c=ch"></property>
 <property name="techpwd" value="1234567890"></property>
 <property name="file" value="/var/opt/nevisadmin/default/nevisadmin/config/keyfile"></property>
 <property name="auth-type" value="nevisadminRealm"></property>
 <property name="jaas-context" value="nevisadminRealm"></property>
</auth-realm>
In this case, nevisAdmin does the following:
- It uses the technical user (cn=techadmin,ou=people,o=SIVEN,c=ch) and its password to connect to LDAP.
- It searches for a user with the filter (sAMAccountName=${userid}) underneath of the base DN (ou=people,o=SIVEN,c=ch).
- If a user is found, nevisAdmin uses the full DN to bind and validate the password entered by the user.
Assumption: The user filter should return only 1 user.
Set the javax.enterprise.system.core.security property value to "FINE" if you need to get detailed log messages about the LDAP authentication procedure.
Creating users automatically
By default, nevisAdmin does not create users automatically when they log in for the first time. To enable automatic user creation, configure the following property.
ch.nevis.nevisadmin.login.ldap.createuser=true
Creating zones, environments and groups
You can also create zones, environments and groups in advance by using a command line tool. You specify the objects you want to create in a property file and add them to nevisAdmin using the command nevisadmin creategroups <absolute path to the property file>. The command only creates new objects but does not delete any existing ones.
Stop nevisAdmin before executing the script.
The property file contains:
- The
environmentsproperty defines a space separated list of environment names. - The
zonesproperty defines a space separated list of zone names. - The
group*properties define which group to add. The suffix id identifies the property entries of a group. The suffix name specifies the group name and the suffix permission defines the permission granted by the group (READ, READWRITE, OPERATE, DEPLOY, SOFTWARE_UPLOAD). The dn suffix specifies to which LDAP DN the group must be mapped (see also the figure above).
environments=dev test
zones=dmz-zh app-zh

group.1.id=1
group.1.name=cfg
group.1.dn=cn=WESadmin,ou=groups,o=SIVEN,c=ch
group.1.permission=readwrite

group.2.id=2
group.2.name=oper
group.2.dn=cn=WESadmin,ou=groups,o=SIVEN,c=ch
group.2.permission=operate

group.3.id=3
group.3.name=deploy
group.3.dn=cn=WESadmin,ou=groups,o=SIVEN,c=ch
group.3.permission=deploy

group.4.id=4
group.4.name=read
group.4.dn=cn=WESread,ou=groups,o=SIVEN,c=ch
group.4.permission=read
Multiple DN entries per group
In the above sample property file (the table above), each group corresponds to one DN entry. However, you may want to add multiple DN entries to one group, e.g., in the case of an admin group. For this purpose, create different sections, one per DN, with the same group name in the property file. See the sample property file in the table below how to do this:
environments=dev test
zones=dmz-zh app-zh

group.6.id=6
group.6.name=admin
group.6.dn=cn=TESTWESadmin,ou=groups,o=TESTSIVENAG,c=de
group.6.permission=readwrite

group.7.id=7
group.7.name=admin
group.7.dn=cn=2TESTWESadmin2,ou=groups,o=2TESTSIVENAG2,c=de
group.7.permission=readwrite