Classic Deployment
This section describes how to deploy a project configuration created in nevisAdmin 4 to an infrastructure inventory.
Starting the Deployment
The deployment of a configuration project is executed with the Deployment Wizard. You can access the wizard by clicking on Deploy button, as you can see in the next figure:
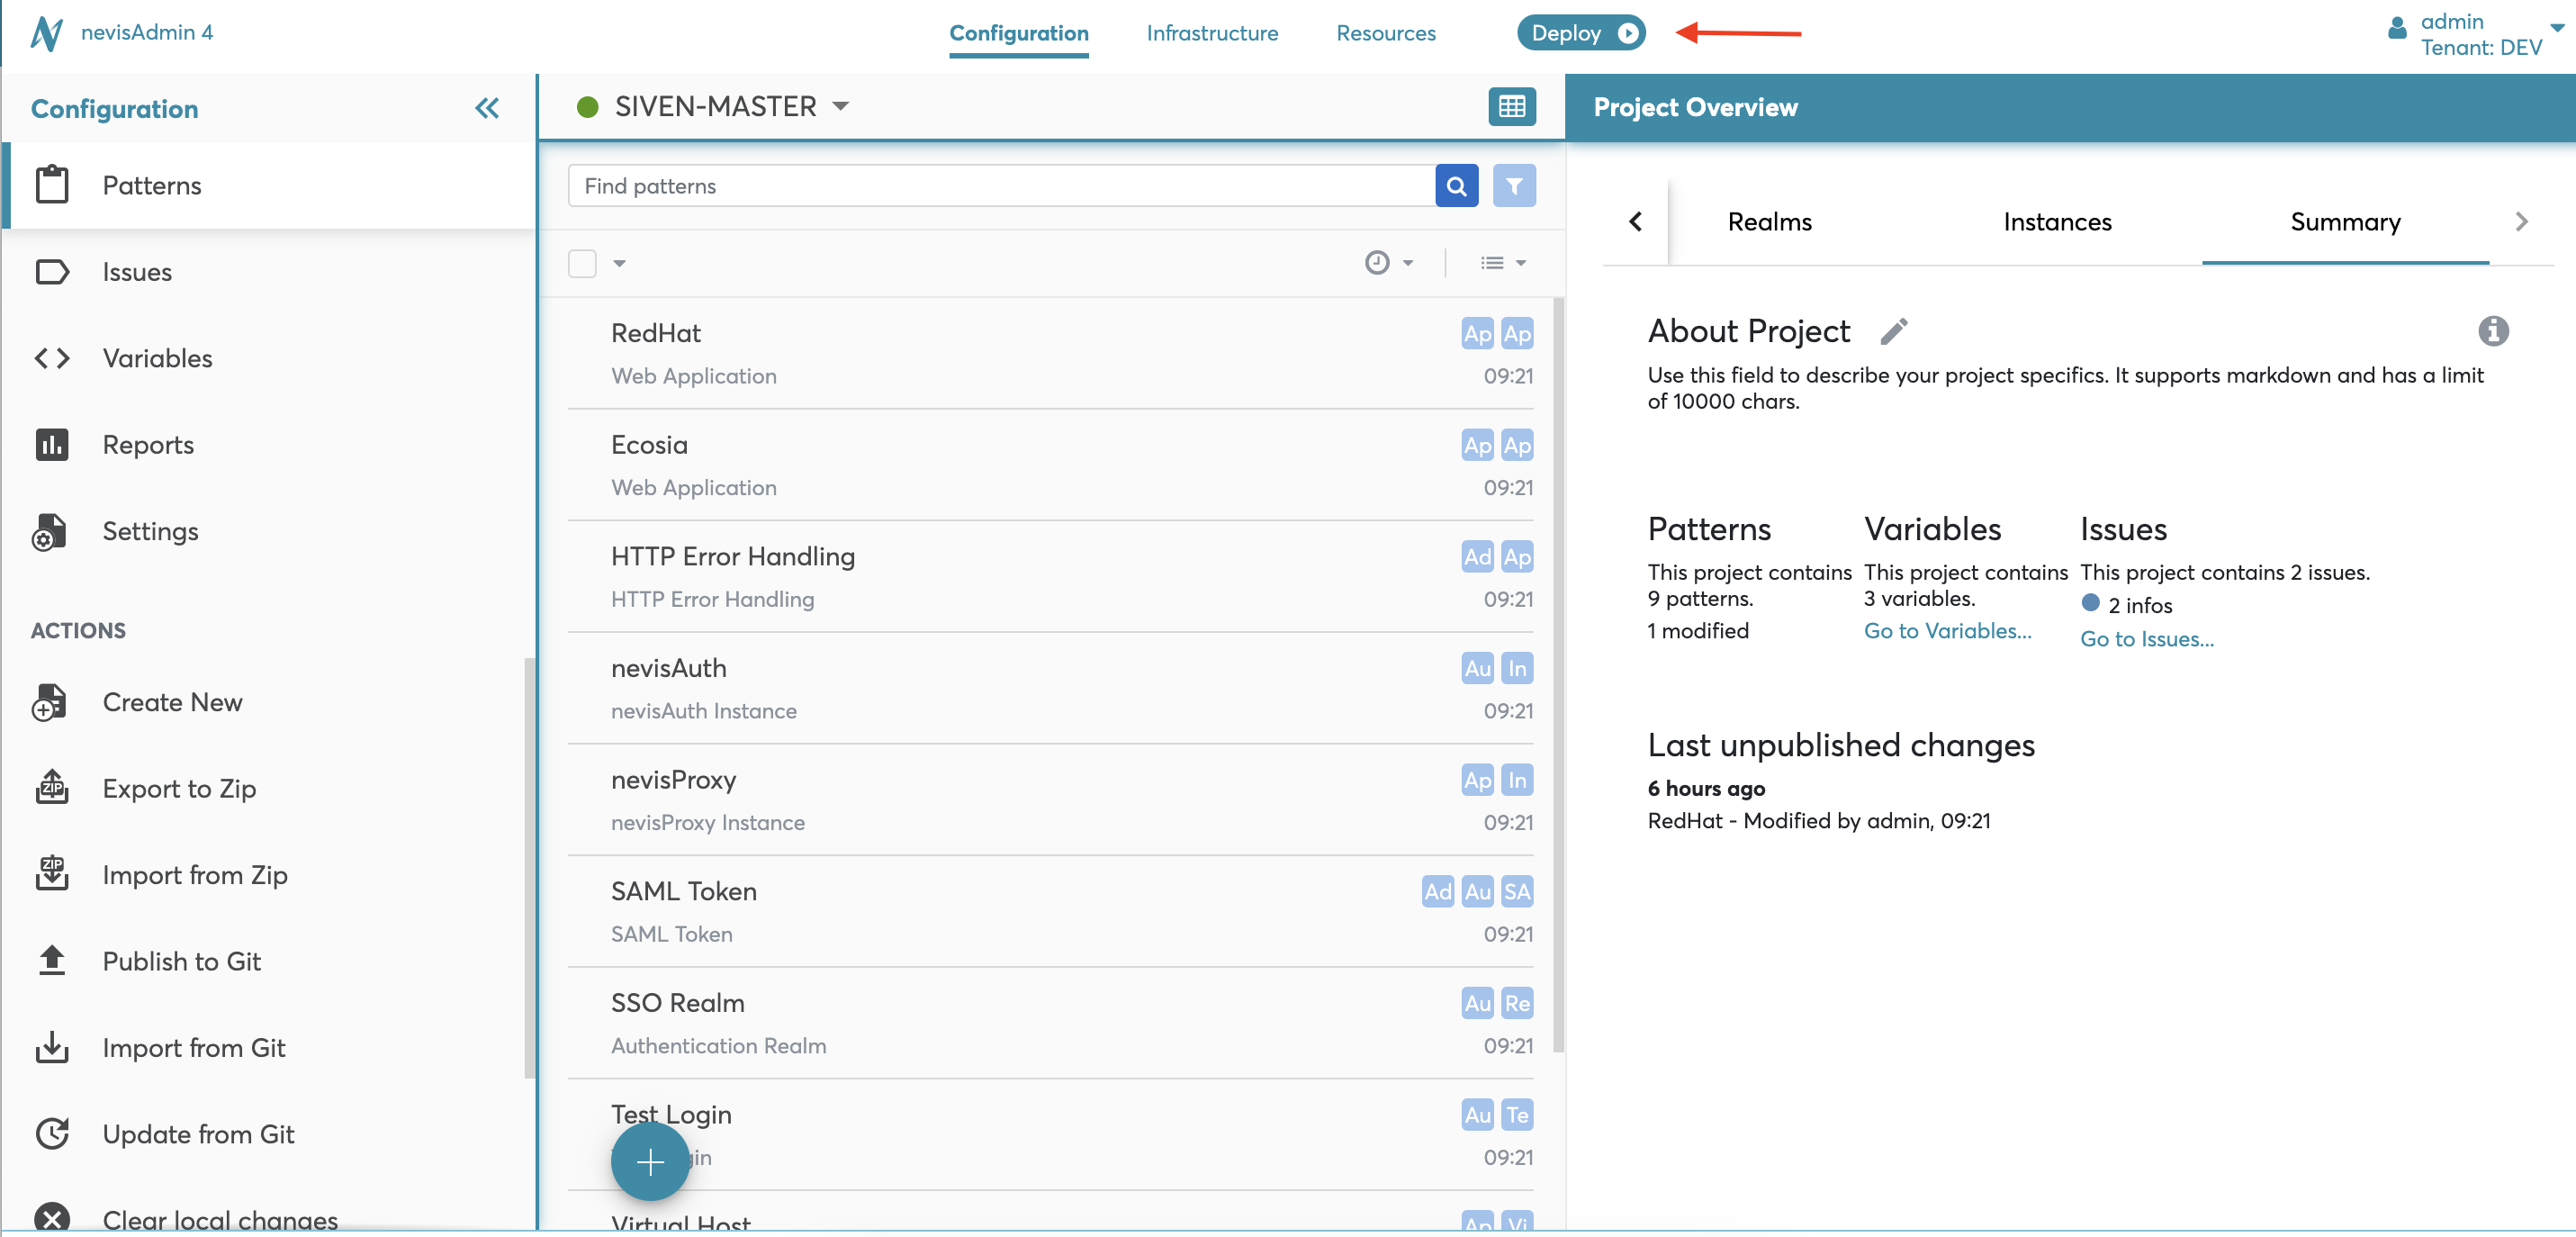
The deployment can also be executed from the Deployment History as part of a rollback operation.
See Deployment History and Rollback for information on how to rollback your project configuration.
Deployment Step 1: Select
In the first step of the deployment process, you select what you want to deploy:
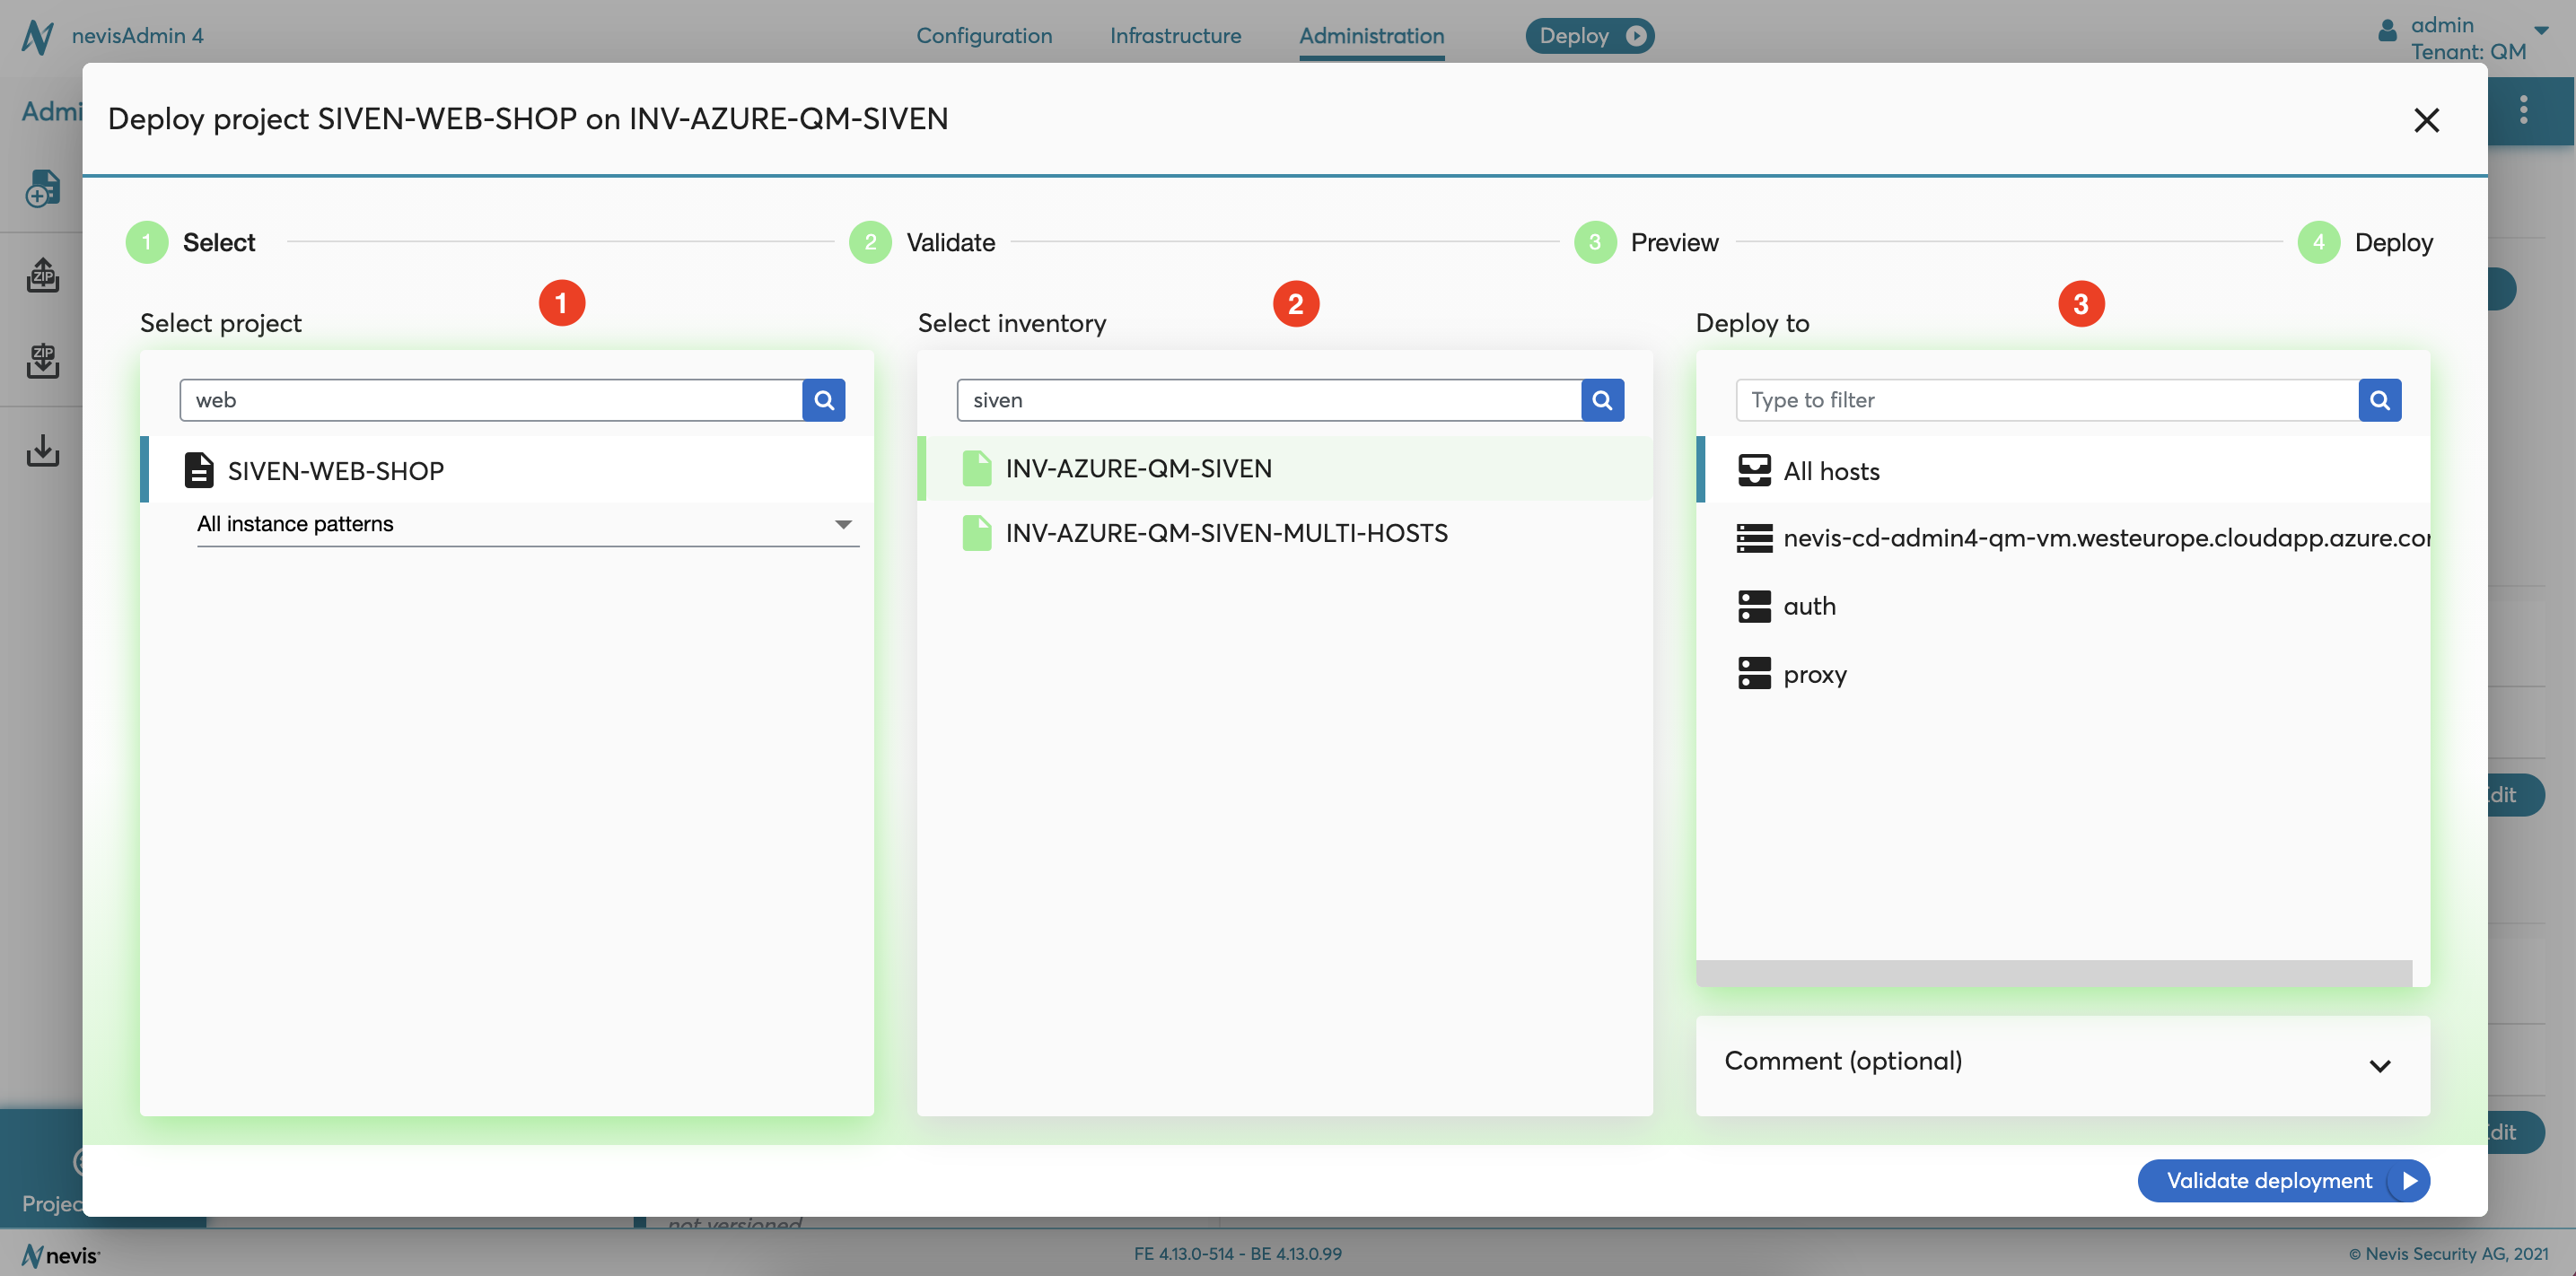
- Select a project in Select project on the left side of the wizard (no. 1 in the previous figure).
- Only the projects accessible by you are listed.
- Selection is mandatory.
- You can use the filter to search for a project.
- In case of classic deployments, instance patterns can be selected.
- Select an inventory in Select inventory in the middle of the wizard (no. 2).
- Only the inventories accessible by you are listed.
- The deployment wizard adopts the color of the selected inventory.
- Selection is mandatory.
- You can use the filter to search for an inventory.
- Select the host or host group to deploy to in Deploy to on the right side of the wizard (no. 3).
- The list in Deploy to includes all hosts and host groups from the selected inventory.
- It is possible to restrict the deployment to a single host, host group or (instance) pattern.
- The default setting is "All hosts". This means that your project is deployed to all hosts of the selected inventory.
- You can use the filter to search for a host.
- You can add a comment to this deployment in the Comment box in the lower right corner of the Deployment Wizard.
Inventories marked with the warning icon can only be used with projects that are published. If your project is not published, you will not be able to proceed to Step 3 "Preview" after validation. For more information, see Publish Project and Inventory Required and Restricting Deployment to Published Projects Only.
The next movie demonstrates the first deployment step:
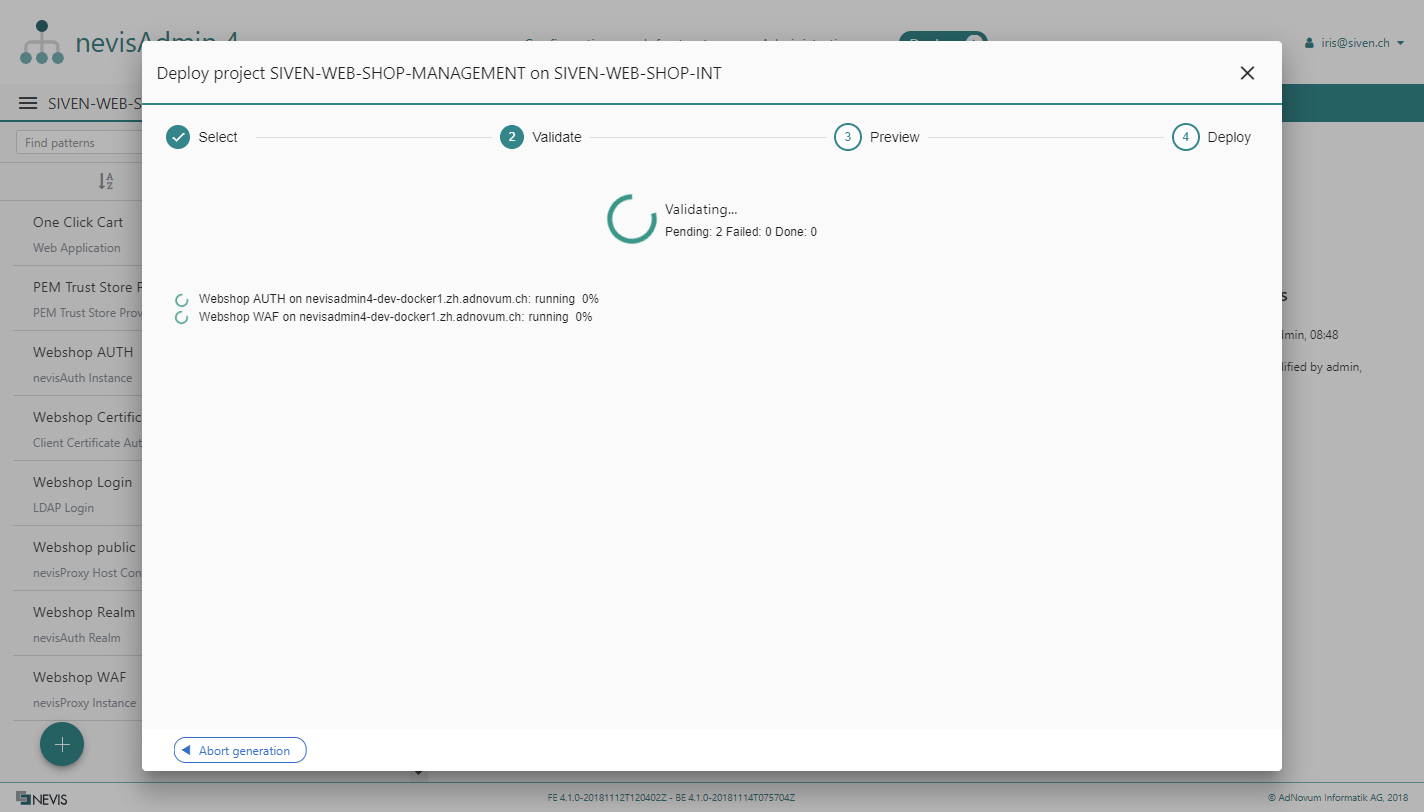
Deployment Step 2: Validate
In this step, the Generation Engine generates the deployment artifacts such as the configurations files and commands. It then validates these artifacts against the selected inventory, showing the progress of the validation and providing you feedback immediately in case of any error.
If Validation Fails
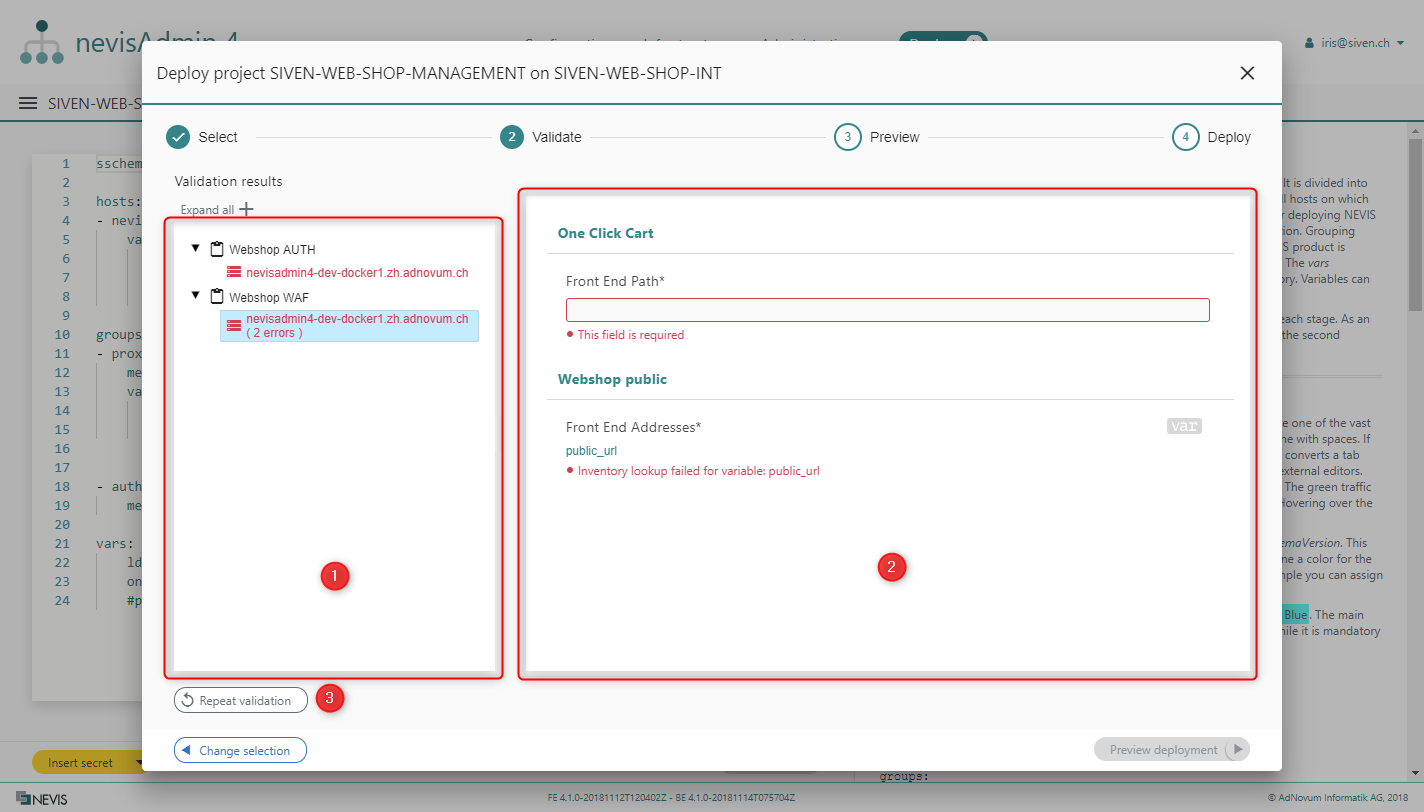
If a setting is missing or something is wrongly configured, then this is visible in the wizard's Validation results list: All configuration elements with a problem are marked red. If you click these elements, the wizard shows the details of the problem, including links to the source of the problem. This gives you the opportunity to correct the missing or erroneous information and continue with the deployment process.
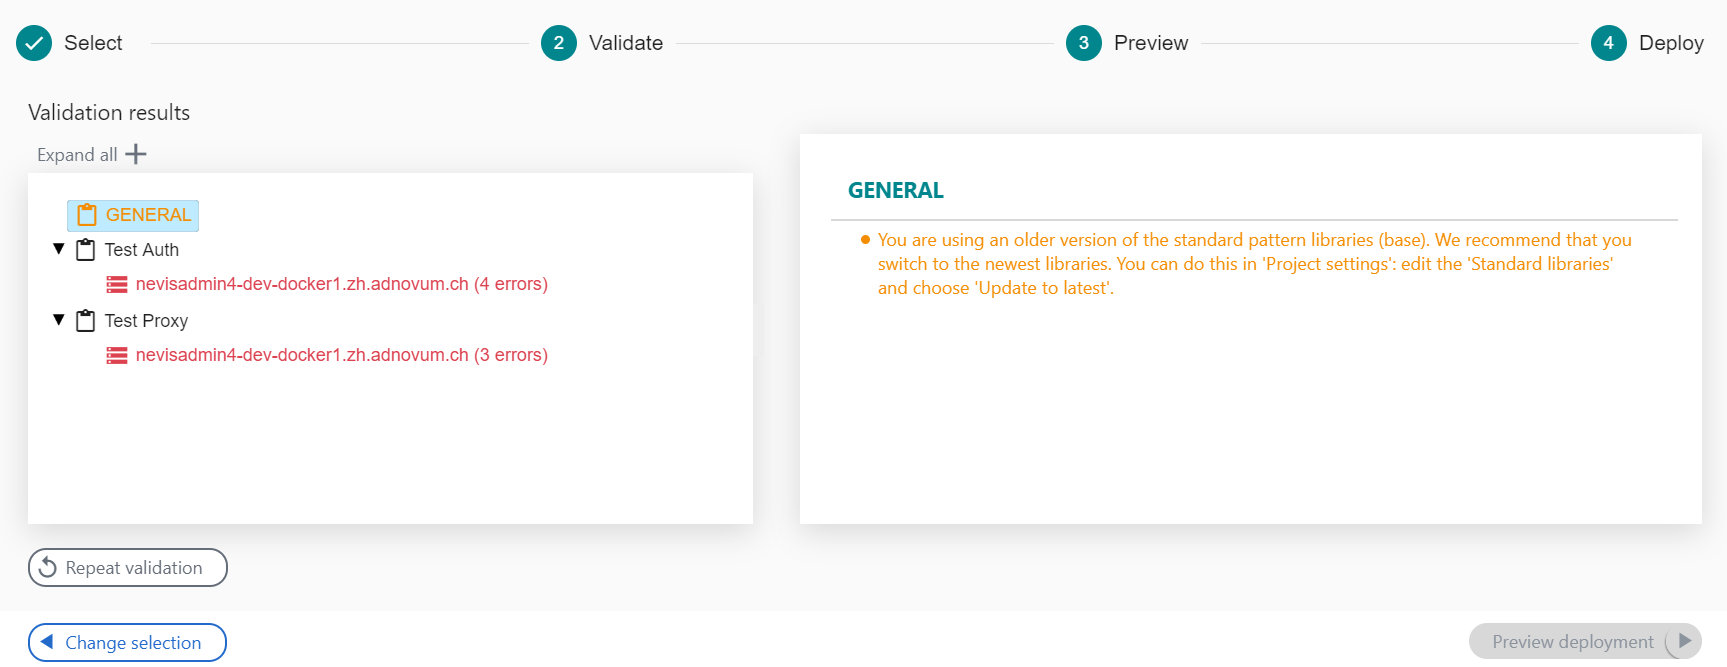
A general warning message appears when you try to deploy a project with an older version of the standard pattern libraries (see picture below). You can correct this by navigating to the Project settings, where you can edit the Standard libraries and select the Update to latest option.
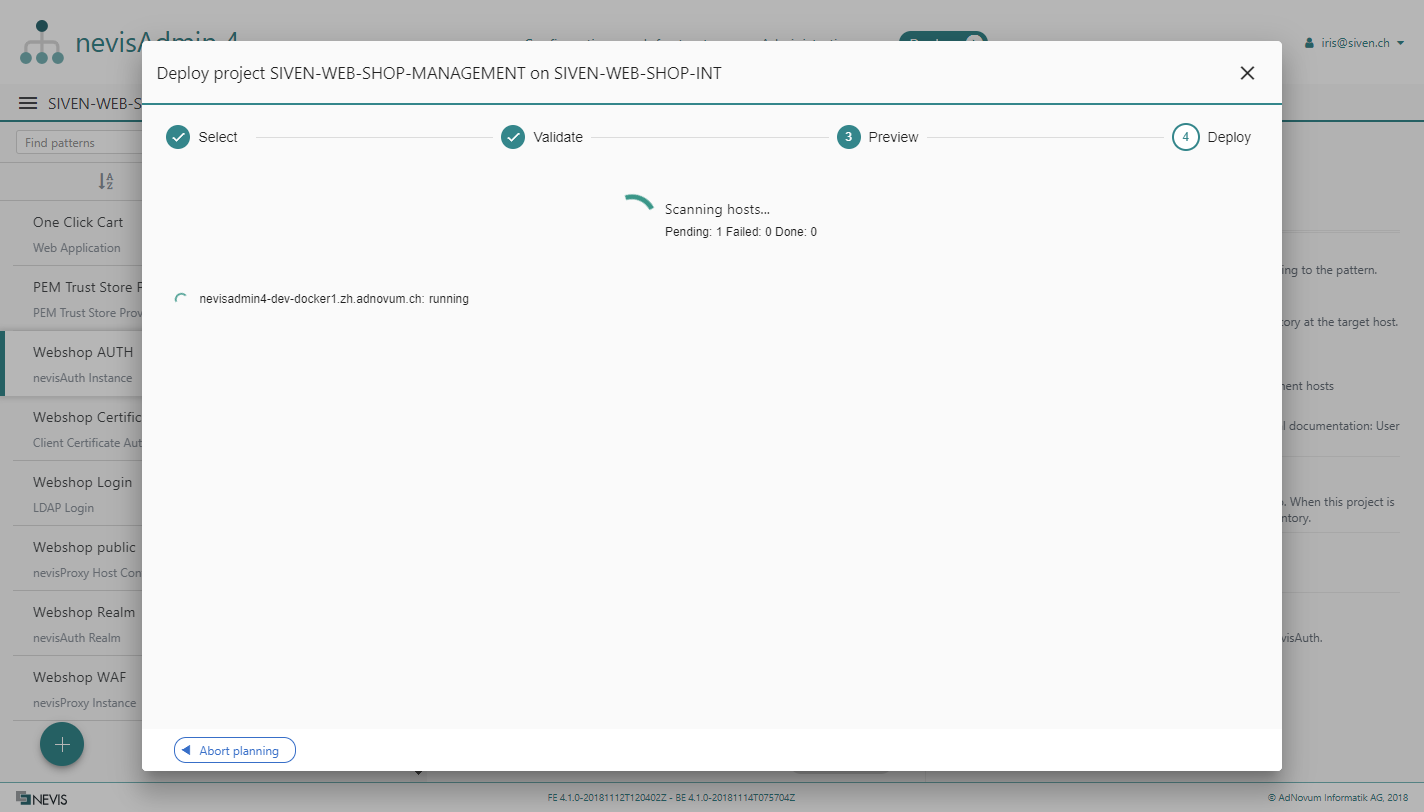
Have a look at the previous figures as well as the following movie. Here, we validate the deployment of the project SIVEN-WEB-SHOP-MANAGEMENT on the inventory SIVEN-WEB-SHOP-INT.
The previously mentioned Validation results list shows the failed patterns (each representing a Nevis component instance) - see no. 1 in the [first figure].
Note that the validation results are shown per combination of Nevis component instance and target host (that is, the server where you want to deploy the instance of the Nevis component).
There are errors in the configurations for both the nevisProxy instance Webshop WAF and the Authentication instance Webshop AUTH. If you click on the host you can see the details of the error in the right part of the wizard (no. 2 in the first figure). In this case there are two errors:
- The Front End Path in the pattern Webshop WAF is empty, although it is required to set a value.
- If you click on the One Click Cart pattern link, you can set the missing value right away in the pattern's configuration page on the GUI. Restart the deployment process after entering the missing information.
- The Front End Addresses in the pattern Webshop WAF is not defined in the inventory you are trying to deploy to.
- To solve the error, add the variable to the inventory and restart the deployment process.
Continue the Deployment with Errors and Warnings
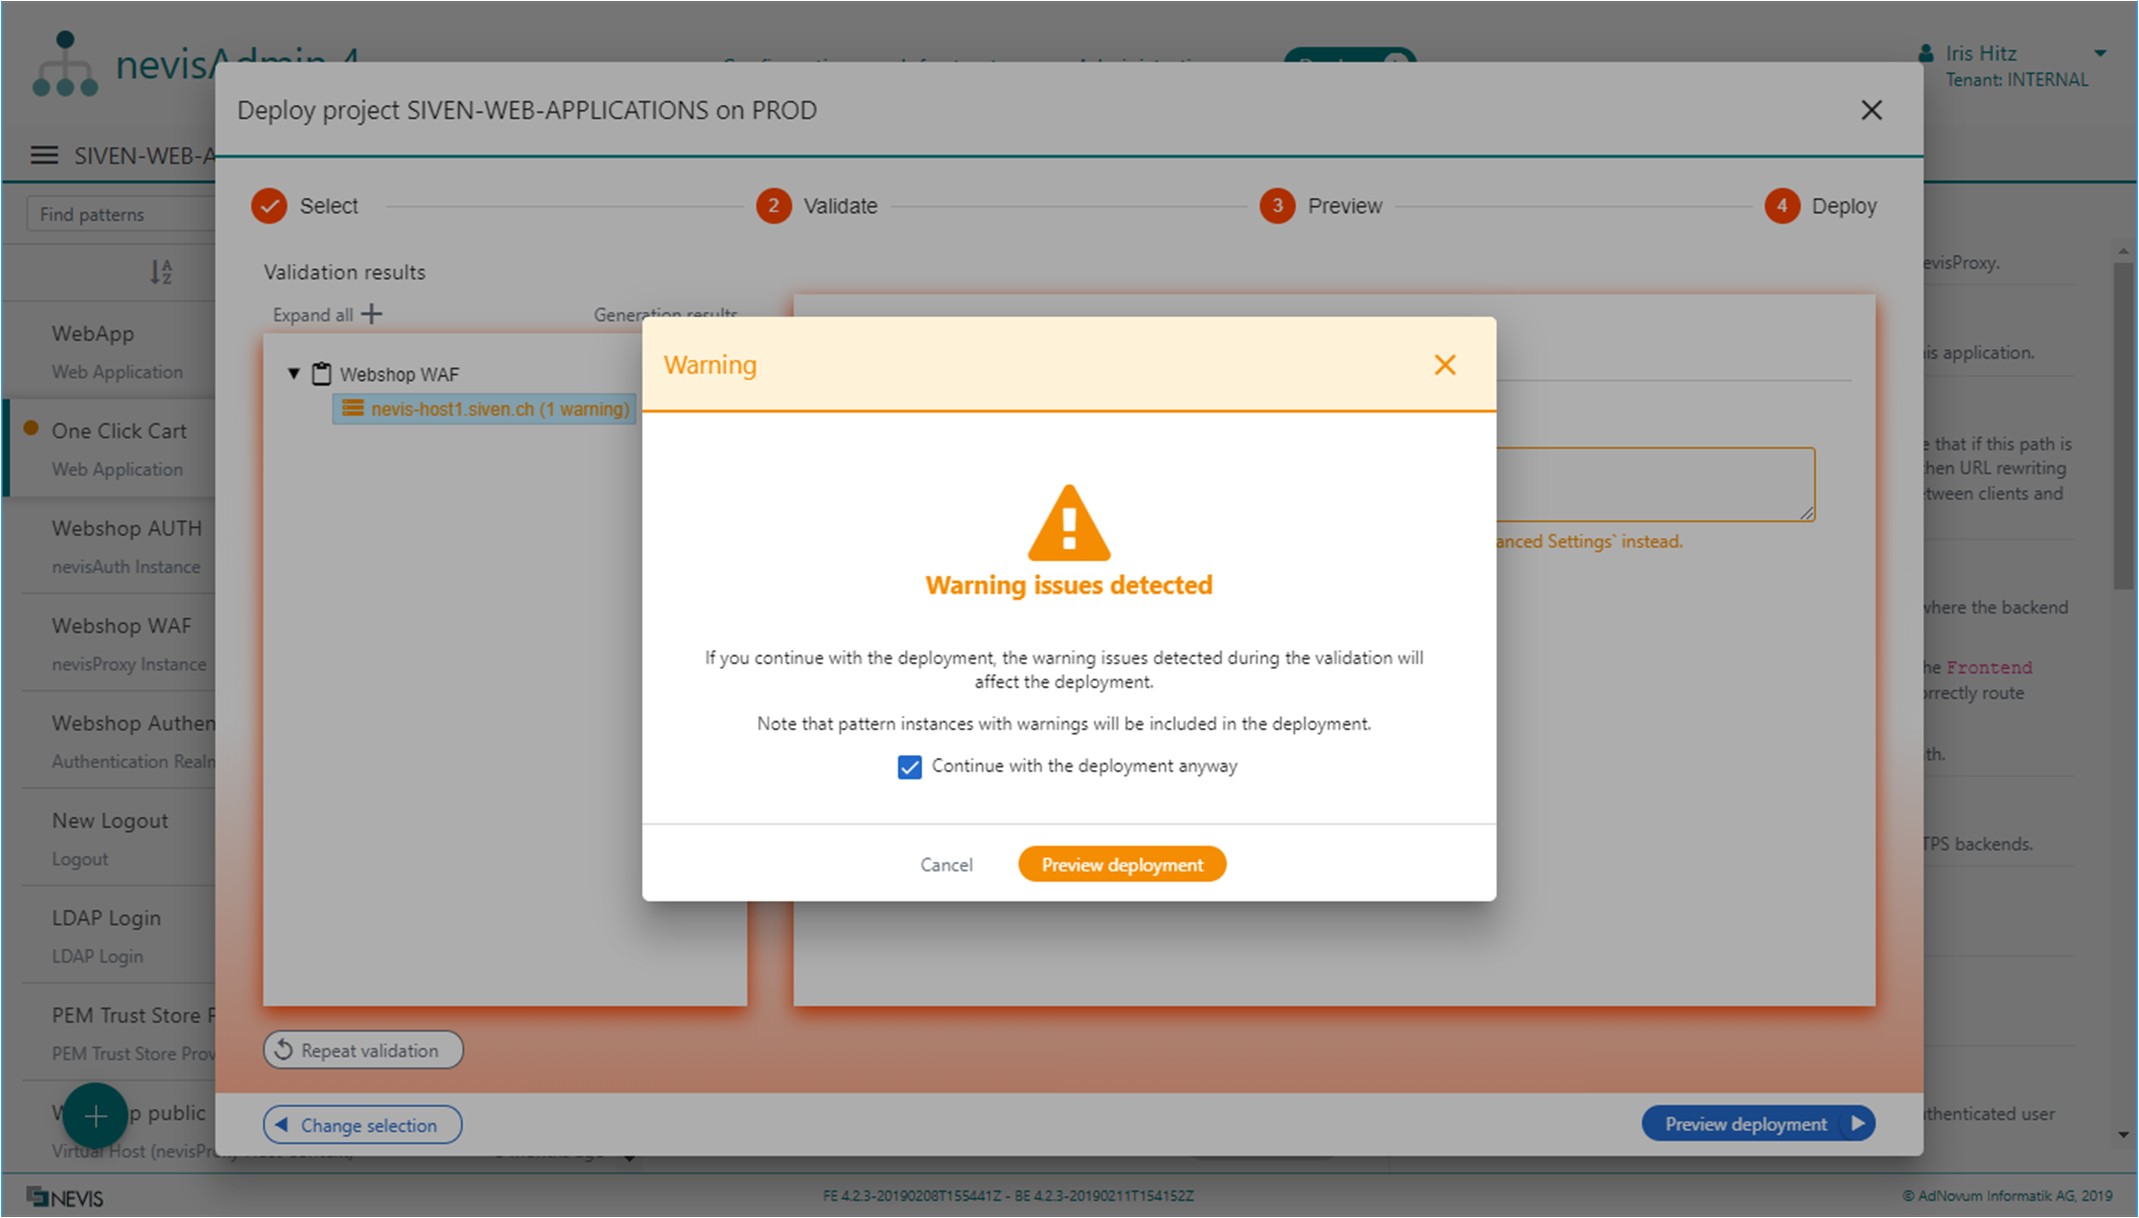
In some cases, it is possible to continue the deployment even if the project configuration contains errors and/or warnings. This is possible if the validation of the configuration only detected warnings. To continue deployment in this case, explicitly confirm that you want to deploy the instance patterns with warnings:
When the instance patterns are configured to be deployed on different hosts, some hosts may have errors whereas others can be validated successfully without any error. In this case, you may want to deploy to the hosts without errors. To do this, you can return to the selection step by clicking the Change selection button. The next movie explains how this works:
If there are errors on any of the selected hosts, it will not be possible to continue with the deployment.
If Validation Succeeds
If nevisAdmin 4 did not find any issues and everything is fine, there are green check marks before each Nevis component instance/host combination. The following figure illustrates this:
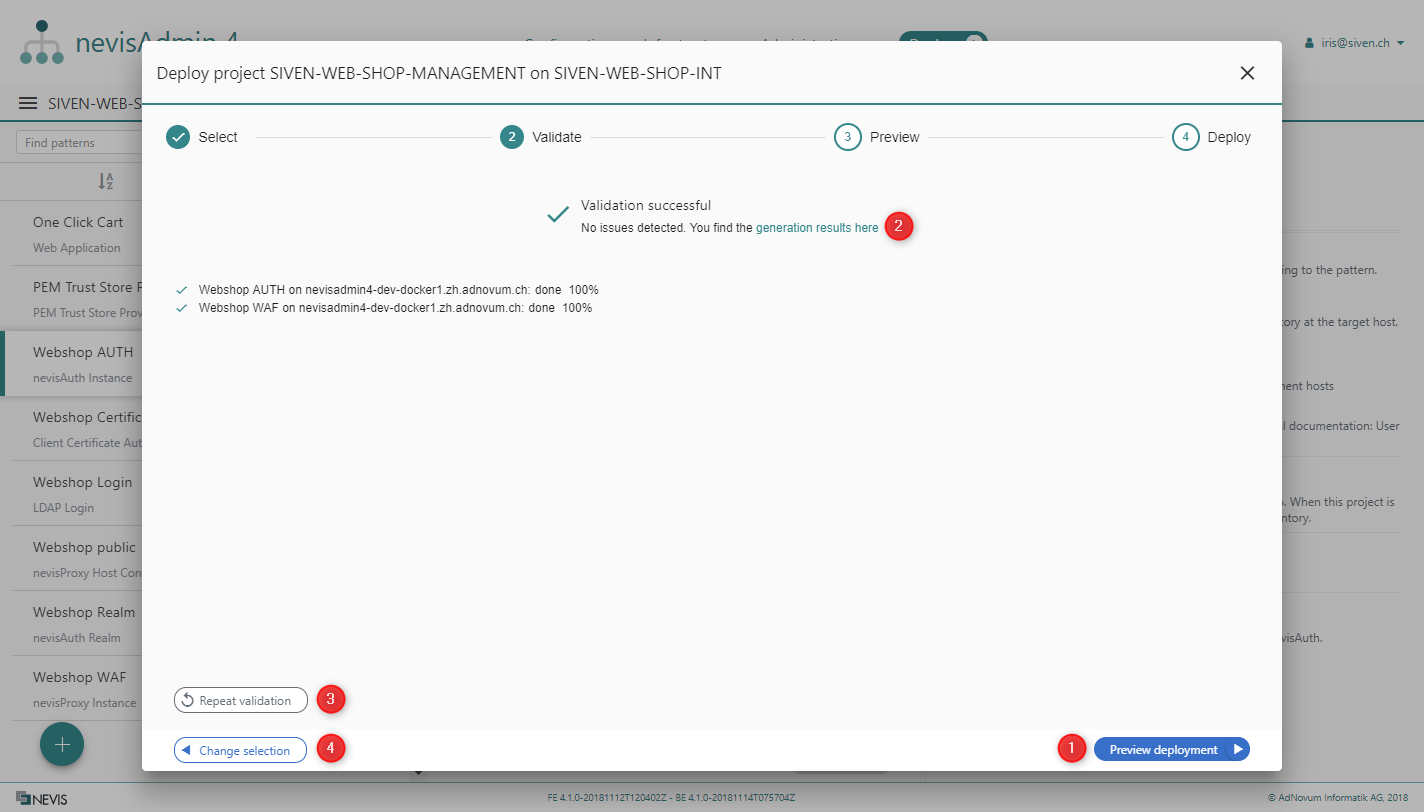
At this point the project and inventory are validated successfully. The following options are available:
- If you want to move to the next step, click the Preview deployment button (no. 1 in the previous figure).
- If you want to see the details of the artifacts that were generated during the validation, click on the generation results here link (no. 2).
- If you want to repeat the validation, click the Repeat validation button (no. 3).
- If you want to change the project or inventory selection, click the Change selection button (no. 4).
Generation Results
If you want to view the generated deployment artifacts, click the link generation results here (see no. 2 in the previous figure). This opens the Generation results screen (see the next figure).
Per instance/host combination, the screen lists the checks that were performed during the validation. It also shows the generated commands and files. Additionally, you can view the details for each element in the list.
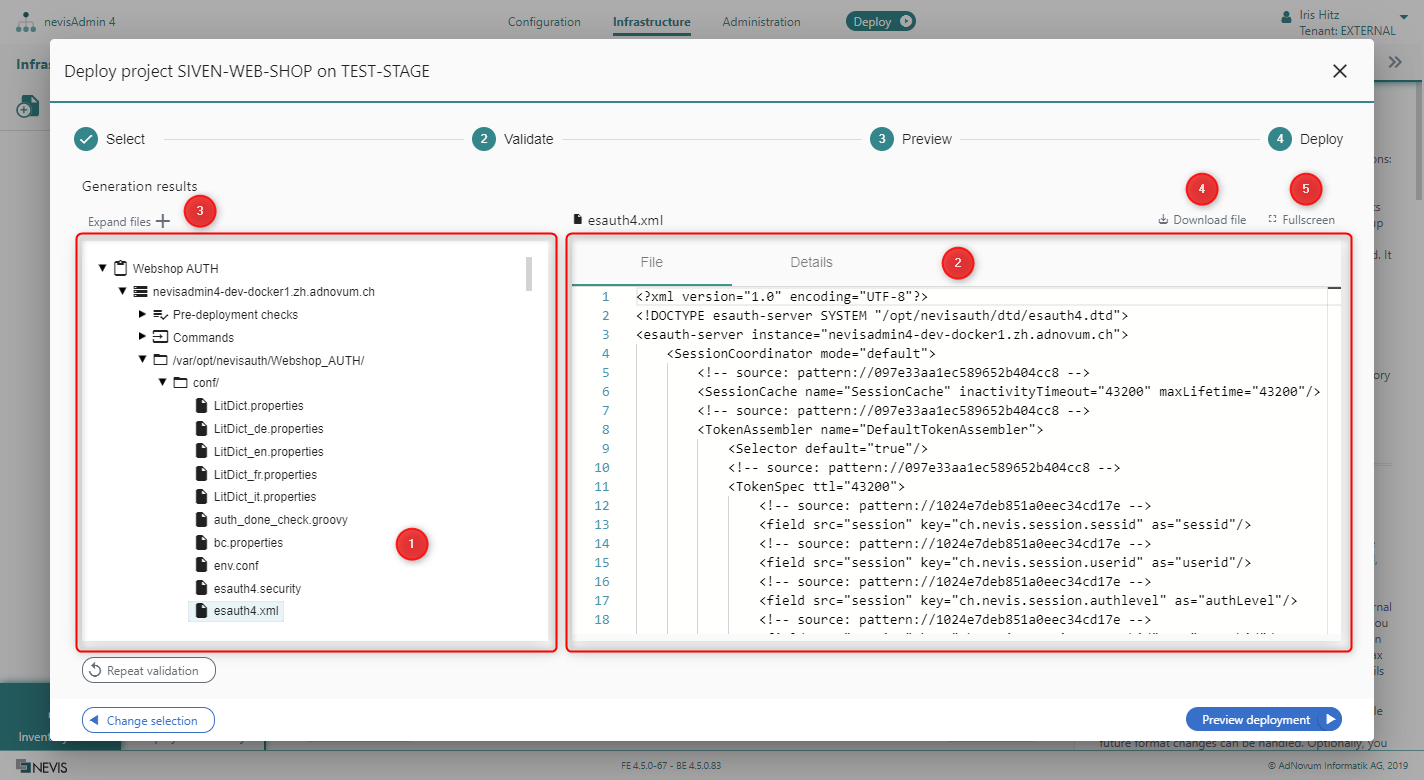
The Generation results screen consists of:
-
The results tree (no. 1 in the previous figure):
- Shows the artifacts generated per component instance and target host(s).
- These artifacts can be generated by host: Pre-deployment checks, Commands, Directories and Files.
-
The selection details part (no. 2):
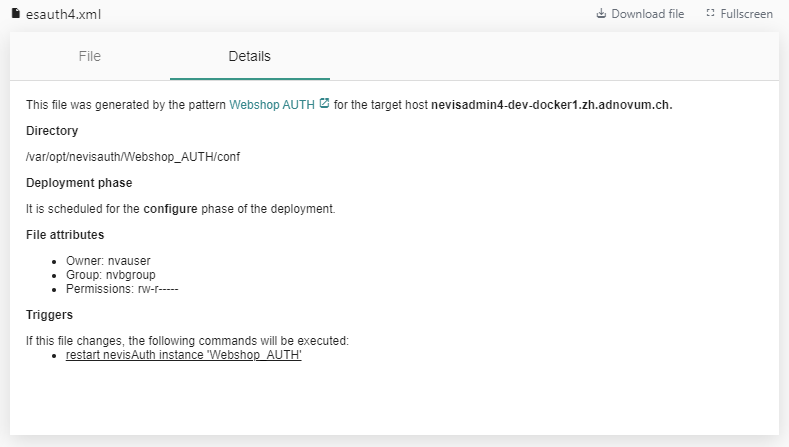
- It shows the content of the selected file in the File tab on the left, and the file details in the Details tab on the right.
- If the selected item is a directory, a command or a check, only the Details tab is visible. Clicking on patterns or hosts will not show details.
The next figure shows the Details tab:
- The Expand files function (no. 3 in the Generation results screen):
- Expands all the directories in the tree to show the location of all files.
- Pre-deployment checks and commands are not expanded.
- The Download file function (no. 4):
- Downloads the selected file in the tree.
- The Fullscreenfunction (no. 5):
- Displays the content of the file in fullscreen mode.
If you are happy with the generated deployment artifacts and the validation has been successful, you can proceed to the next step in the deployment process.
Publish Project and Inventory Required
Some inventories can be restricted to allow deployment only if the selected project and inventory are published. See Restrict Deployment to Published Projects and Inventories Only to configure this setting.
Suppose you have set this restriction for the inventory you are trying to deploy to. If you also have local changes pending to be published, you will not be able to continue the deployment. The Preview deployment button will be disabled, and you will be requested to publish the local changes. Once you have done that, you can restart the deployment process. Deployment will be possible now.
The next movie demonstrates this process.
Deployment Step 3: Preview
During this step, nevisAdmin 4 compares the generated configuration files and commands with the currently valid files and commands on the target server.
Deployment Preview
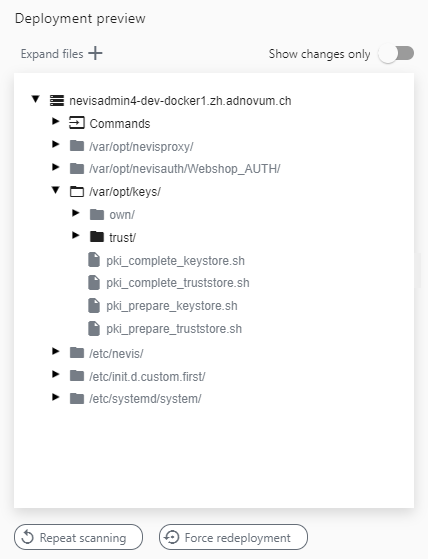
The Deployment preview screen provides an overview of the deployment to be executed (see the next figure). It shows the files that will be created or modified on the target hosts as well as the commands to be executed.
From all the generated files in the Validate step, the deployment wizard will only include those files for deployment that are either not found on the target host or that must be modified.
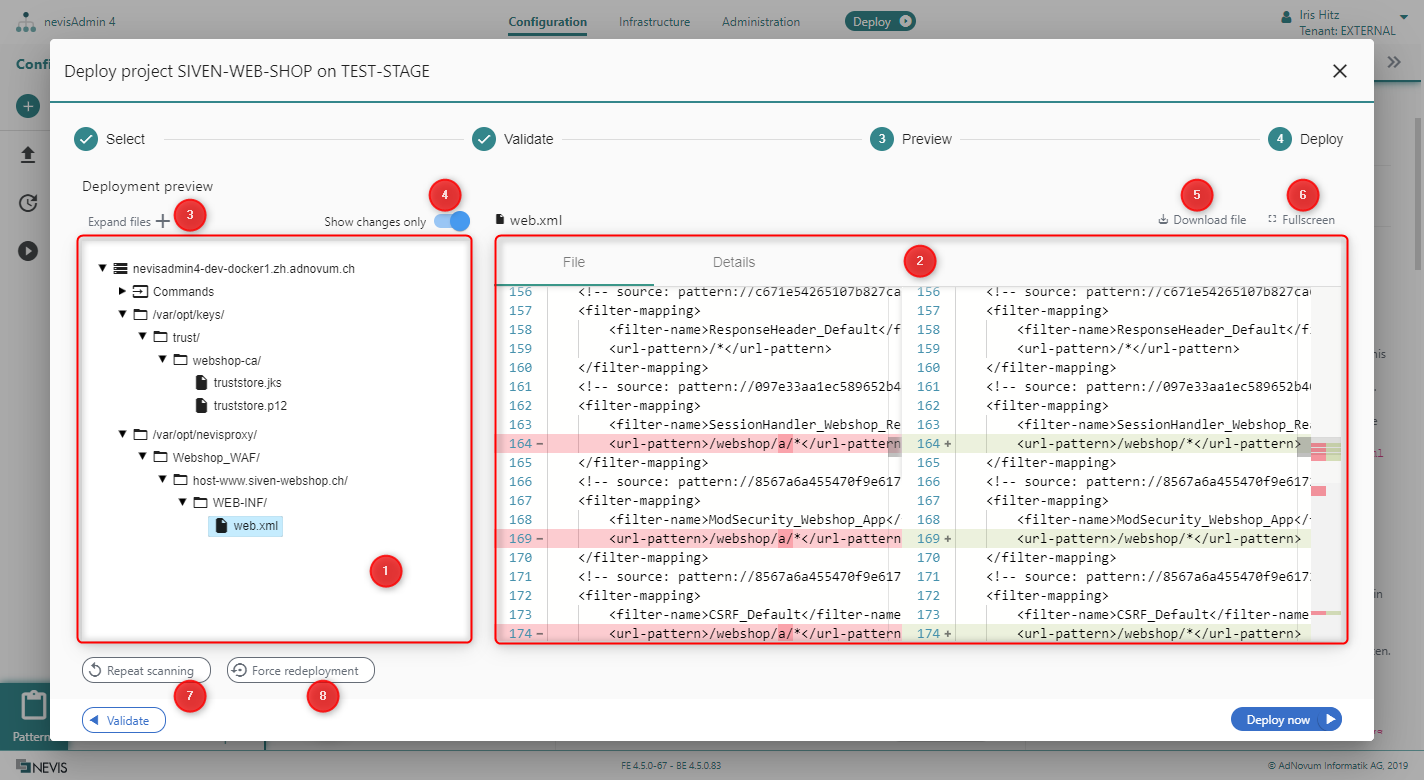
The Deployment preview screen consists of the following elements:
- The deployment preview tree (no. 1 in the previous figure):
- Contains all artifacts that will be part of the deployment (per target host).
- This includes these artifacts: Commands, Directories and Files.
- Selection details on the right side of the screen (no. 2):
- The File tab on the left shows the differences between the content of the file selected in the tree and the content of the same file on the target host. The Details tab on the right shows the details of the file.
- If the selected item is a directory, a command or a check, only the Details tab is visible. Clicking on a host will not show details.
- The Expand files function (no. 3):
- Expands all the directories in the tree to show the location of all files.
- Commands are not expanded.
- The Show changes only function (no. 4):
- Enabled: Shows only those commands and files that will change on the target hosts.
- Disables: Shows all the commands and files on the target host, regardless of whether they will change or not.
The next figure shows the Show changes only function:
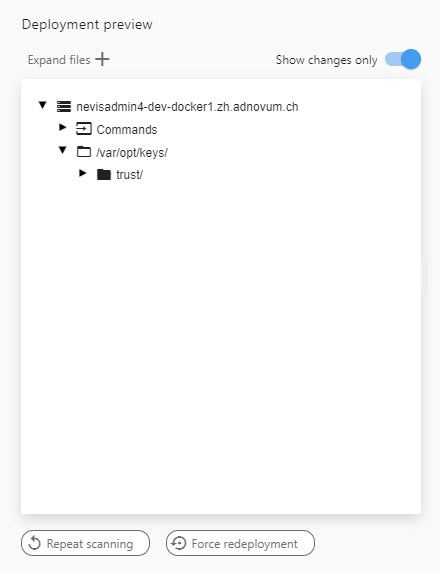 Show changes only function
- The Download file function (no. 5):
- Downloads the selected file in the tree.
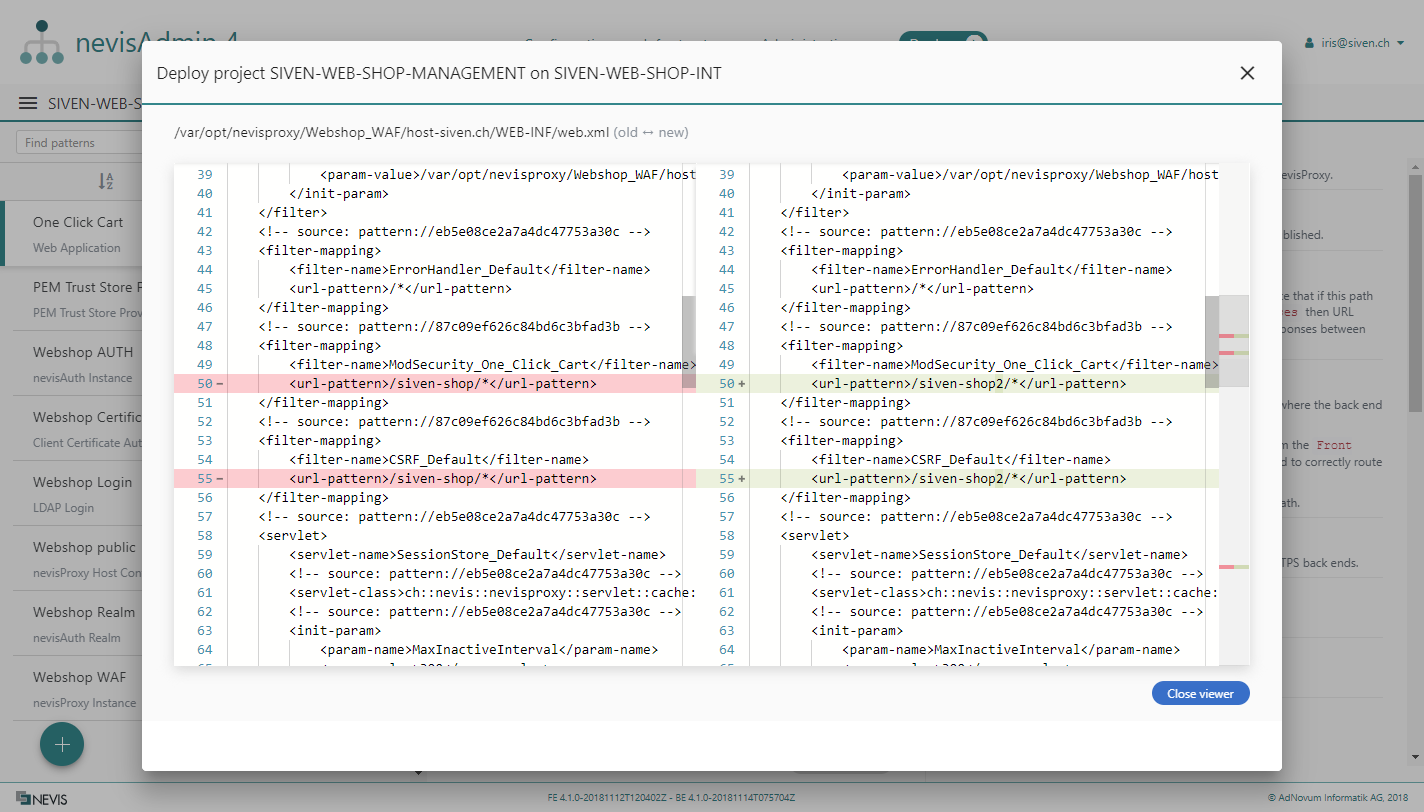
- The Fullscreen function (no. 6):
- Displays the differences between the content of the file selected in the tree and the content of the same file on the target host, in fullscreen mode.
The next figure shows the Fullscreen function:
- The Repeat scanning function (no. 7):
- Restarts the scanning process.
- The Force redeployment function (no. 8):
- Changes the deployment from "delta" to "full" mode.
- All the generated artifacts will be deployed, without considering their current state on the target host.
- The deployment preview tree will change accordingly. This allows you to review the artifacts before you start the deployment.
Scan Hosts Failed
If the scanning of a host failed, you will be able to see the description of the failure in the Deployment previewtree on the failed host:
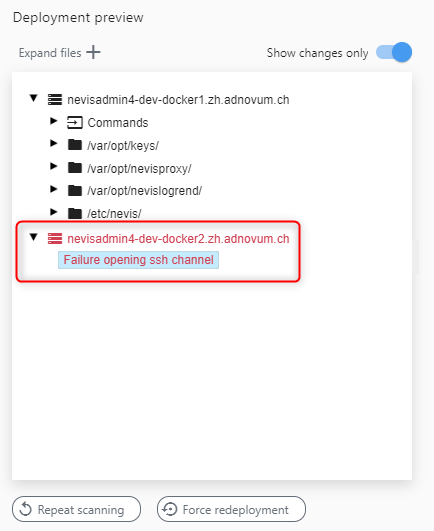
The scanning can fail due to:
- Issues connecting to the host. For example, the SSH connection failed. See Deployment via SSH for setup instructions.
- A failing pre-deployment check. For example, if the create directory command (mkdir) does not exist on the target host.
Once you have solved the issue with the connection or the target host, you can click Repeat scanning and continue the deployment.
If there is at least one host that failed to be scanned, you will not be able to deploy. You can try to filter the deployment to the successful hosts only, as explained in Continue the Deployment with Errors and Warnings.
Deployment Step 4: Deploy
The final step in the deployment process is the actual execution of the deployment. Now, all generated configuration files and commands will be deployed on the target host(s).

In this step, the wizard creates all Nevis instances that you configured in your project on your target server infrastructure.
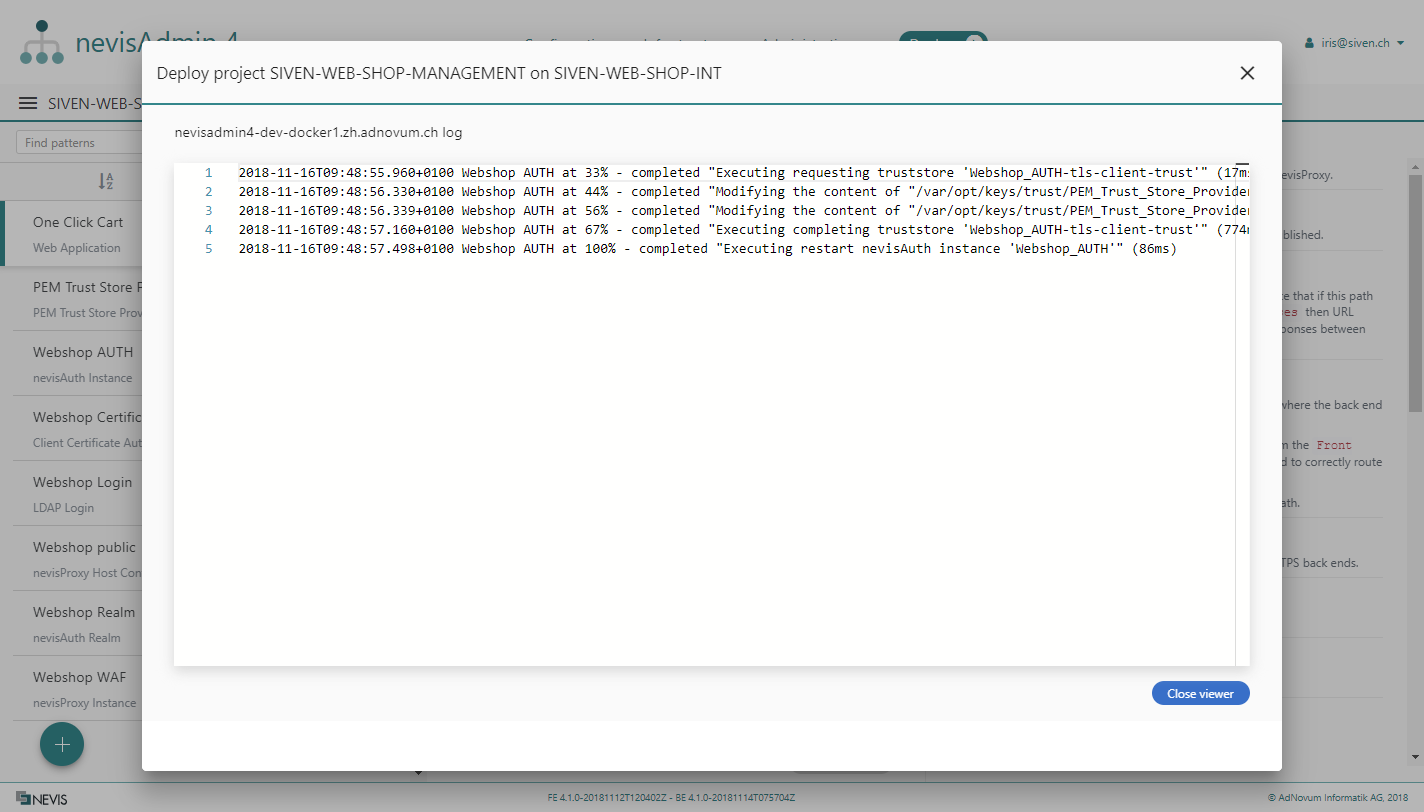
Once the deployment has finished, you see a report with the result of the deployment execution. This Deployment report lists both successful and failed hosts.
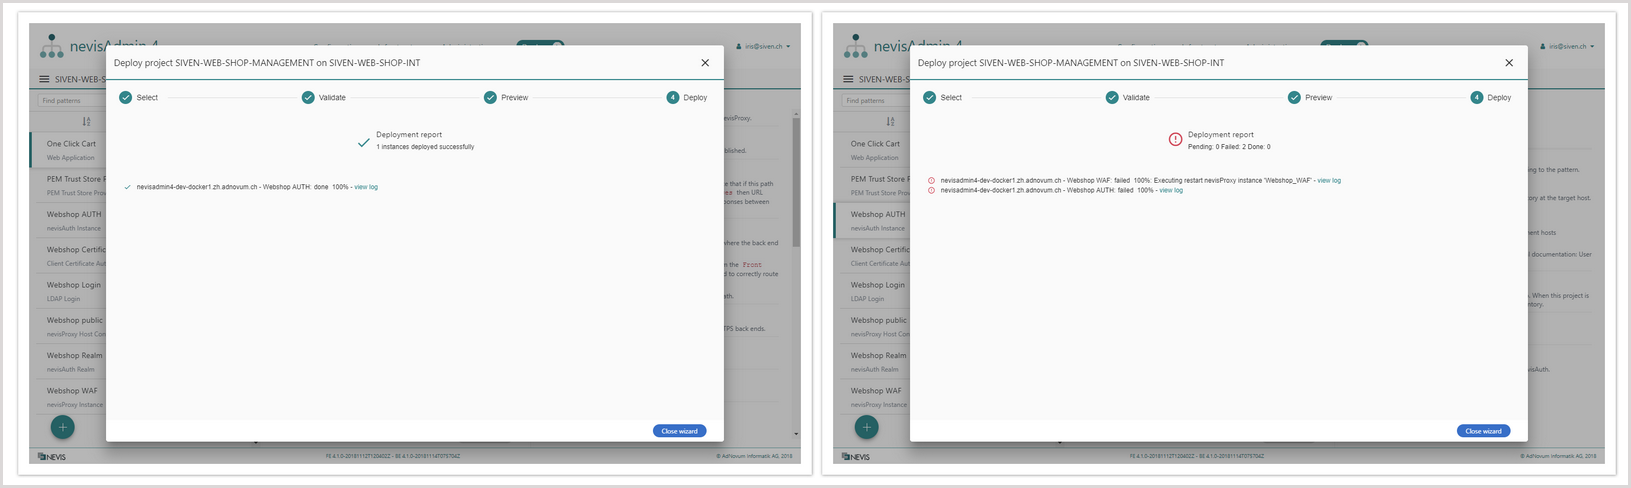
If you want to view the deployment details for each host in a log file, click the view log link in the figure above. See the next figure for an example of the log file: