Deployment History and Rollback
The Deployment History screen shows all previous deployments executed to an inventory and the details of the execution. From here, you can also perform a rollback of your currently deployed configuration. This re-deploys a previous state of your project and inventory.
Navigation to Deployment History screen
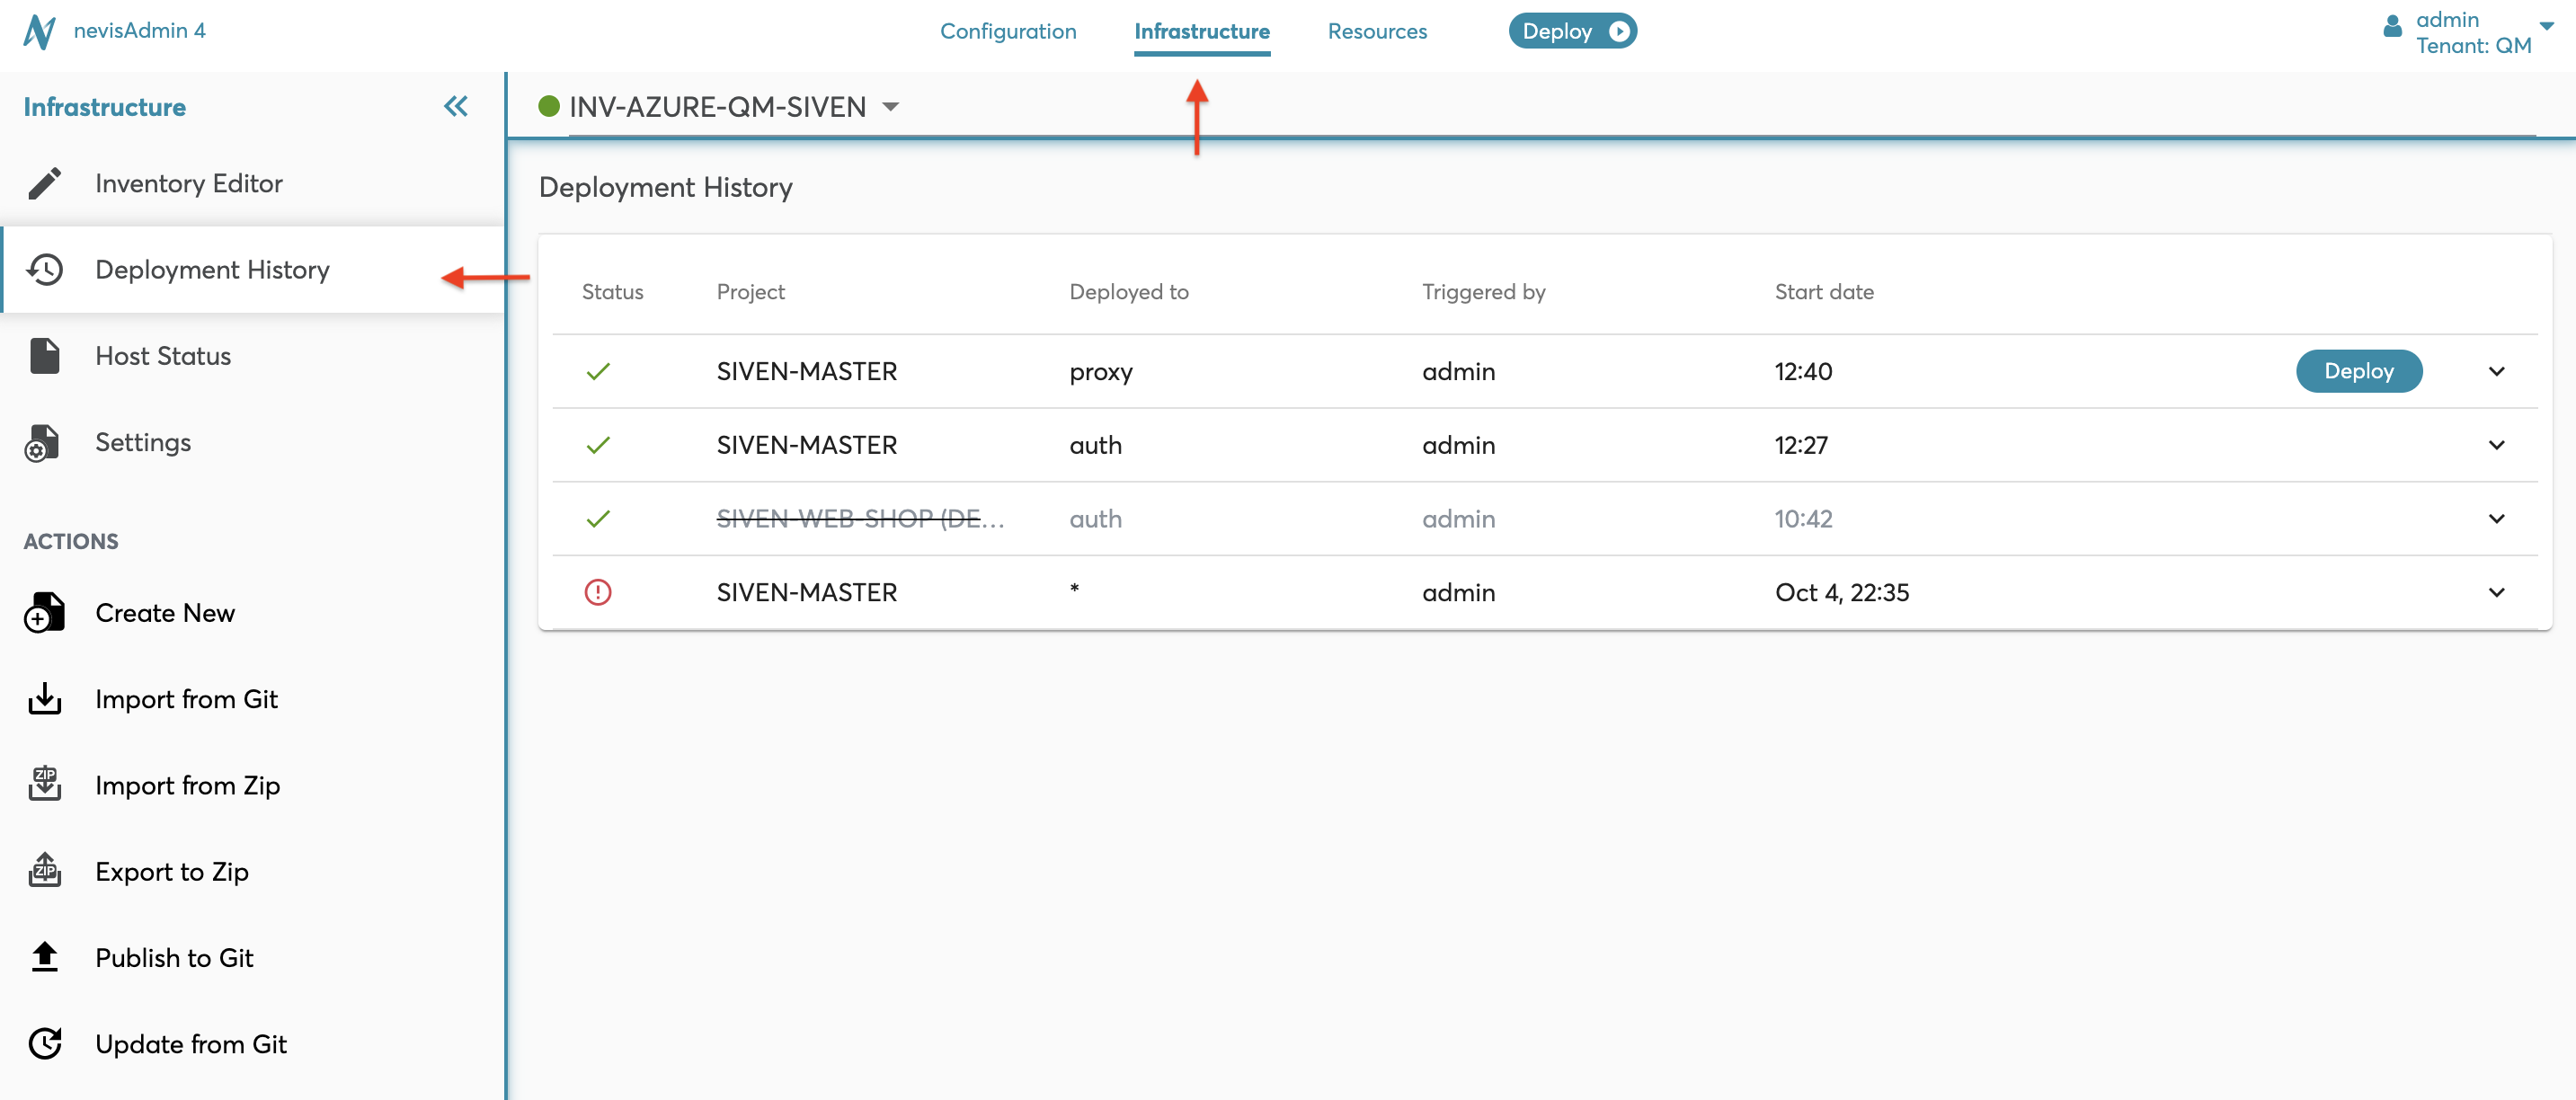
You access the Deployment History screen by clicking on Deployment History in the Navigation menu in the sidebar of the Infrastructure tab:
Deployment History screen
The Deployment History screen lists all past deployments for the selected inventory. Each time you run a deployment process, the outcome is registered as a past deployment along with additional information.
If the deployment history is empty, first deploy your project configuration to an inventory. See Deployment of the Configuration.
Each past deployment entry shows the following information:
Classic deployment:
- Status:Indicates the outcome of the deployment: successful, failed, unknown or in progress.
- Project: The project that was deployed to the inventory.
- Deployed to:Shows whether the deployment included the entire project and all hosts, or whether it was restricted to, for example, a group of hosts or a specific pattern.
- Deployed by: The name of the user who ran the deployment.
- Date triggered: Shows when the deployment started.
- Deploy button: Re-deploys the configuration that was deployed in the past (rollback).
Kubernetes deployment:
- Status:See the classic deployment.
- Side-by-side deployment status icons: Indicates the status of the given secondary deployment. These are the possible status options:
- Active: Actual secondary deployment.
- Promoted: Promoted secondary deployment.
- Rolled back: Rolled back secondary deployment.
- Outdated: Outdated secondary deployment. The secondary deployment becomes outdated once the user re-deploys the same project.
- Project: See the classic deployment.
- Deployed by:See the classic deployment.
- Date triggered:Shows when the deployment started. In case of a promoted/rolled back deployment, it is the date of promotion, or when the rolling back started.
- Deploy button: See the classic deployment.
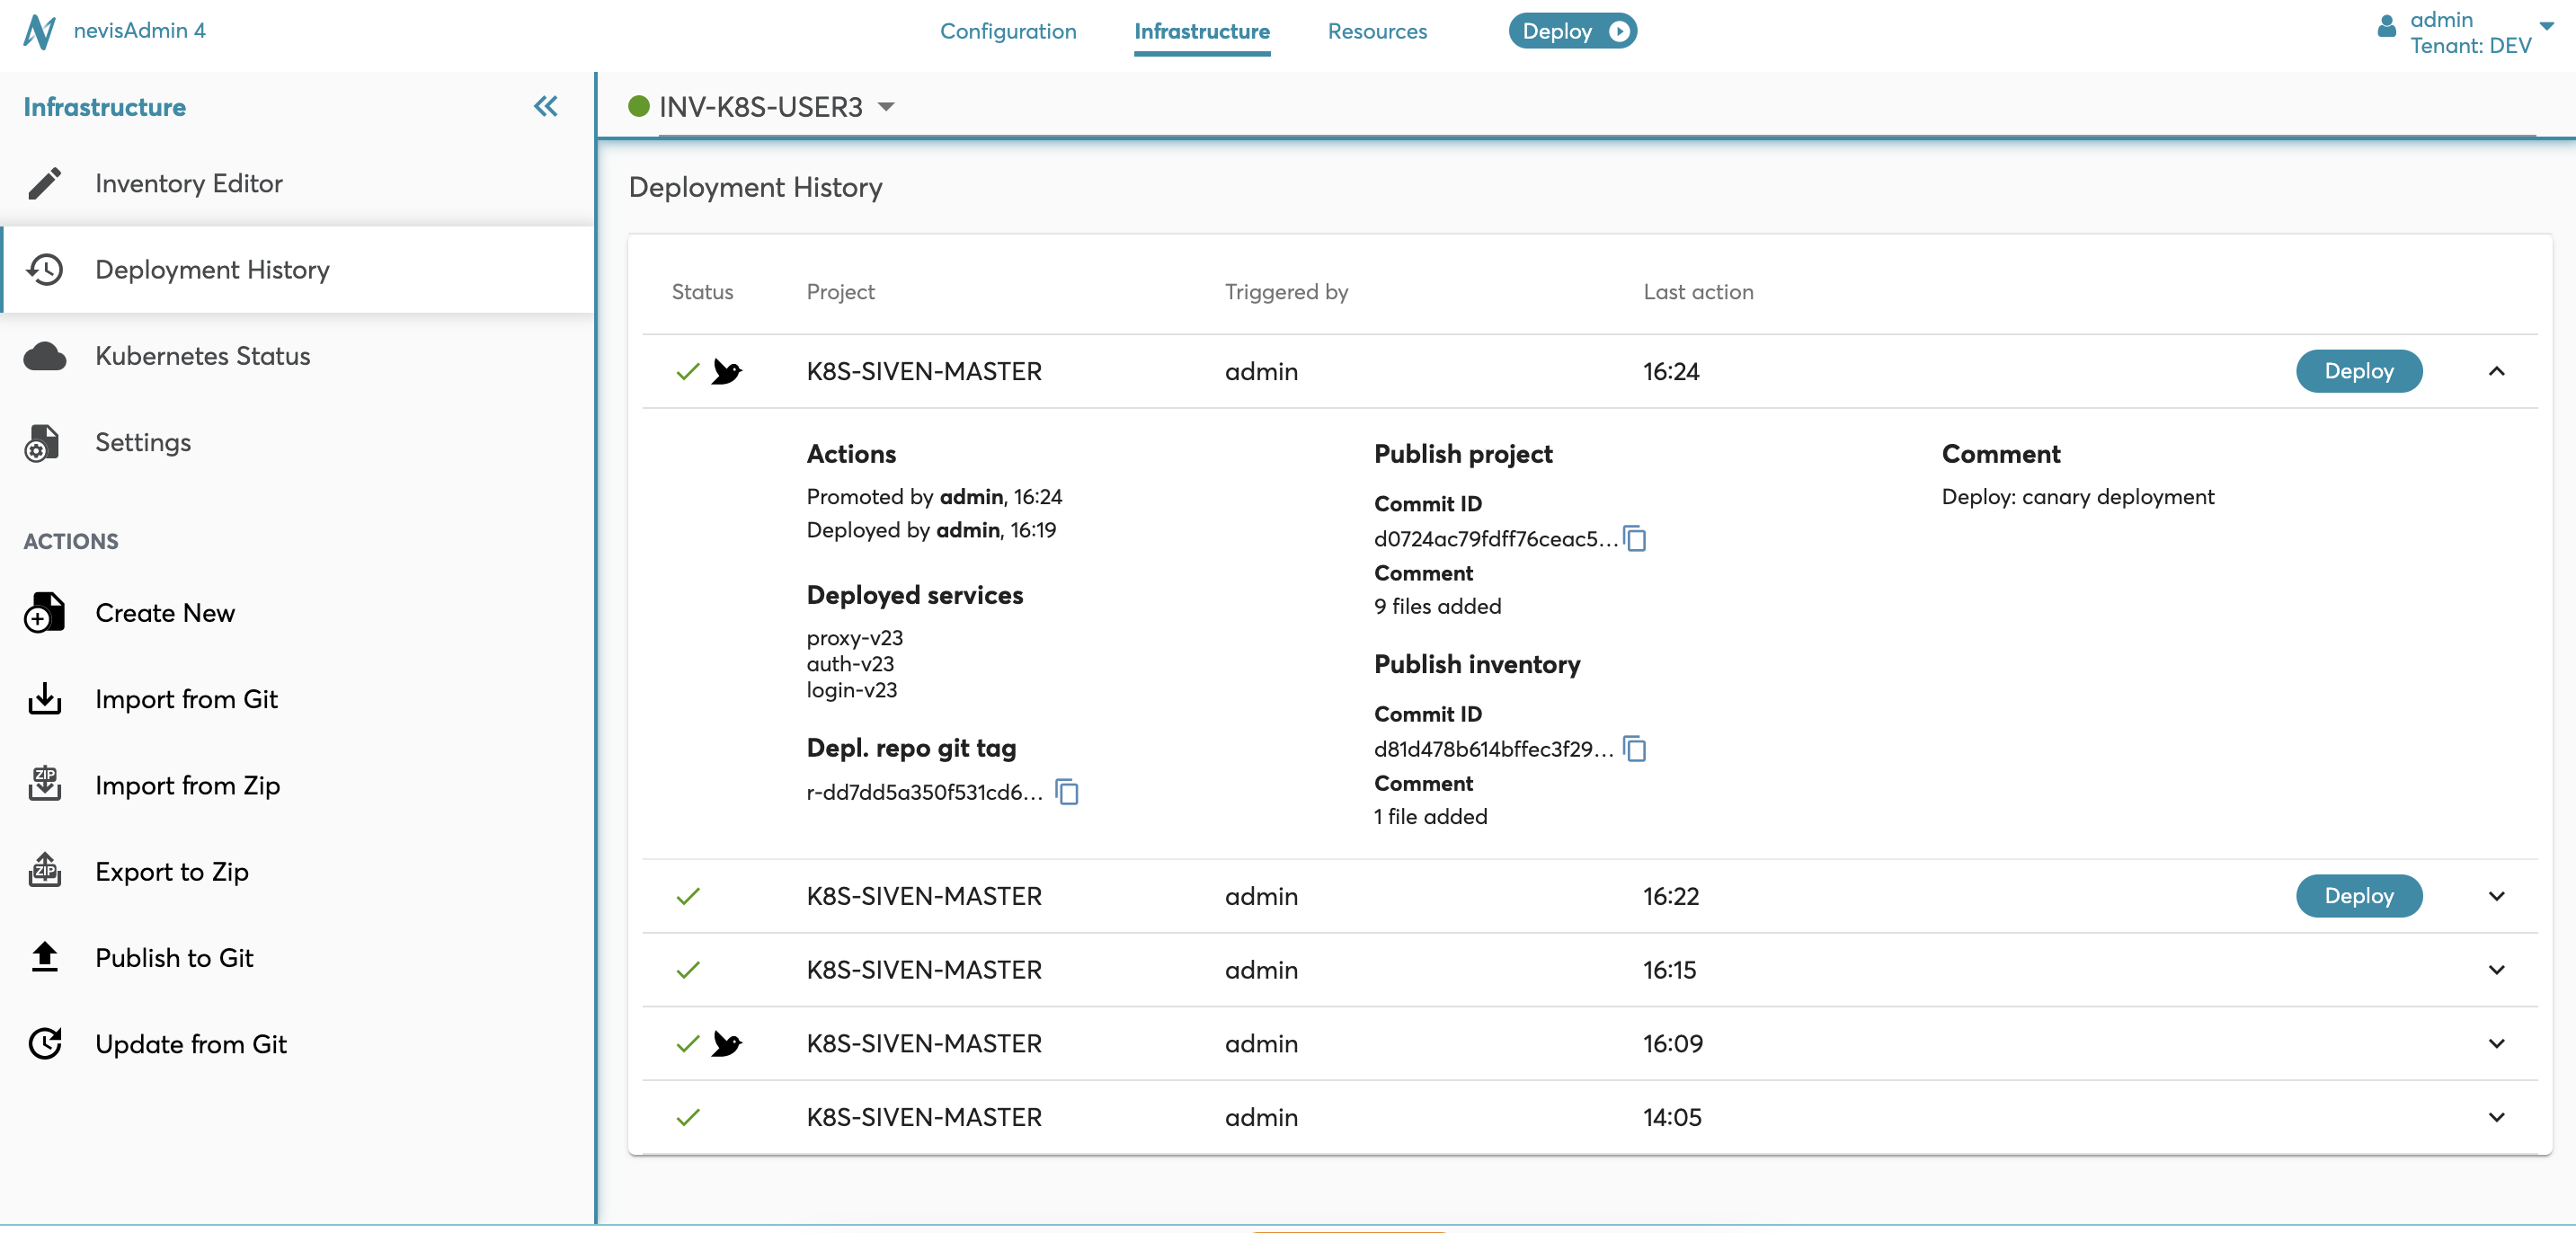
Clicking on an entry will show the details of the deployment:
Classic deployment:
- Publish project information: Shows the commit ID and commit message of the project at the time of deployment. The ID can be copied by clicking on the Copy icon. This info is only available if the project has been published to Git before the deployment.
- Publish inventory information:Shows the commit ID and commit message of the inventory at the time of deployment. The ID can be copied by clicking on the Copyicon. This info is only available if the inventory has been published to Git before the deployment.
- Comment: Shows the comments defined during the deployment creation.
Especially for production inventories, it is important to have a complete audit trail in Git. You can then rollback to any previously deployed configuration.
To ensure this, enable the function Require a published project and inventory for deployment. For more information on how to configure this, see Restricting Deployment to Published Projects and Inventories Only.
Kubernetes deployment:
- Actions:Displays who made the deployment, and promoted/rolled back the secondary deployment.
- Deployed services: Shows the list of services deployed with the version number (e.g. proxy-v2). The version number is incremental. Note that the version number does not indicate the version of the component. It is a technical indicator to differentiate between secondary and primary deployments. The field is available for deployments done with nevisAdmin 4 version 4.9.
- Deployment repository git tag: The git tag of the generated configuration. To copy it, click the Copyicon. The field is available for deployments done with nevisAdmin 4 version 4.9.
- Publish project information: See the classic deployment.
- Publish inventory information: See the classic deployment.
- Secondary (side-by-side) deployment: Displays routing information for the secondary deployment, such as Header name and/or Cookie name.
- Comment: Shows the comments defined during the deployment creation and/or in promoting/rolling back the secondary deployment.
You can re-deploy a past deployment by clicking on the Deploy button next to each entry in the past deployments list. This will re-run the deployment of the old version of the project and inventory. Upon completion, the configuration on the remote hosts will be reverted to the previous state.
As always, you will go though the Deployment Wizard steps where you can validate and preview what exactly will be deployed. The following movie shows how to re-deploy a past deployment:
Some past deployments do not provide the Deploy button as they cannot be re-deployed. This can happen for the following reasons:
- The deployment execution failed.
- The project or the inventory had local changes pending to be published at the time of the deployment. To avoid this, configure the inventory to enforce publishing changes before a deployment. See Restricting Deployment to Published Projects and Inventories Only.
- You do not have view permission for the project you are trying to deploy.
- If you do not have deploy permission for the inventory, the Deploy button is visible, but when clicking it you will get an error indicating the lack of permissions.
- The same happens if the past deployment was already re-deployed by another user and you do not have view permission for the created checkout project and inventory (see below). If this happens, request the required view and deploy permissions, or ask for them to be deleted.
Checkout of Older Project and Inventory Versions
To deploy a past deployment, nevisAdmin 4 relies on the version control repository. This means that the selected project and inventory must have been published right before the deployment was executed. This allows you to re-deploy it in the future.
When you re-deploy, the following will happen:
- The old version of the project will be checked out (imported) as an independent project.
- Similarly, the old version of the inventory will be checked out.
- The Deployment Wizard will start, with these old versions pre-selected.
Projects and inventories created by this process have the same key as the original object followed by ":" and the first seven digits of the checked out commit ID. For example, an older version of the inventory TEST_STAGE may appear as TEST_STAGE:5C214D3. These projects and inventories are read-only and cannot be published. But it is possible to deploy them, inspect them, or export them to Zip.
When done, feel free to delete the versioned copies of the project and inventory. They can be re-created anytime from the past deployments list.
Reverting a project or inventory
In some cases, you may want to revert your configuration project or inventory to a previous version, and continue working from there.
To accomplish this, you have the following options:
If you previously published and deployed the project and inventory, you can leverage the rollback functionality:
- Click the Deploy button to checkout the old versions.
- Close the Deployment Wizard as soon as it starts.
- Export the old project or inventory to Zip.
- Switch to your current project/inventory, without the ":" in the name, and import the just exported old project/inventory from Zip. This will overwrite the current state of your project/inventory!
- Delete the old project and inventory versions in nevisAdmin 4.
If you published the project (or inventory), but did not deploy it, you can work with Git directly:
Make sure there is nothing to publish for the project (try Publish project to Git to verify).
Clone the remote project on the command line.
Revert to the previous version into the current directory:
git revert --no-commit HEAD
If you need to revert various versions you can use a range:
git revert --no-commit HEAD~n..HEADReplace 'n' with the number of versions you want to revert.
- Commit and push your change.
- Update the project in nevisAdmin 4.