Test the Access App
Your Authentication Cloud instance comes with a single-page test web application so that you can discover the basic functionality of the Access App.
Install the test Access App
Android
Click on this link.
Provide your email address. The email address must be associated with a Google Account. Two invitations (one for Android, one for iOS) will be sent to that address.
Open the Android invitation email in your Android device. Accept the invitation by clicking on Get Started.
Optionally you can install the Firebase App Tester application to help you with the installation process before accepting the invitation.
Follow the instructions to proceed with the Muvonda Access App application installation.
iOS
- Install the TestFlight application in your iPhone.
- Using your iPhone, open this link.
- Follow the instructions to install the Muvonda Access App set up to work with your instance. Once installed, accept all permission requests as you progress.
Open the single-page test application
- Open the Nevis Portal, and click on your Authentication Cloud tile.
- Click the Test & Debug link in the bottom left corner, which opens your test application in the browser.

Add your Access Key to the test application
In this scenario, we register your phone as a biometric authenticator for a user account.
- If you previously created an Access Key, have it ready, otherwise follow the instructions in Create an Access Key.
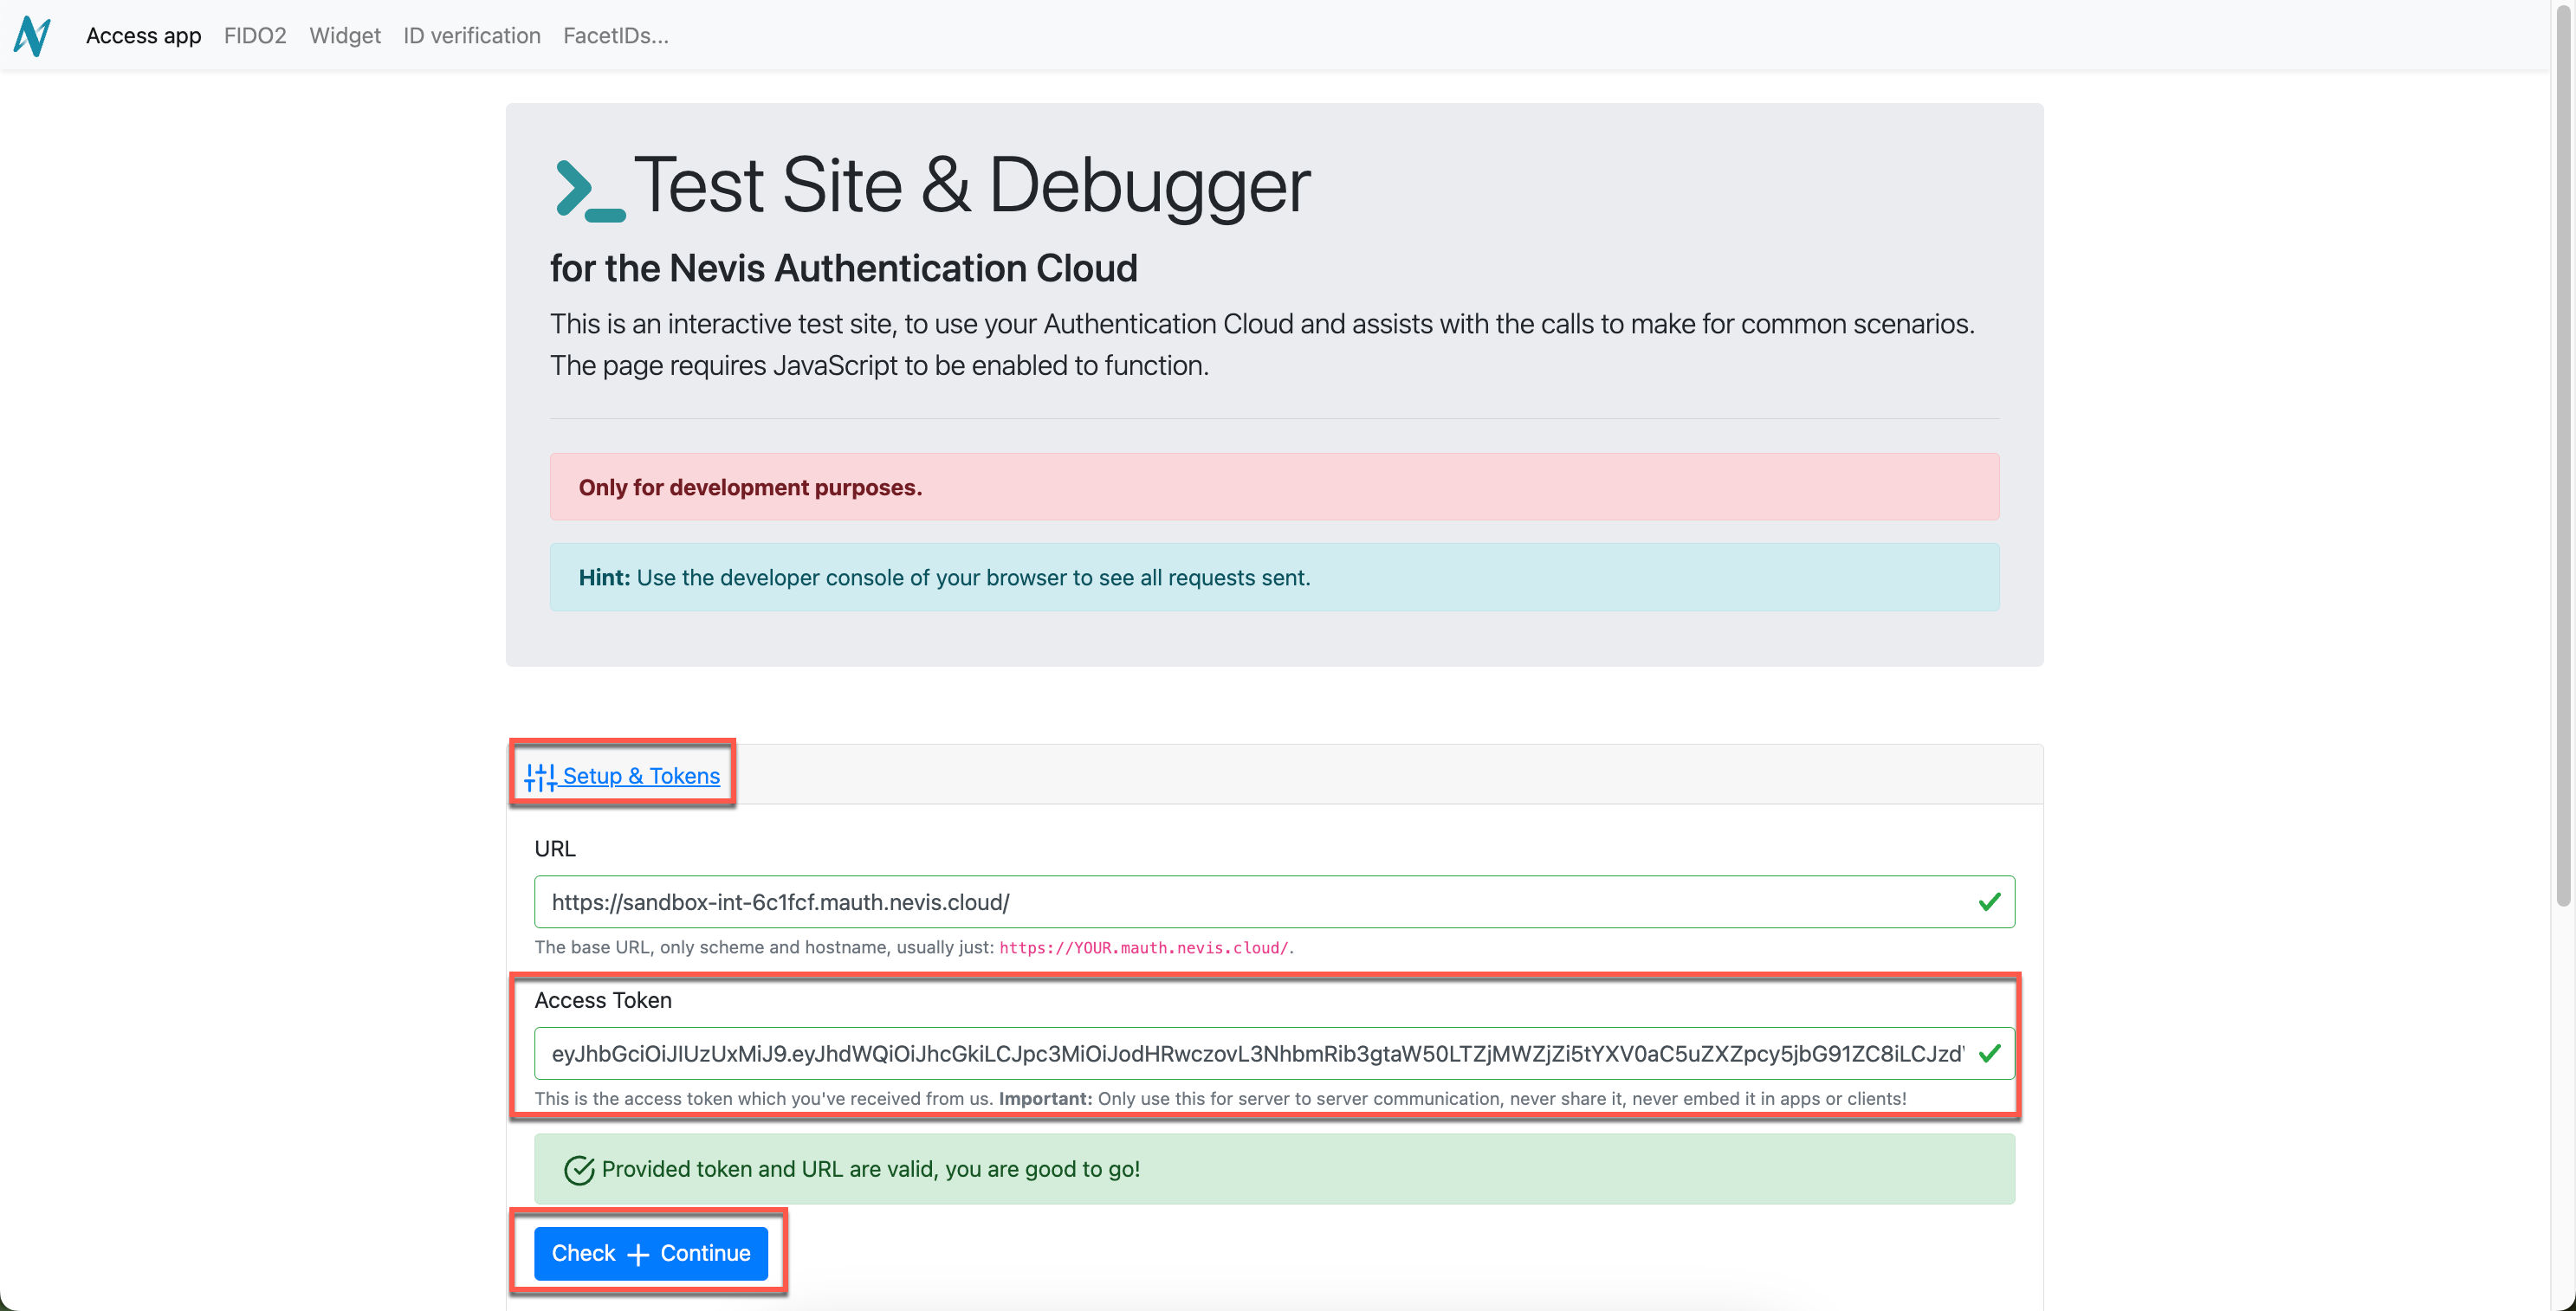
- Open the test application in a browser.
- Under Setup & Tokens, paste your Access Key in the Access Token field.
- Click Check + Continue. If your Access Key is correct, the Enroll a new Authenticator section is opened automatically.
Register and sign a transaction
In this scenario, you register an account, and also sign a simulated financial transaction using biometric authentication.
Register your phone as a biometric authenticator for your user account.
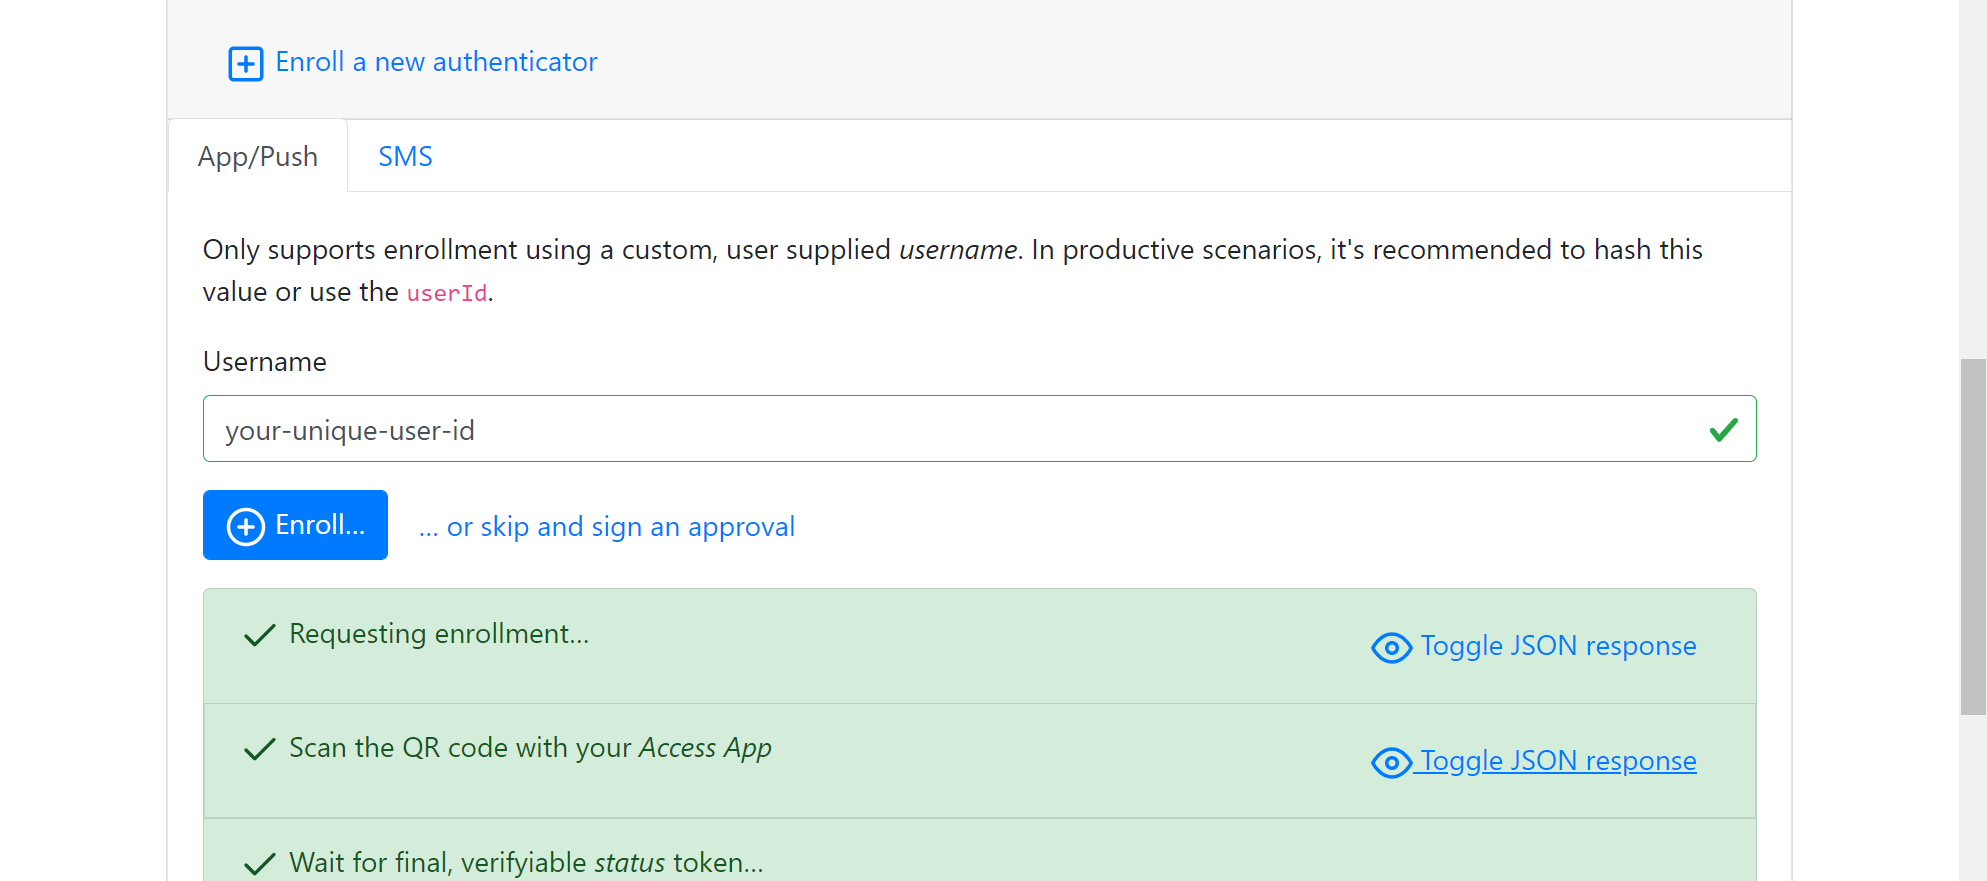
- Under Enroll a new Authenticator, enter a unique username, for example, your name appended with a date, or your email address.
- Click Enroll. A QR code is displayed.
- Unlock your phone, and open the Muvonda Access App.
- In the mobile app, click Continue.
- Scan the QR code with the app.
- On your phone, for Authentication Method, select a biometric option, facial recognition, or fingerprint scan.
- Confirm your biometric authenticator.
- In your browser, notice how the status of the registration changed to
succeeded.
Using the account created, sign a simulated financial transaction using passwordless authentication.
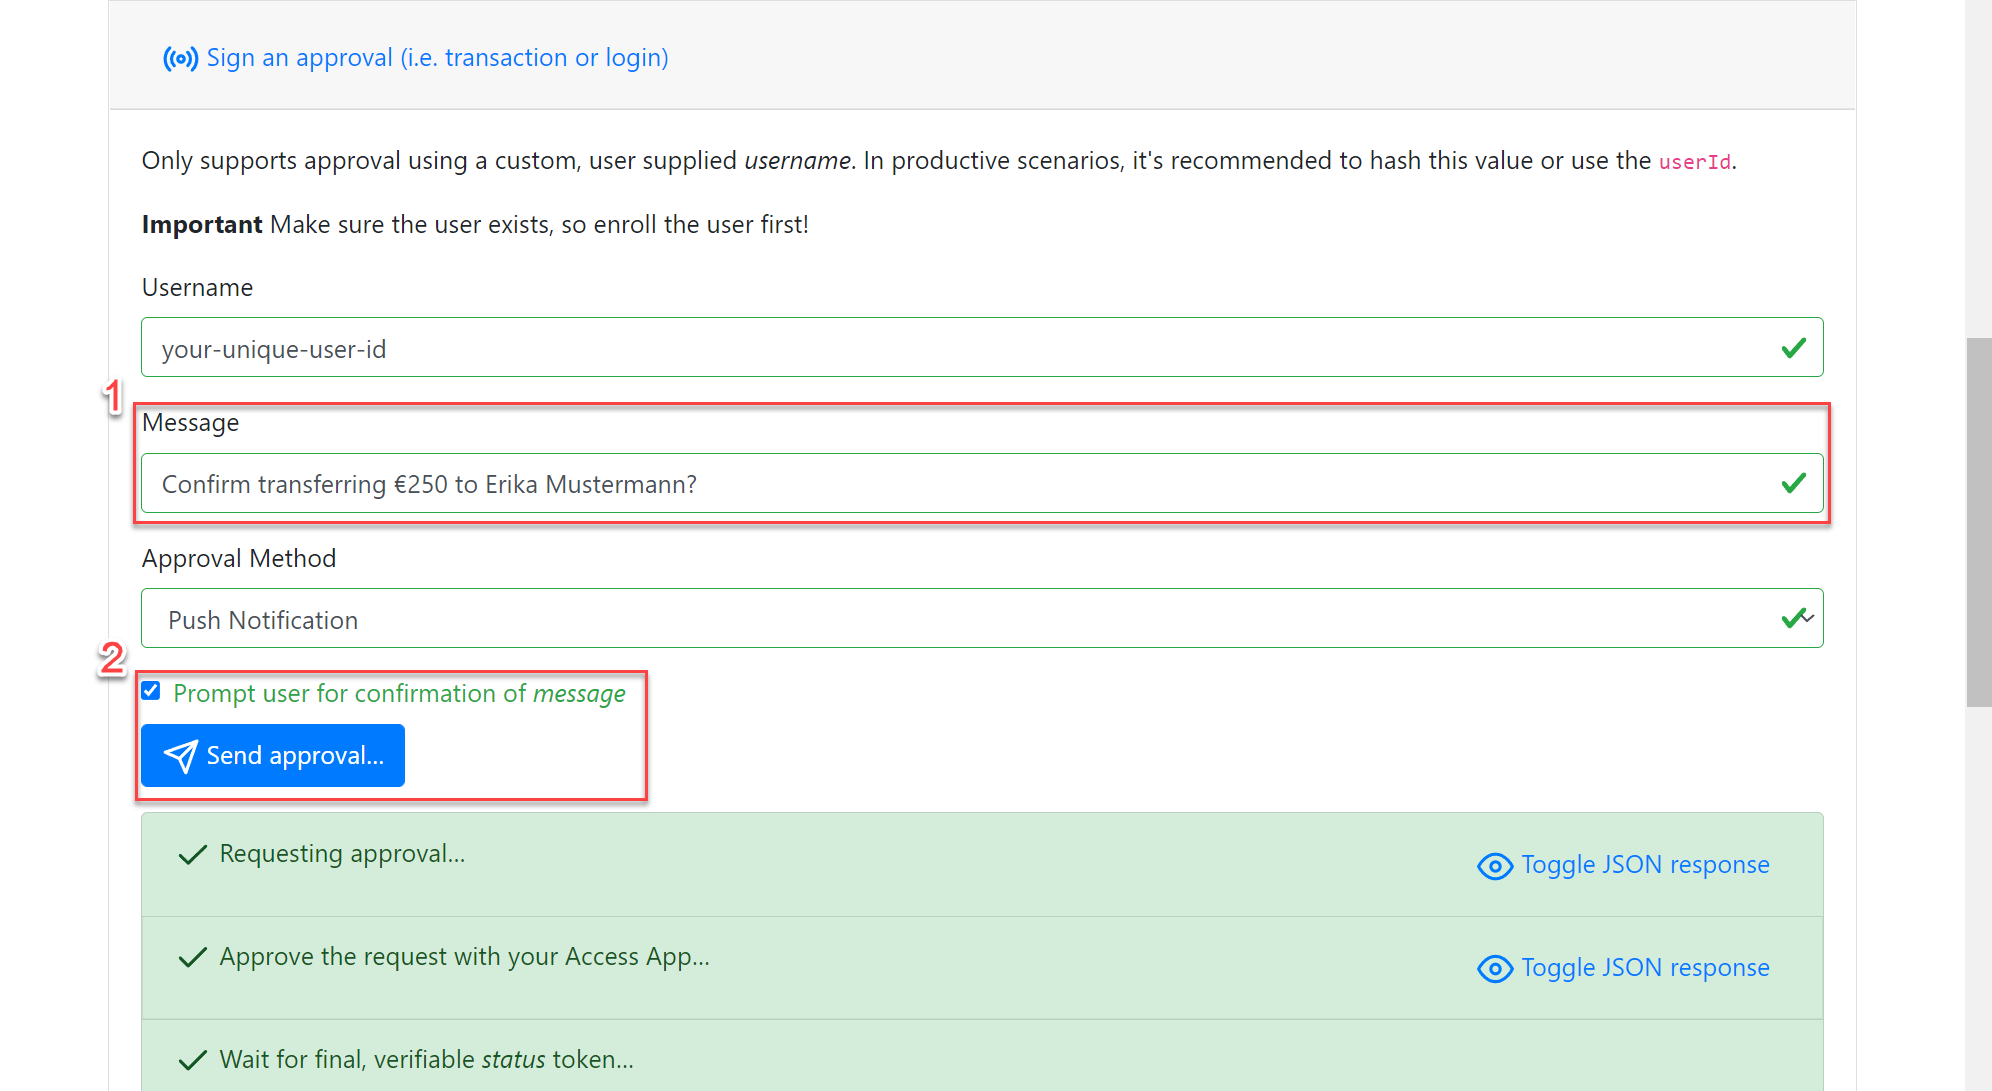
- In the test application in your browser, click on the Sign an approval section. Notice that the username is already filled in for you with the account you just registered.
- Enter a sample message such as: Confirm transferring €250 to Erika Mustermann?
- Leave the Approval Method on Push Notification.
- Select the Prompt user for confirmation of message checkbox.
- Click Send Approval.
- On your phone, click the notification message to open the app. For help, see If push messages do not arrive....
- In the app, click Confirm to authorize the transaction.
- Notice how the status of the transaction changed to
succeededin your browser.
Congratulations, you just created your first user and registered a mobile app as a biometric authenticator for that user. Next, check out the user and the authenticator in your Authentication Cloud instance in Users and Authenticators.