Project Overview
The Project Overview screen provides an overview of the settings of your project. It looks different when your project is new and you have nothing configured yet.
Project Overview Screen - New Project
If your project is newly created and not configured yet, the Project Overviewscreen looks like the screen in the next figure. The screen briefly describes how nevisAdmin 4 works and gives some suggestions for common use cases like "New Web Application" or "New Authentication Realm". It is the starting point for your configurations.
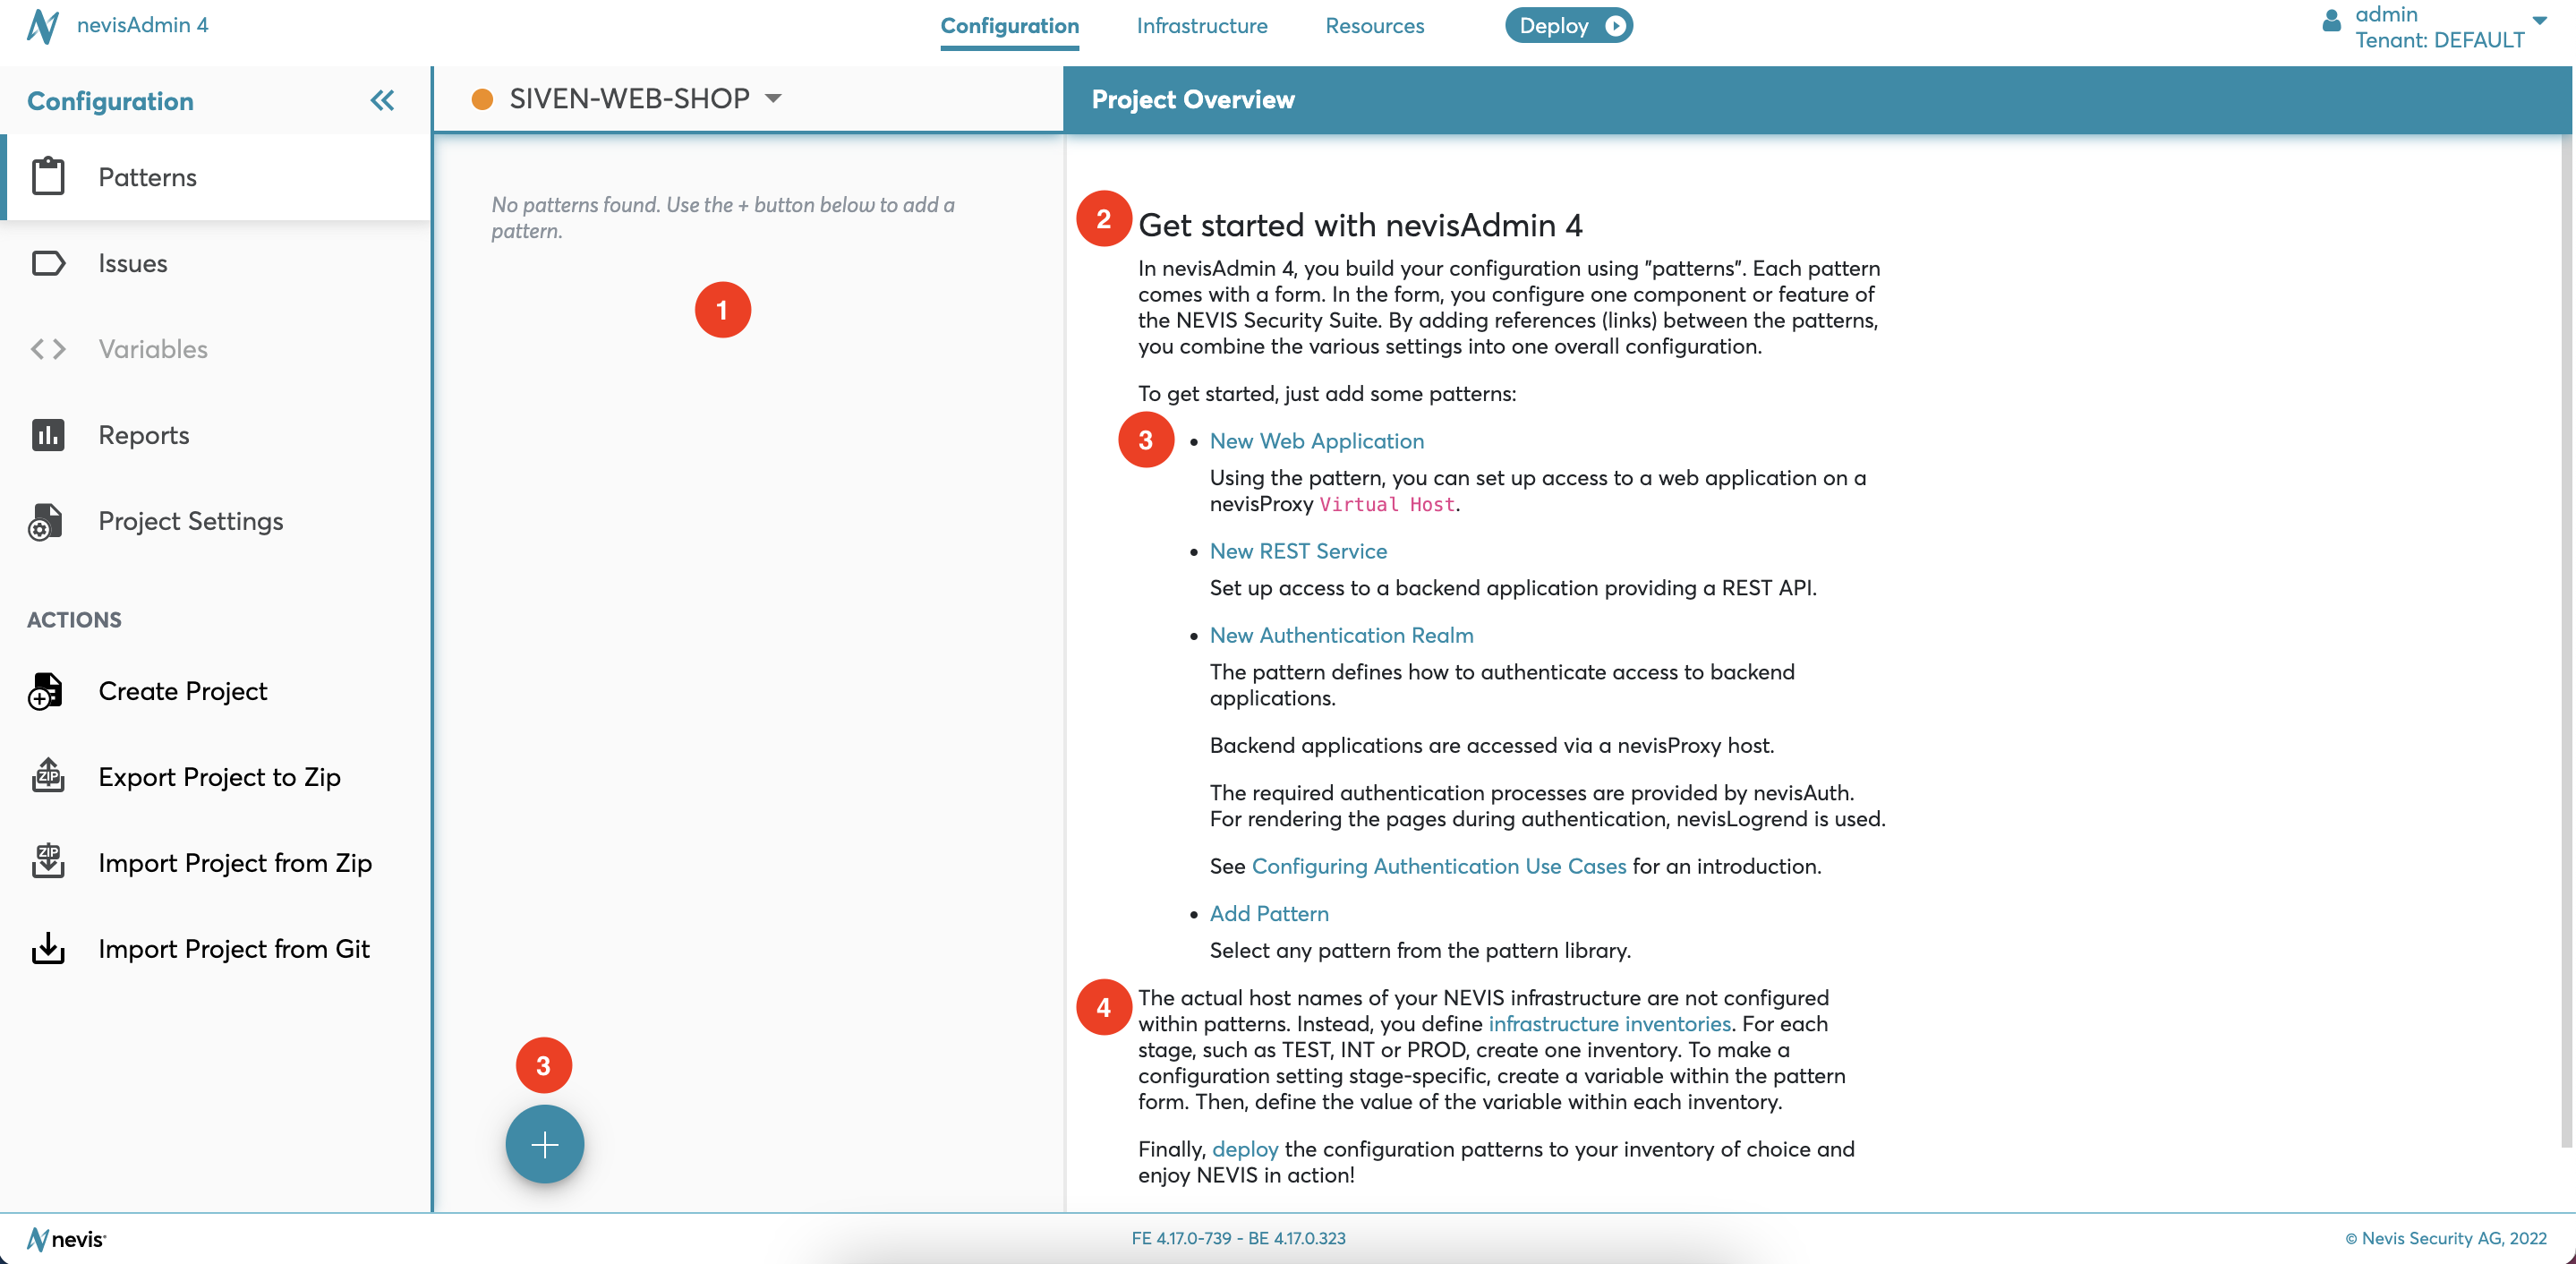
You will see the following elements in the Project Overview screen when you create a new project:
- The Patterns list part (no. 1 in the figure) will be empty. It tells you how to add the first pattern.
- In the middle of the screen, you will see a "Get started" text (no. 2 in the figure). This text briefly explains how the project configuration is built from patterns.
- You can add your first pattern from various places in the screen (all marked no. 3 in the figure). The "Get started" text proposes some quick links to add common patterns. You can also add new patterns with the
 icon, which you find in the lower left corner of the Patterns list.
 - The last two sections of the "Get started" text describe the next steps after you finished configuring the project (see no. 4 in the figure).
Project Overview Screen - Configured Project
The next figures show the Project Overviewscreen in case you have already started configuring your project, by adding patterns, defining variables, and so on.
Navigating to the Project Overview Screen
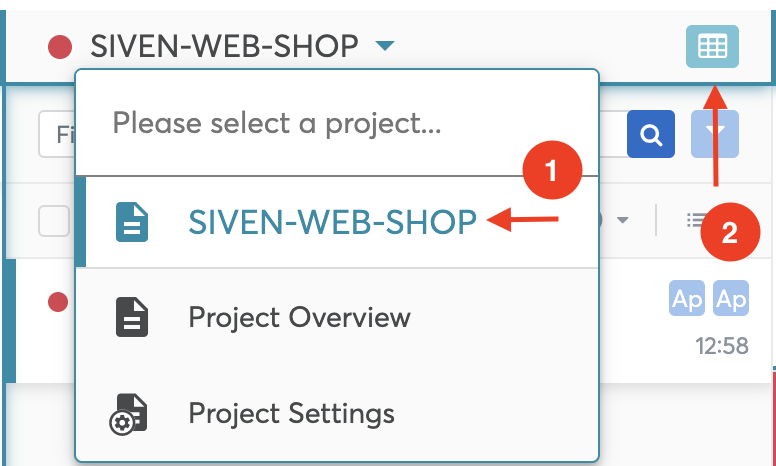
Once you have configured at least one pattern for a project, you can access the respective Project Overview screen from the navigation menu (no. 1 in the next figure):
Project Overview Screen Tabs
The Project Overview screen provides an overview of the project settings by showing summary reports of the main patterns within your project. The summary reports are divided over the tabs Applications, Realms, and Instances:
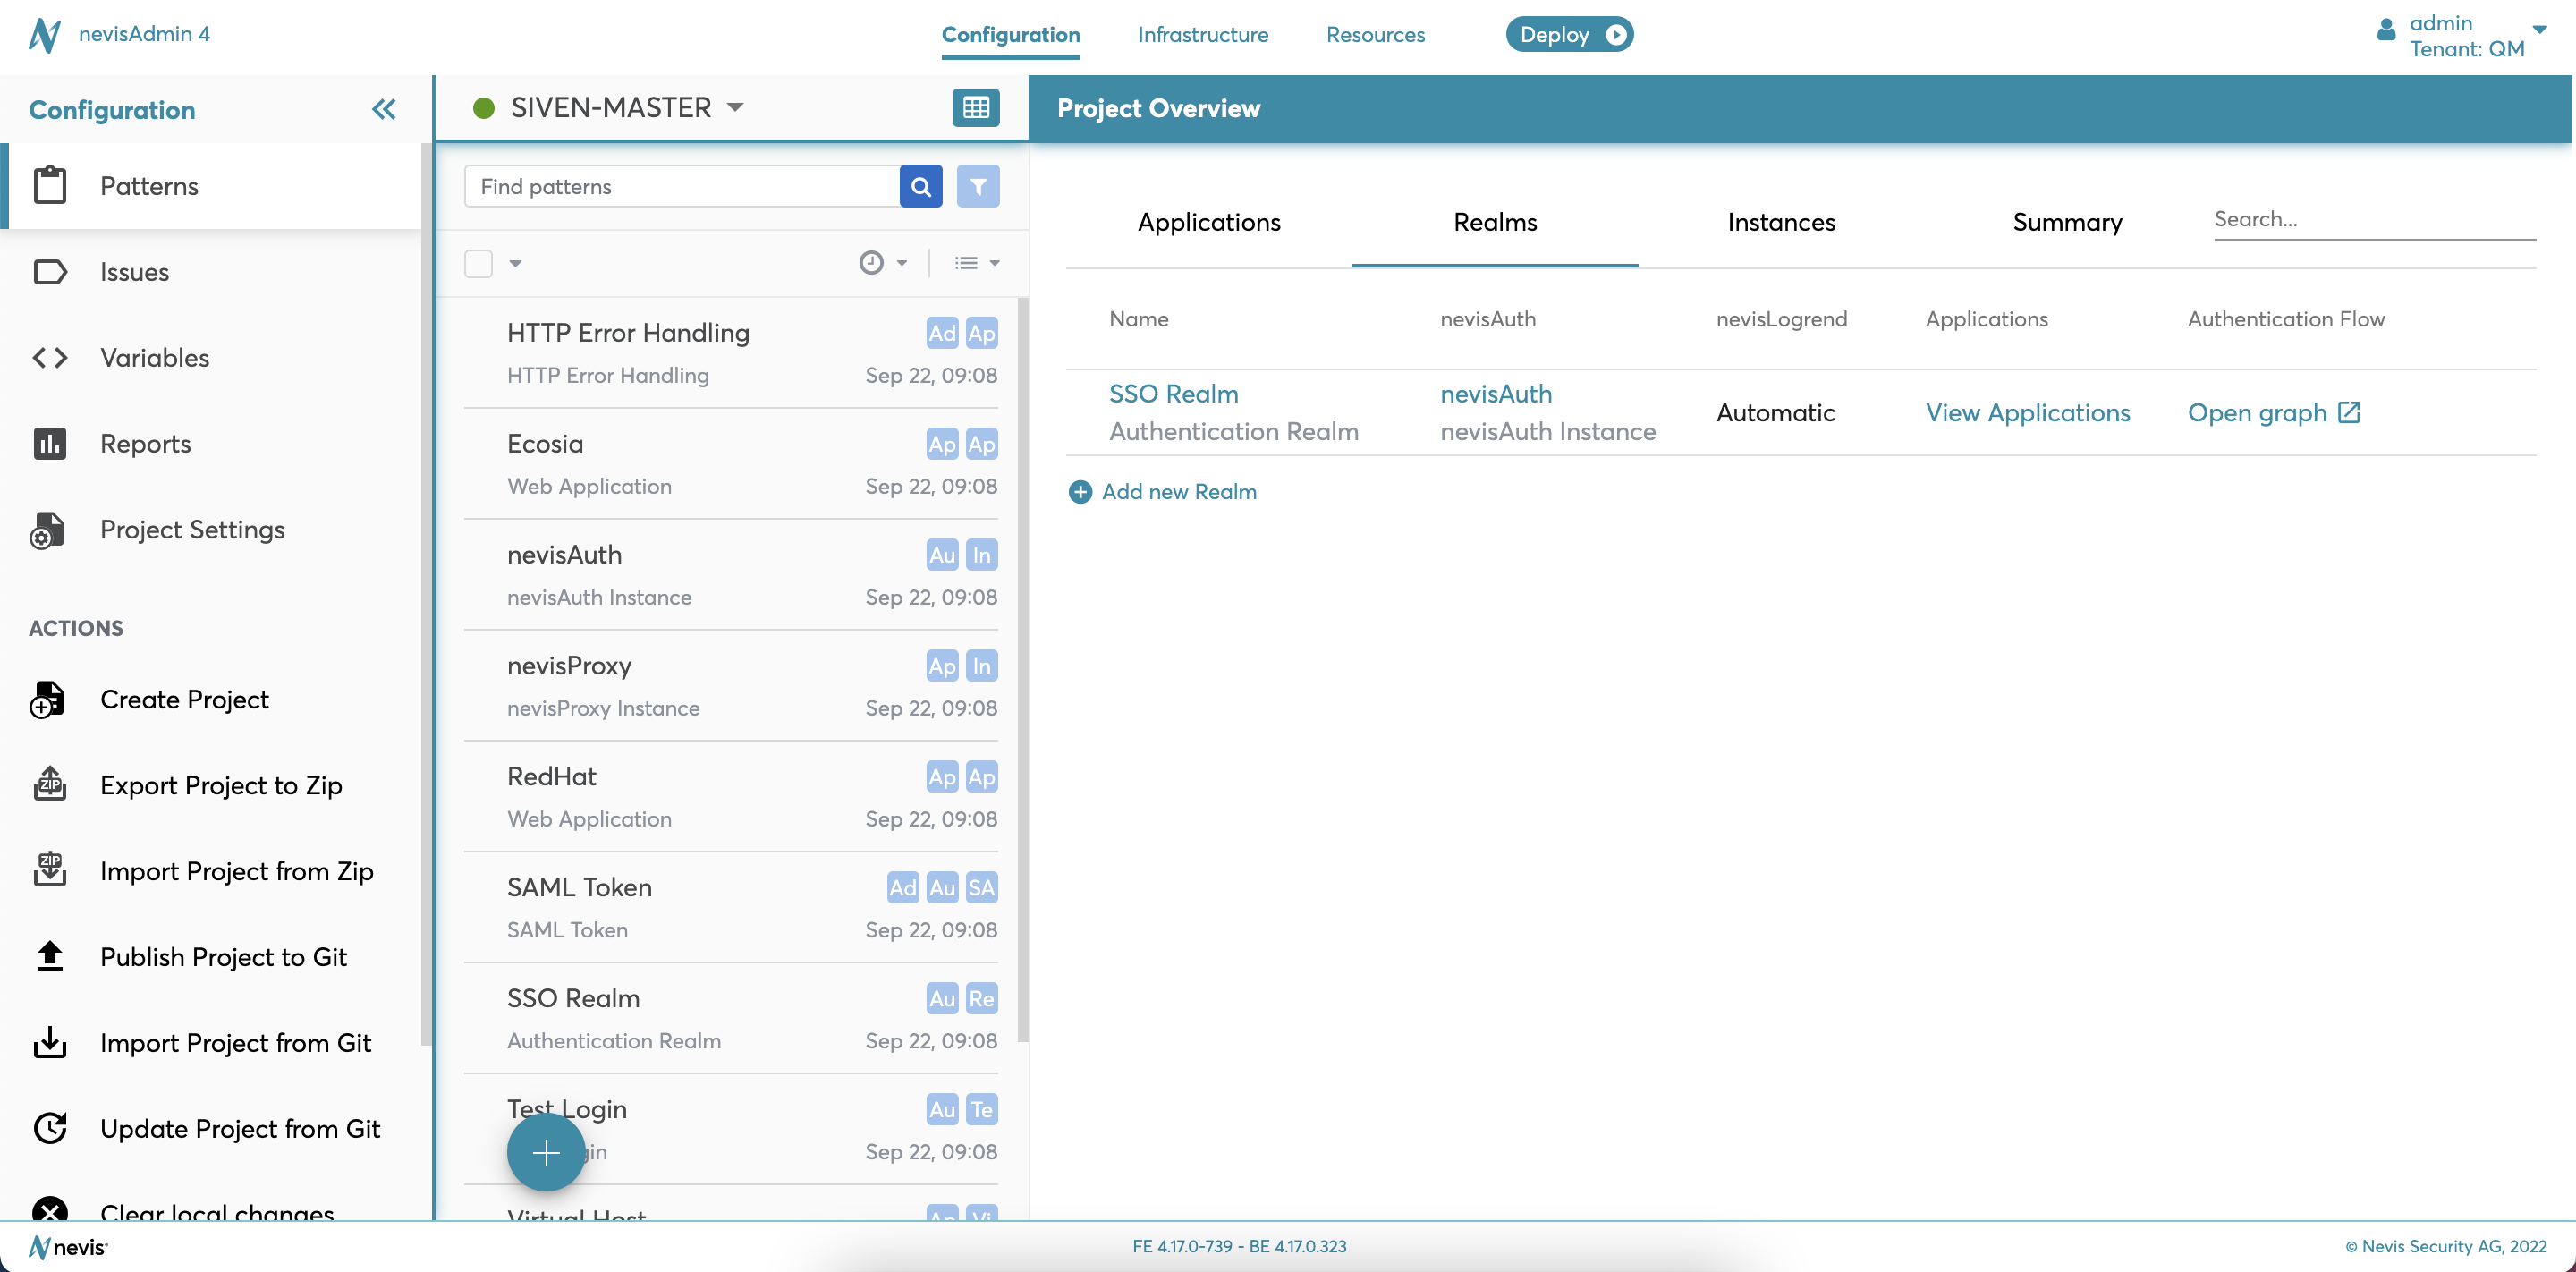
- Applications tab: Lists all application and service patterns. For example, Web Application patterns or REST Service patterns.
- Realms tab: Lists all realm patterns. For example, Authentication Realm patterns or SAML SP Realm patterns.
- Instances tab: Lists all Nevis instance patterns. For example, nevisProxy Instance patterns or nevisAuth Instance patterns.
Besides giving you an overview of the project, the summary reports can also help you to quickly navigate to the patterns, by clicking on the pattern names.
Use the search field to create filtered overviews of your project. Note that the search value remains valid while switching tabs, so that you can apply the filter to the whole project overview.
Summary Tab
The Summary tab gives a summary of the whole project by providing some statistics. You may also add a description to your project for future reference.
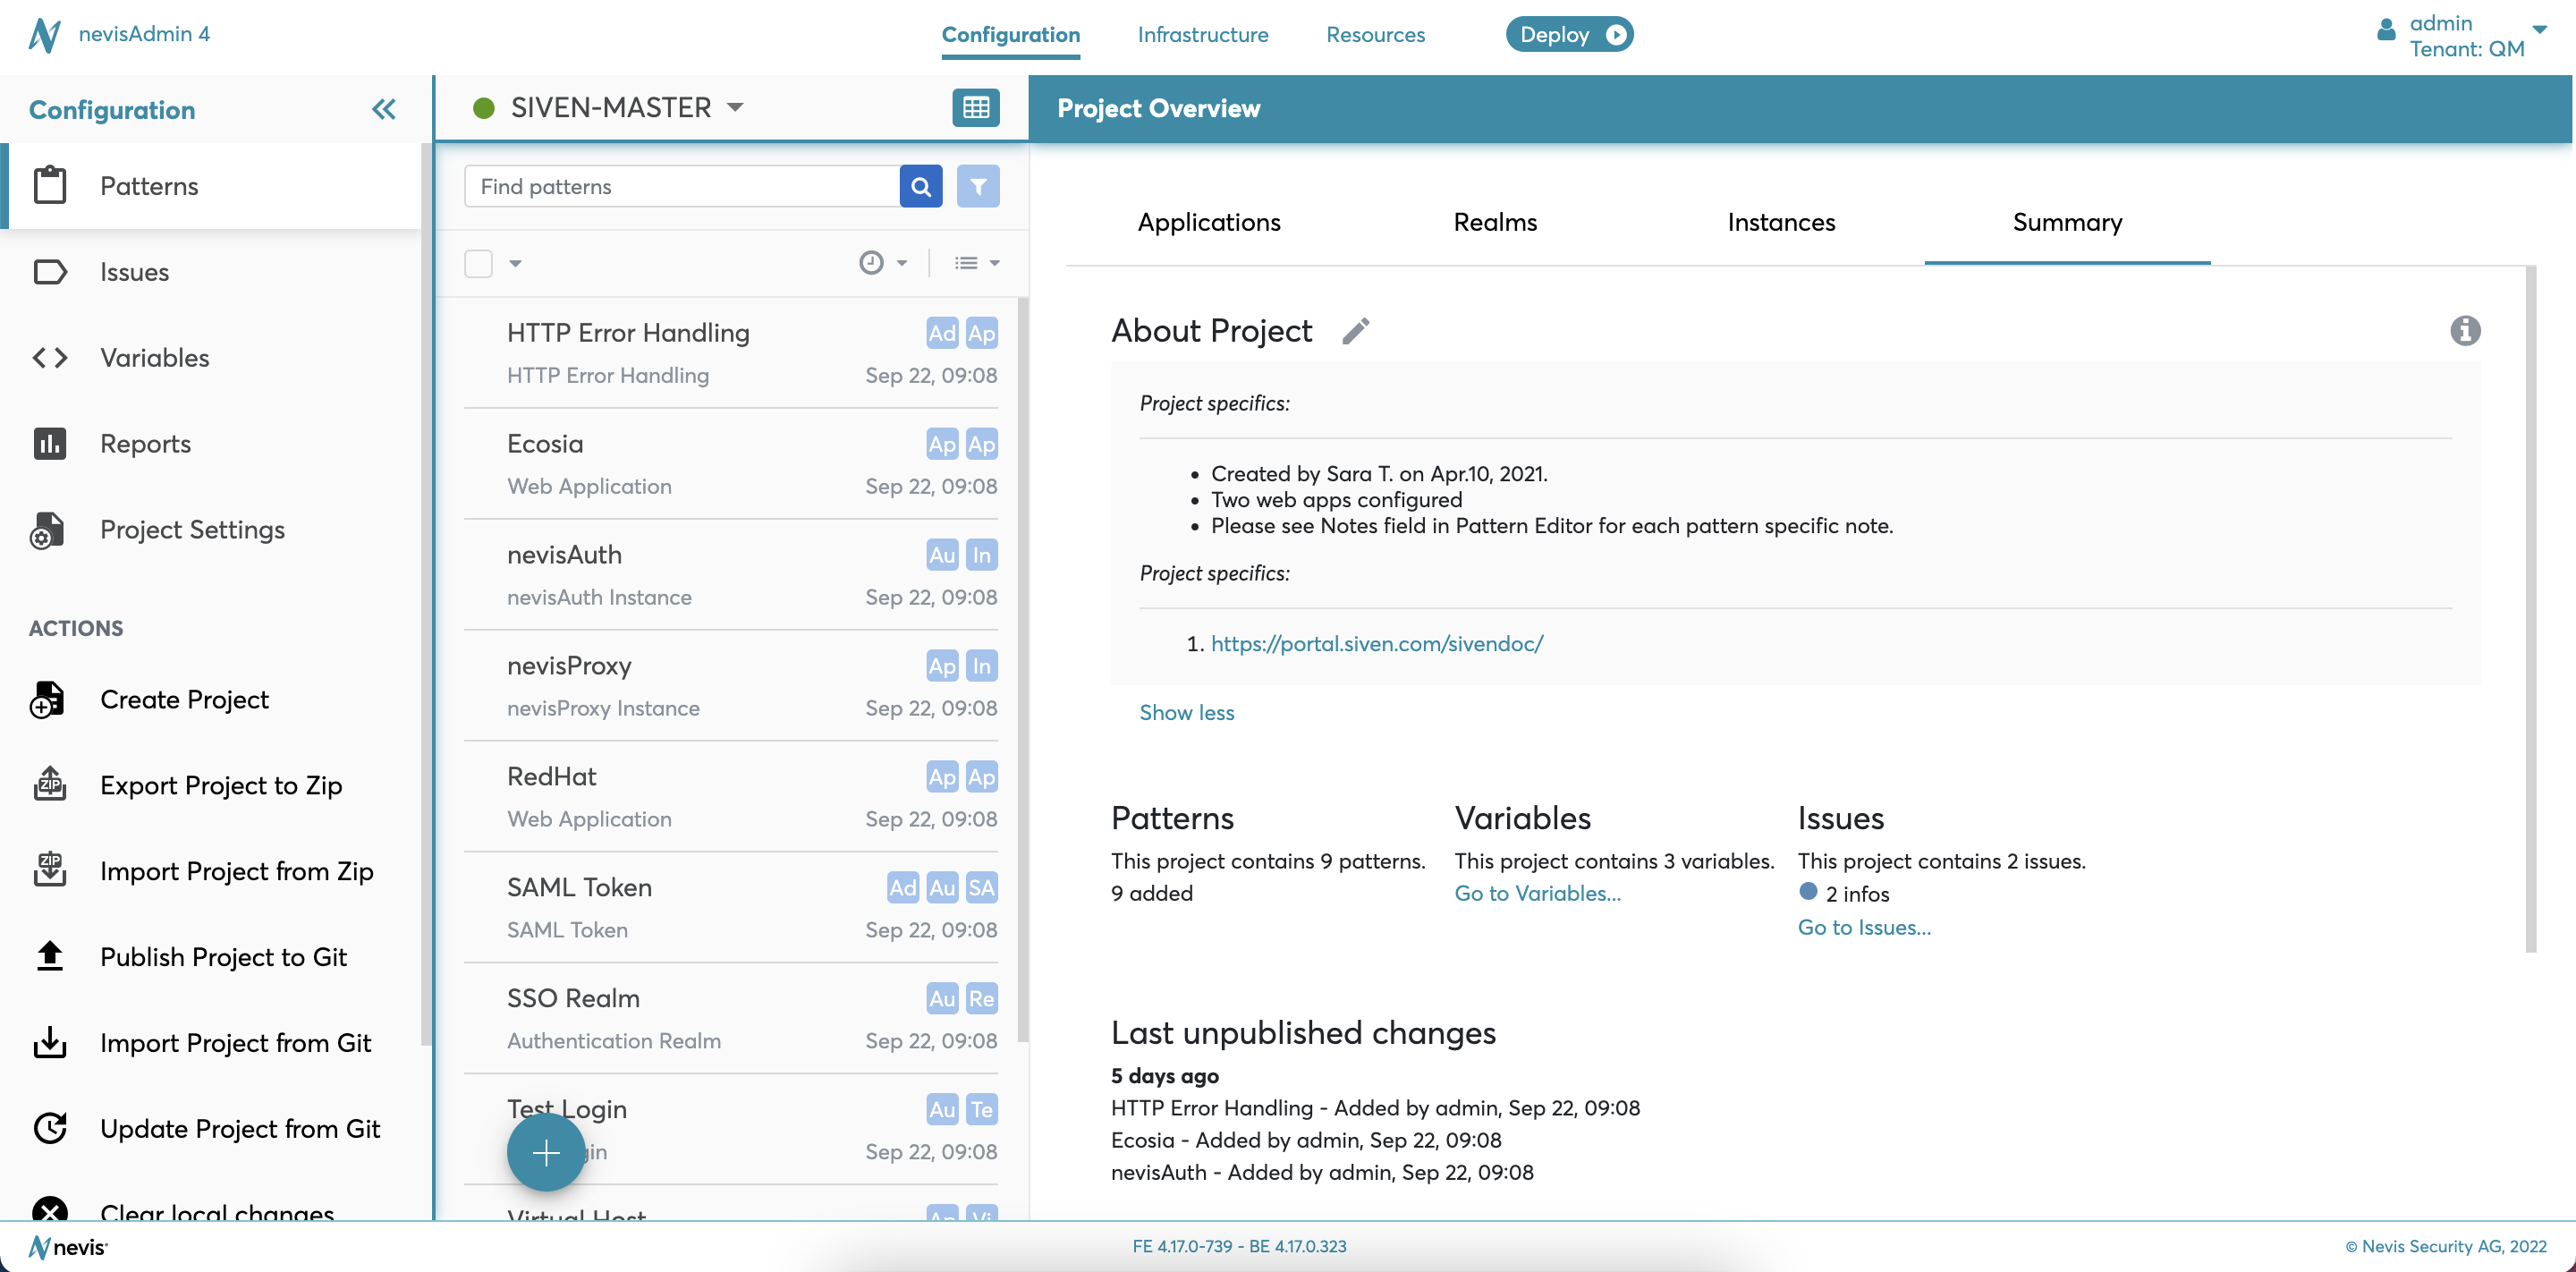
The Summary tab contains the following sections:
- About Project: The free text field allows you to add a description to your project. Use the field to describe the specifics of your project, add some configuration notes and links to external documentation. The field supports markdown to better organise your notes.
- Patterns: Summarizes the number of patterns that are added, modified and deleted in this project.
- Variables: Displays the number of variables set in this project, with a link to the Variables screen.
- Issues: Displays the number of open issues (error, warning and info), with a link to the Issues screen.
- Last unpublished changes: Lists who modified a specific pattern, and when. This pertains to modifications that have not been published yet.