Working with a feature branch
Preface
The branching feature is useful when you need to make a change in your project but want to ensure that you still have a stable project during that time. It allows you to branch your project with a version control system such as Git. Now, you may implement your changes in the newly created branch without affecting your master branch. Once the changes on the feature branch are done, they may be merged back into master.
Example
In this example configuration, we are going to protect a web application with nevisIDM, then on a feature branch, add a second factor authentication using mTAN.
Base configuration
Structure of the example project:
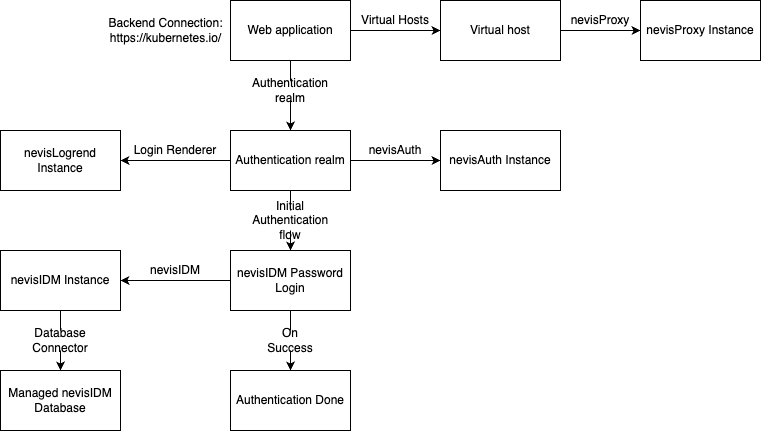
The backend of the web application is going to be Kubernetes.io (Web application > backend connection > backend address is set to kubernetes.io).
Branching the project
Suppose we would like to protect certain subdomains of our web application with second-factor authentication. Users trying to access the blogs subdomain are required to upgrade their session. To implement this functionality on a feature branch, first connect the project to git and publish it. Then, click the Branch Project button on the Administration tab of the project to create a feature branch. Once created, the branch is automatically checked out.

Finished configuration
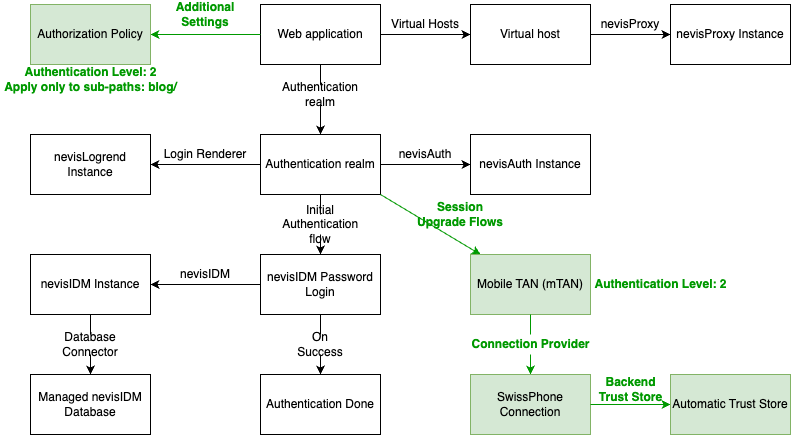
The modified project on the feature branch requires users to upgrade their sessions to authorization level 2 via mTAN, upon visiting the blog subdomain. See the changes in green below:
Testing on the modified project may be conducted by deploying it to a different, test environment, or by deploying it to the same environment as a secondary deployment with the use of the side-by-side deployment feature.
Merging new functionality
Once the testing is concluded, complete the following steps to merge the feature branch into the master:
- Make sure any side-by-side deployments from the feature branch project are rolled back.
- Publish the project on the feature branch to Git.
- Open a pull request in git from the feature branch onto the master branch in Git, then merge it.
- Update the project from Git in nevisAdmin4.
- You may now delete the feature branch and its project in nevisAdmin4.