Editing Pattern Fields
You "personalize" your patterns by editing their fields in the Pattern Editor of the Patterns screen. The fields in the Pattern Editor represent a pattern's properties. To set the pattern's property values, different kind of input fields are available: Simple text fields, fields where enter URLs, fields with drop-down menus, and so on. There are also some special input field types, such as pattern reference fields or attachment fields. This chapter describes these special types of input fields.
Help
The Help part of the Patterns screen offers guidance on how to fill out pattern fields correctly.
Special Input Field Type: Pattern Reference
A pattern can be referenced by another pattern. Thus, these two patterns are linked together. The link allows the source pattern to utilize the referenced pattern during the [Generation Process].
Adding Patterns as Reference
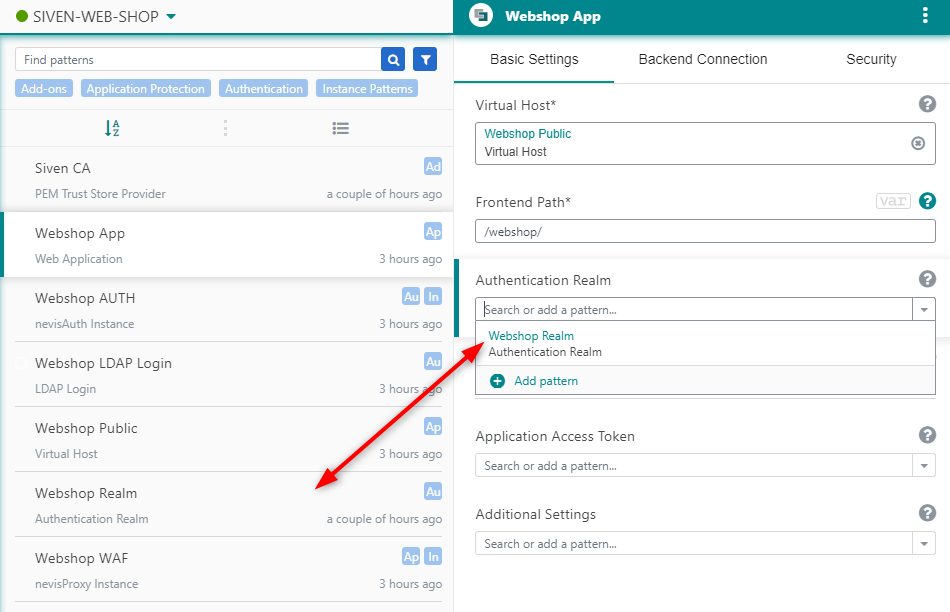
You recognize pattern reference fields by the help text: "Search or add a pattern...". If a pattern matching the reference criteria already exists in your project, it will be available in the field's drop-down menu.
See the next figure. Here you have to specify an authentication realm in the input field Authentication Realm. Because your project already contains the "Webshop Realm" pattern of the "Authentication Realm" pattern type, the "Webshop Realm" pattern is available in the Authentication Realm field's drop-down menu:
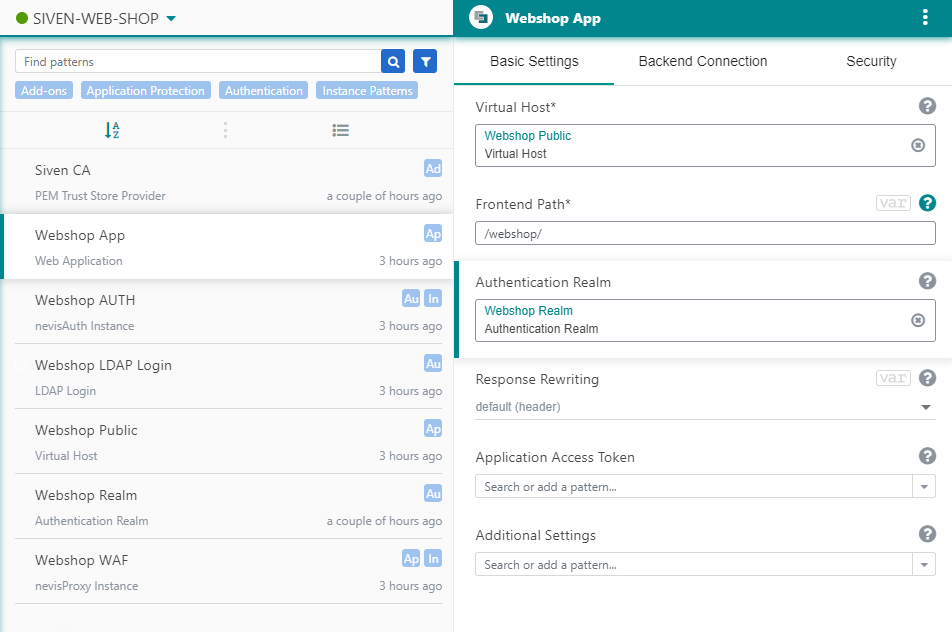
Click on the pattern of your choice in the drop-down list to reference it. The input field displays the referenced pattern in the form of a link:
The settings of the reference field/pattern property determine how many patterns you can add to the field as reference (one or more).
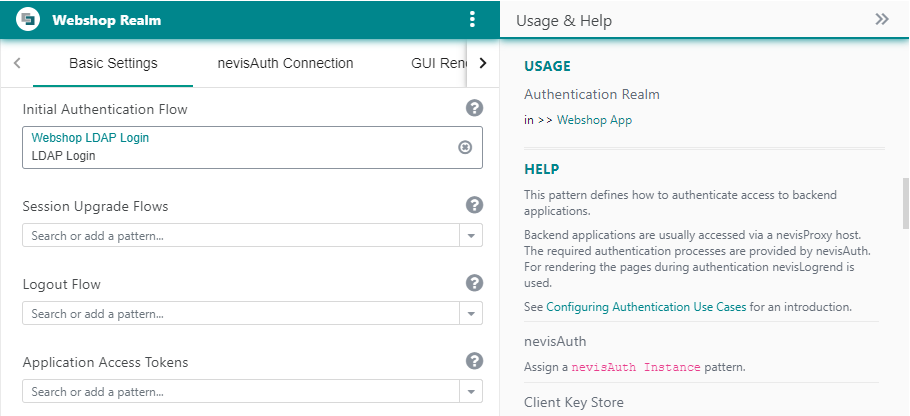
Also the referenced pattern contains a link to the source pattern, in the Usage section of the Help part, as you can see in the next figure. The Usage section displays:
- The relevant input field name of the source pattern.
- A link to the source pattern.
Adding New Patterns as Reference
If there are no matching patterns in your project, you can add a new pattern directly from the input field, by clicking on Add pattern in the field's drop-down menu. This will trigger the regular "Add pattern" workflow (for more details, see "Adding Patterns"). The only difference is that the available pattern types are limited to the matching pattern types.
The following movie shows the entire workflow:
In some cases the new pattern is added immediately after you clicked on the Add pattern link. This happens when there is only one matching pattern type available for the field.
Removing Referenced Patterns
If you want to remove the referenced pattern from the input field, click the "x" icon next to it. This action will only remove the link between the patterns, but not the referenced pattern itself.
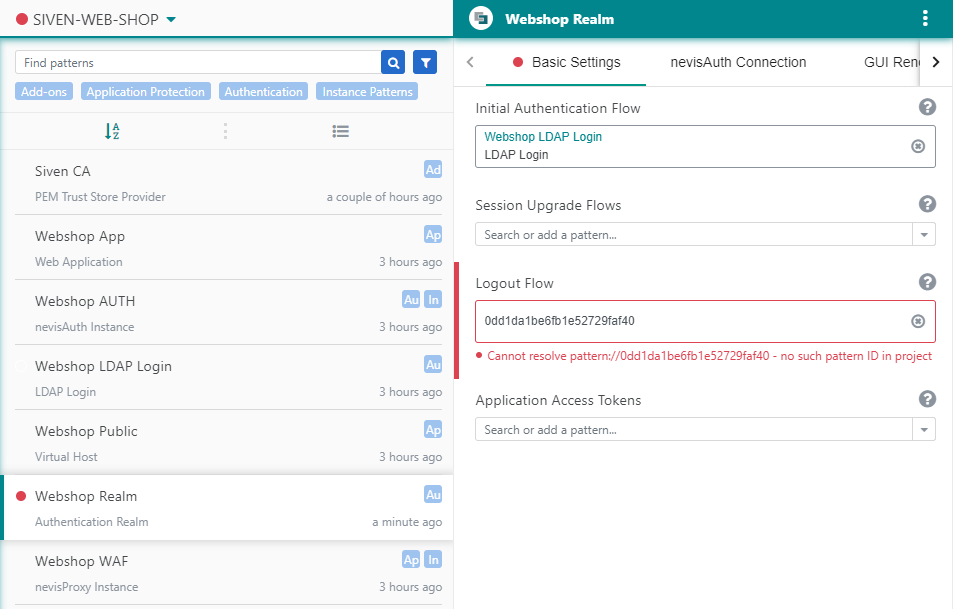
Note that if a referenced pattern itself is deleted, the link to the pattern remains visible in the input field, however in an erroneous state (see the next figure). Remove the broken link manually.
Special Input Field Type: Attachment
The attachment input field allows the uploading of files to a pattern. These files will be used during the generation process.
Rules for uploading files are:
- Each attachment field allows only specific file types to be uploaded (for example, only HTML or CSS files).
- The settings of the attachment field/pattern property determine how many attachments you can upload (one or more).
- Some attachment fields accept ZIP files that are extracted on deployment. This allows you to attach nested directories and files.
You recognize attachment fields by the help text: "Add an attachment" (see the next figure).
Adding Attachments
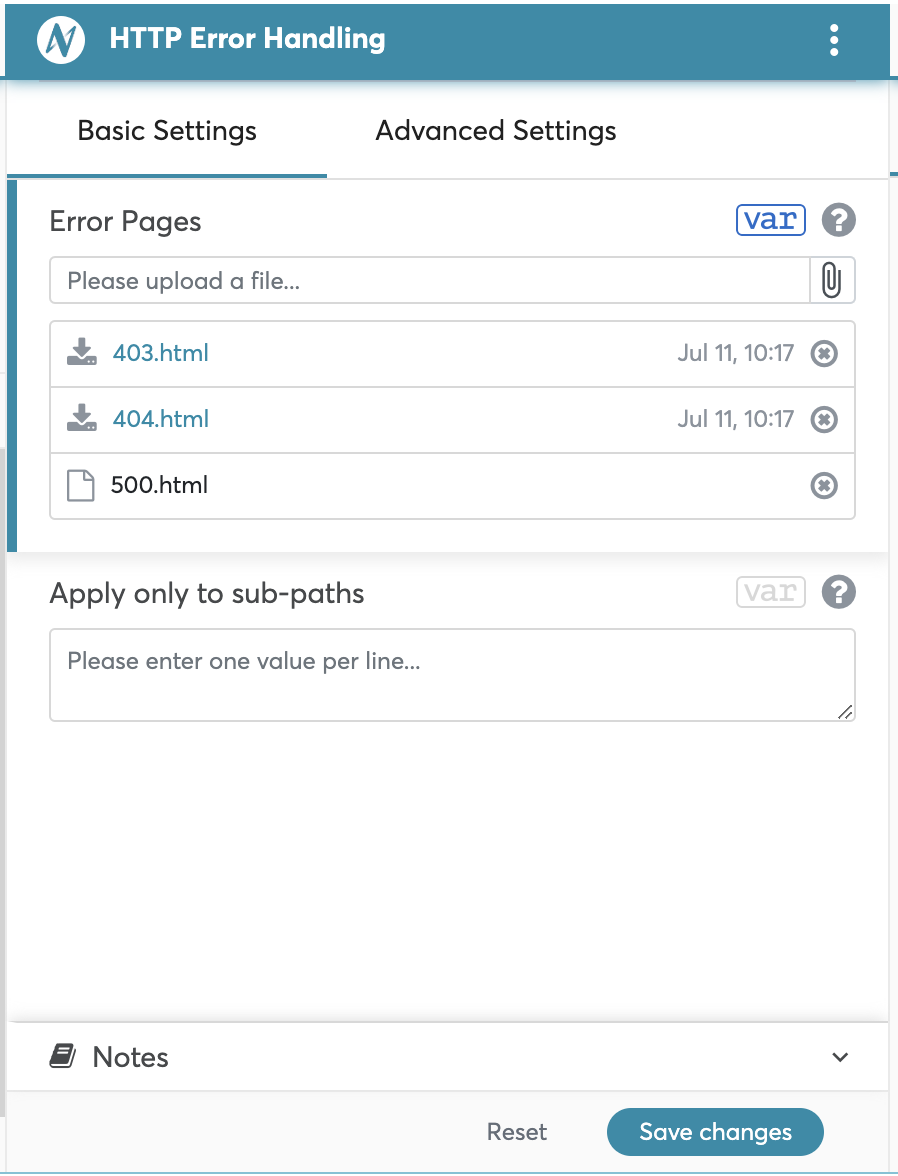
The next figure shows an attachment field with attachments:
To add an attachment to the attachment field:
- Click the Add attachment icon (the paperclip icon) at the right side of the field.
- Search for and select the file-to-be-uploaded in the appearing dialog.
- The file is added to the list of attachments just below the attachment field.
- To actually upload the file, click the (blue) Save changes button in the bottom-right corner of the Pattern Editor.
- Note: "Added date" of an attachment is visible next to the title of the item. More details appear in a tool tip when hoovering the mouse over the date.
The icons on the left side of the attachments in the list have the following meaning:
-
 This icon shows that an attachment has been uploaded. To download the attachment, click on the icon.
 -
 This icon shows that you have selected the file but did not yet upload it. Click the Save changes button to actually upload the file.
Updating and Removing Attachments
There are two ways to update an attachment:
- By uploading a file with the same name as the attachment.
- If you upload a file with the same name, the originally attached file is replaced with the new file.
- By editing the file content. To edit the file content, perform the following steps:
- Click on the uploaded file name.
- Edit the file content in the Edit content dialog screen.
- Click the Done button to finish editing.
- To save the changes, click on the Save changes button. The changes are saved with
utf-8encoding.
To remove an attached file, first click the delete icon next to it and then the Save changes button to save the changes.
The date of the modification of an attachment is visible next to the file name.
Special Input Field Type: Secret fields
Some fields contain sensitive data like a password or a private key passphrase. To prevent you from entering this data as plain text, you are forced to set a variable instead. Additionally, define the sensitive data as a secret in the inventory. That's why we call this type of input fields "secret fields".
You find more information about variables in Working with Variables.
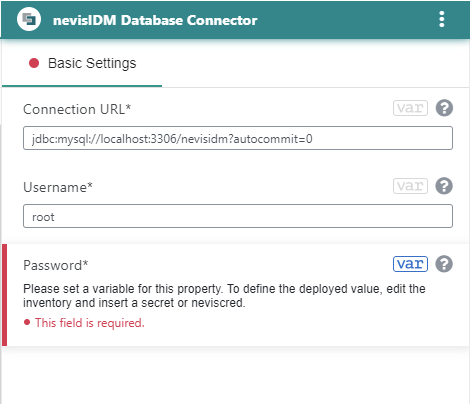
You recognize secret fields by the fact that there is no input field. Instead, there is a text telling you to set a variable (see the next figure).
Special Input Field Type: Rule Modifications and Recommender
The Rule Modifications field in Request Validation Settings (ModSecurity) pattern is used to add, modify or remove ModSecurity rules.
Use the Rule recommender to convert the logs to new rules. Perform the following steps:
- Click on the Rule recommender button below the Rule Modificationsfield.
- A Create New Rule dialog screen is opened.
- Copy the log snippets from the nevisProxy
navajo.logfor the requests blocked by ModSecurity. - Paste the logs into the first line of the first (input) box.
- Click on the Convert to rule button.
- The recommended rules are displayed in the second, output box.
- Click on the Insert button.
- The recommended rule is inserted into the Rule Modifications field.
- Click on the Save changes button.
A sample log structure:
2020-07-21 13:00... IW4ModsecF ... Matched "Operator `Rx' with parameter ... against variable `REQUEST_BODY' ... [id "930100 ... [uri "/nevisidm/admin/
The following movie shows how to convert a log message to a new rule using the Rule recommender:
You may also enter your own rules or modifications directly into the Rule Modifications filed, skipping the Rule recommender tool. Check the ModSecurity documentation for further information on how to modify the rules.
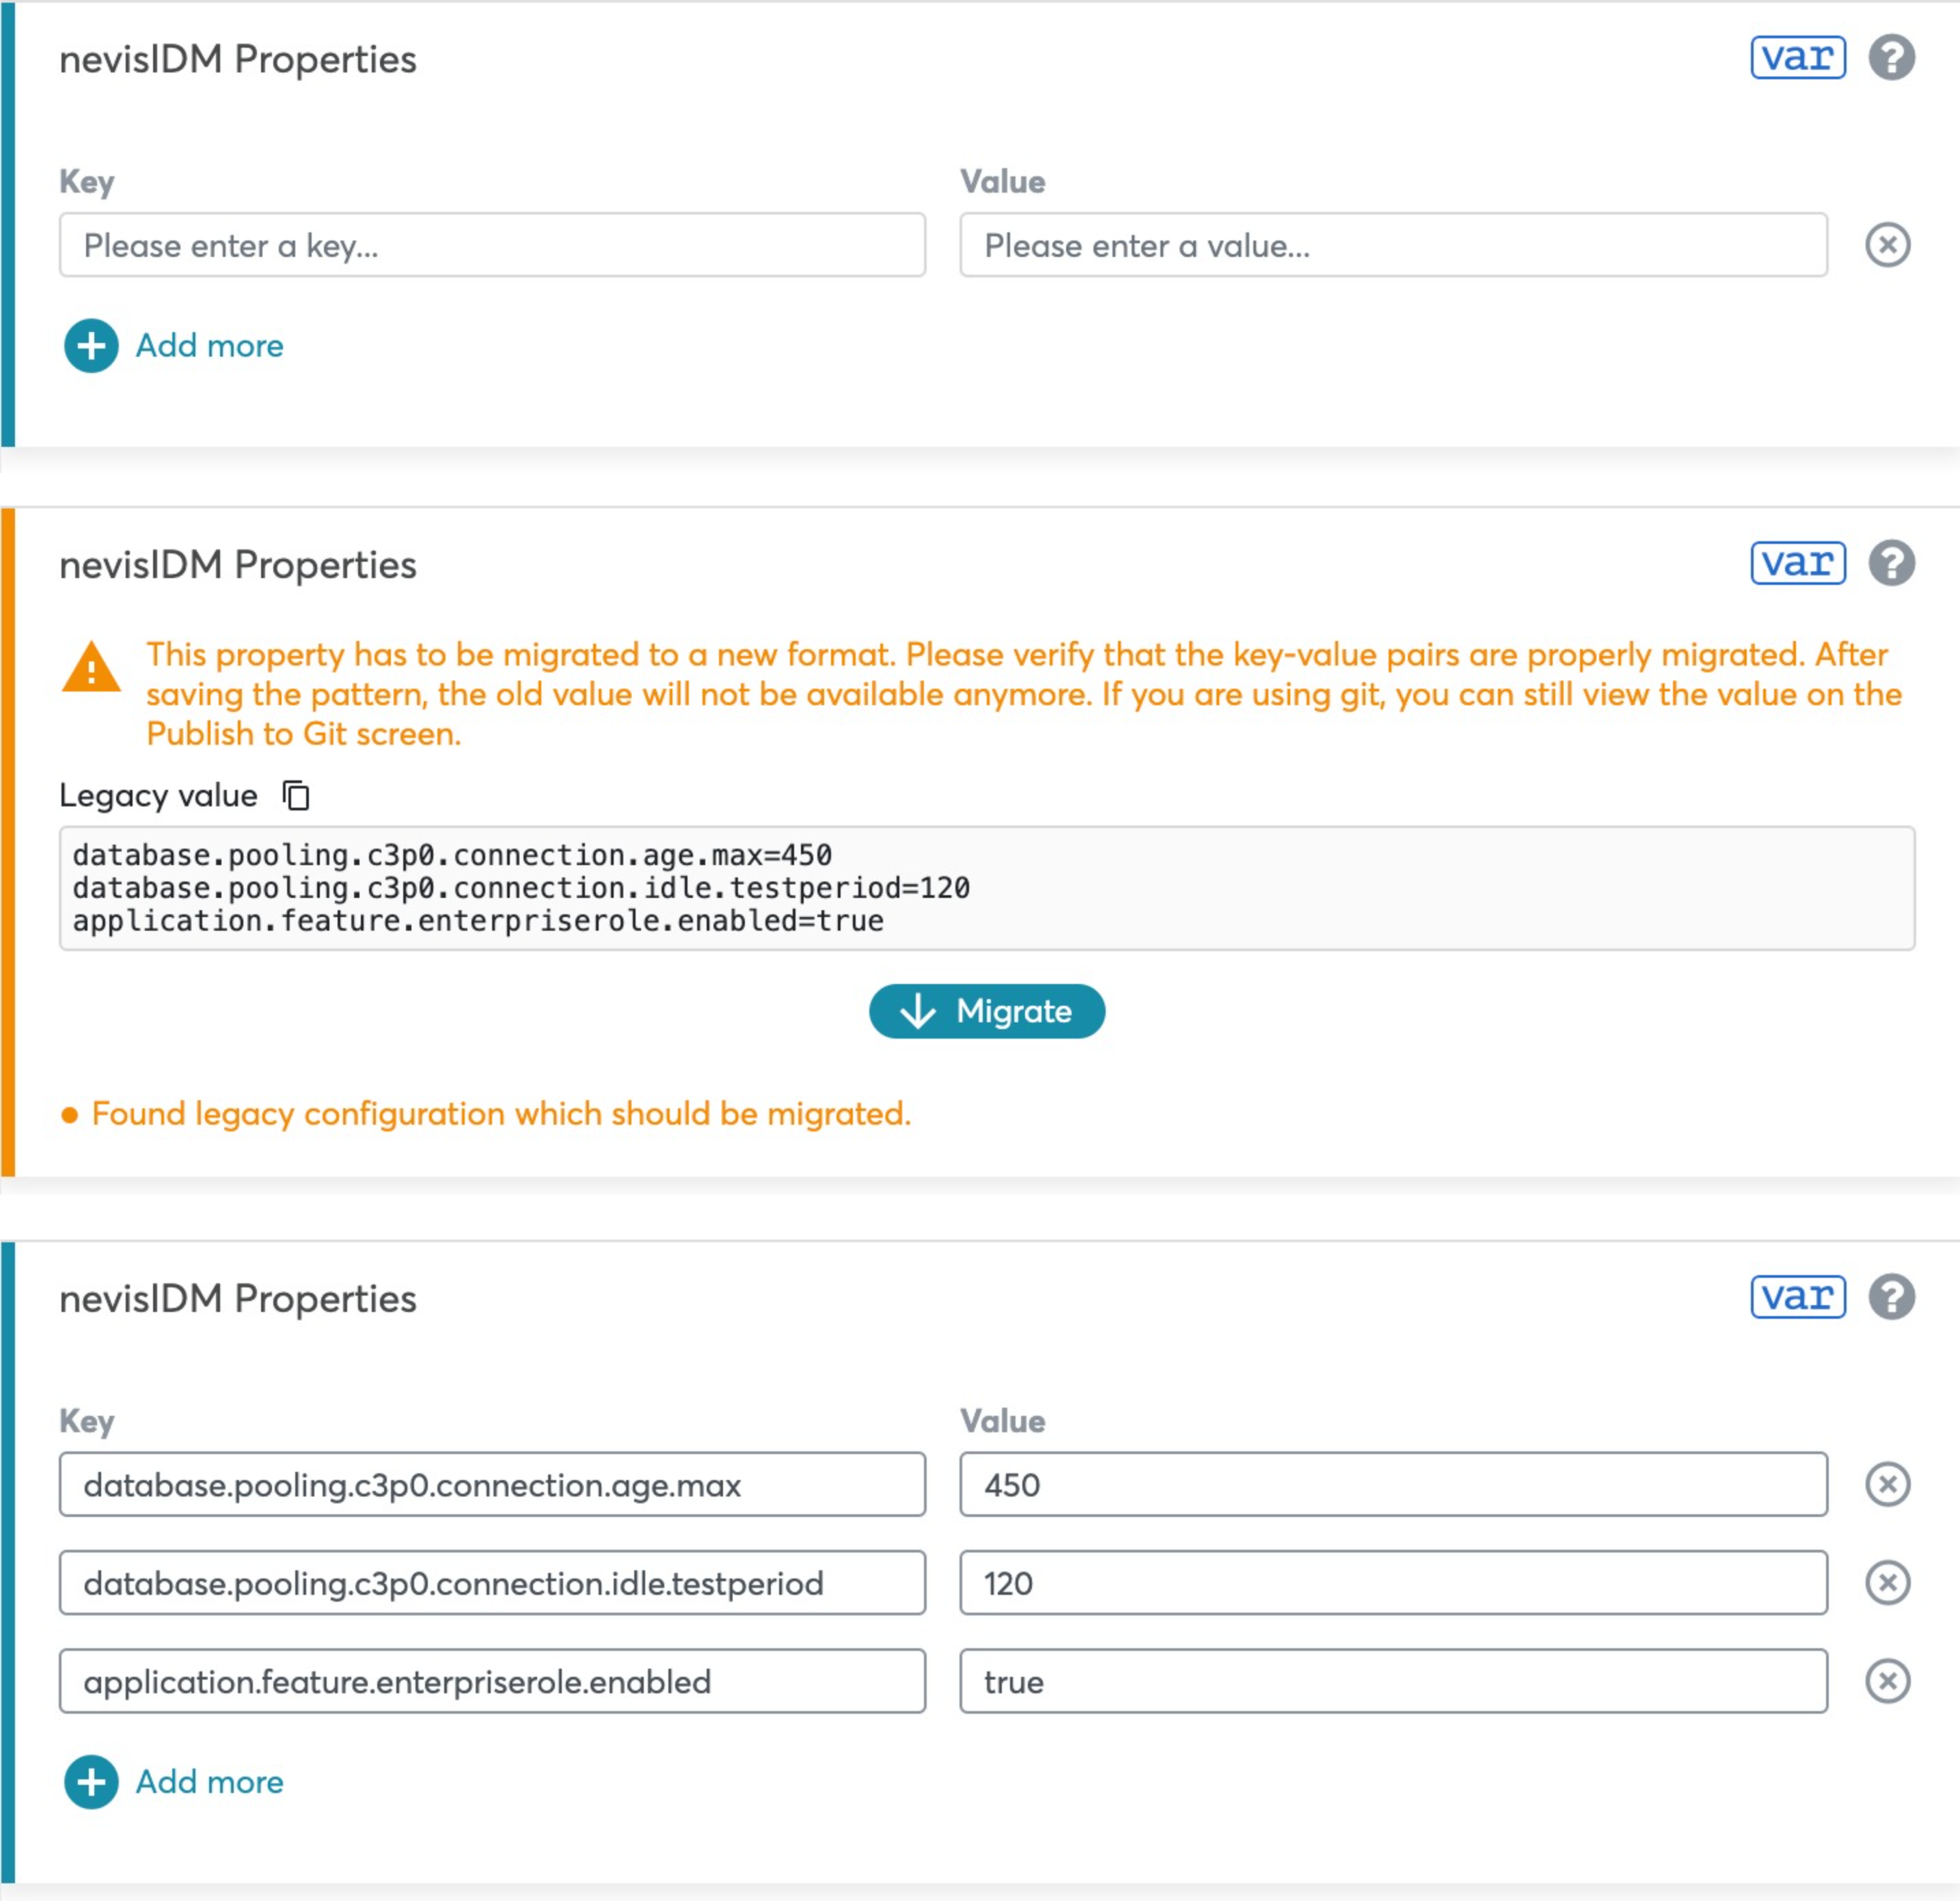
Special Input Field Type: Key-value property
The special key-value property allows you to enter a key and value in separate input fields. You can add multiple key and values by using Add more button on the widget.
Prior to the 4.17 release, the legacy property was a text box where you had to separate the key and values with the separators: = , : , ->. With the key-value property, you no longer use separators but simply enter key and values into their respected fields.
If the legacy property already contains a value, known as a legacy value, you have to migrate it to a new format. You can do it by using Migrate button or manually.
Make sure that each key-value pair is properly migrated to the new fields. There could be cases where the key-value position is put in reverse order, usually done with -> separator. In such case, the migration switches the key-value position. After saving the pattern, the legacy value is not available anymore. You can view the legacy value only when you publish the changes to Git.
Links to Additional Information
Some pattern input fields have additional information to show, like diagrams. You can access this additional information through a link in the bottom right corner of the input field:

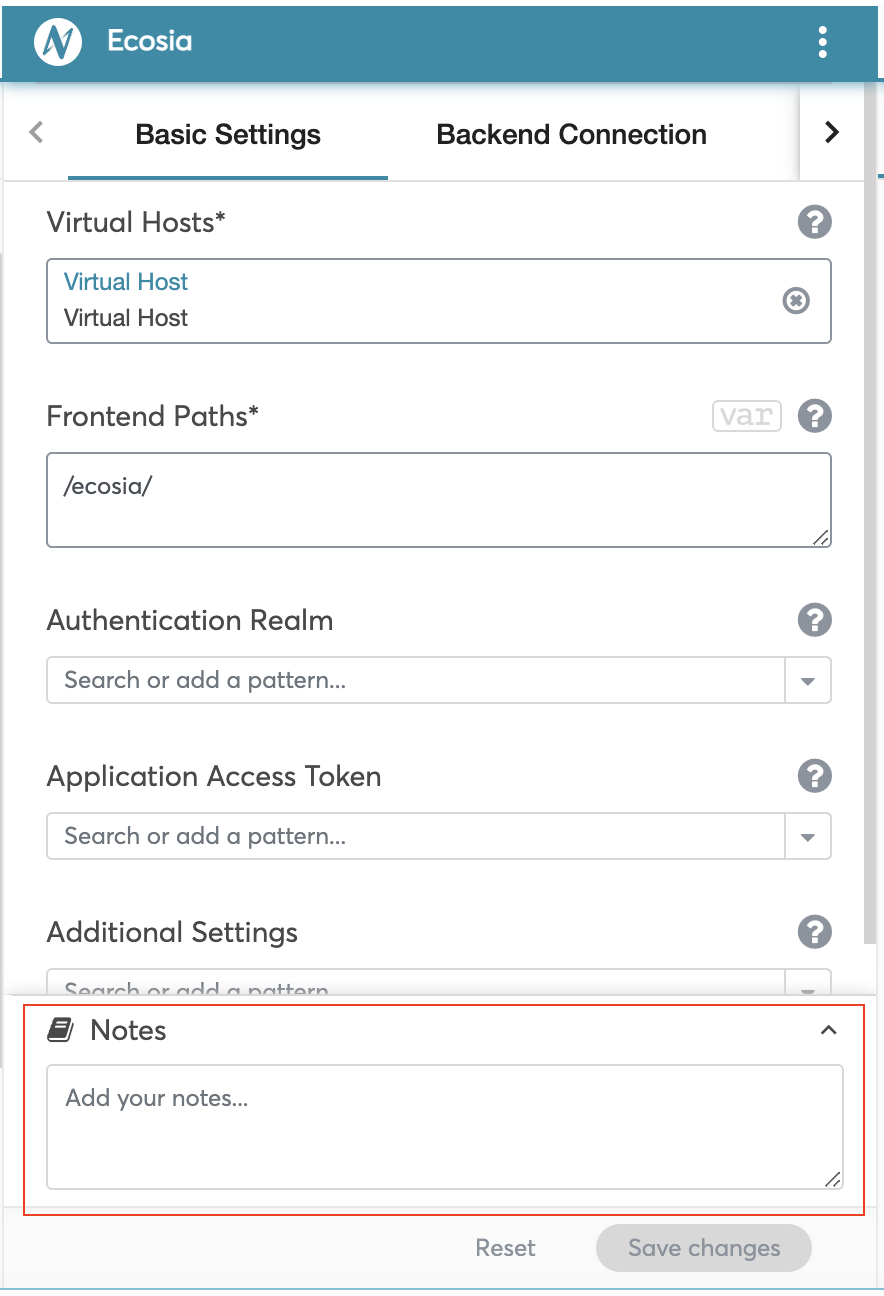
Notes
You can take a note for your pattern configurations using Notesfield at the bottom of the *Pattern Editor.*The field is a simple text field. The notes are saved as a part of the given pattern.
Related Topics
Replacing Input Values with Variables
Some of the pattern field values can be replaced with variables. These input fields are marked with a ![]() button.
You find more information about variables in Working with Variables.
button.
You find more information about variables in Working with Variables.
Input Validation
Input values are validated once a deployable pattern (instance pattern) is added to the project. You find more information about property validation in Solving Configuration Issues.