Defining Kubernetes Inventory Files
Overview
You need Kubernetes inventory files if you use nevisAdmin 4 to deploy to a Kubernetes infrastructure.
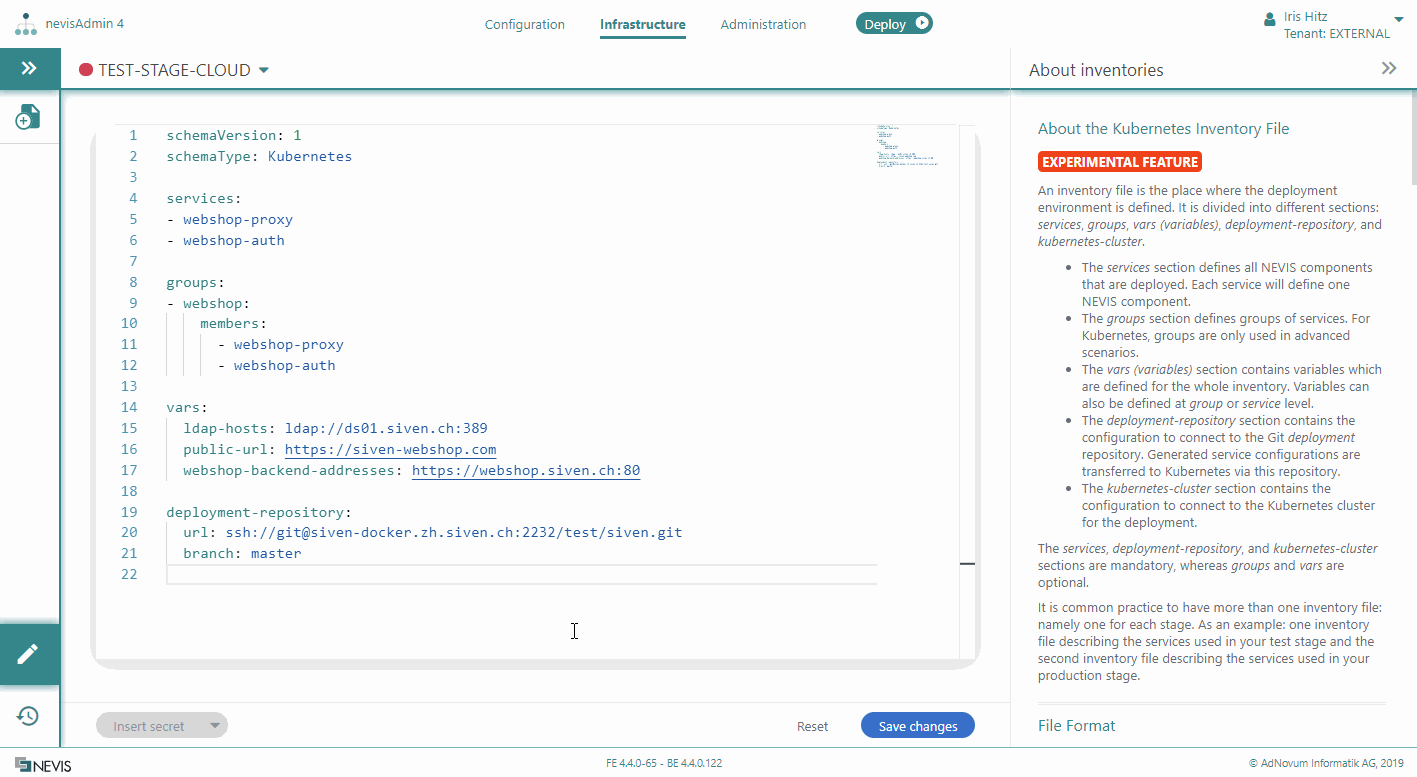
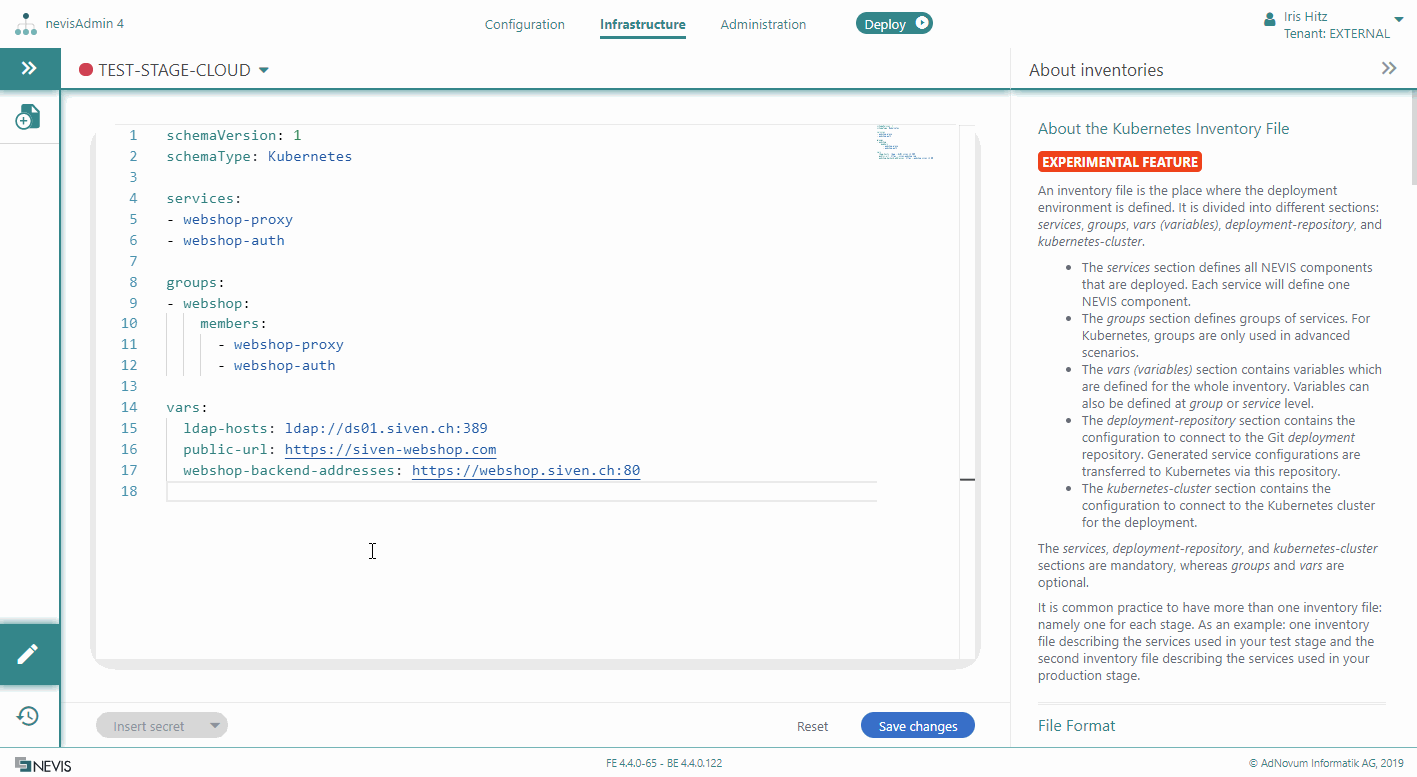
A Kubernetes inventory file is divided into different sections: services, vars (variables), deployment-repository, and kubernetes-cluster.
The services, deployment-repository, and kubernetes-cluster sections are mandatory, whereas vars are optional.
It is common practice to have more than one inventory file, namely one for each stage. For example: One inventory file describes the services used in your test stage, whereas the second inventory file describes the services used in your production stage.
Kubernetes versus Classic Inventory Files
Kubernetes inventory files differ from classic inventory files in several ways:
- In Kubernetes inventory files, you define services instead of hosts. A service in a Kubernetes inventory file specifies a Kubernetes service that will deploy the Nevis component in the Kubernetes cluster. (Whereas a host in a classic inventory file refers to the target server where a Nevis component will be deployed.)
- A service in a Kubernetes inventory file represents a Nevis component, such as nevisProxy or nevisAuth. This means that two Nevis components can never use the same service. (Whereas in a classic deployment mode, several Nevis components can use the same host, that is, the same target server.)
- To be able to deploy an instance of a Nevis component, the Kubernetes inventory file must include a service that is mapped to the component's Instance pattern. The mapping happens via the Instance pattern's Deployment Target field.
- You achieve redundancy in a Kubernetes deployment setup by defining the number of replicas per service in the Kubernetes inventory file. Kubernetes will deploy as many instances of the respective component as defined.
- Kubernetes inventory files require two additional sections:
- The deployment-repository section: This section defines the connection to the deployment repository. During deployment, the generated configuration is transported to Kubernetes via this Git repository.
- The kubernetes-cluster section: The section defines the connection to the Kubernetes cluster. nevisAdmin 4 creates Kubernetes custom resources through this connection.
First Steps
Perform the following first steps to create your Kubernetes inventory file:
-
Create a new inventory as explained in Creating an Inventory.
-
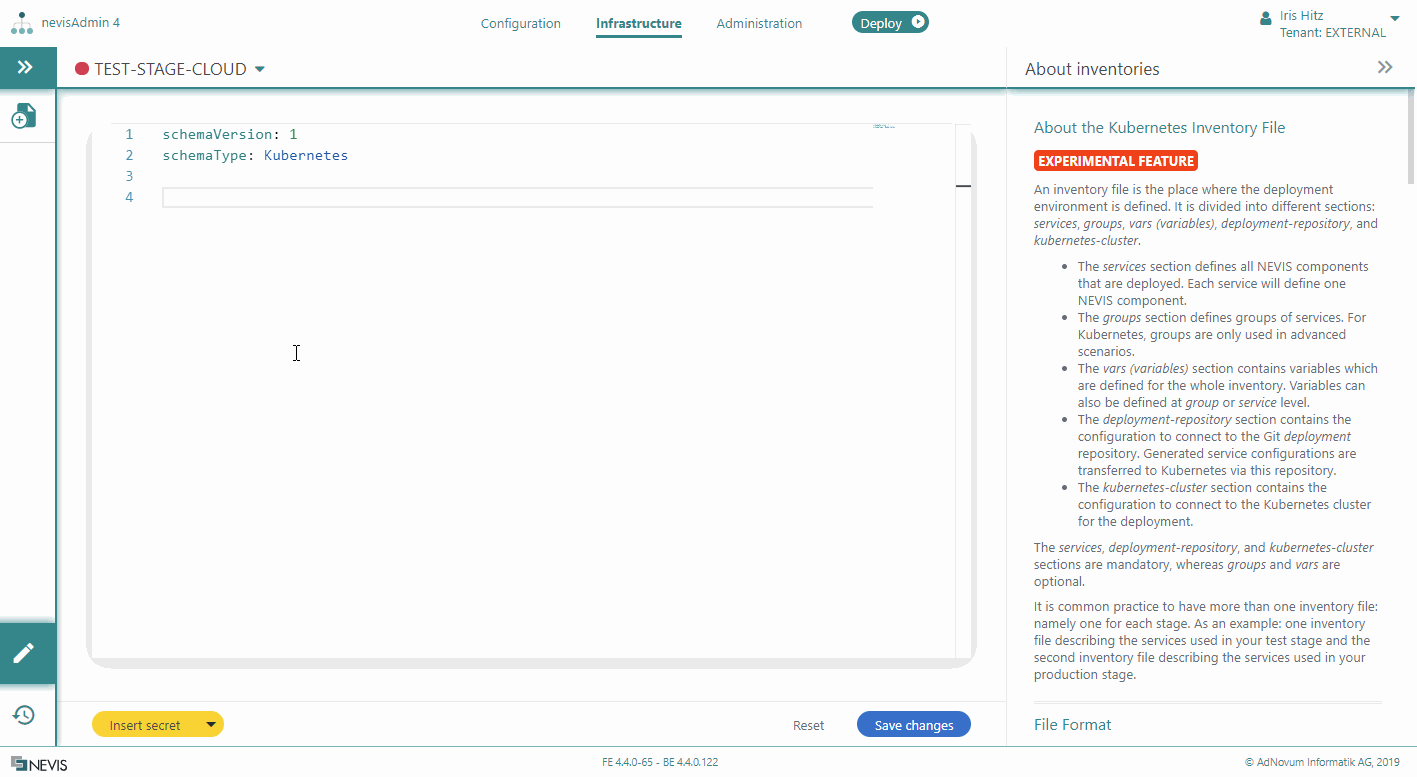
To make this inventory a Kubernetes inventory, insert the line schemaType: Kubernetes on top of the inventory file:
schemaType: KubernetesschemaVersion: 1# ... -
Save your changes by clicking on Save changes in the lower right corner of the inventory file. By doing this, the Kubernetes specific help content will appear in the Help section on the right side of the screen.
When saving the file, you will be informed that there are validation errors. This is because some required sections are still missing. Save the file anyway. The following content explains you how to correctly define a Kubernetes inventory.
Defining Services
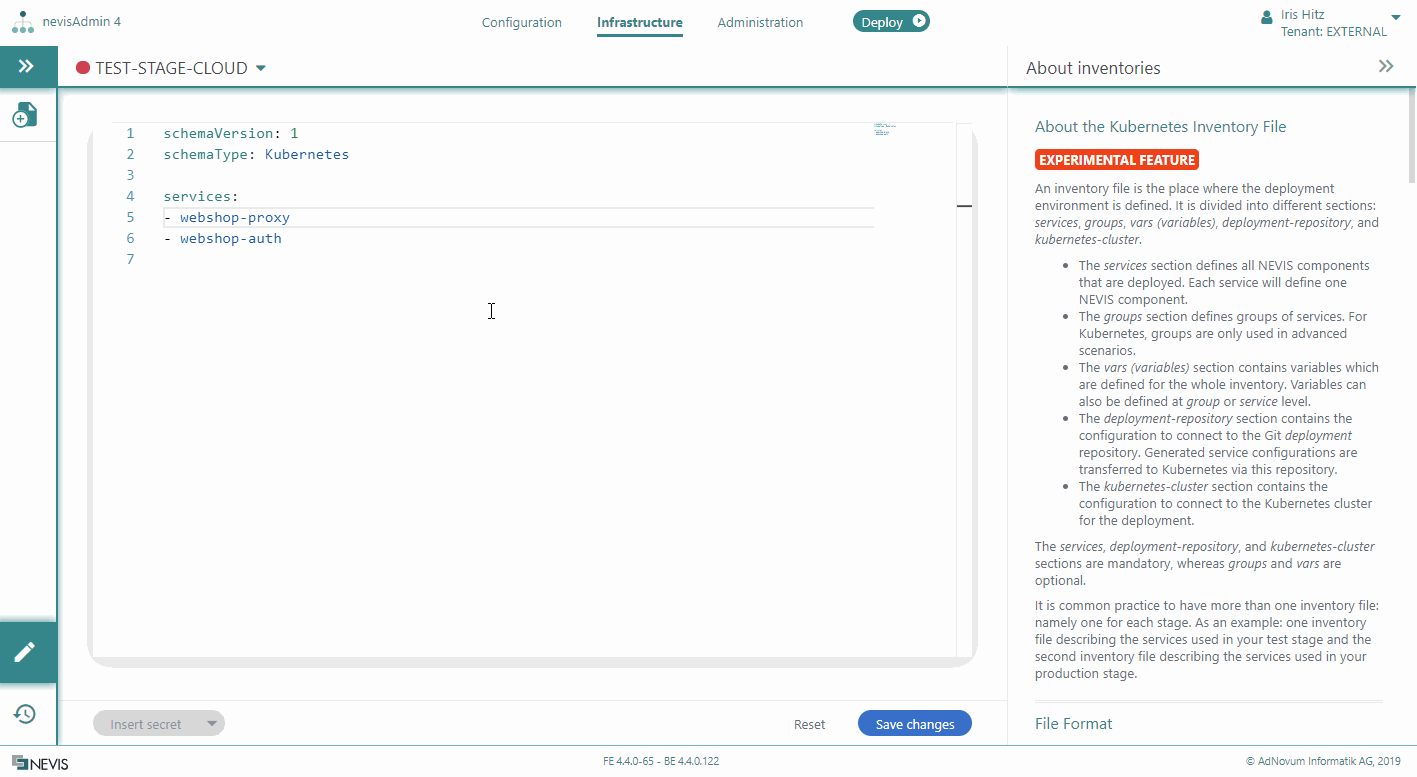
You define the Kubernetes services in the services section of the inventory file, as a list.
The Services section can be omitted if you only want to define the names of the services. In this case, the service names will be read from the deployment target fields of the instance patterns.
The following movie shows you how to define services in a Kubernetes inventory file:
Each service you define here represents a set of identically configured Nevis component instances. The service is mapped to the component's Instance pattern via the Instance pattern's Deployment Target field. This means that use the same name for the service here as the one you entered in the Deployment Target field of the corresponding component's Instance pattern. For example, if you configured a nevisProxy Instance pattern with "webshop-proxy" as the Deployment Target, then the Kubernetes inventory file must include a service with the value "webshop-proxy", to be able to deploy a nevisProxy instance in the Kubernetes cluster.
Note that each Kubernetes service can only be mapped to one Nevis component. So if your Nevis configuration consists of nevisProxy, nevisAuth and nevisIDM, and you want to deploy this configuration to a Kubernetes infrastructure, you need to define three different services in your Kubernetes inventory file: One service to deploy nevisProxy instances, one service to deploy nevisAuth instances, and one service to deploy nevisIDM instances.
For more details, see Setting Deployment Target and Kubernetes Deployment.
Defining Replicas per Service
Per service, you can set the number of replicas as well as the Docker image version of the component you want to deploy. Kubernetes will then deploy as many instances of the respective component as defined, in the specified Docker image version. For this, add a kubernetes subsection to a service, containing the attributes replicas and version, respectively:
Example
services:
- webshop-proxy:
    kubernetes:
      replicas: 2
      version: "3.14.0.1-32"
    vars:
      ...
Note that these replicas are exact clones of the same instance, based on the same component's Instance pattern. In the previous sample code, for example, Kubernetes will deploy two nevisProxy instances in the Kubernetes cluster, with exactly the same properties, based on the same nevisProxy Instance pattern.
If you want to create two different nevisProxy instances, with different properties, within one project, you need to create two different nevisProxy Instance patterns and map them to two different services in the Kubernetes inventory file.
Secondary deployments will use the same amount of replicas as the primary deployment, unless you specify a different number of replicas in a canary block. For more information, see Kubernetes Infrastructure Inventory YAML file format
Adding Variables to Services
You can define variables in a Kubernetes inventory file on two levels:
- On service level
- On inventory level
Service variables are more specific than inventory variables.
This section explains how to add variables to services. Service variables are defined in a list, right below the service identifier. The following movie shows you how to proceed:
Defining Variables
You can define variables in a Kubernetes inventory file on service level, or globally on inventory level.
Service variables are more specific than inventory variables.
There are two ways to do this:
Manually Defining Variables
- For more information on defining variables for services, see Defining Services.
- Variables that are valid for the entire inventory are called global variables. You define global variables in the vars section of the inventory file. You do this in the same way as adding variables on service level.
Inserting Variables from a Project
If you have created variables in a project, you can add these variables together with their sample values to an inventory. The following movie demonstrates how this is done:
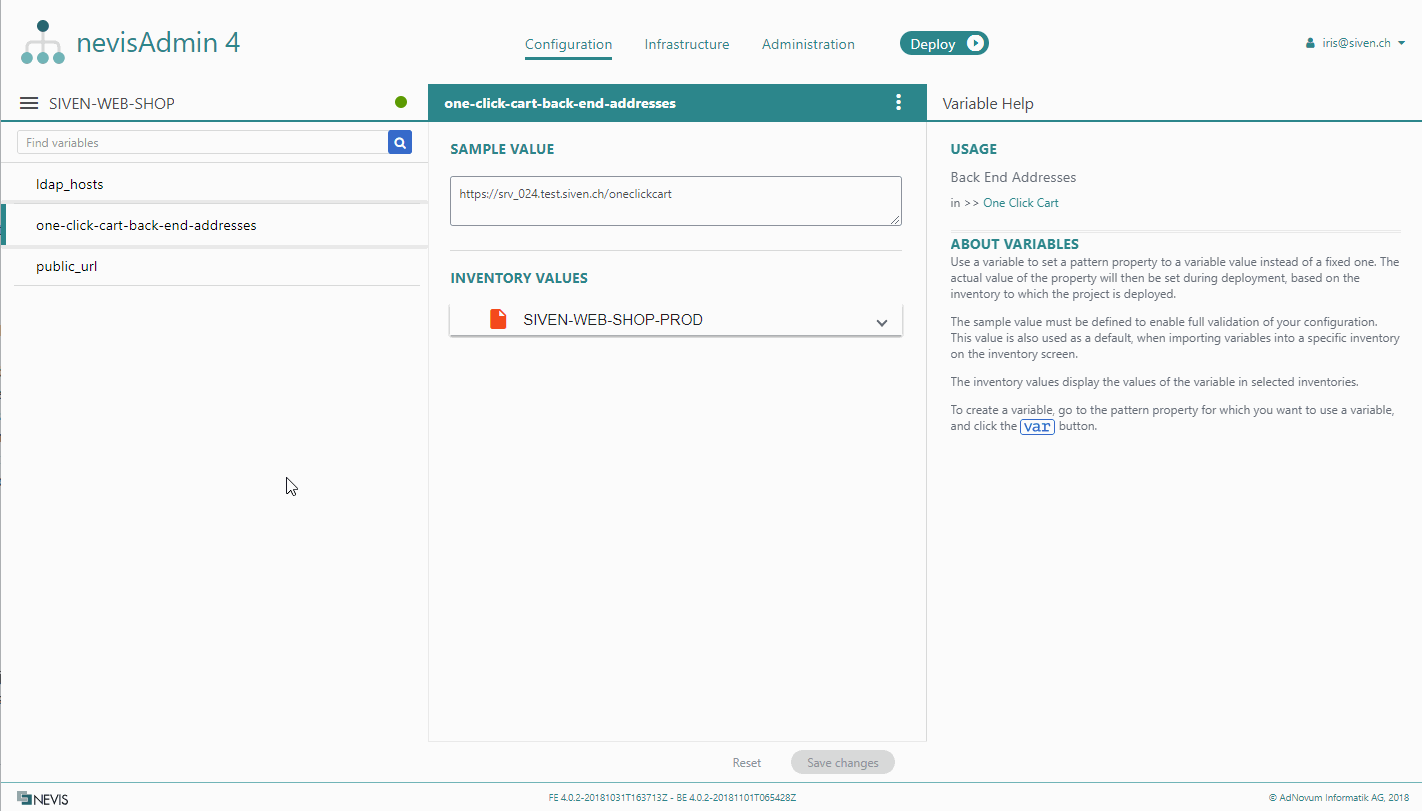
Perform the following steps to insert variables from a project into an inventory:
- First click in the inventory file, then click the triangle arrow icon on the Insert secret button. You find this button in the lower left corner of the inventory file.
- Select Insert variables from the drop-down menu.
- The Insert Variables dialog opens. Select a project from the dialog's drop-down list and click Insert variables. All variables from the selected project will be added to the inventory, even if they are already present in the inventory.
- The variables with their sample values are inserted at the bottom of the inventory file, commented out.
You can copy-paste the variable, and its sample value pairs, to each level in the inventory file. Variables in the vars section are valid for the entire inventory.
- If you do not have a global vars section yet, you can uncomment the whole inserted section. To do this, select the section and press CTRL-/.
- Review the sample values and update them before saving.
Defining Kubernetes Settings
To be able to deploy to Kubernetes, the Kubernetes inventory file must include two additional, mandatory sections, in which you define Kubernetes-specific settings.
These additional sections are:
- The deployment-repository section: Defines the Git repository that will be used to store the generated configuration files (such as web.xml and esauth4.xml).
- The kubernetes-cluster section: Defines the connection to the Kubernetes cluster for the deployment.
Deployment Repository Connection
See Git Setup and Best Practices for an introduction and best practices regarding this connection.
The deployment-repository section of the Kubernetes inventory file defines the connection to the Git deployment repository. Generated service configurations are transferred to Kubernetes via this repository.
The deployment-repository section is mandatory.
The deployment-repository section includes the following attributes:
- url: Defines the URL of the repository.
- branch: Defines which repository branch to use.
The following movie shows you how to configure the deployment-repository section:
Kubernetes Cluster Connection
The kubernetes-cluster section of the Kubernetes inventory file defines the connection to the Kubernetes cluster for the deployment.
The kubernetes-cluster section is mandatory.
The kubernetes-cluster section includes the following attributes:
- url: Defines the URL of the Kubernetes cluster.
- namespace: Defines the relevant namespace within the cluster.
- token: Defines the nevisadmin4 service account token used to connect to the cluster.
The following movie shows you how to configure the kubernetes-clustersection: