Get started
In this chapter we want to help you get started by walking you through the recommended first steps when starting your journey with Identity Cloud.
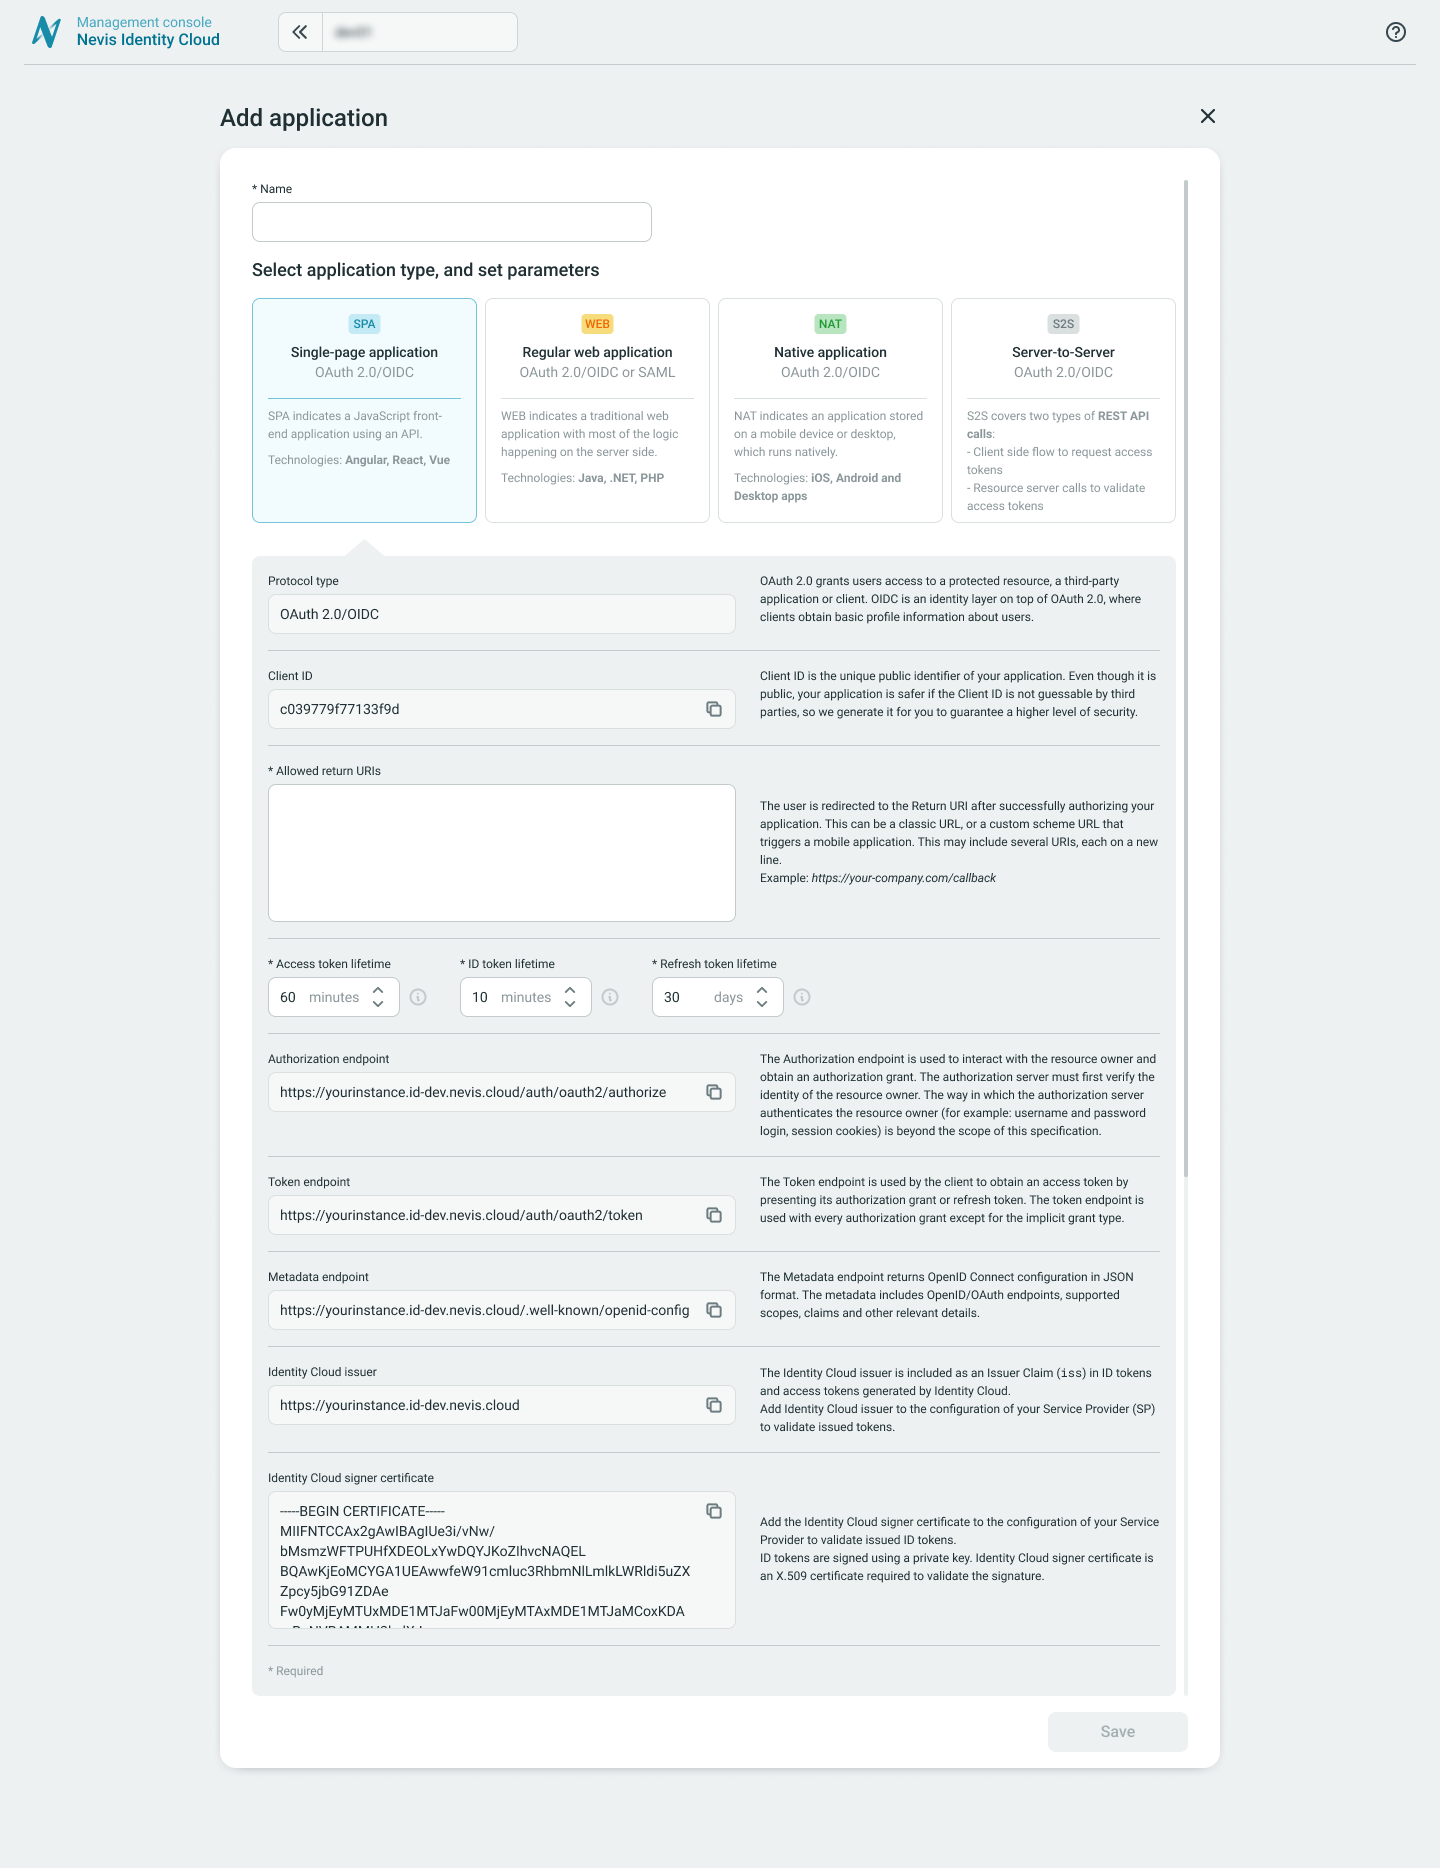
Step 1. Add your application
You need to add one or more of your applications for which you want Identity Cloud to handle the signup and login.
Under Application management > Applications click Add application and provide all mandatory inputs to add your first application. For more information, see Add applications.
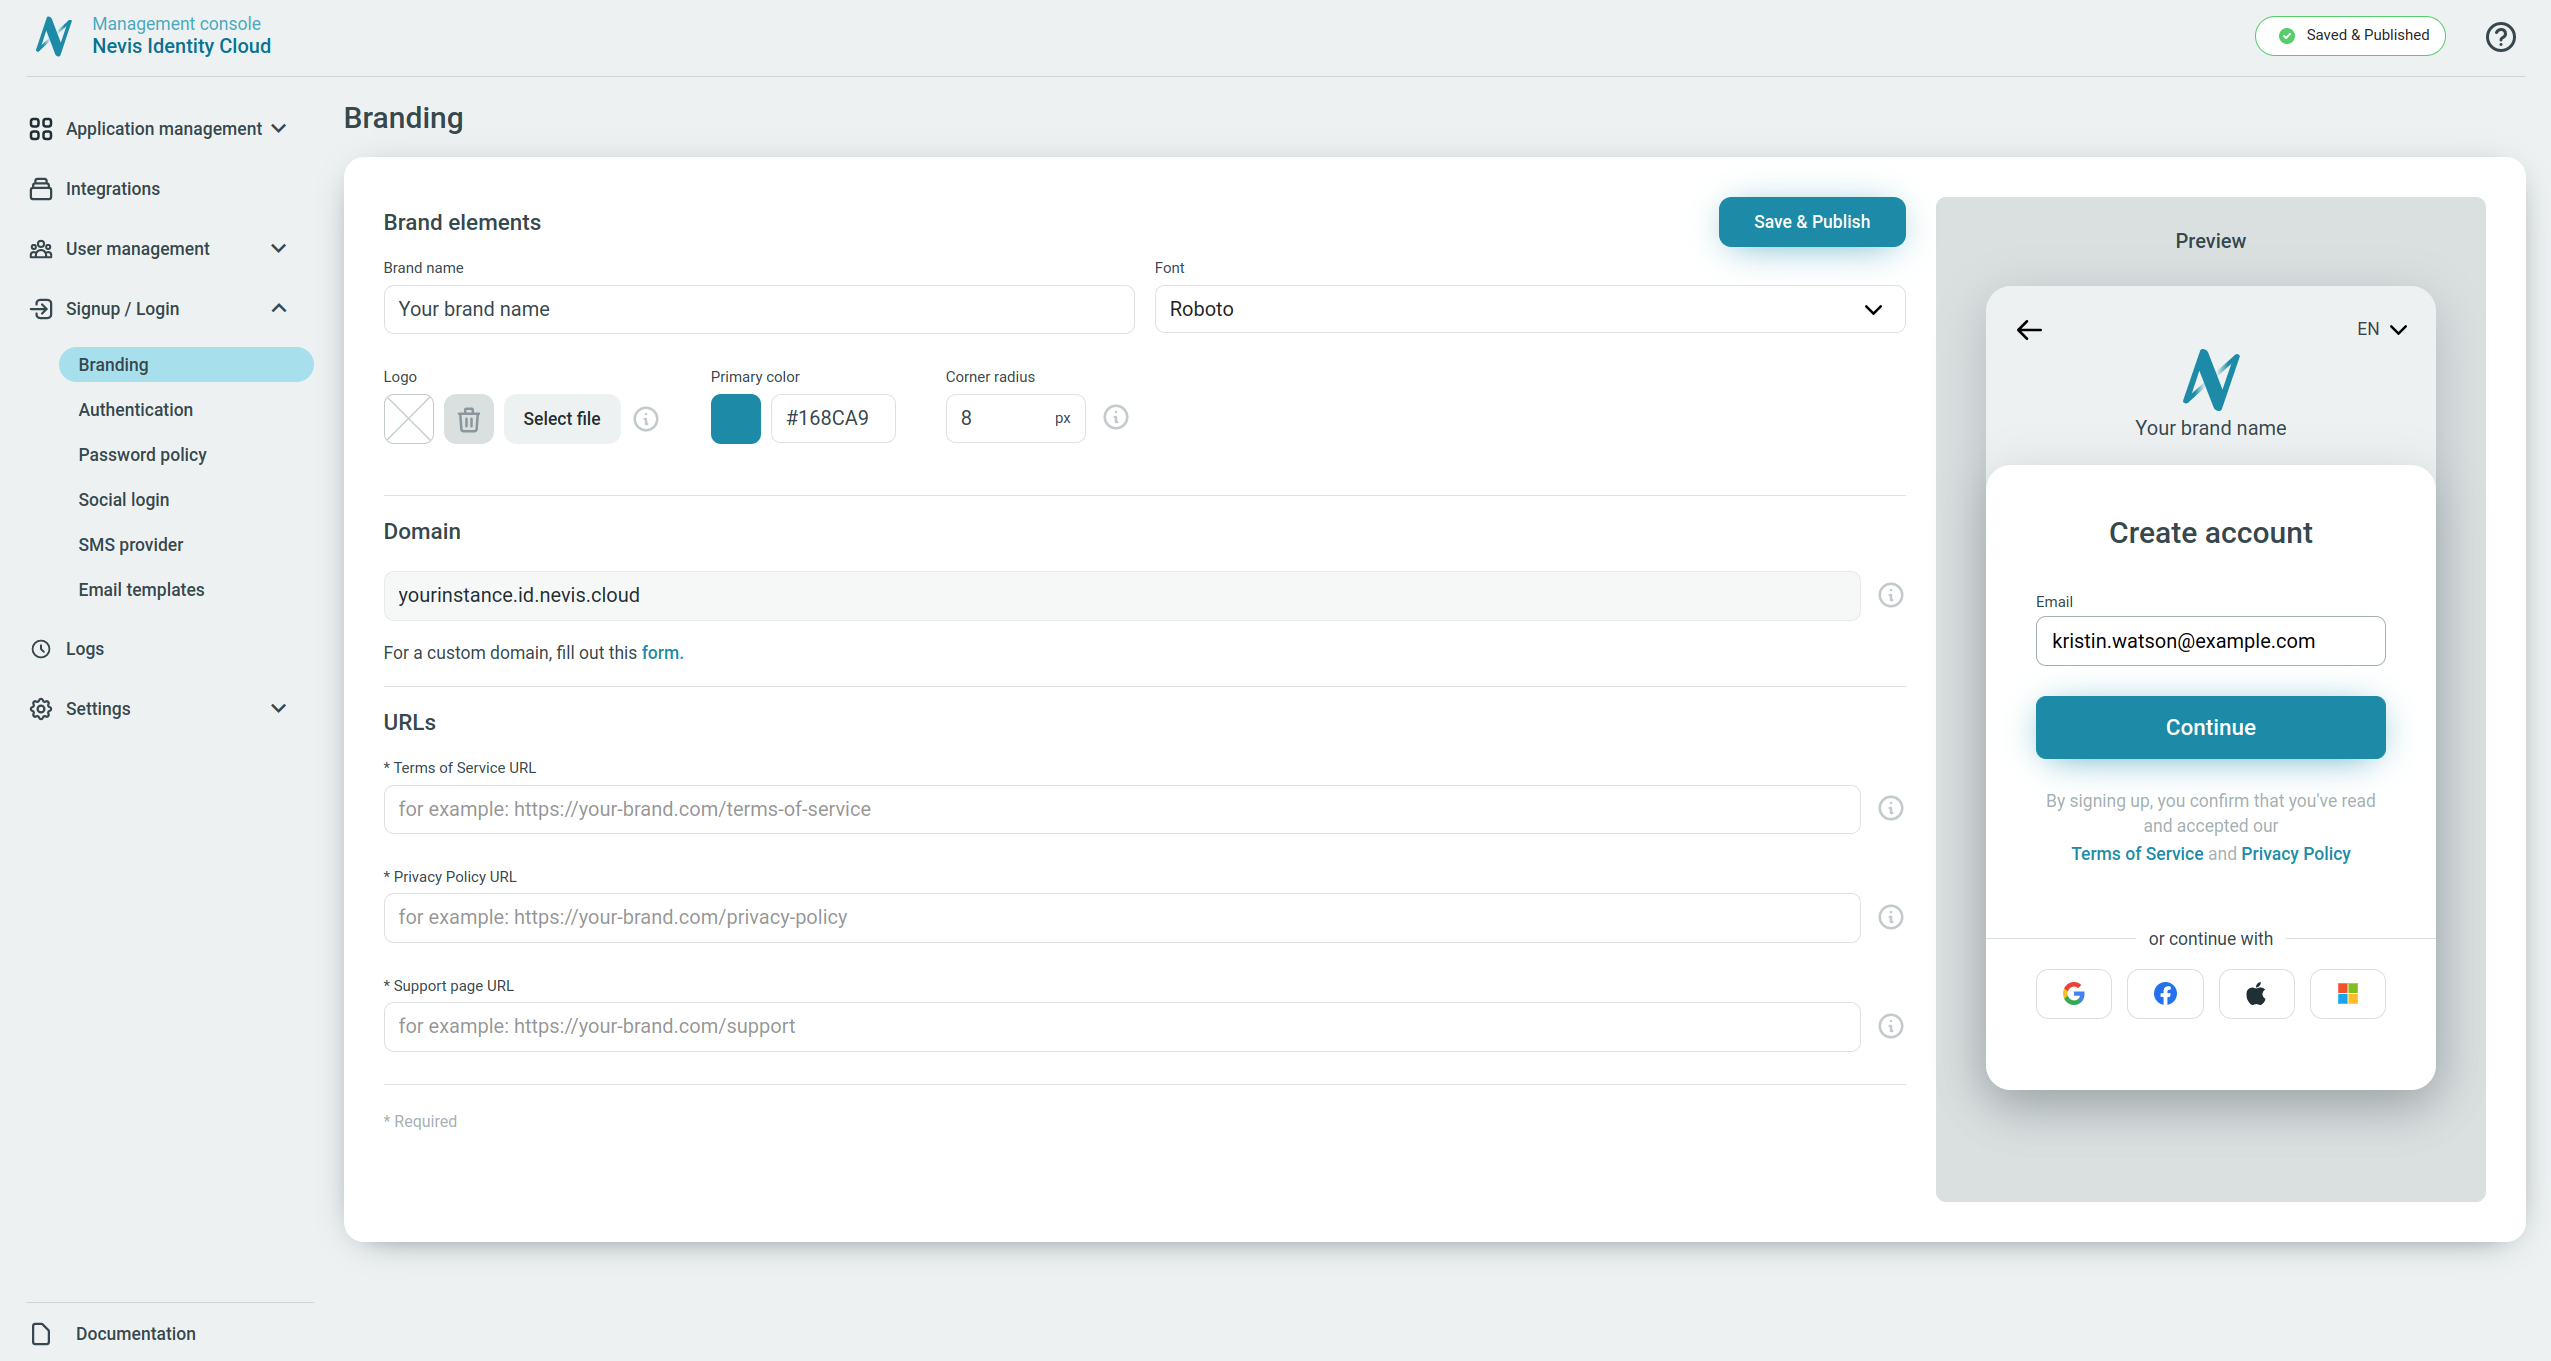
Step 2. Configure the signup and login URLs
You need to provide the minimal set of URLs for the signup and login to your application.
In Europe, the law requires companies that process any kind of identity data to get consent from their users first.
- It is mandatory to provide URLs pointing to your application's terms of service and privacy policy. During signup to your application, your users need to confirm that they have read and accepted your application's terms of service and privacy policy.
- It is also mandatory to provide a URL that points your users to a contact form or any other type of support page, in case they need support during the signup or login process.
Under Signup/Login > Branding provide the mandatory URLs. For more information, see Branding.
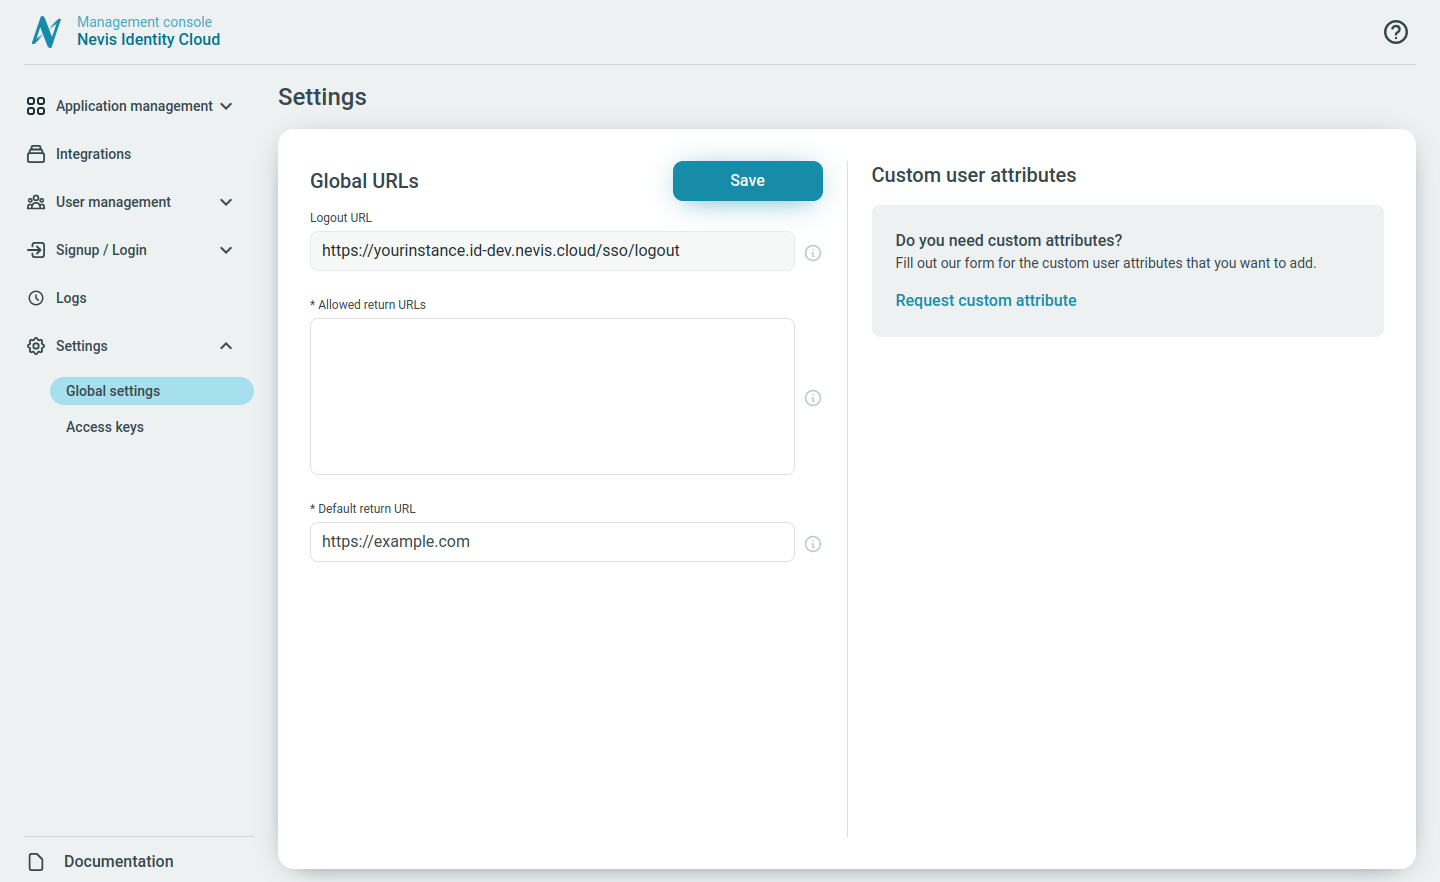
Step 3. Configure the logout URL
Users need to visit the Logout URL to effectively log out of your service and terminate the session. Afterward, by default, your users are forwarded to the Default return URL. Alternatively, you can forward your users to any of the registered Allowed return URLs.
Under Settings > Global settings adapt the Default return URL to a URL of your choice, and provide a list of your Allowed return URLs. For more information, see Global settings.
Step 4. Configure authentication preferences
You use Identity Cloud to authenticate users logging into your services. You need to define the type of authentication you want Identity Cloud to use for your users when logging into your configured services.
Identity Cloud supports three types of authentication for the signup and login flows:
Different authentication methods can be configured for each authentication type under the Signup/Login > Authentication section of the Management console. See details for each under the Authentication chapter.
Step 5. Configure self-service signup preferences
Self-service signup with Identity Cloud is the process of allowing users to initiate and complete their account creation on their own from the Identity Cloud login page.
When self-service signup is not enabled, users cannot sign up through the Identity Cloud login page. They can sign up using the invite sent from the Management console by the administrator, or through any other signup flow you have based on the Identity Cloud REST API that does not involve the Identity Cloud login page.
You can can configure the self-service signup, under the Signup/Login > Branding / Signup section.
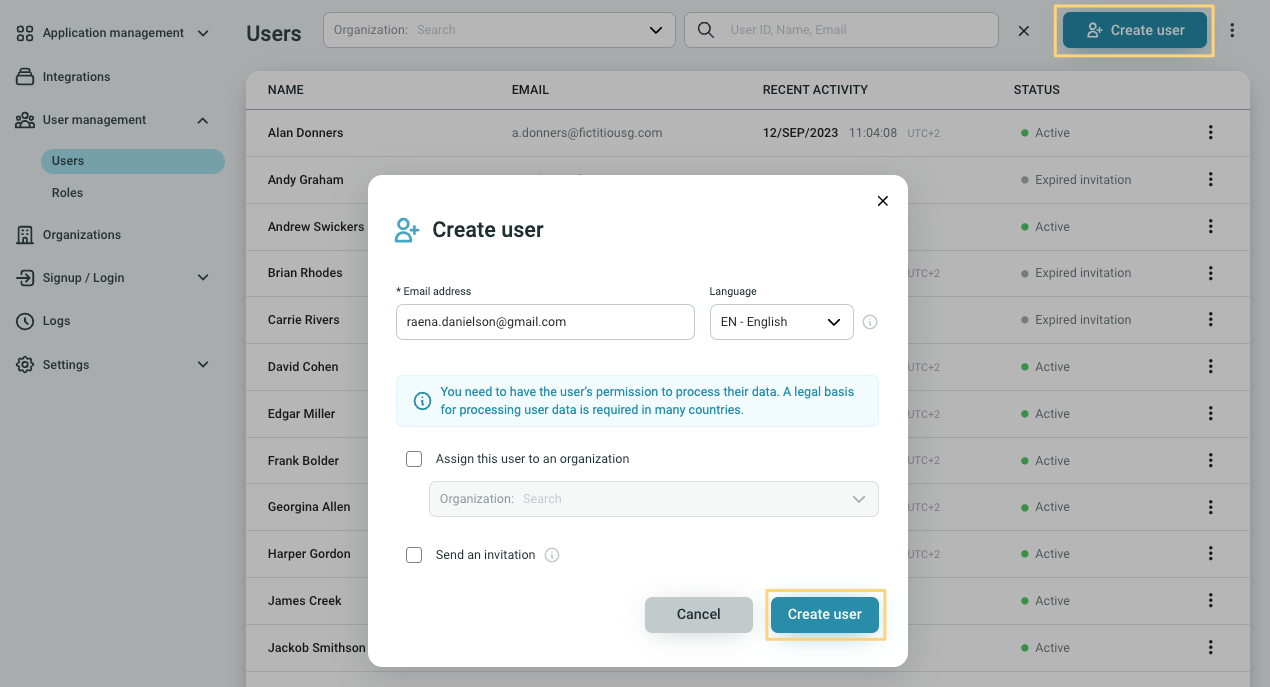
Step 6. Invite users
Based on the self-service signup preferences you configured, your users can either self-register to your service using the signup flow, or you can invite them directly via email.
To invite users directly from the Management console go to User management > Users click Create user. For more information, see Create users and Invite users.
Step 7. Configure organizations
The Organizations feature is a great way to manage customers and partners in a business-to-business (B2B) relationship, where one organization interacts with another.
It is also great for managing other kinds of hierarchies in your business.
Organizations allow you to group users in the Identity Cloud Management console for the purpose of distinct branding and specific authentication requirements, such as an enforced login provider or different self-service signup settings.
This means that you can control the self-service signup and authentication methods individually for any specified user group in an organization. Learn more about how this works in our organizations use case example and in our chapter about signup and login flow defining factors.
Ready to go and more
After completing the above few steps you are ready to go with the very basics of Identity Cloud.
If you want to get more out of your Identity Cloud instance, we also recommend you to check out these chapters:
- Customize the branding of your Identity Cloud signup and login flows. Ensure your brand consistency by configuring your logo, brand color, and corporate font on the signup and login pages for your users.
- Integrations are frequently used third-party services for which Identity Cloud provides easily configurable, out-of-the-box Single Sign-on (SSO) authentication. Integrations include Zendesk, Hubspot and other similar services where authentication is provided with federation protocols such as SAML or OAuth 2.0.
- In Identity Cloud you can configure and manage the permissions that a user has for your applications using roles. Roles are a set of Identity Cloud application Permissions, used to define the rights of a user.Checkout our chapter on of how permissions, applications, roles, and users are connected under Permission concept