Integrating Intercom
In this tutorial, you will learn how to integrate Intercom with Identity Cloud.
Prerequisites
The following setup is required before you start the integration:
- An Identity Cloud instance
- An Intercom account with an enterprise subscription
Intercom SSO configuration
To setup SSO configuration in Intercom follow these steps:
- Log in to your account.
- Navigate to Profile Icon > Settings.
- Navigate to Security > Security settings > Authentication methods, and enable Require SAML SSO.
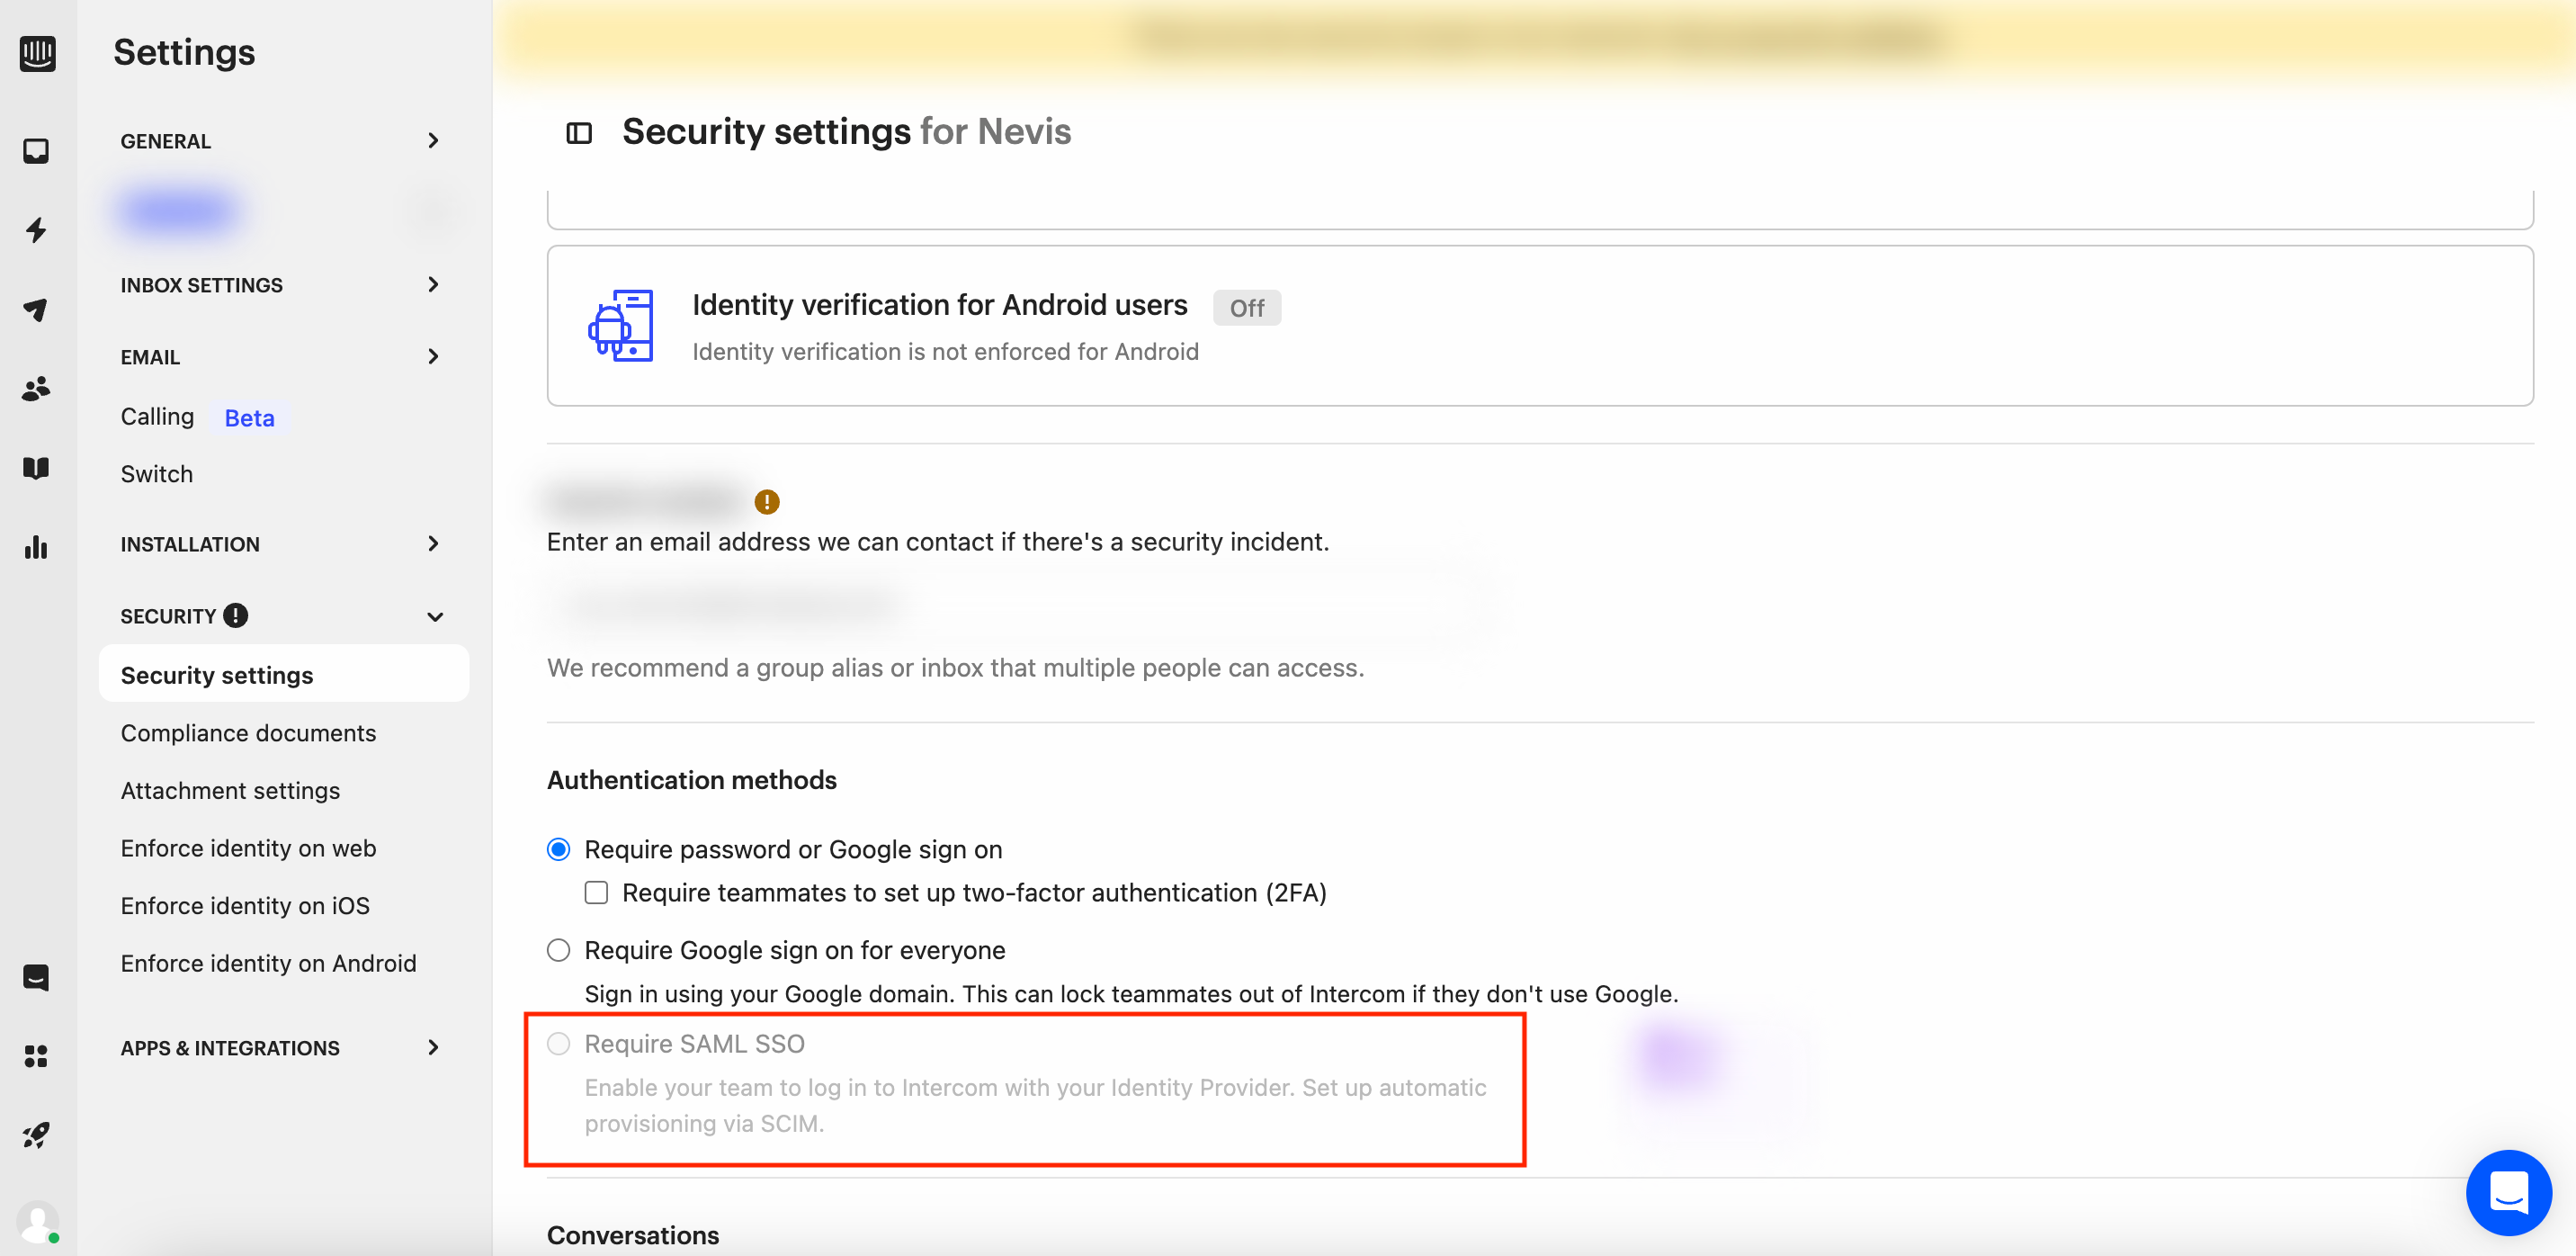
Click SAML SSO.
Proceed with the following steps:
- Copy the Base SAML URL.
- Enter the Identity Cloud SSO service URL value (example form https://yourinstance.id.nevis.cloud/auth/saml/sso ) in the Identity provider Single Sign-On URL field.
- For the Security Certificate, insert the Identity cloud certificate that will become available after following the Identity Cloud configuration steps below.
Identity Cloud configuration
To complete the setup in Identity Cloud Management console follow these steps:
- Navigate to Application management > Applications and select Add application.
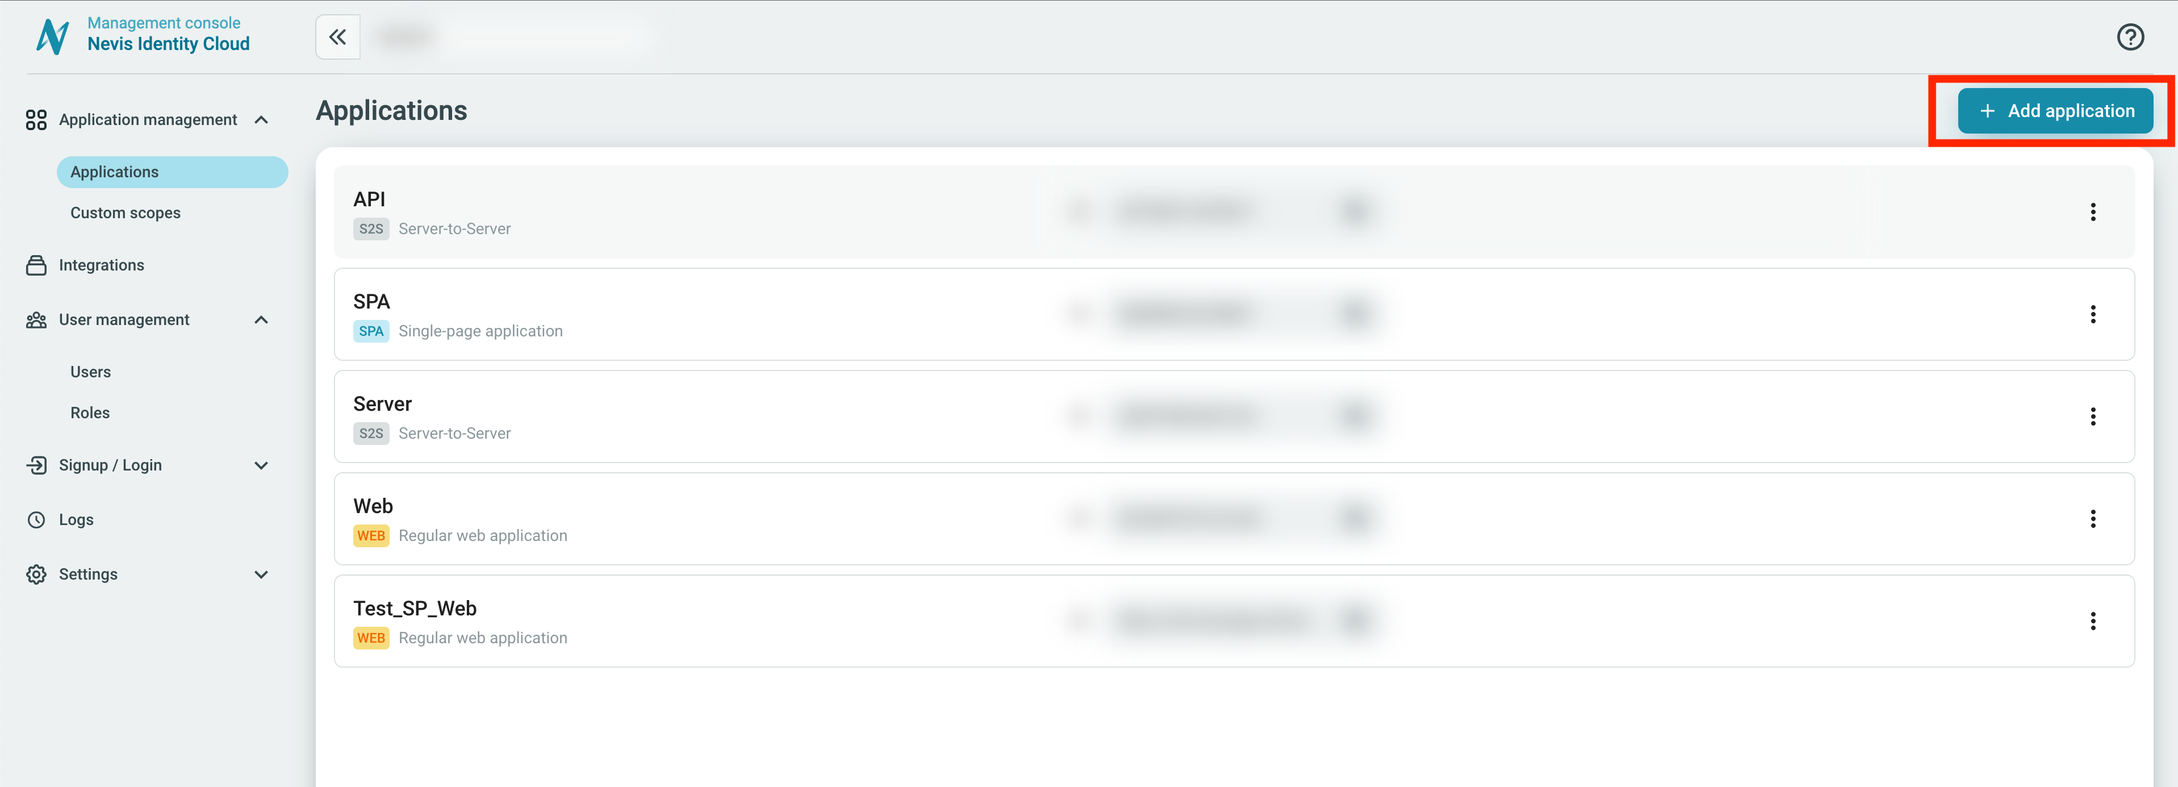
Choose Regular web application and set the Protocol type to SAML.
Enter the following values for these settings:
- In the Issuer field enter the value copied from Base SAML URL.
- In the Subject field choose Email.
- In the Assertion Consumer Service URL enter the value copied from Base SAML URL and add /consume to the end.
- Copy the certificate value and paste it back into the intercom wizard.
- Click Save.