Passwordless signup
Supported passwordless signup methods
Identity Cloud supports the following passwordless sign-up methods:
- Self-service signup methods
- Signup with passkeys
- Signup with access app
- Signup with email codes
- Signup with social accounts
- Invite-initiated signup
- Signup with invitation
Passwordless signup dependencies
Passwordless authentication with Identity Cloud relies on the local passkey, pin and biometric authentication capabilities of user devices to provide secure and convenient authentication. The passwordless fallback authentication method with Identity Cloud is verification by email codes.
- If the user signs up using a device with local passkey, pin, biometric authentication capabilities, they are offered to set up a passkey, pin or biometric authentication for the device to log in with going forward.
- If the user signs up with a device that has no local passkey, pin, biometric authentication capabilities, then the user's signup is completed with the email code based verification.
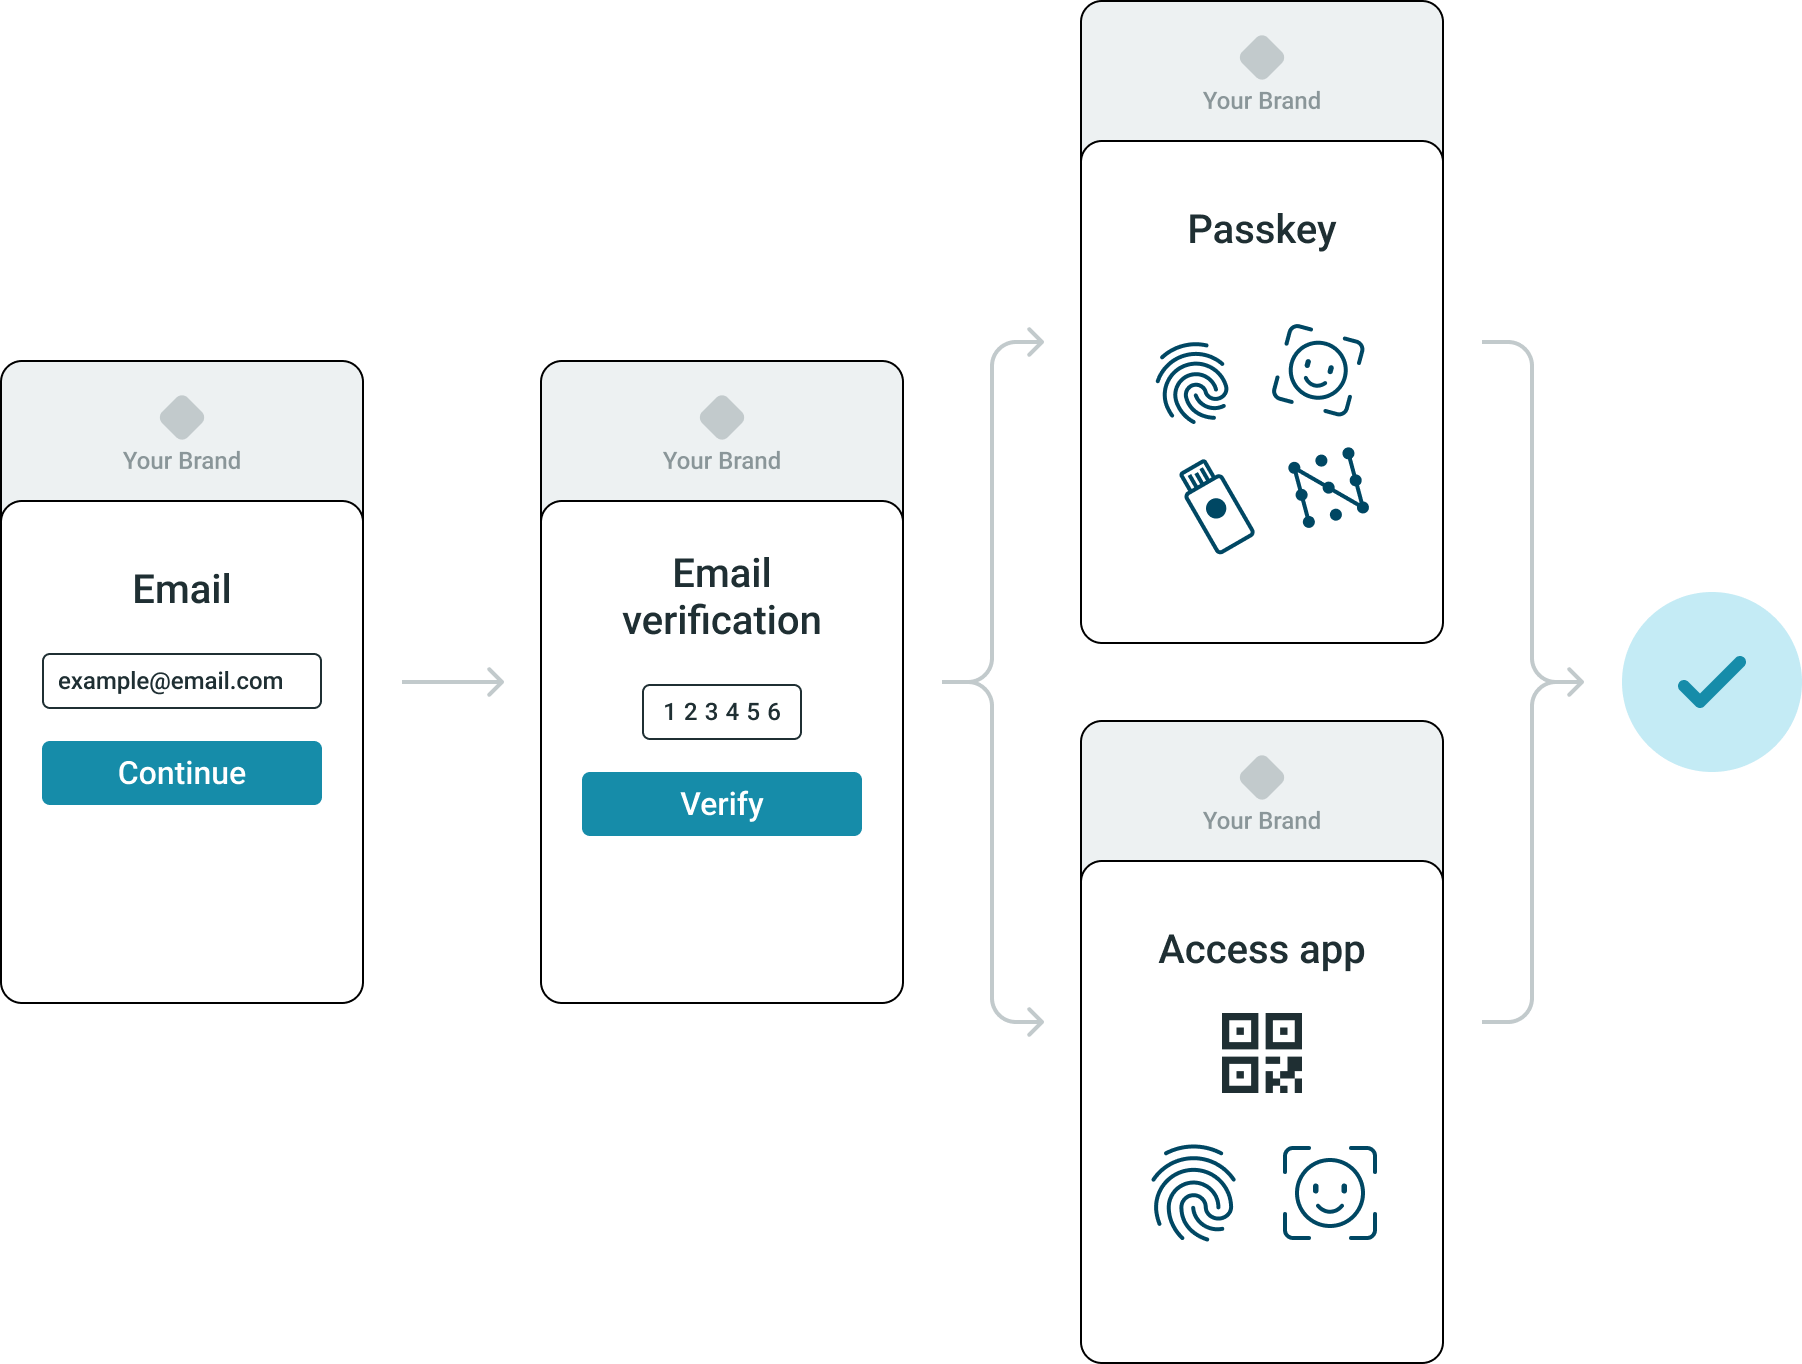
Self-service signup steps
When a user initiates the signup on their own, their first steps are always the following:
- Go to the Login page and click Create account.
- Enter the user's email address and click Continue.
- An email containing a verification code is sent to the user's registered email address.
- By clicking continue, the user also confirms reading and accepting our Terms of Service and Privacy Policy.
- Enter the verification code received in the email on the Email verification page. Upon successful verification, the user is presented with the starting setup page for the authentication method available to them based on the administrator settings and the user device capabilities
If the administrator enabled both passkey and access app authentication in the Management console, when a user initiates signup using a device that supports both passkeys and local biometric authentication, first the user is offered to authenticate with passkeys, and second to authenticate with the access app.
Signup with passkey
Continue signup with passkey setup
- The Create a passkey page is displayed where the user needs to choose if they want to set up a passkey. Select Continue to set up a passkey.
- Follow the native prompts offered by the device to complete the setup.
Once all steps are completed the user is created and logged into your application.
Continue signup without passkey
On the Create a passkey page select Skip for now.
If the user device supports biometric authentication, and the administrator has enabled authentication using the access app, as a next step the user will be offered to register the access app for authentication.
Once all steps are completed, the user is created and logged into your application.
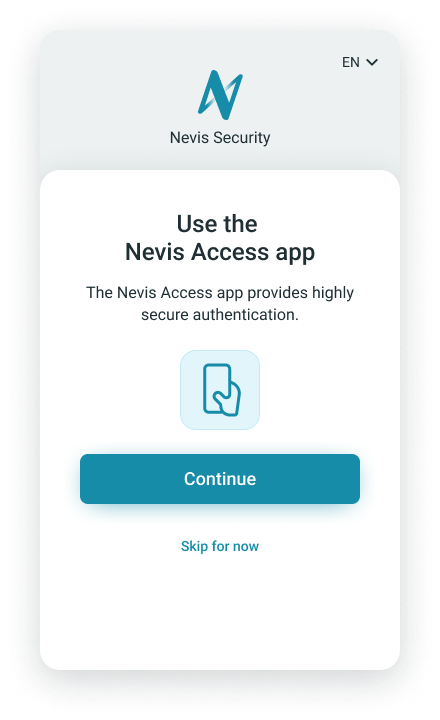
Signup with access app
Continue signup with the Access app
- The Use the access app page is displayed where the user needs to choose if they want to set up authentication using the access app. Select Continue to set up authentication with the access app on the device.
- Follow the on screen prompts to install the access app (if not yet installed). Follow native prompts offered by the device and the access app to register the access app:
- If the user is signing up using a desktop browser, they need to scan the QR code with the access app.
- If the user is signing up using a mobile browser, they need to click on the button on the page to launch the access app automatically.
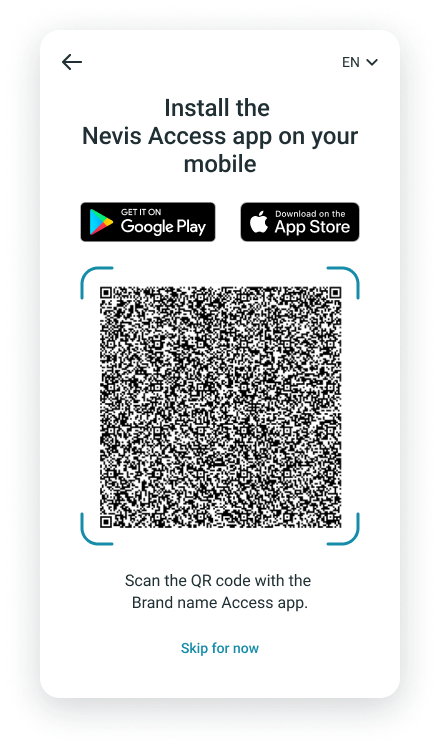
- Follow the prompts in the access app to set up the preferred authentication method to use with the authentication app (face id, finger id, pin, etc.).
Continue signup without access app
On the Use the access app page select Skip for now.
Once all steps are completed the user is created and logged into your application.
Invite-initiated signup
The administrator can invite the user directly from the Management console using user invitations. An invitation link is sent to the user's email address. For more information, see Invite users.
Signup with invitation
- Locate the invitation email in the mailbox of the registered email account and click the link URL in it. The Create a passkey or Use the access app page loads.
- On the Create a passkey and Use the access app pages the user can choose
- Continue to proceed with the passwordless setup.
- Skip for now to skip the setup of a local passkey, access app based authentication.
- On the Terms of Service and Privacy Policy page click Continue to finalize the signup.
Once all steps are completed the user is created and logged into your application.
Signup with social accounts
- On the Login page, select the icon with the logo of the social identity provider of choice. The login page of the social identity provider loads.
- Go through the authentication flow of that social identity provider.
- Enter the verification code received through email.
- Click Verify.
After successful verification, the user account with the social identity provider is created and the user is logged into their account with your application.
Signing up with social accounts is not possible when self-service signup is disabled, or when a custom URL to your signup solution is used for the signup process.
Social identity provider prompts
During signup with social identity providers, the user may be prompted to allow Identity Cloud to use their information from the social identity provider. Denying access to the information terminates the signup flow.
Social identity provider steps and accounts
Specifics of authentication steps and supported account types may vary by social identity provider. For example, only business Microsoft accounts may be used to sign up and log in through Identity Cloud.